On Board

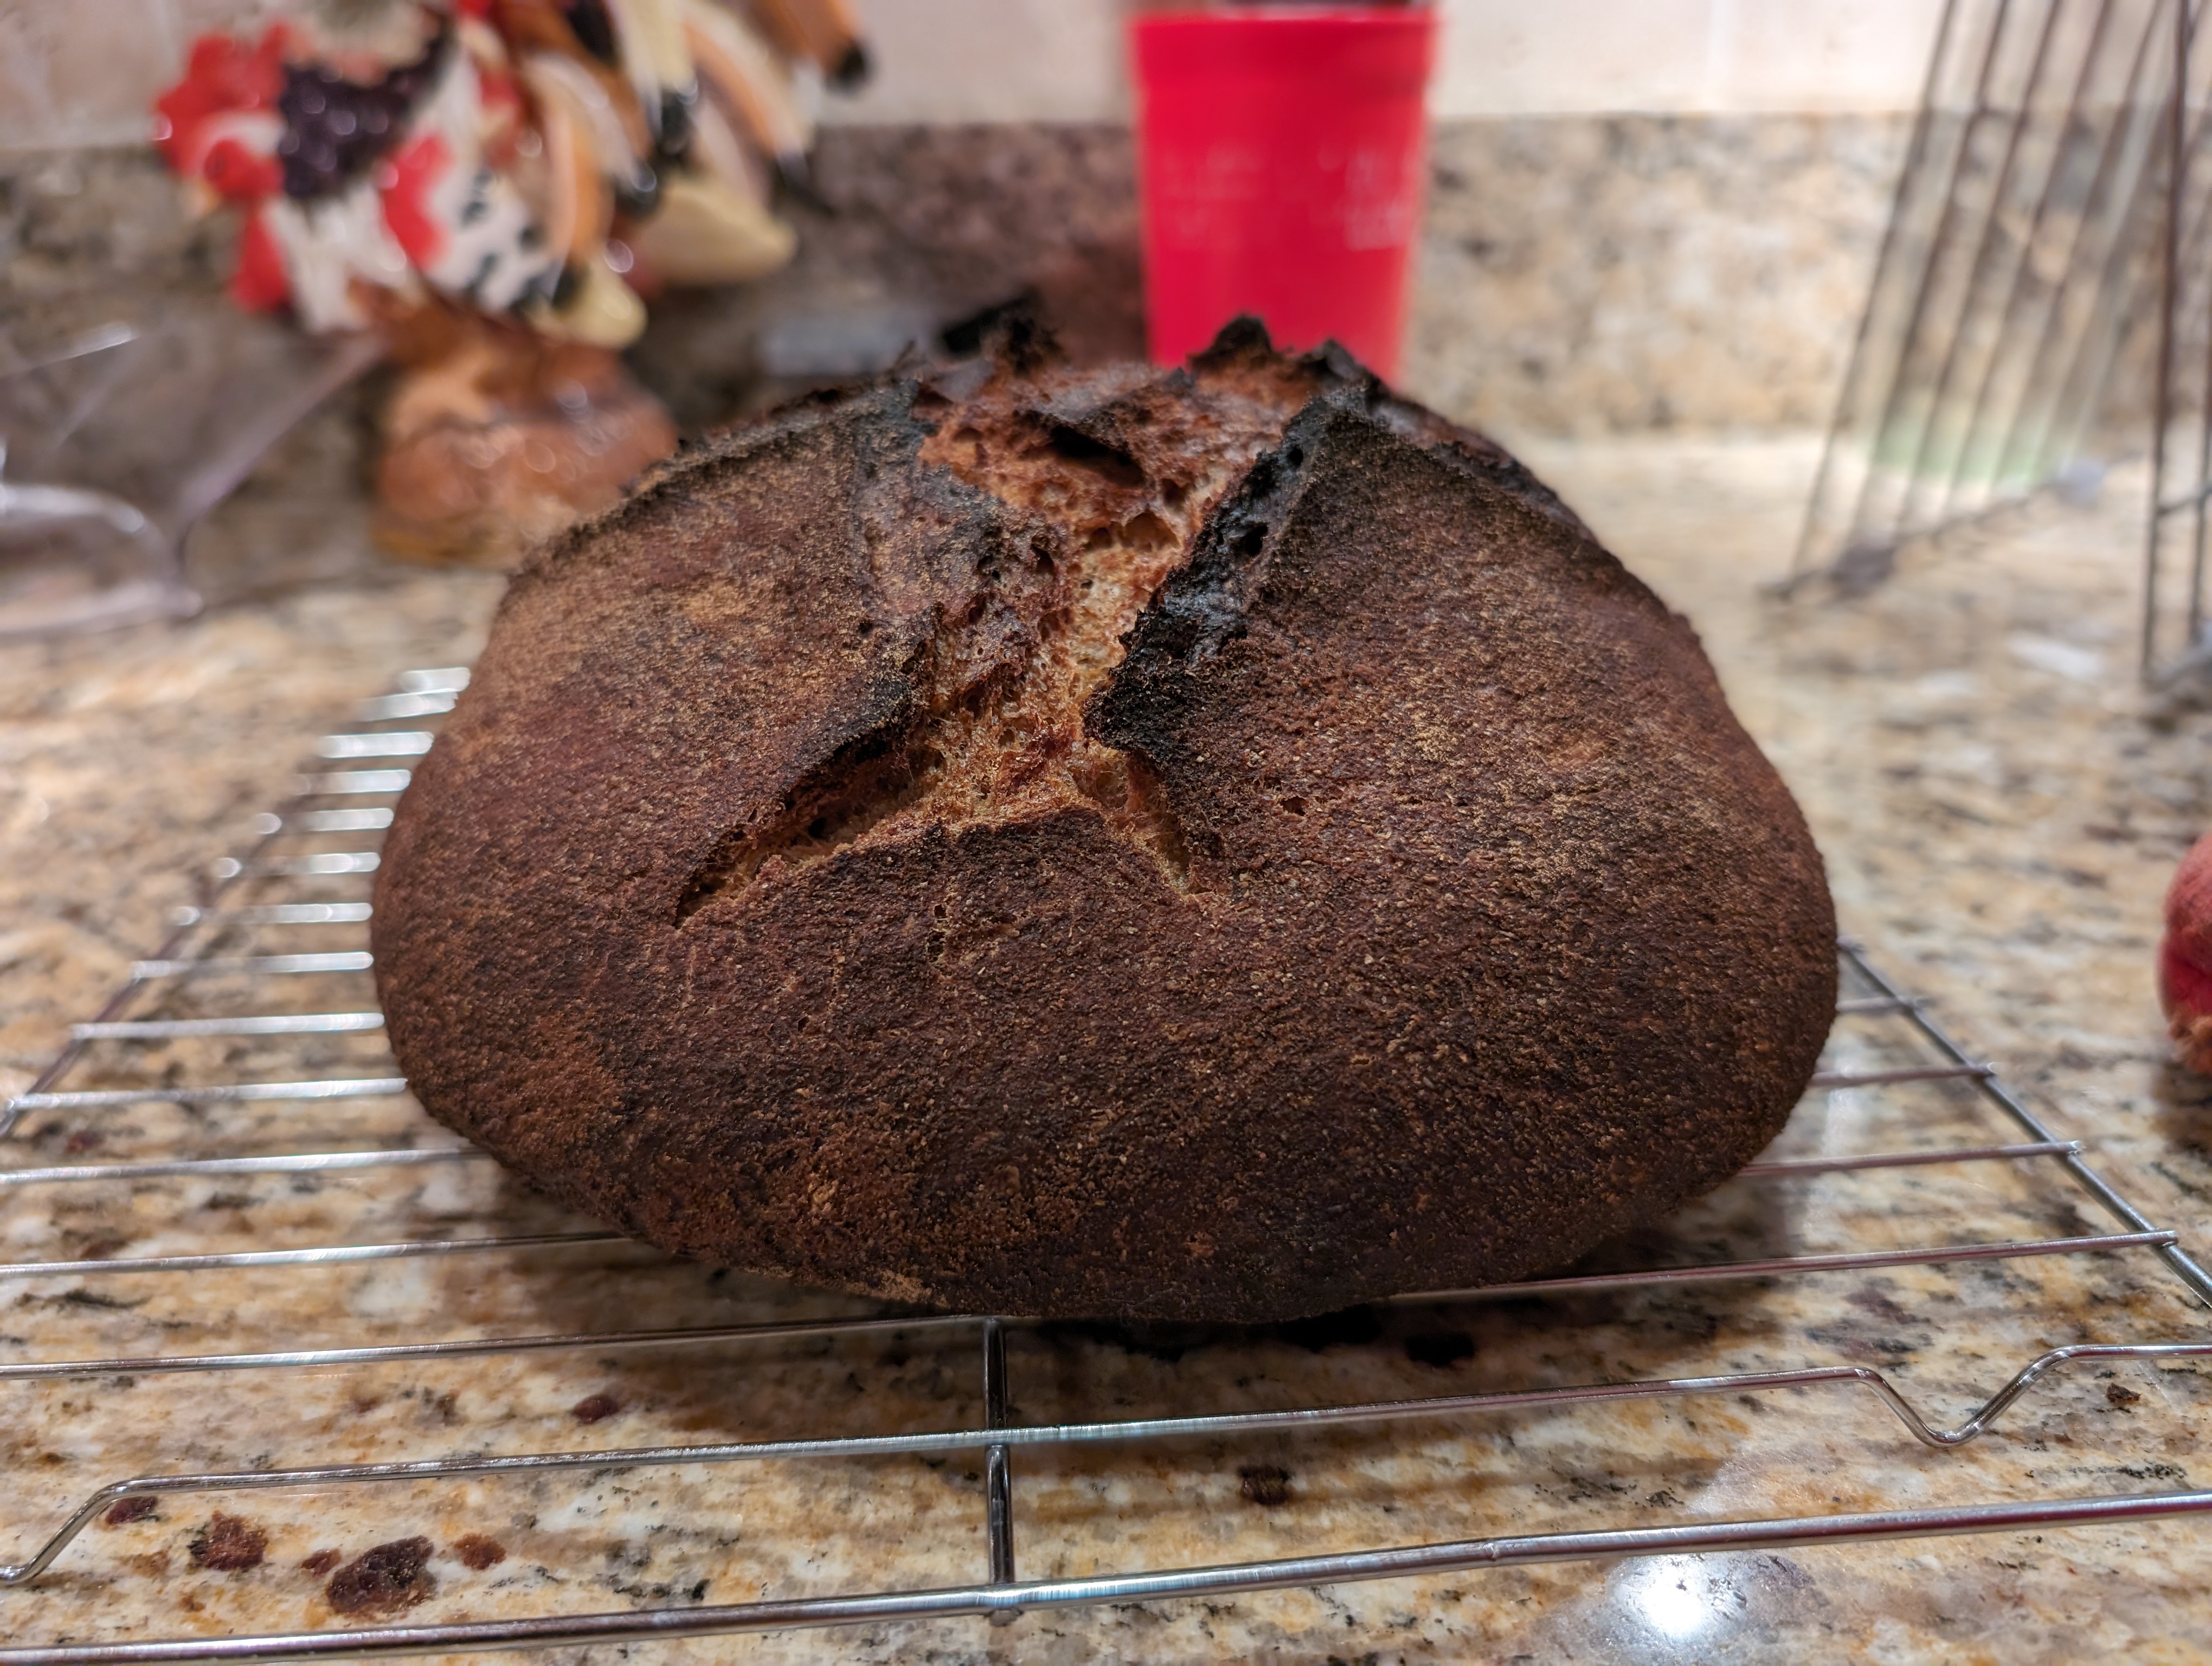
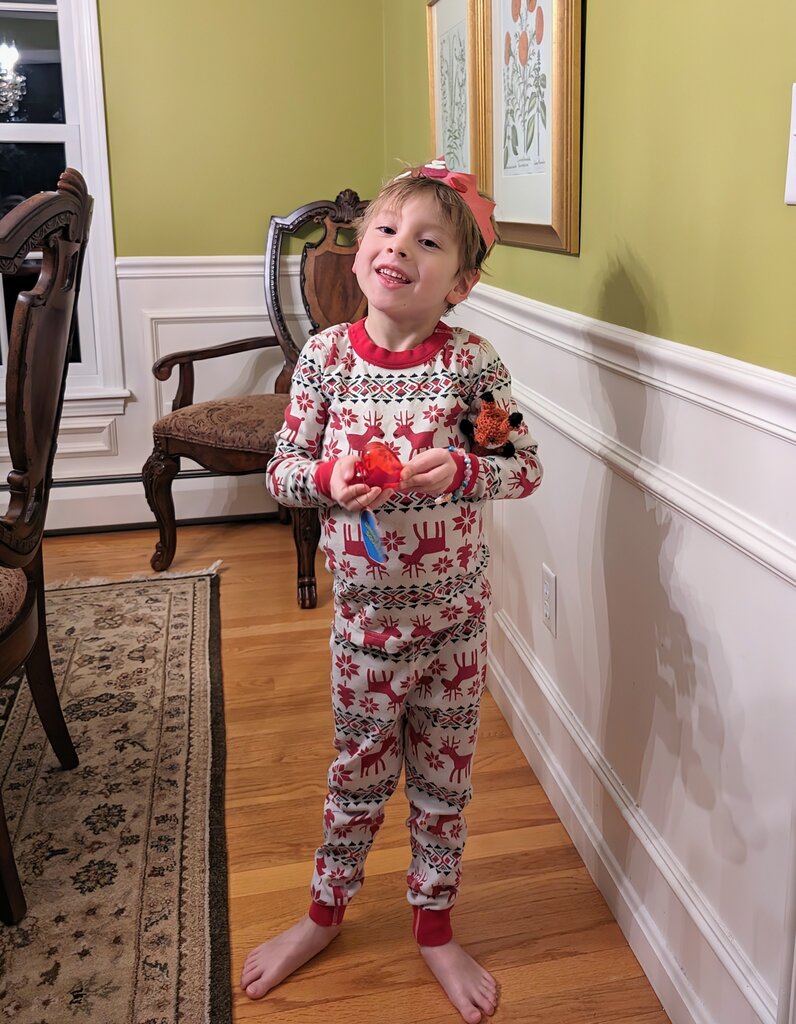
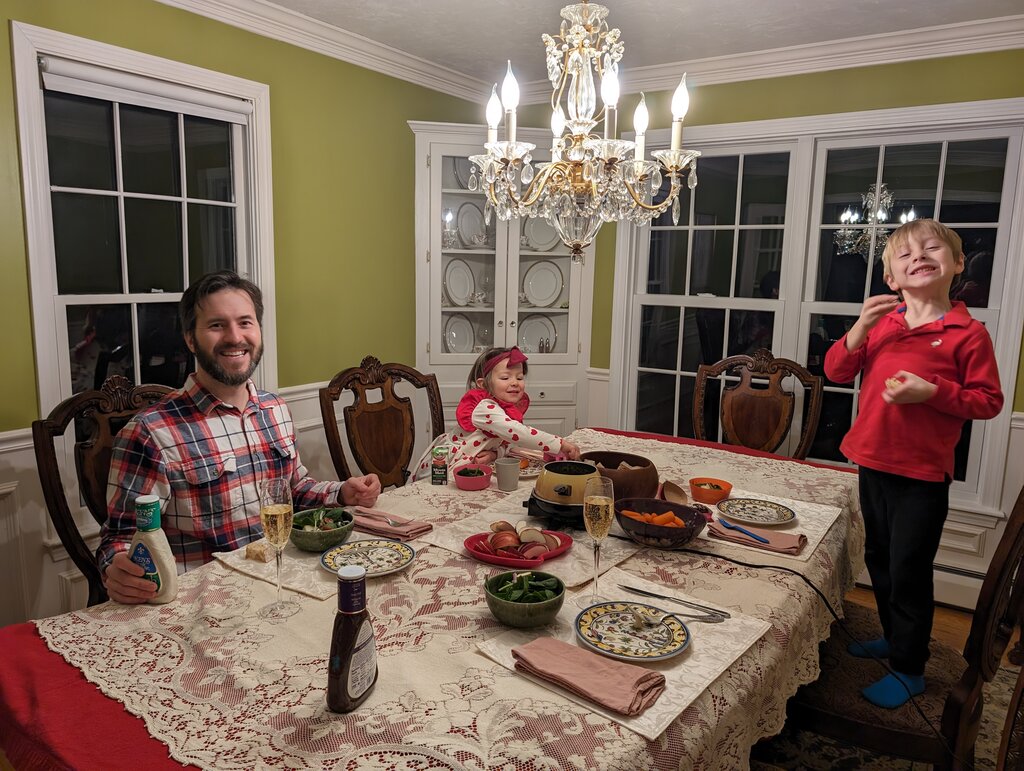
I’ve been a bit stressed out this week.  Like burst out crying to the therapist stressed out.  Monday night I heard some rustling around in the front hall and found Dany eating from a bag of dark chocolate chips.  There were about 10 chips left in the 9oz bag when I caught her and freaked out.  After a few minutes of trying to figure out what the heck happened from an (unreliable) 3 year old and a (slightly more reliable) 6 year old, we discovered Patricia had snuck a new bag of chocolate chips out of the cabinet, used her scissor skills to cut it open and hid in the bar room eating them.  Then she ran away so we wouldn’t catch her and left them on the floor.  She claims she ate “a LOT” but I now suspect that may be like 10 chocolate chips. I freaked out and may have told Patricia that she killed Dany.  (This is not the first time she has done something like this, which is why all the candy and marshmallows in the house are on top of the fridge – except for the chocolate chips.)  Pretty sure you aren’t supposed to tell your 3 year old that they killed their favorite pet.  She doesn’t understand what death is exactly but she came downstairs weeping, “is Dany going to have to stay at the doctor for a long, long time?”  Not my best parenting moment.  Actually probably my worst parenting moment.  Hopefully she never does this again.

Poison control told me I needed to go immediately to an emergency vet with overnight care.  There they had Dany vomit up the chocolate (she had definitely eaten the entire bag) and hooked her up to a monitor to make sure she didn’t have any heart problems overnight.  I was pretty depressed late Monday when I got home.  I just kept thinking of how rough Dany looked when I left and how she was looking at me out of her cage. Poor thing. Luckily Tuesday morning I was able to pick her up and she seemed back to her normal self!  She is now just confused why I’m giving her rice and chicken for all her meals (because of stomach upset) and all her legs are shaved.

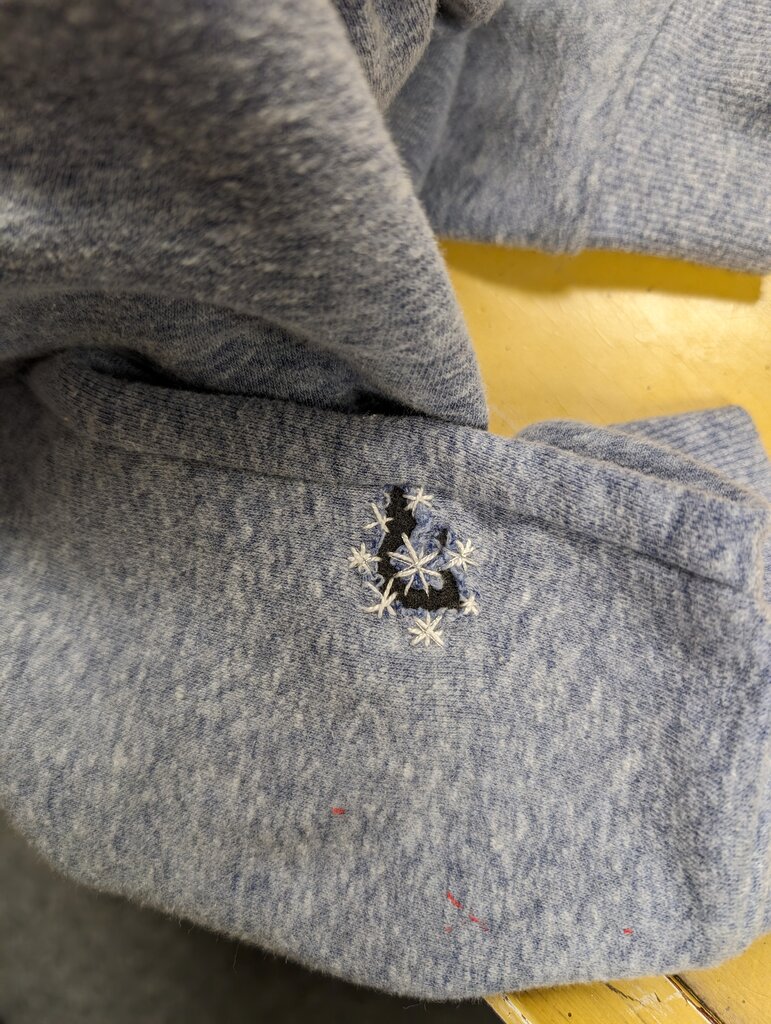
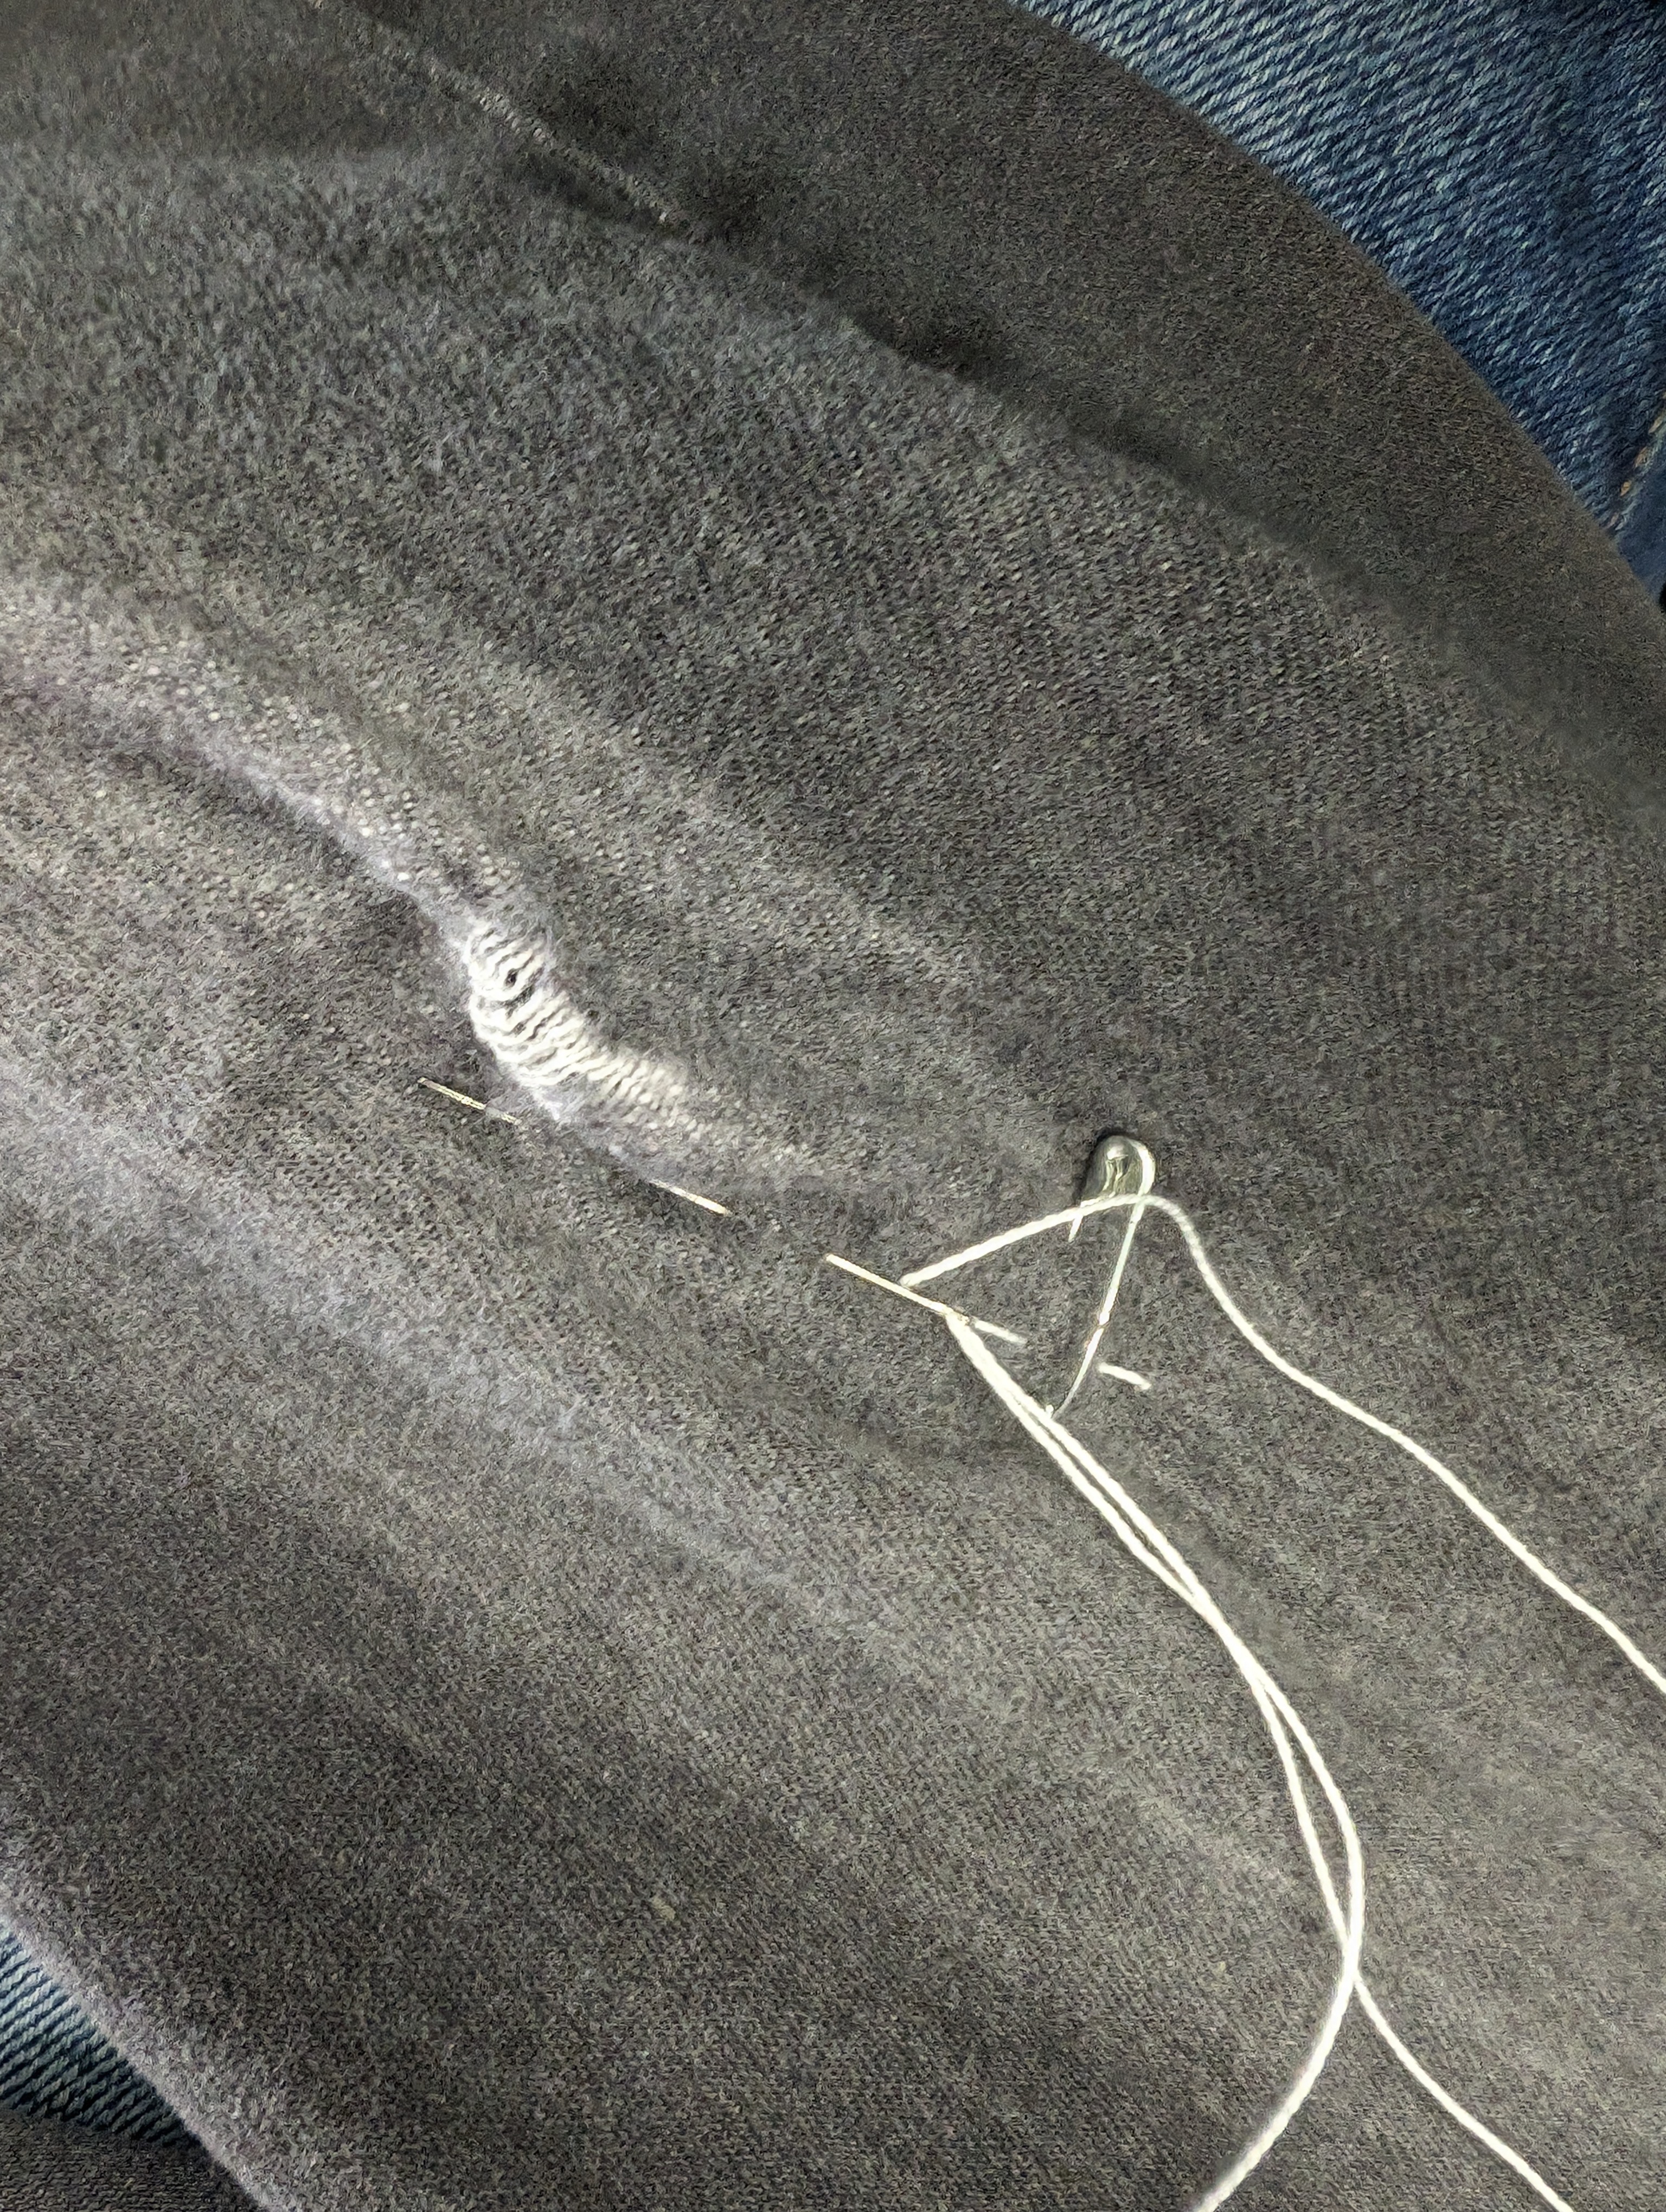
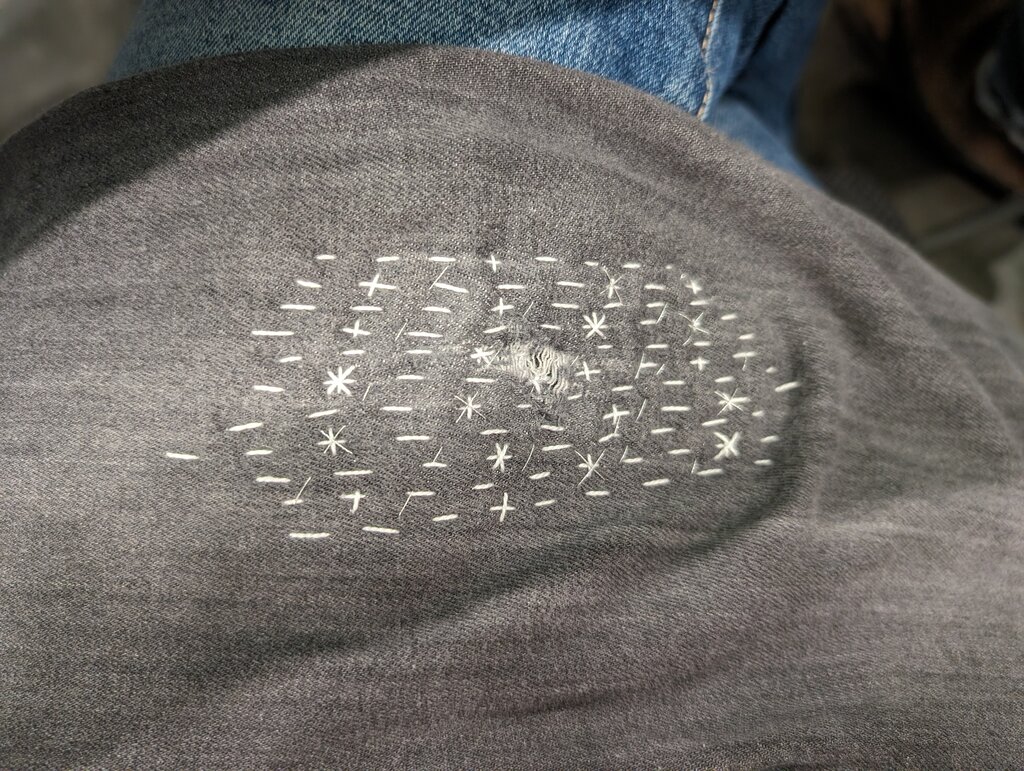
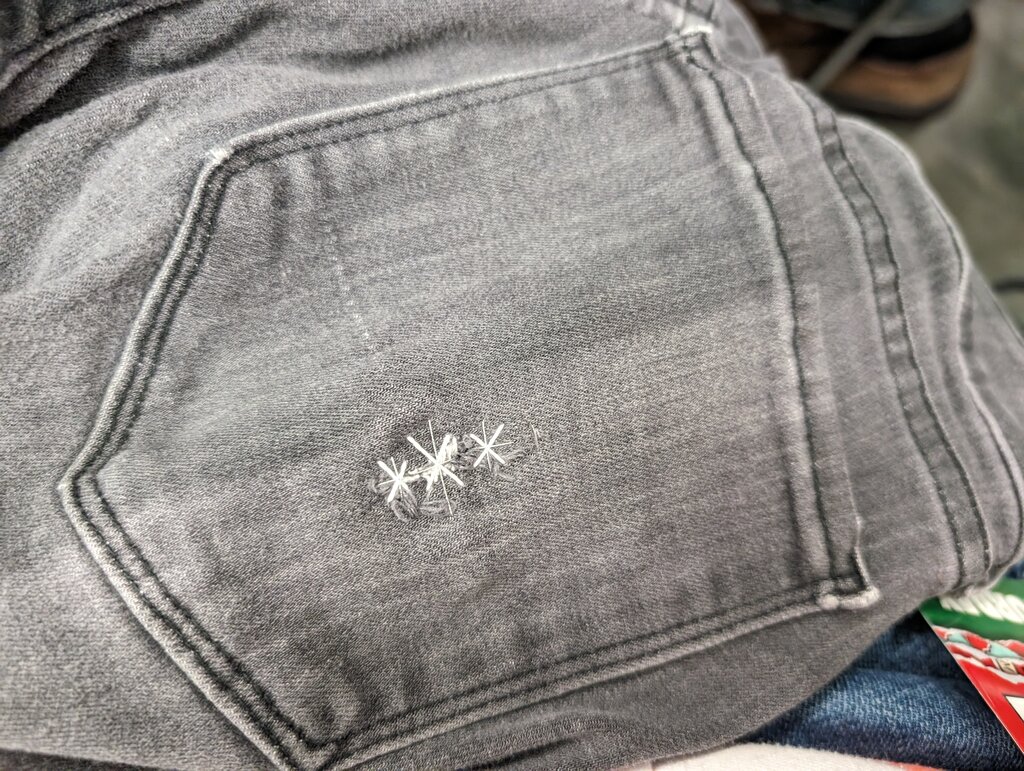
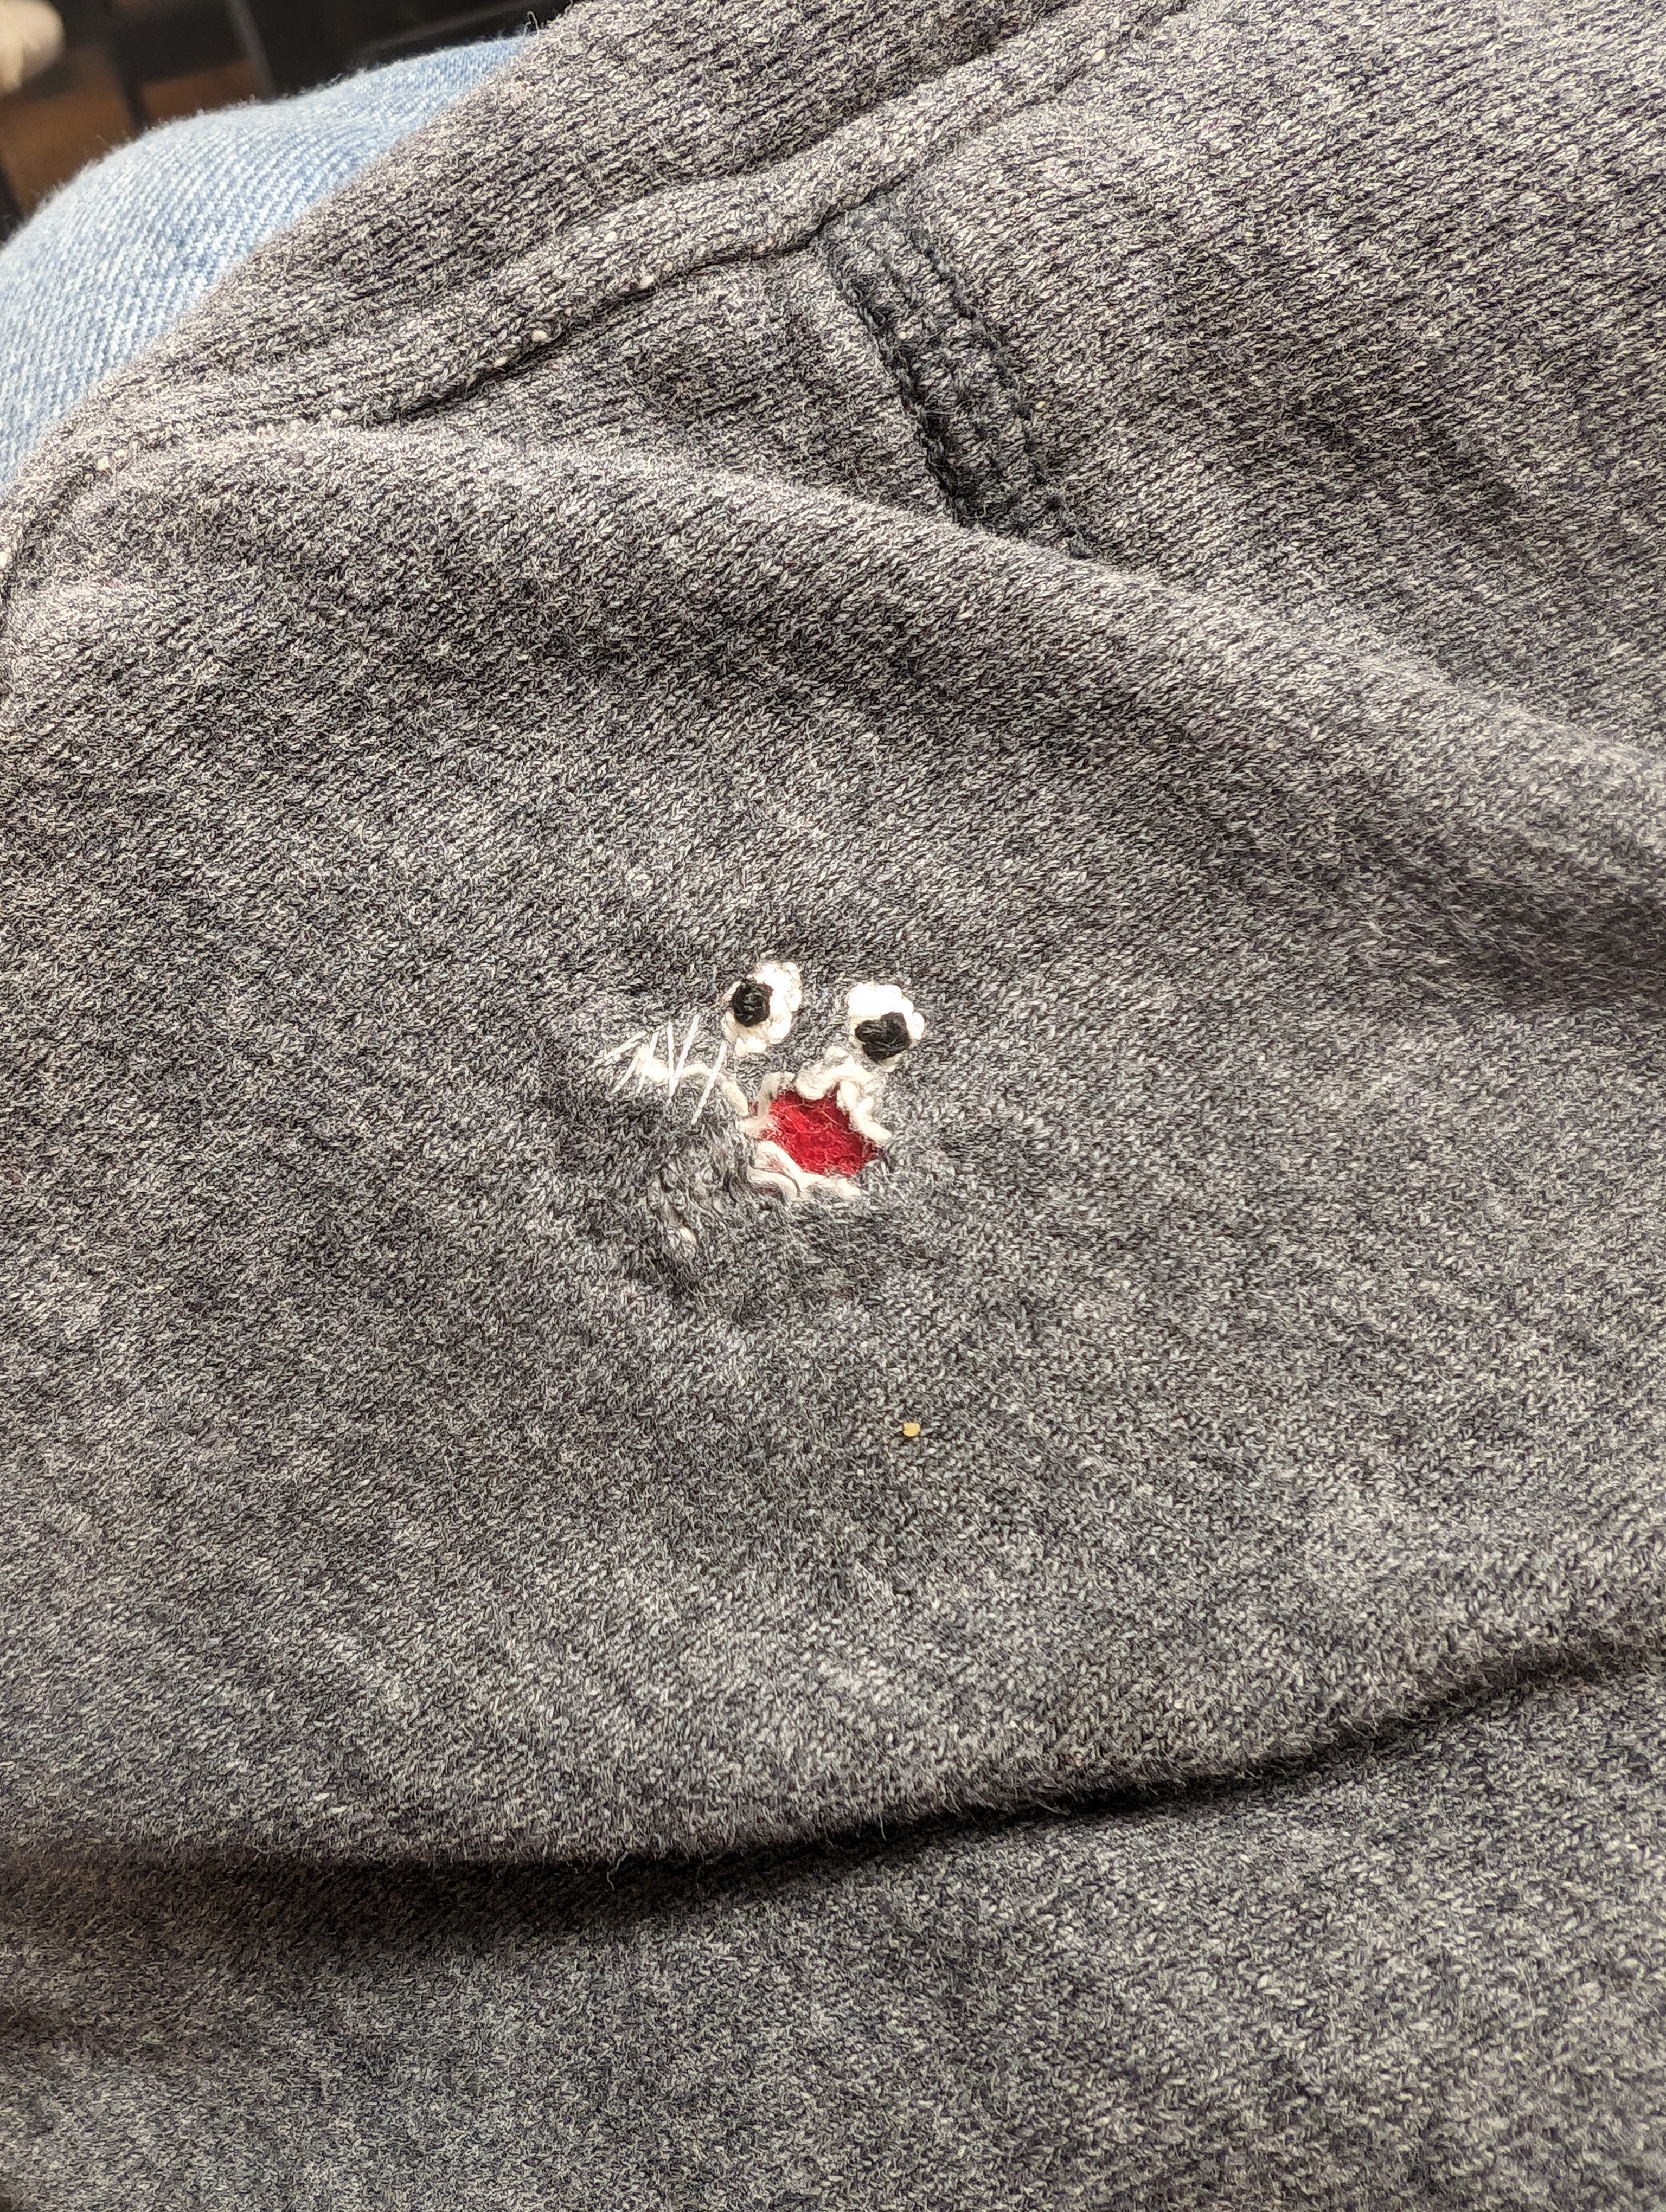
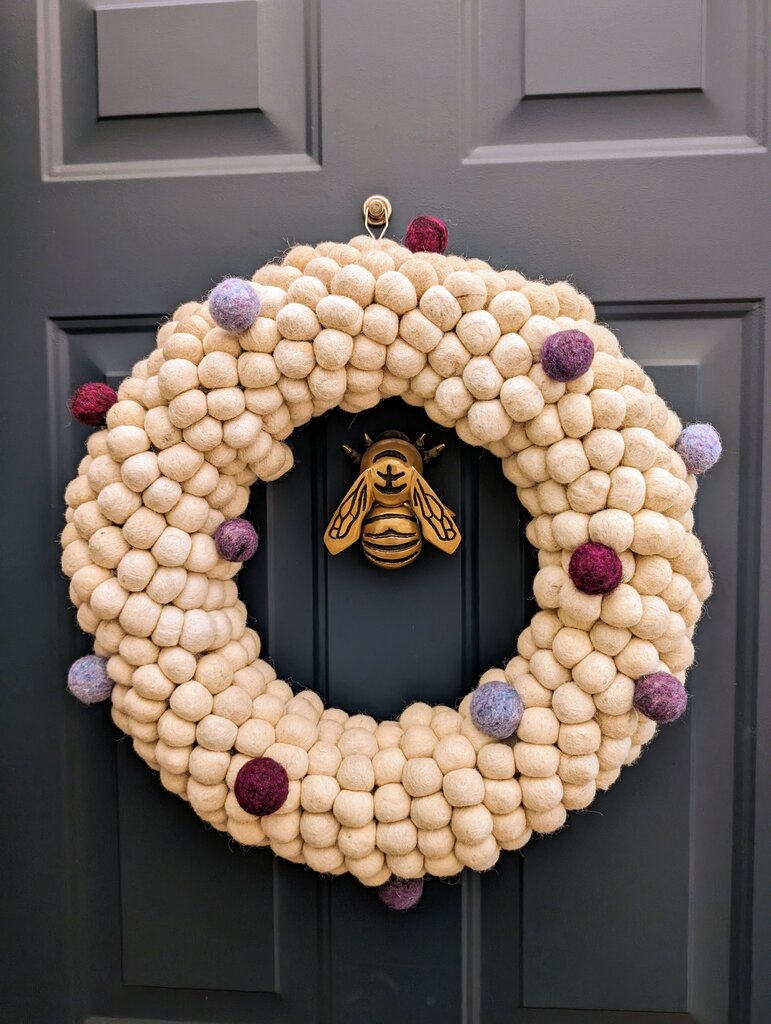
Between guilt for yelling at Patricia, sadness for my doggie getting hurt, and then some lame pity party type sorrow I decided I needed some retail therapy (after actual talk therapy and actual crying).  Since it’s Earth Month I decided to buy from Patagonia worn wear!  If you don’t know, this is Patagonia’s second hand store.  I need shorts (I think it’s finally time to pass along these ones from high school…) so this seemed like a good way to go!  Not only does Patagonia re-sell clothes second hand and recycle textiles, they will repair your clothes!  I love this and really hope it catches on.  As you know, I’m already on board.

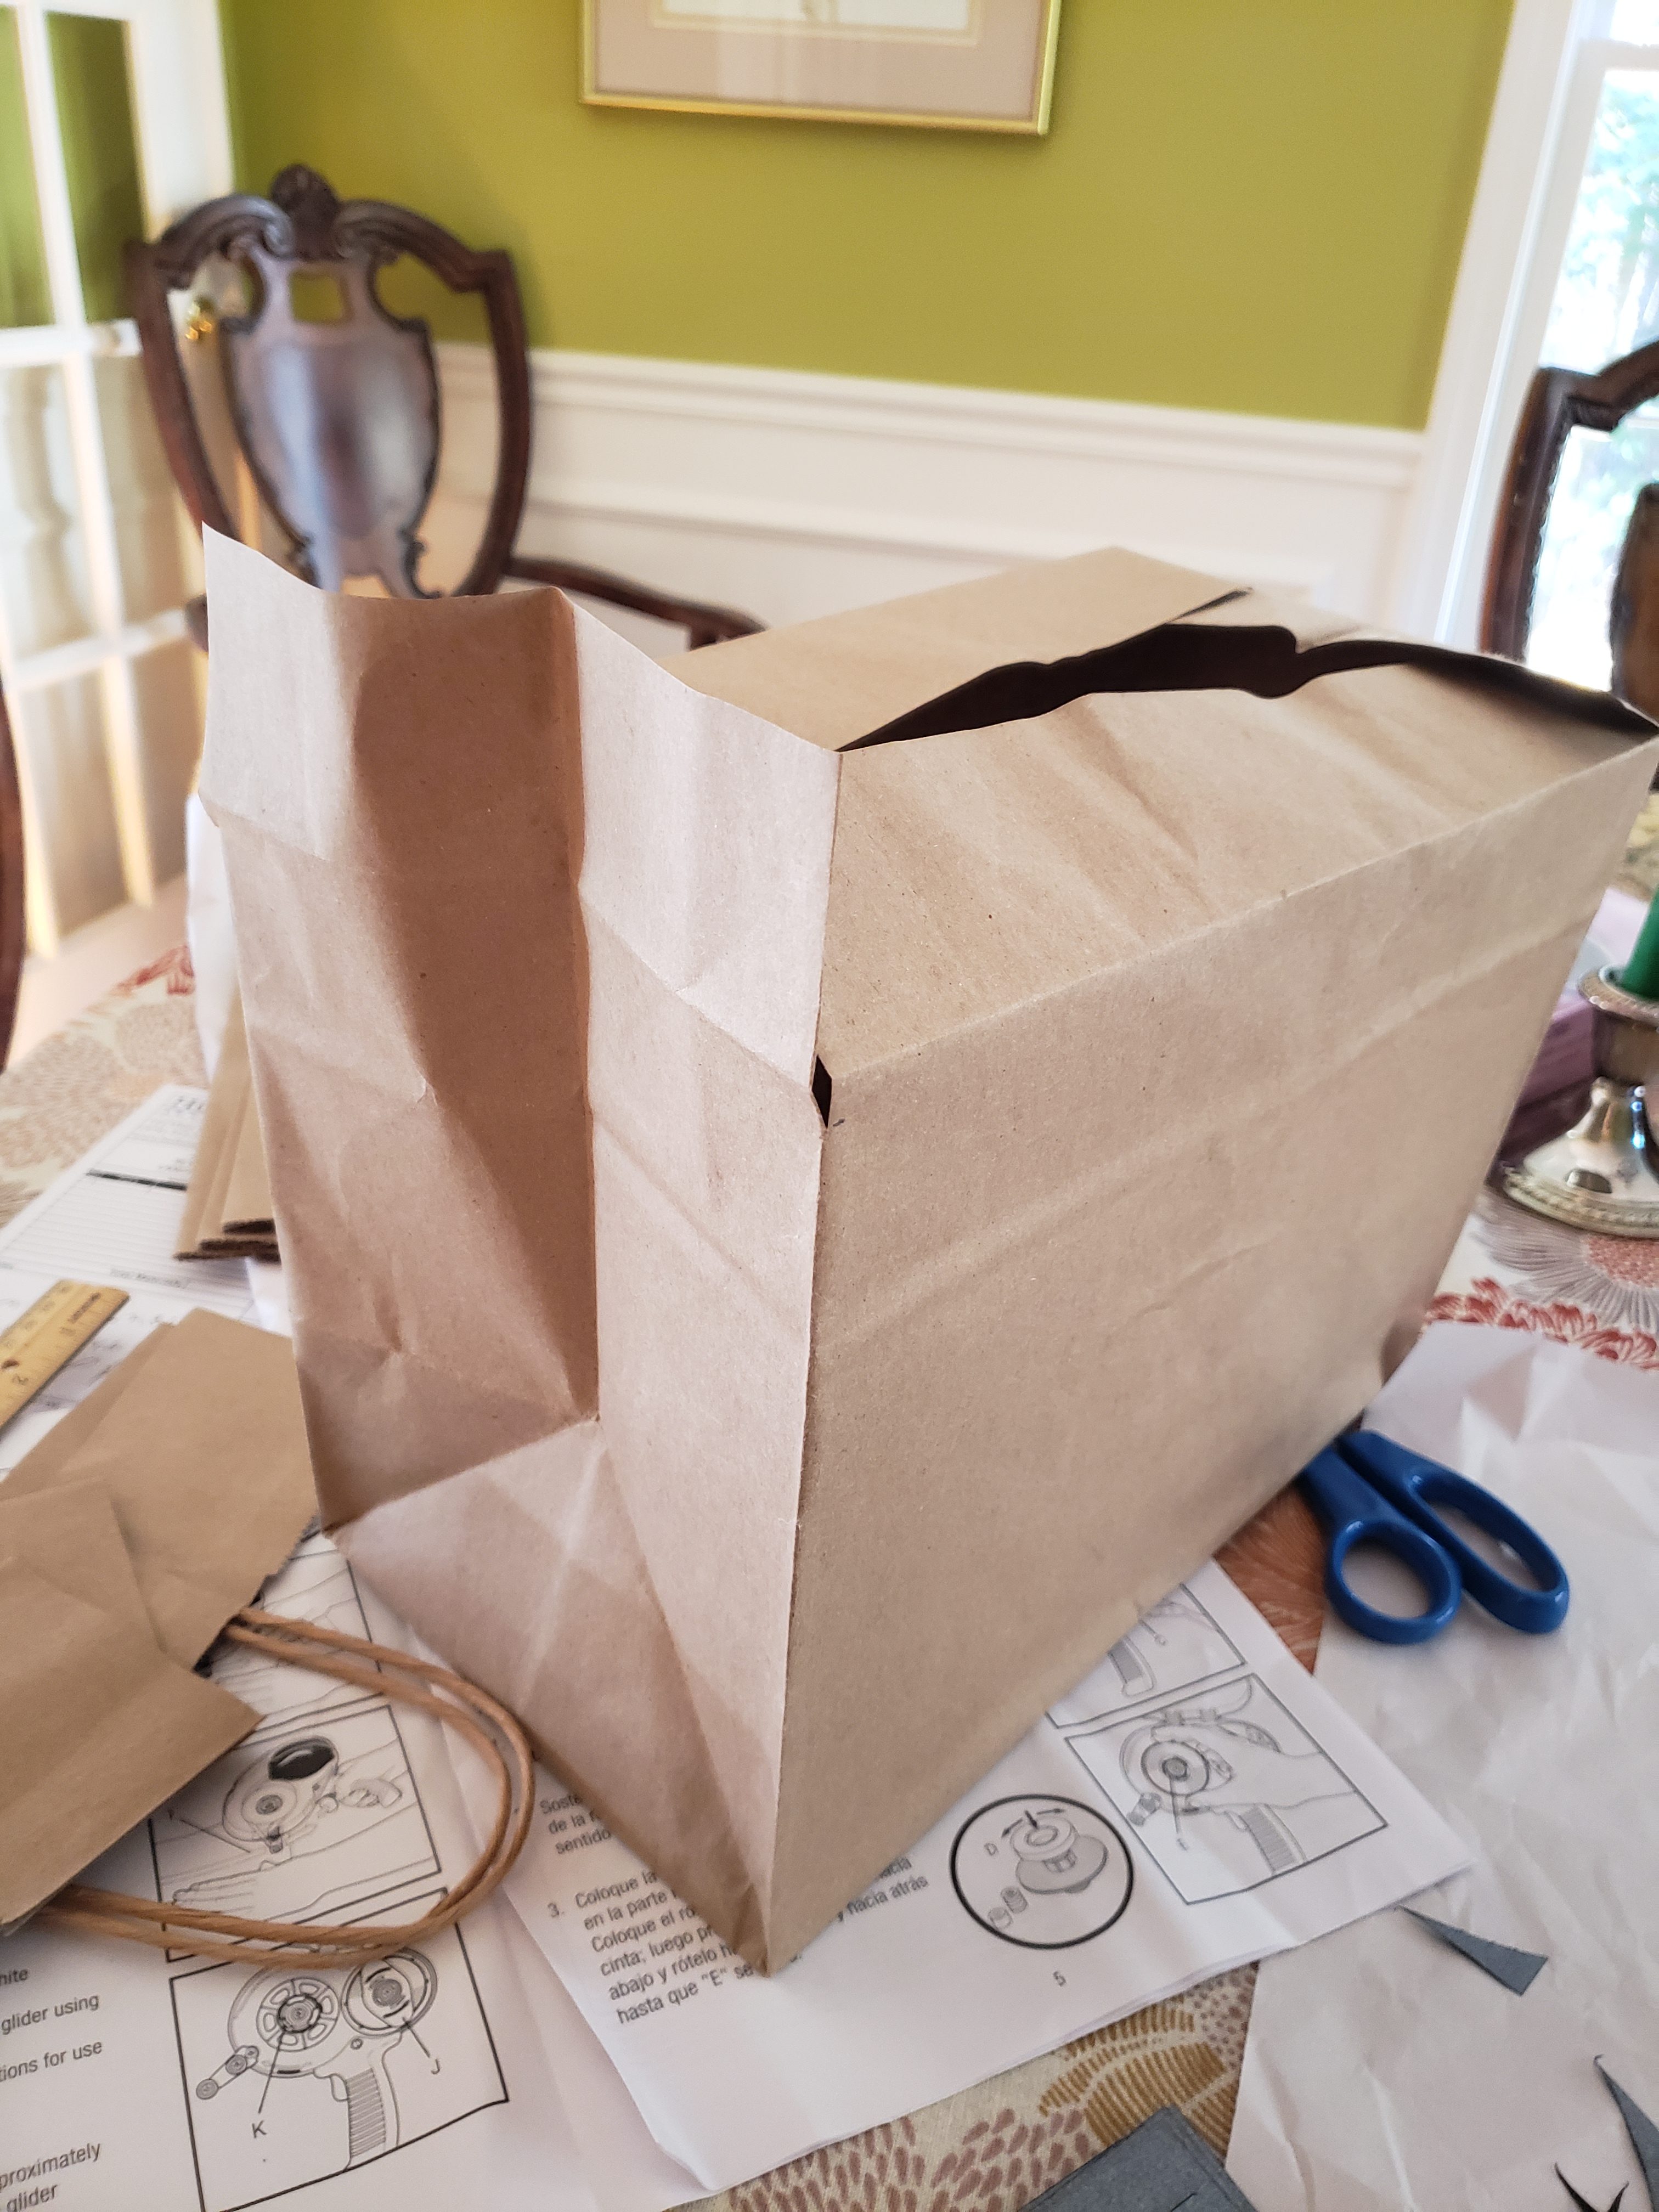
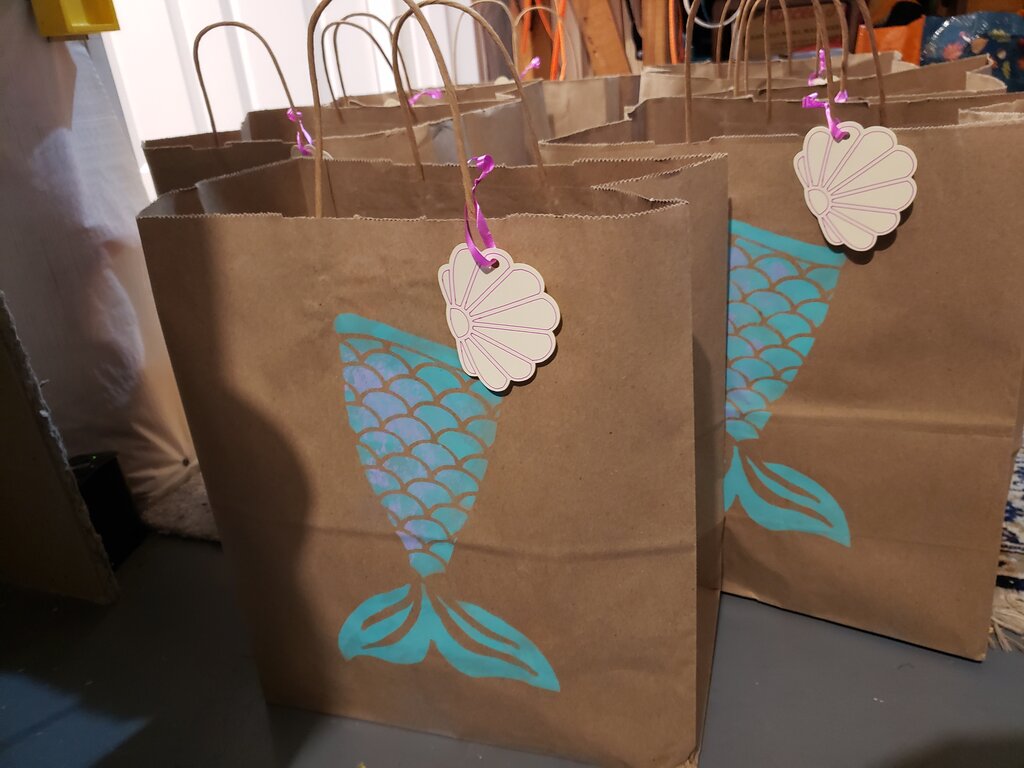
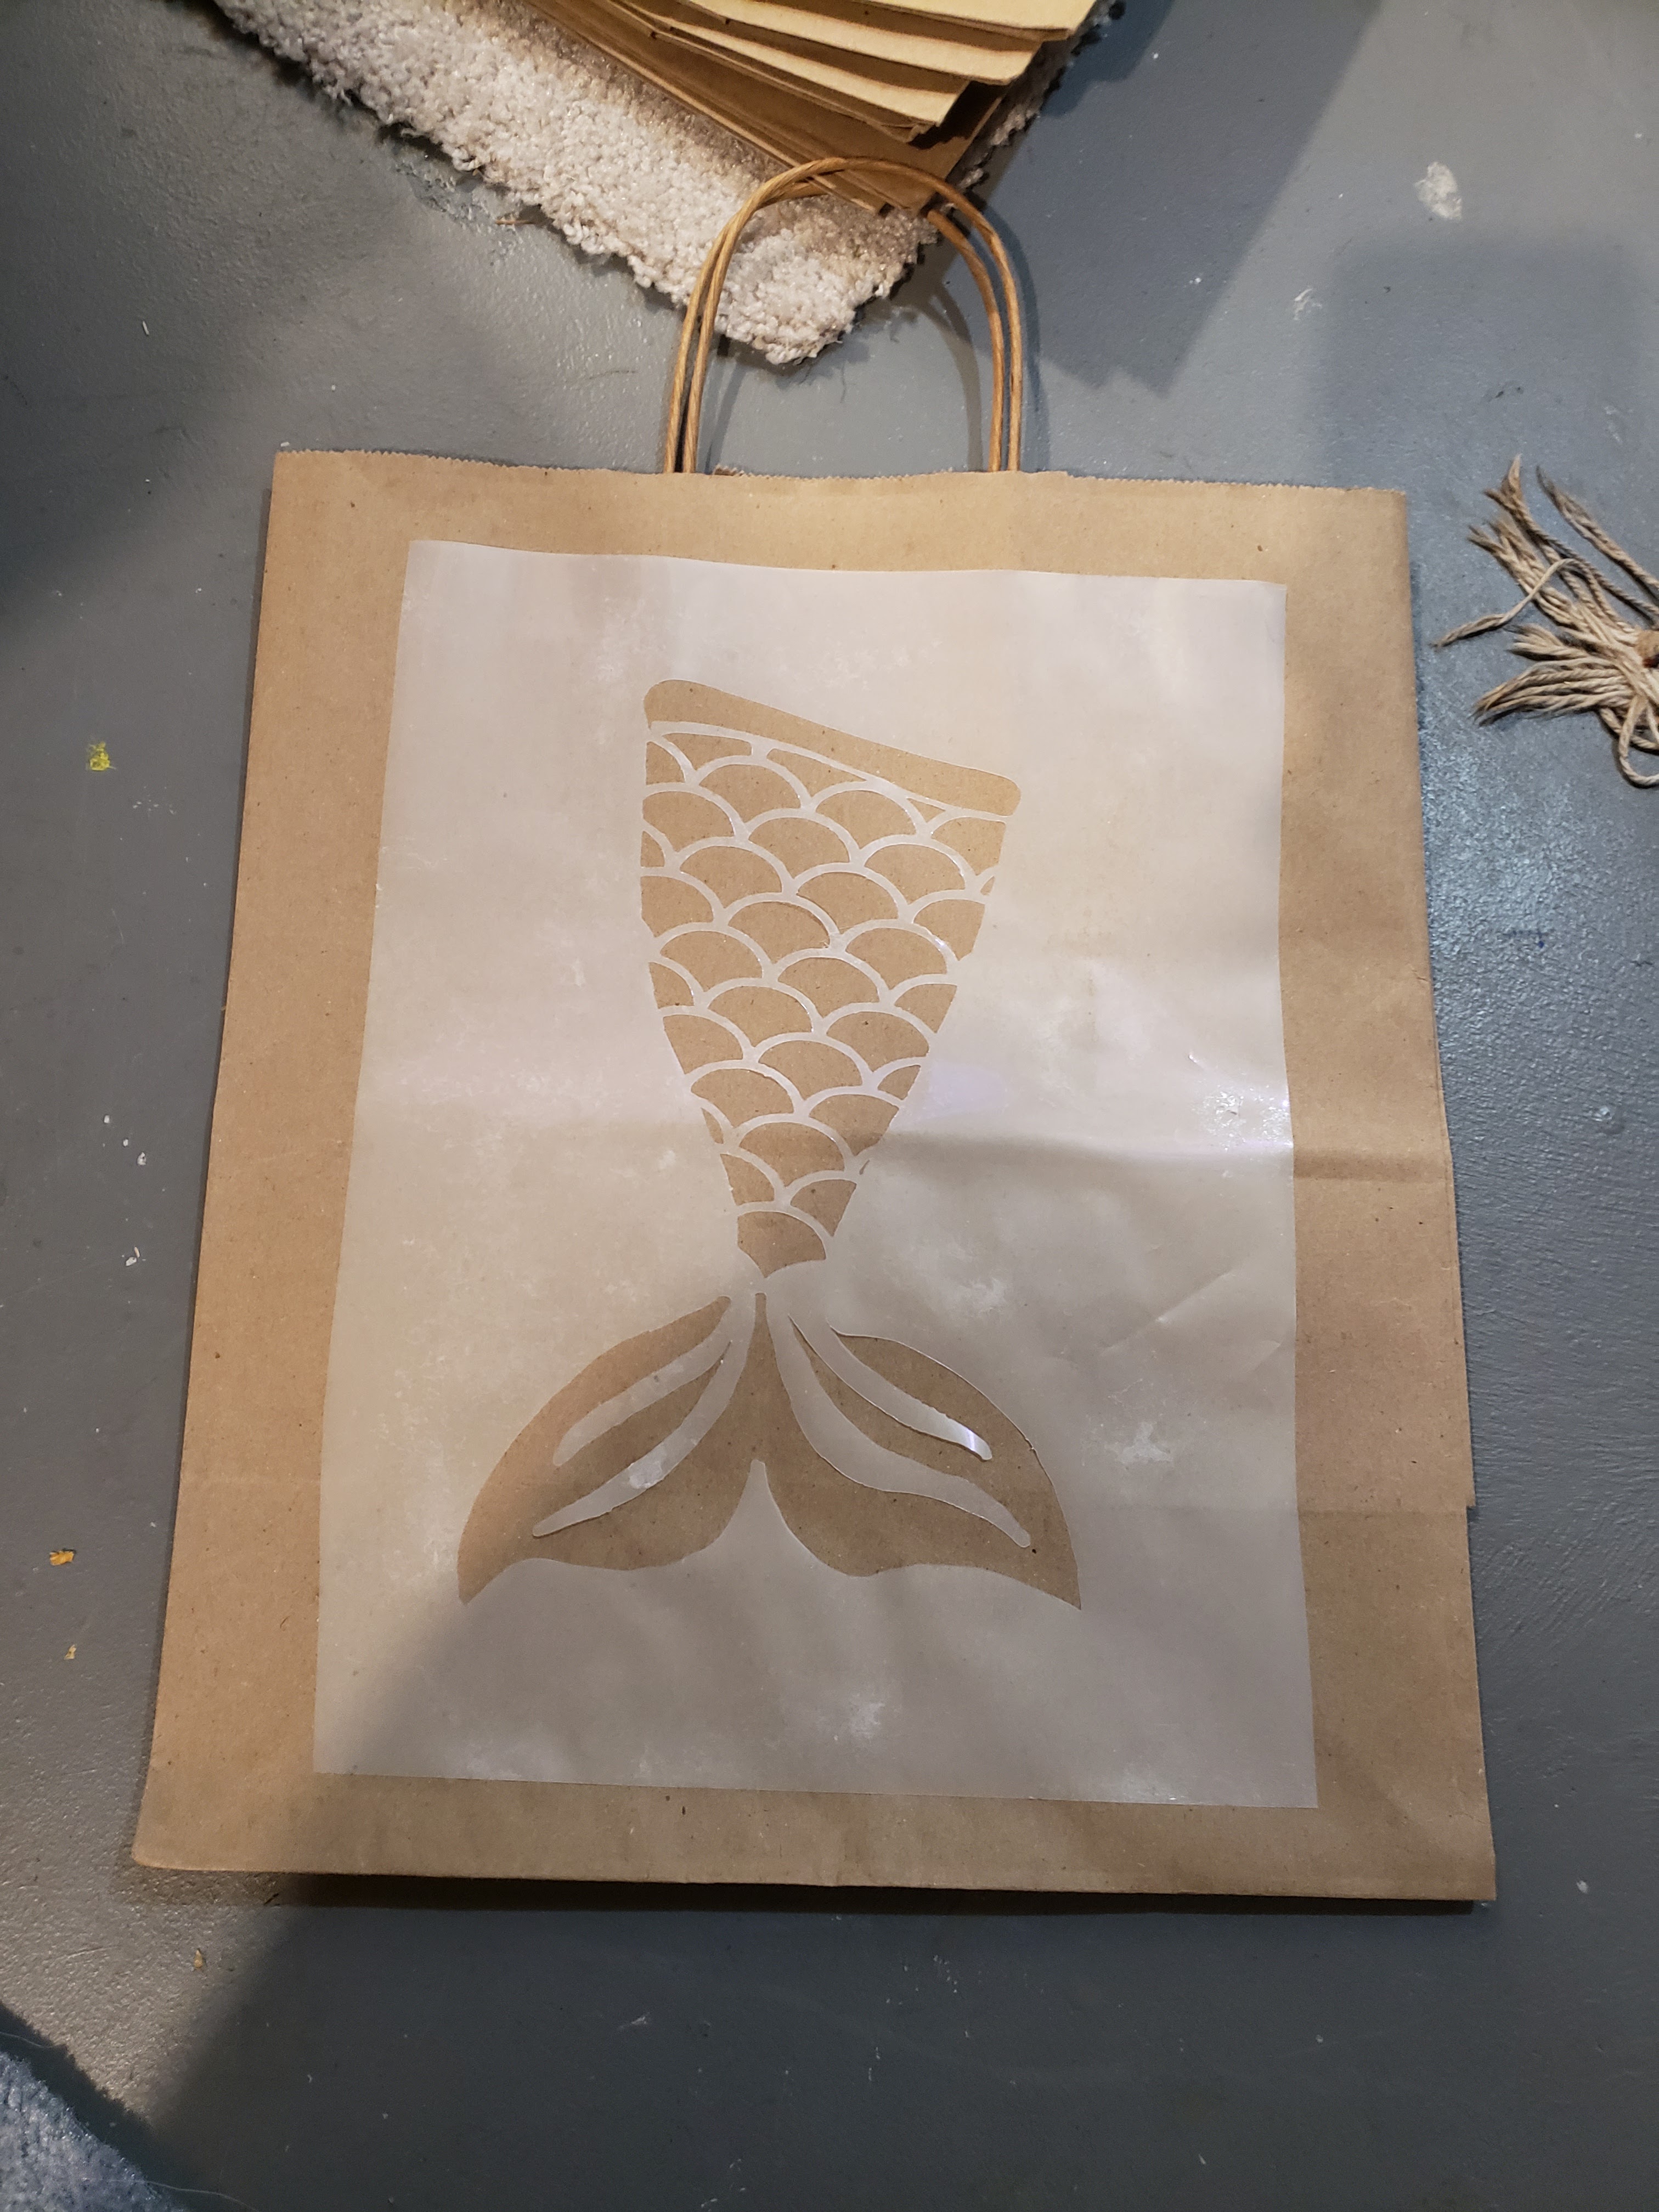
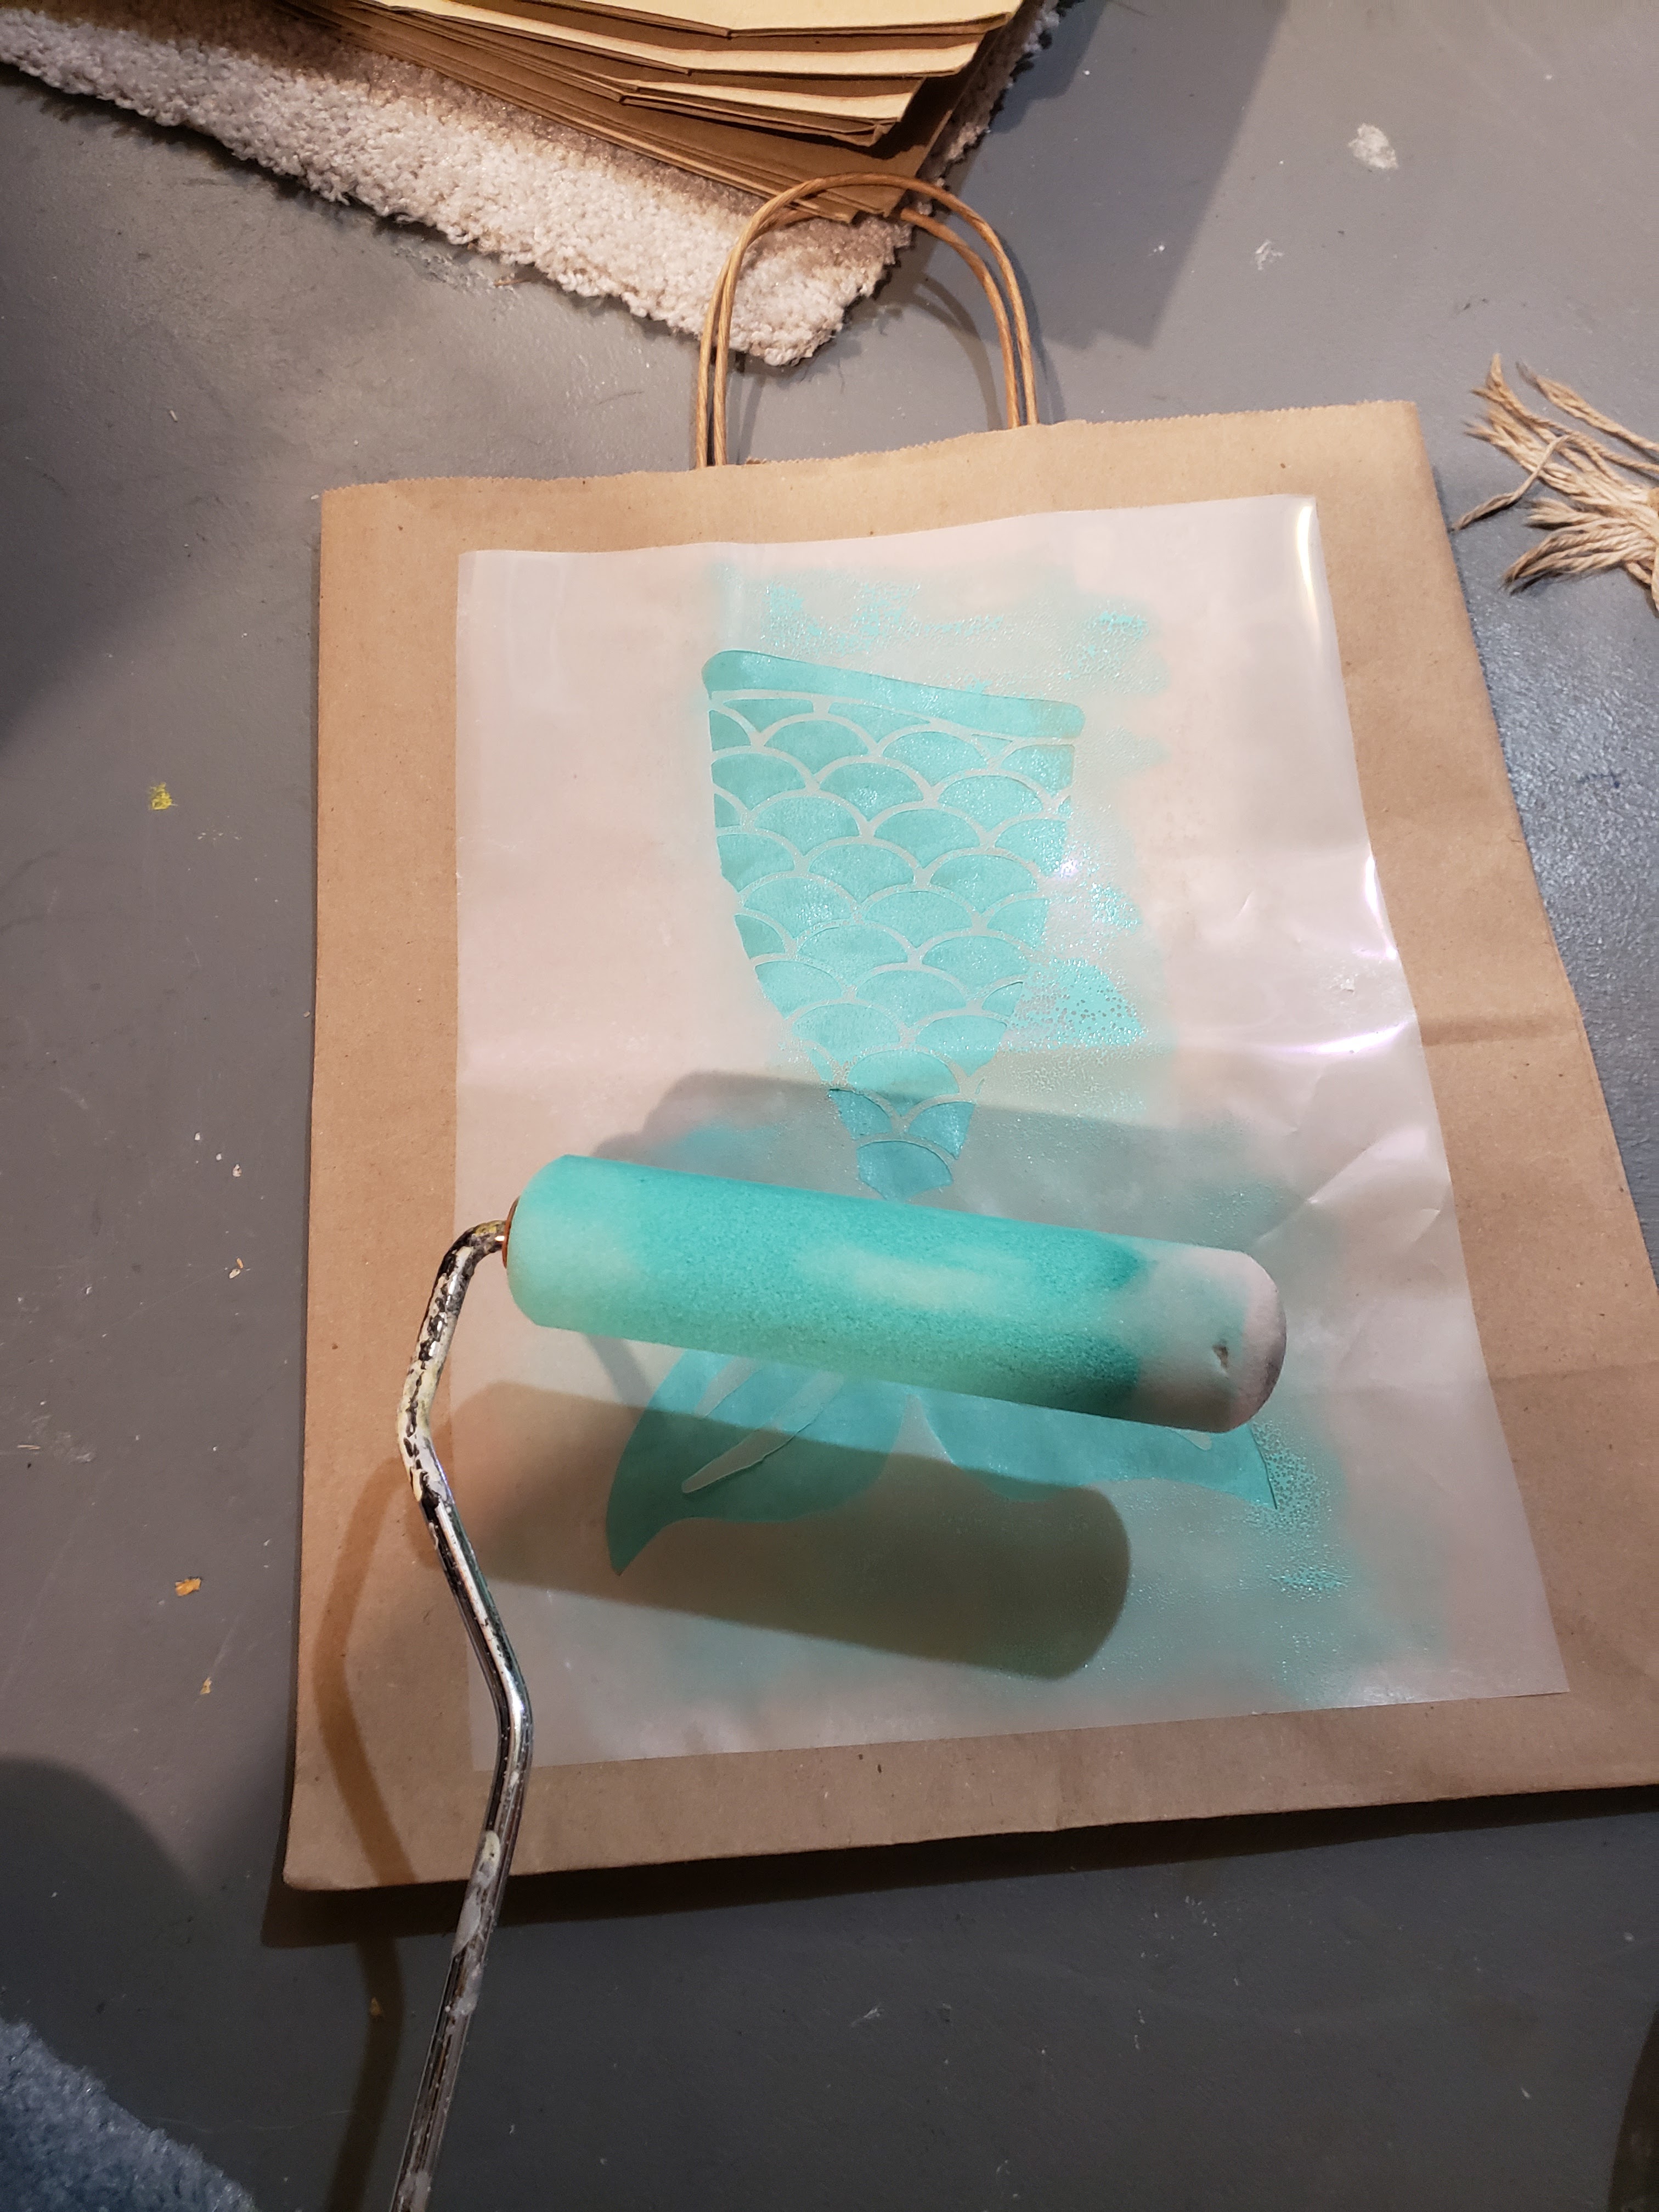
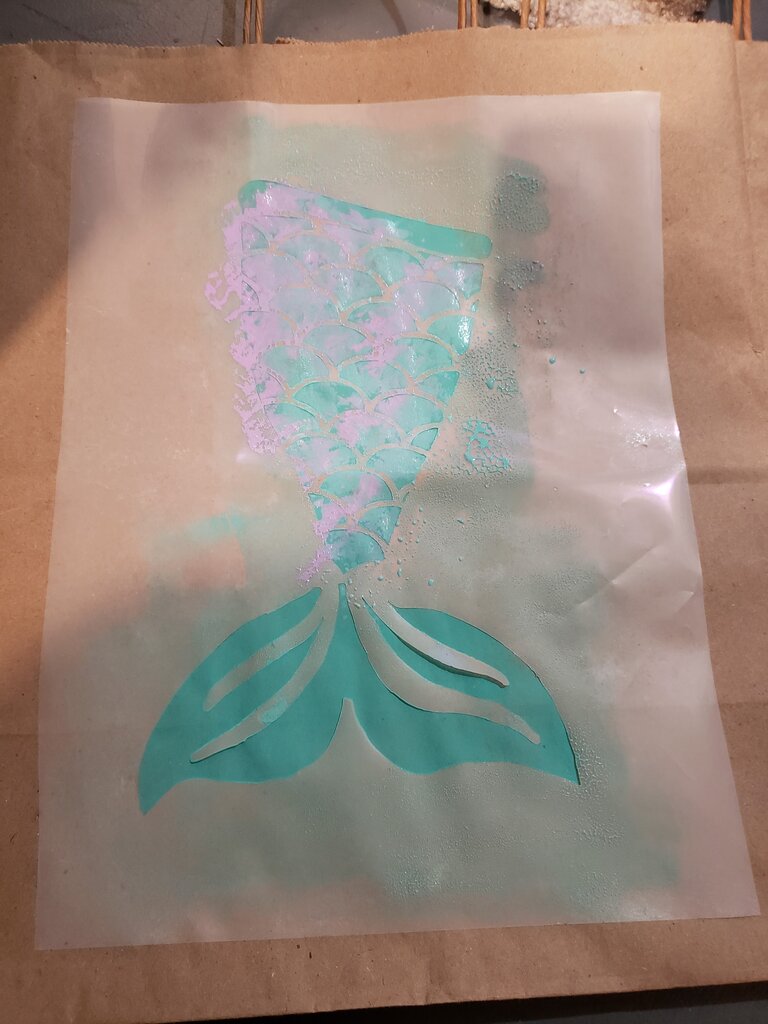
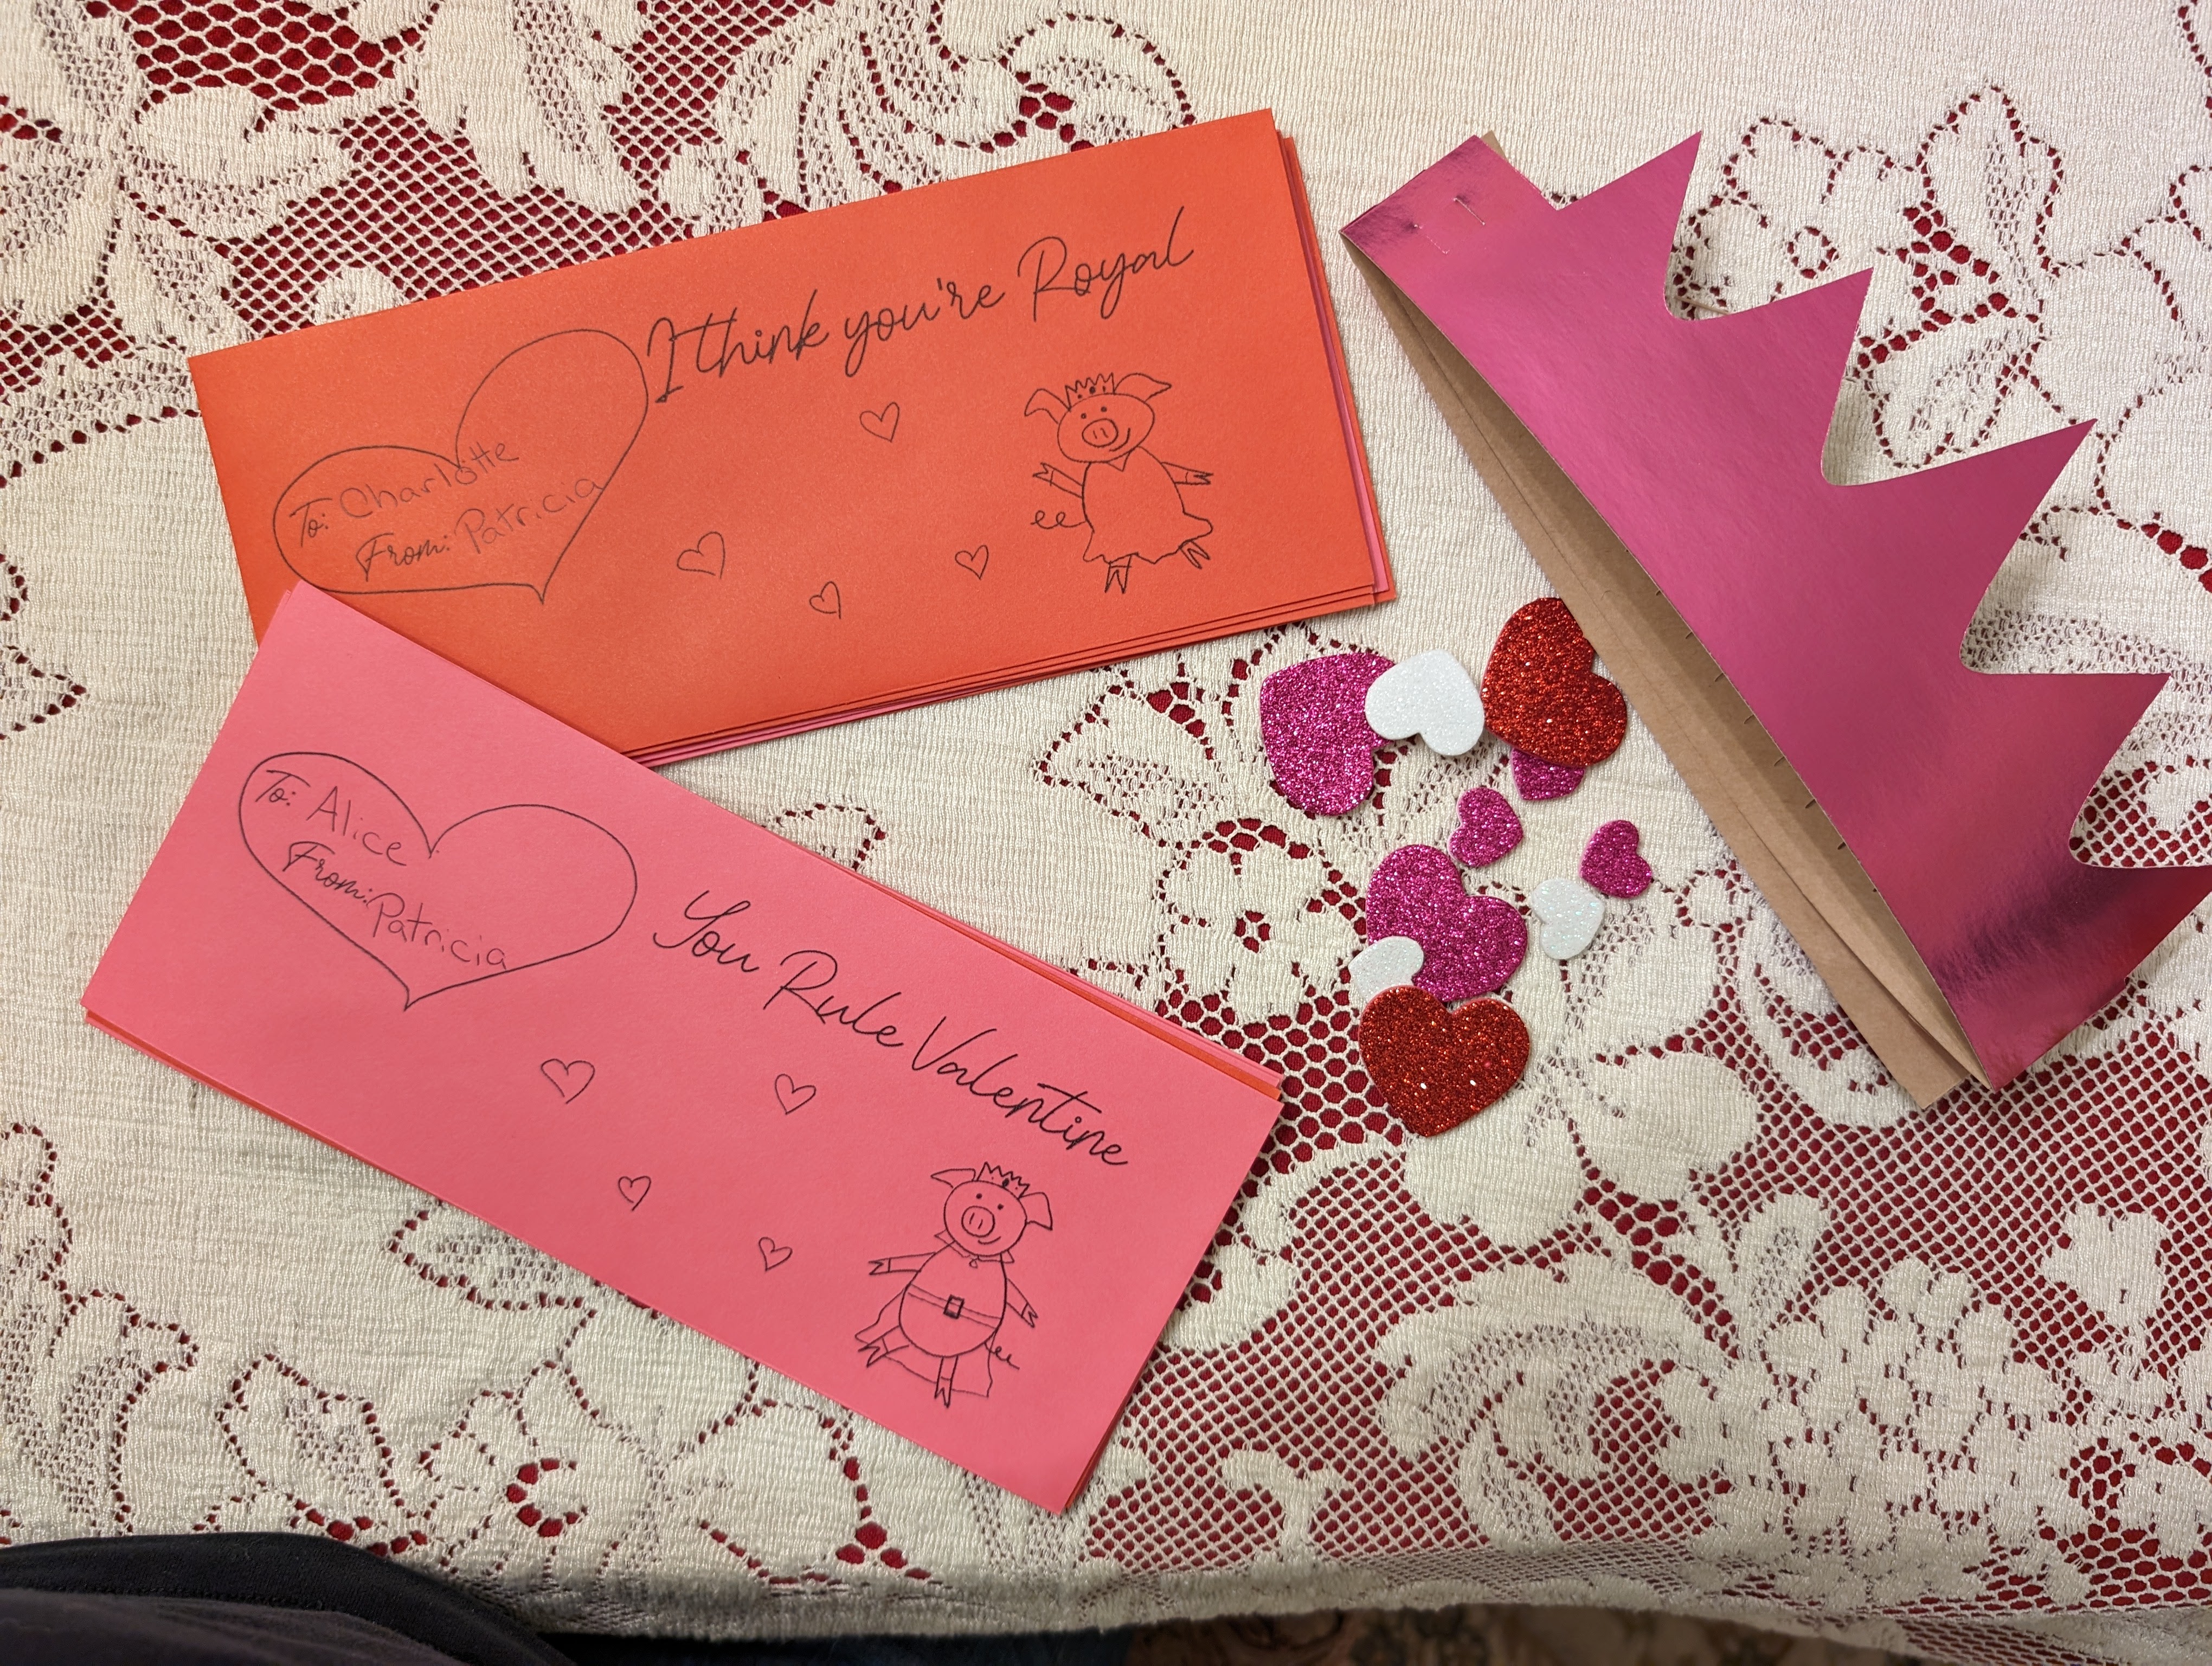
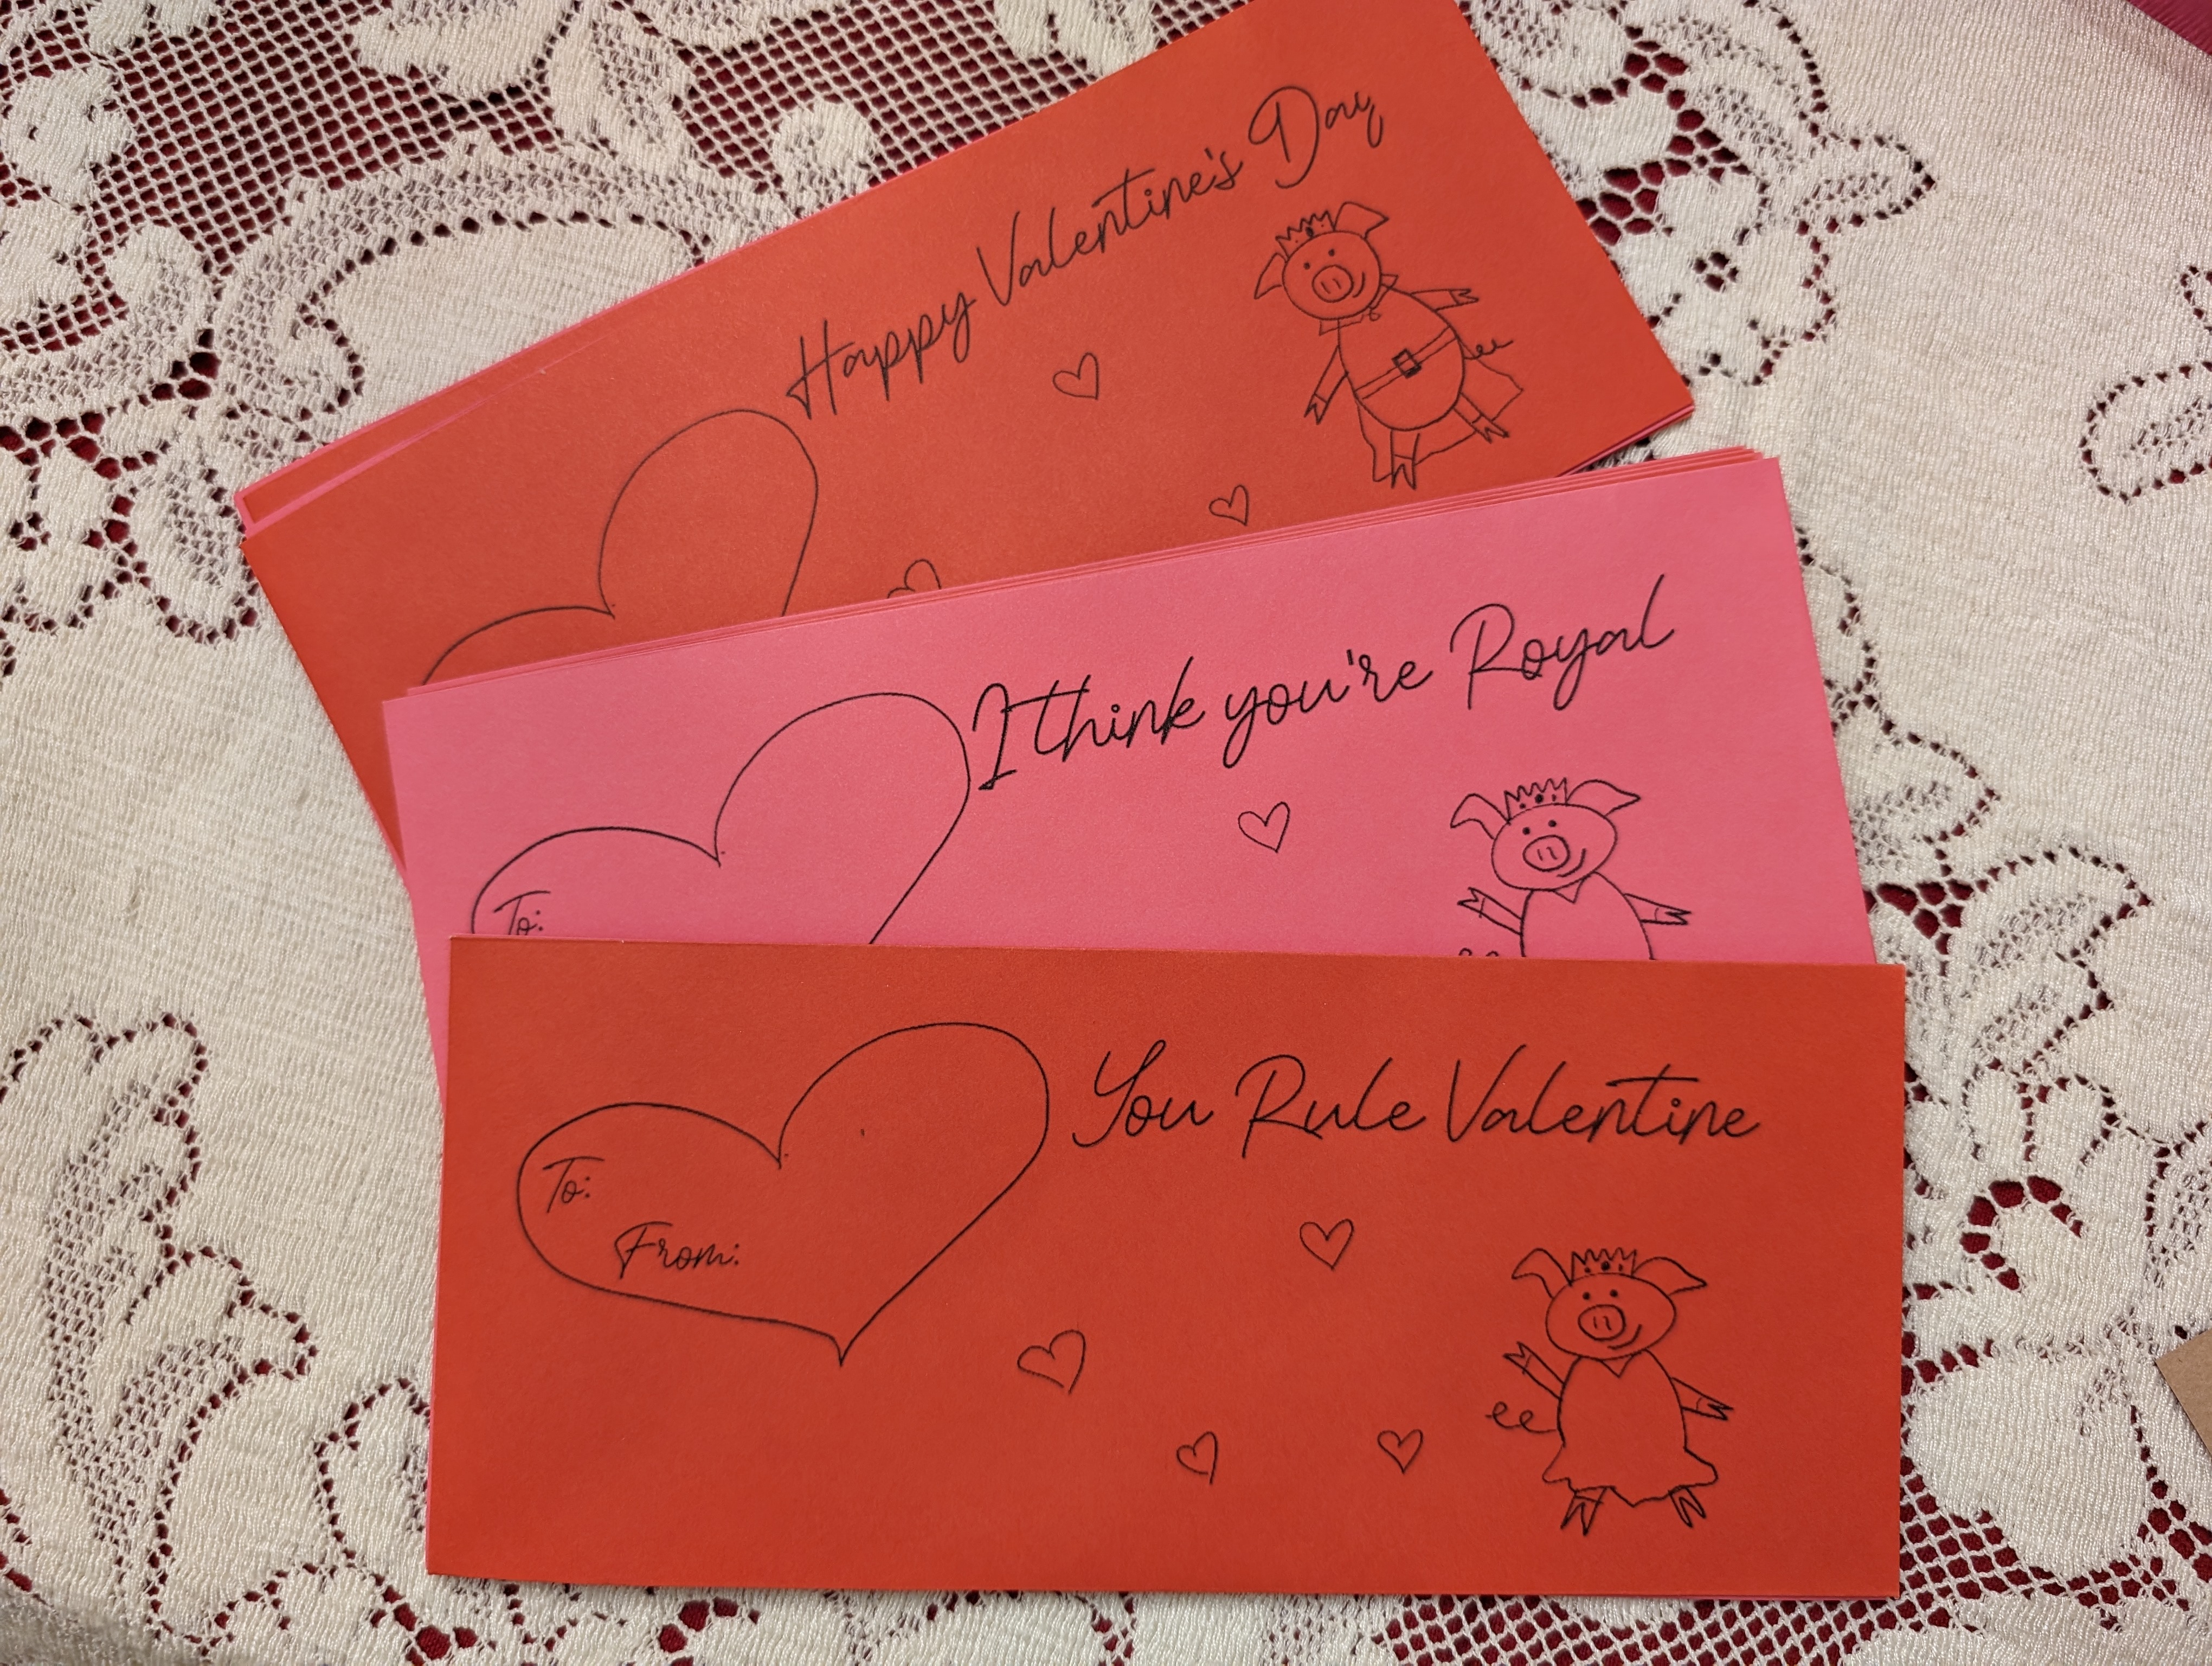
Since it’s Earth Month I have to show you another upcycle.  For Julius’s party I really wanted to create little suitcases as favor bags.  The caveat was that they had to be made from the brown paper grocery bags that I collect.  Here’s how to do it!  

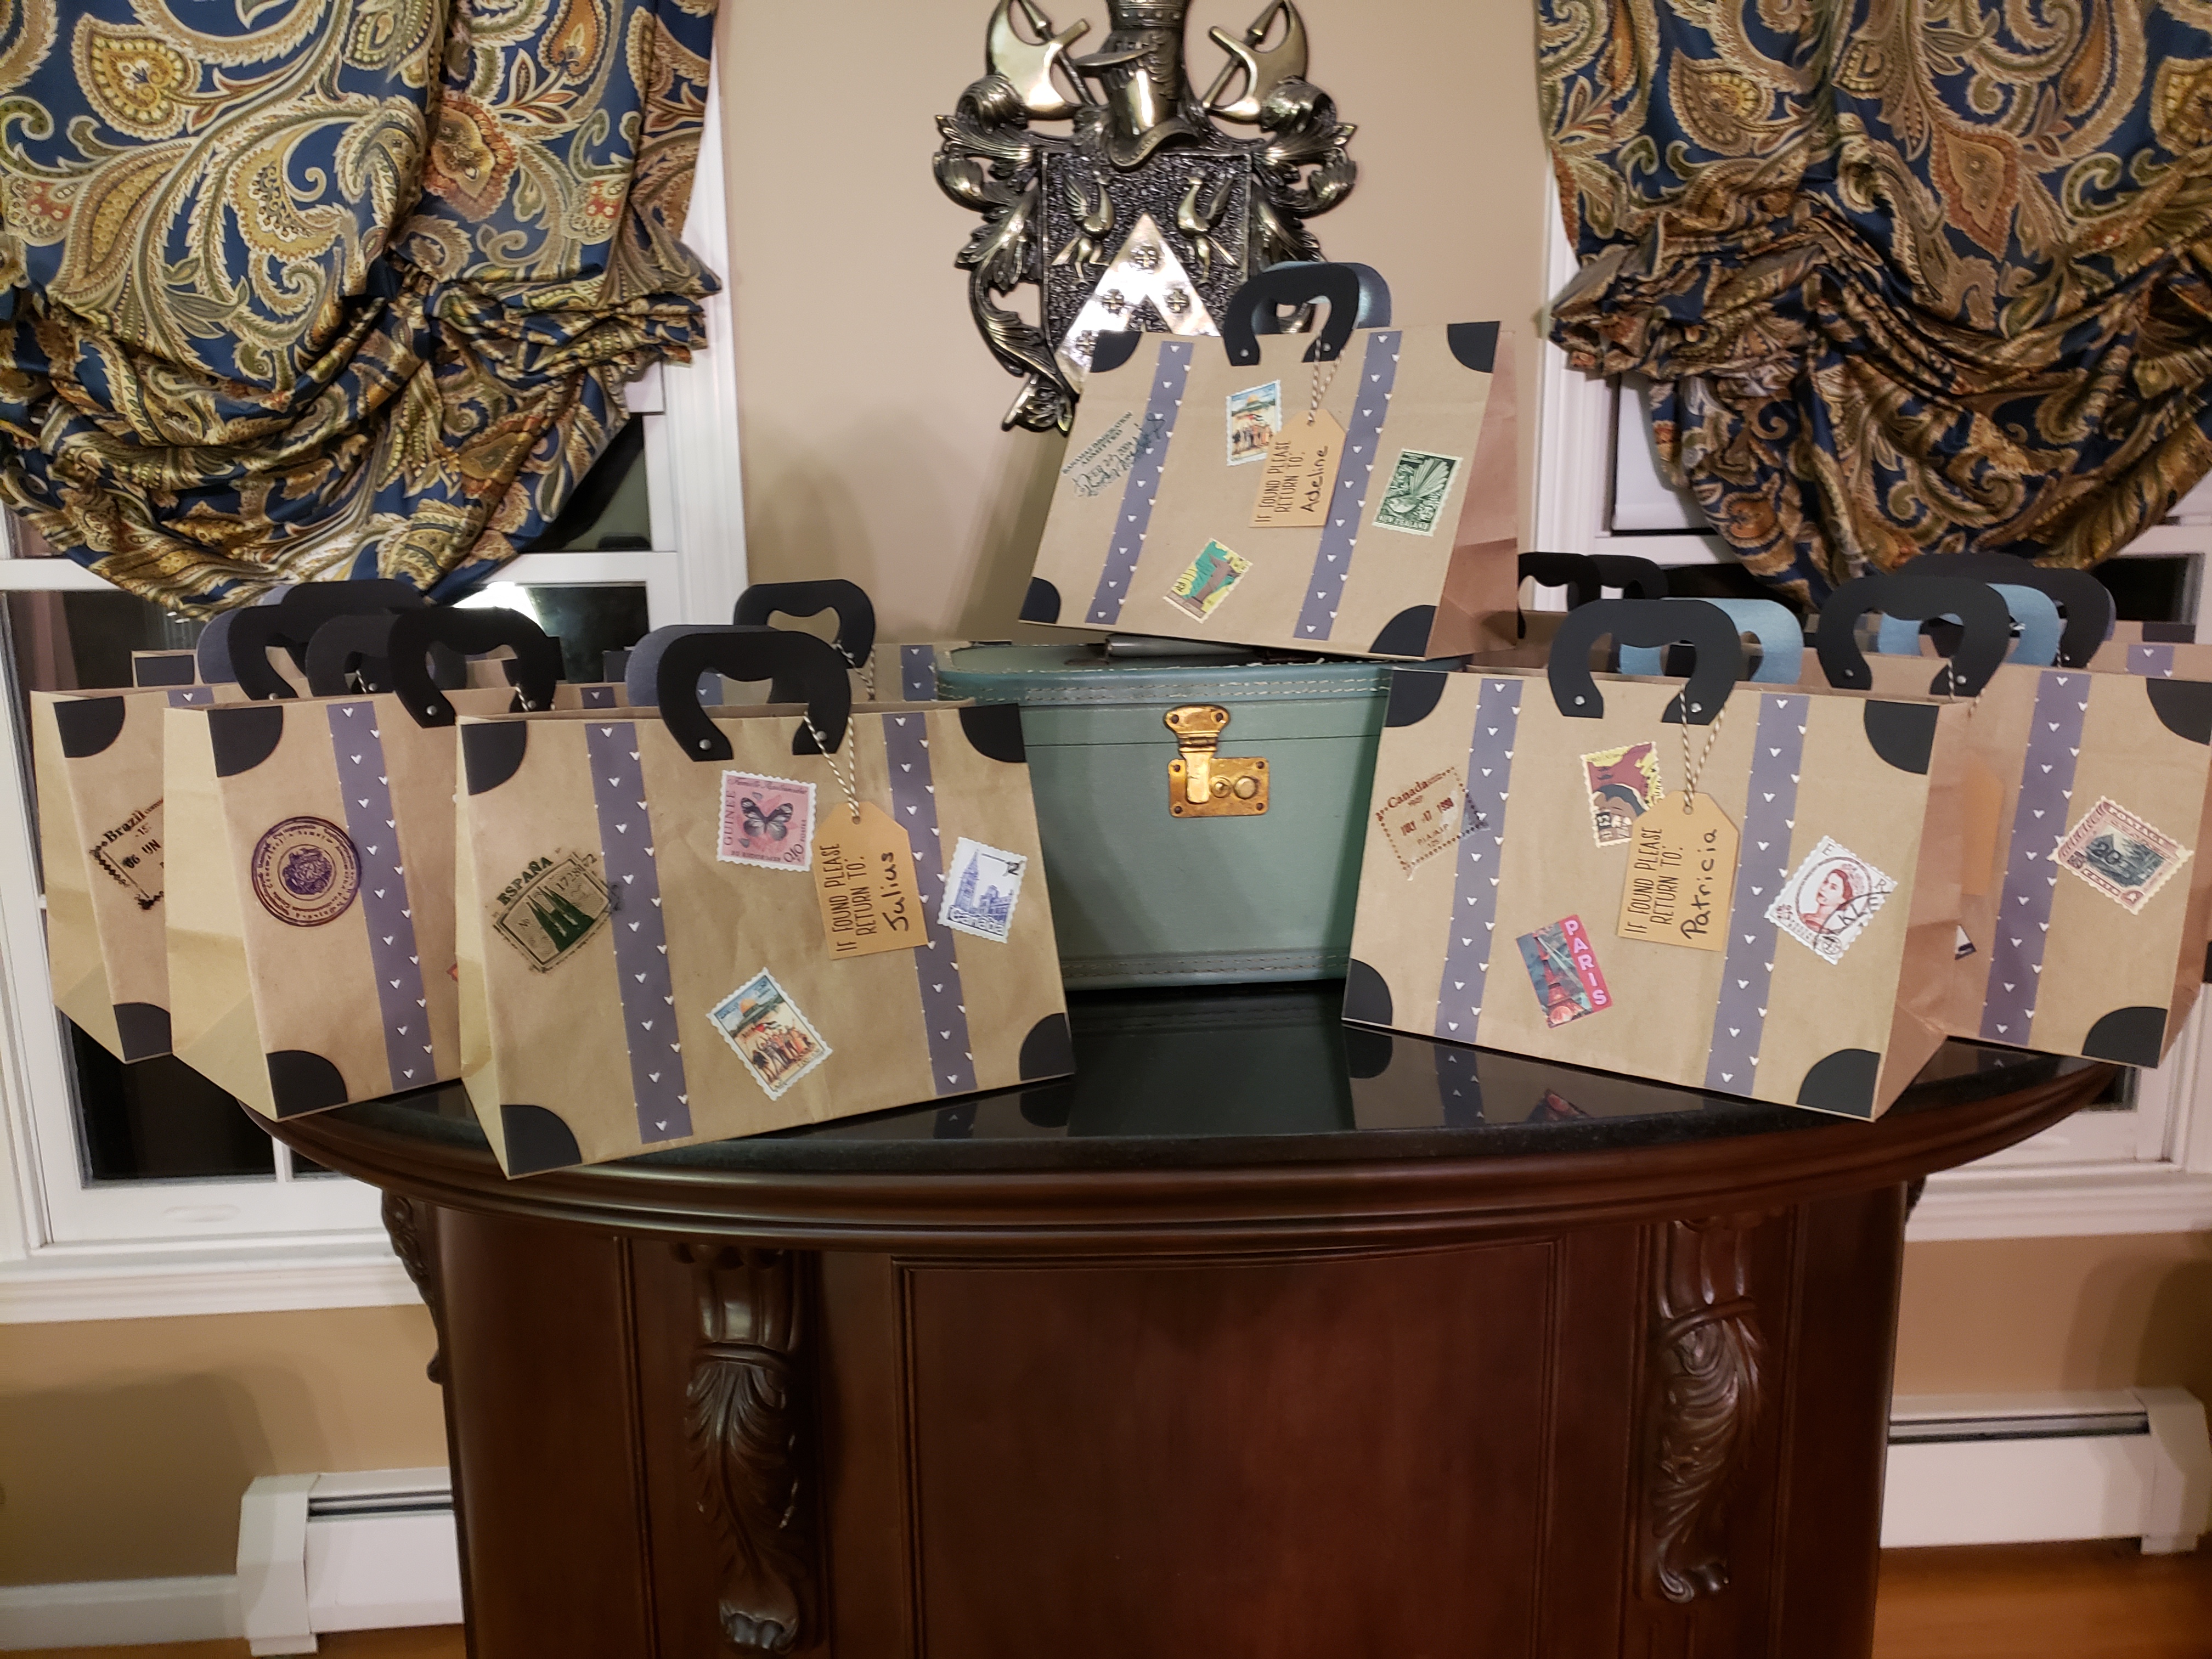
Train Luggage Favor Bag

What you’ll need for each:

  • brown paper grocery bag
  • paper for “strap”
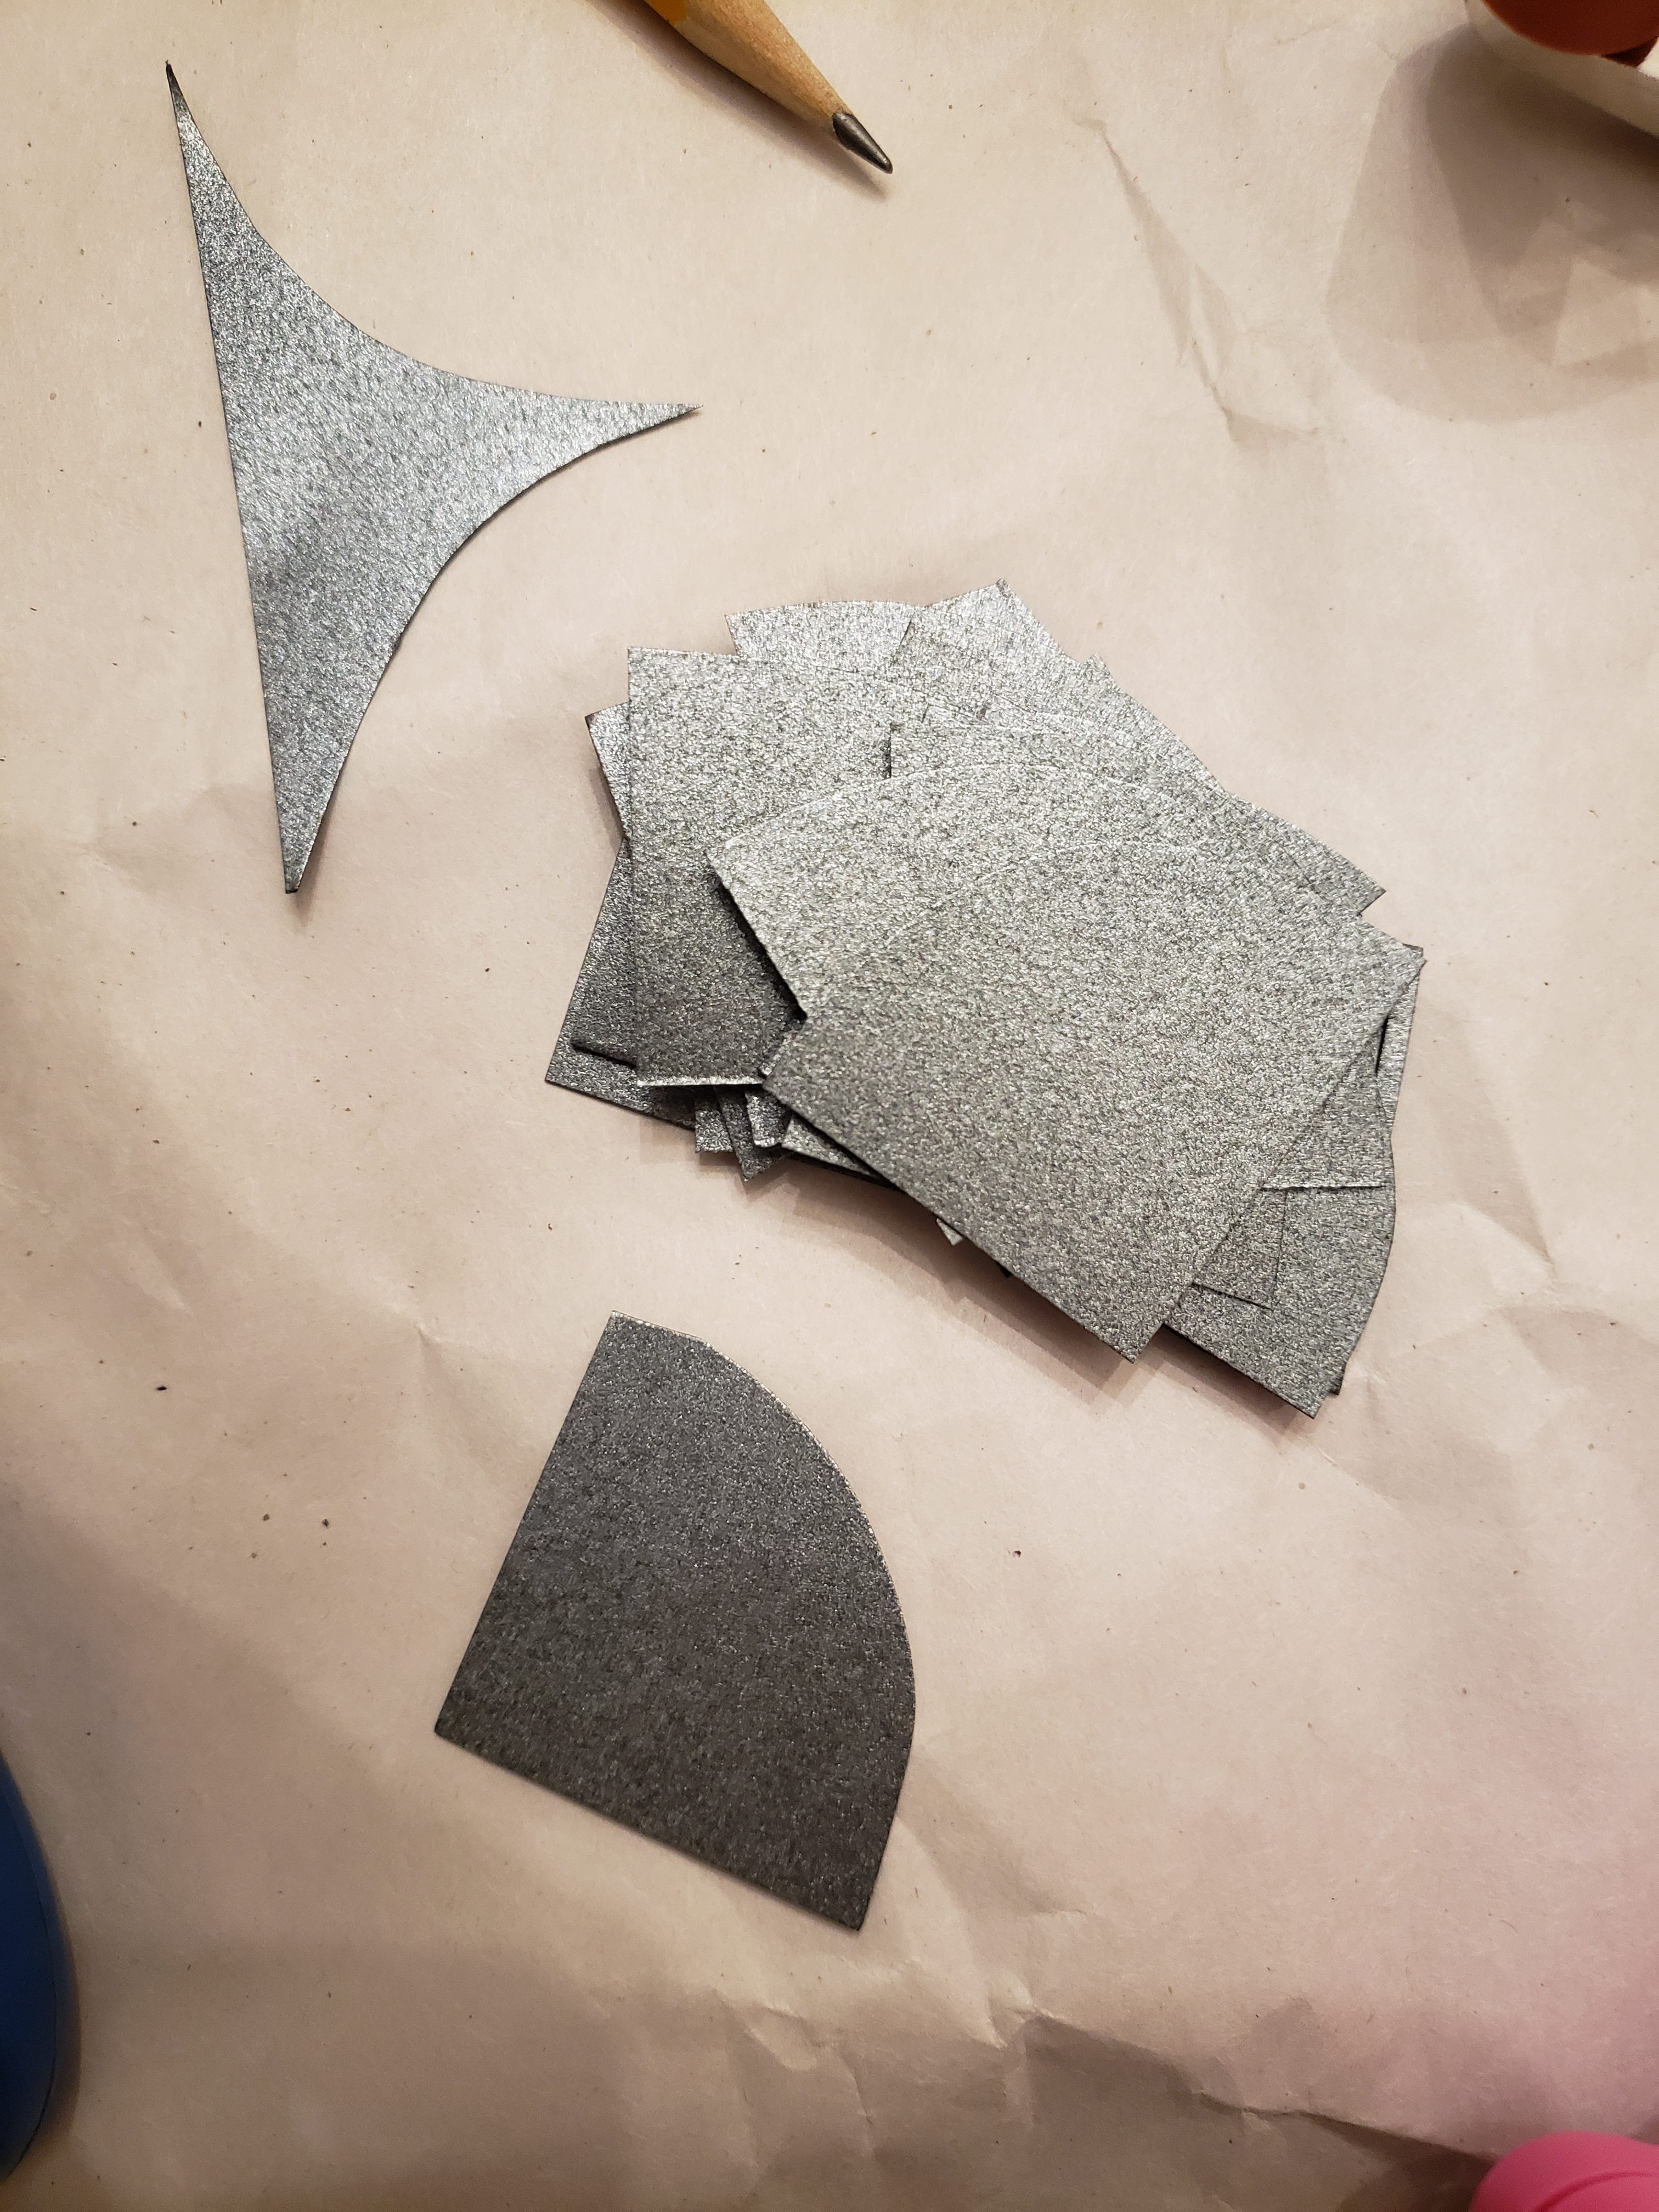
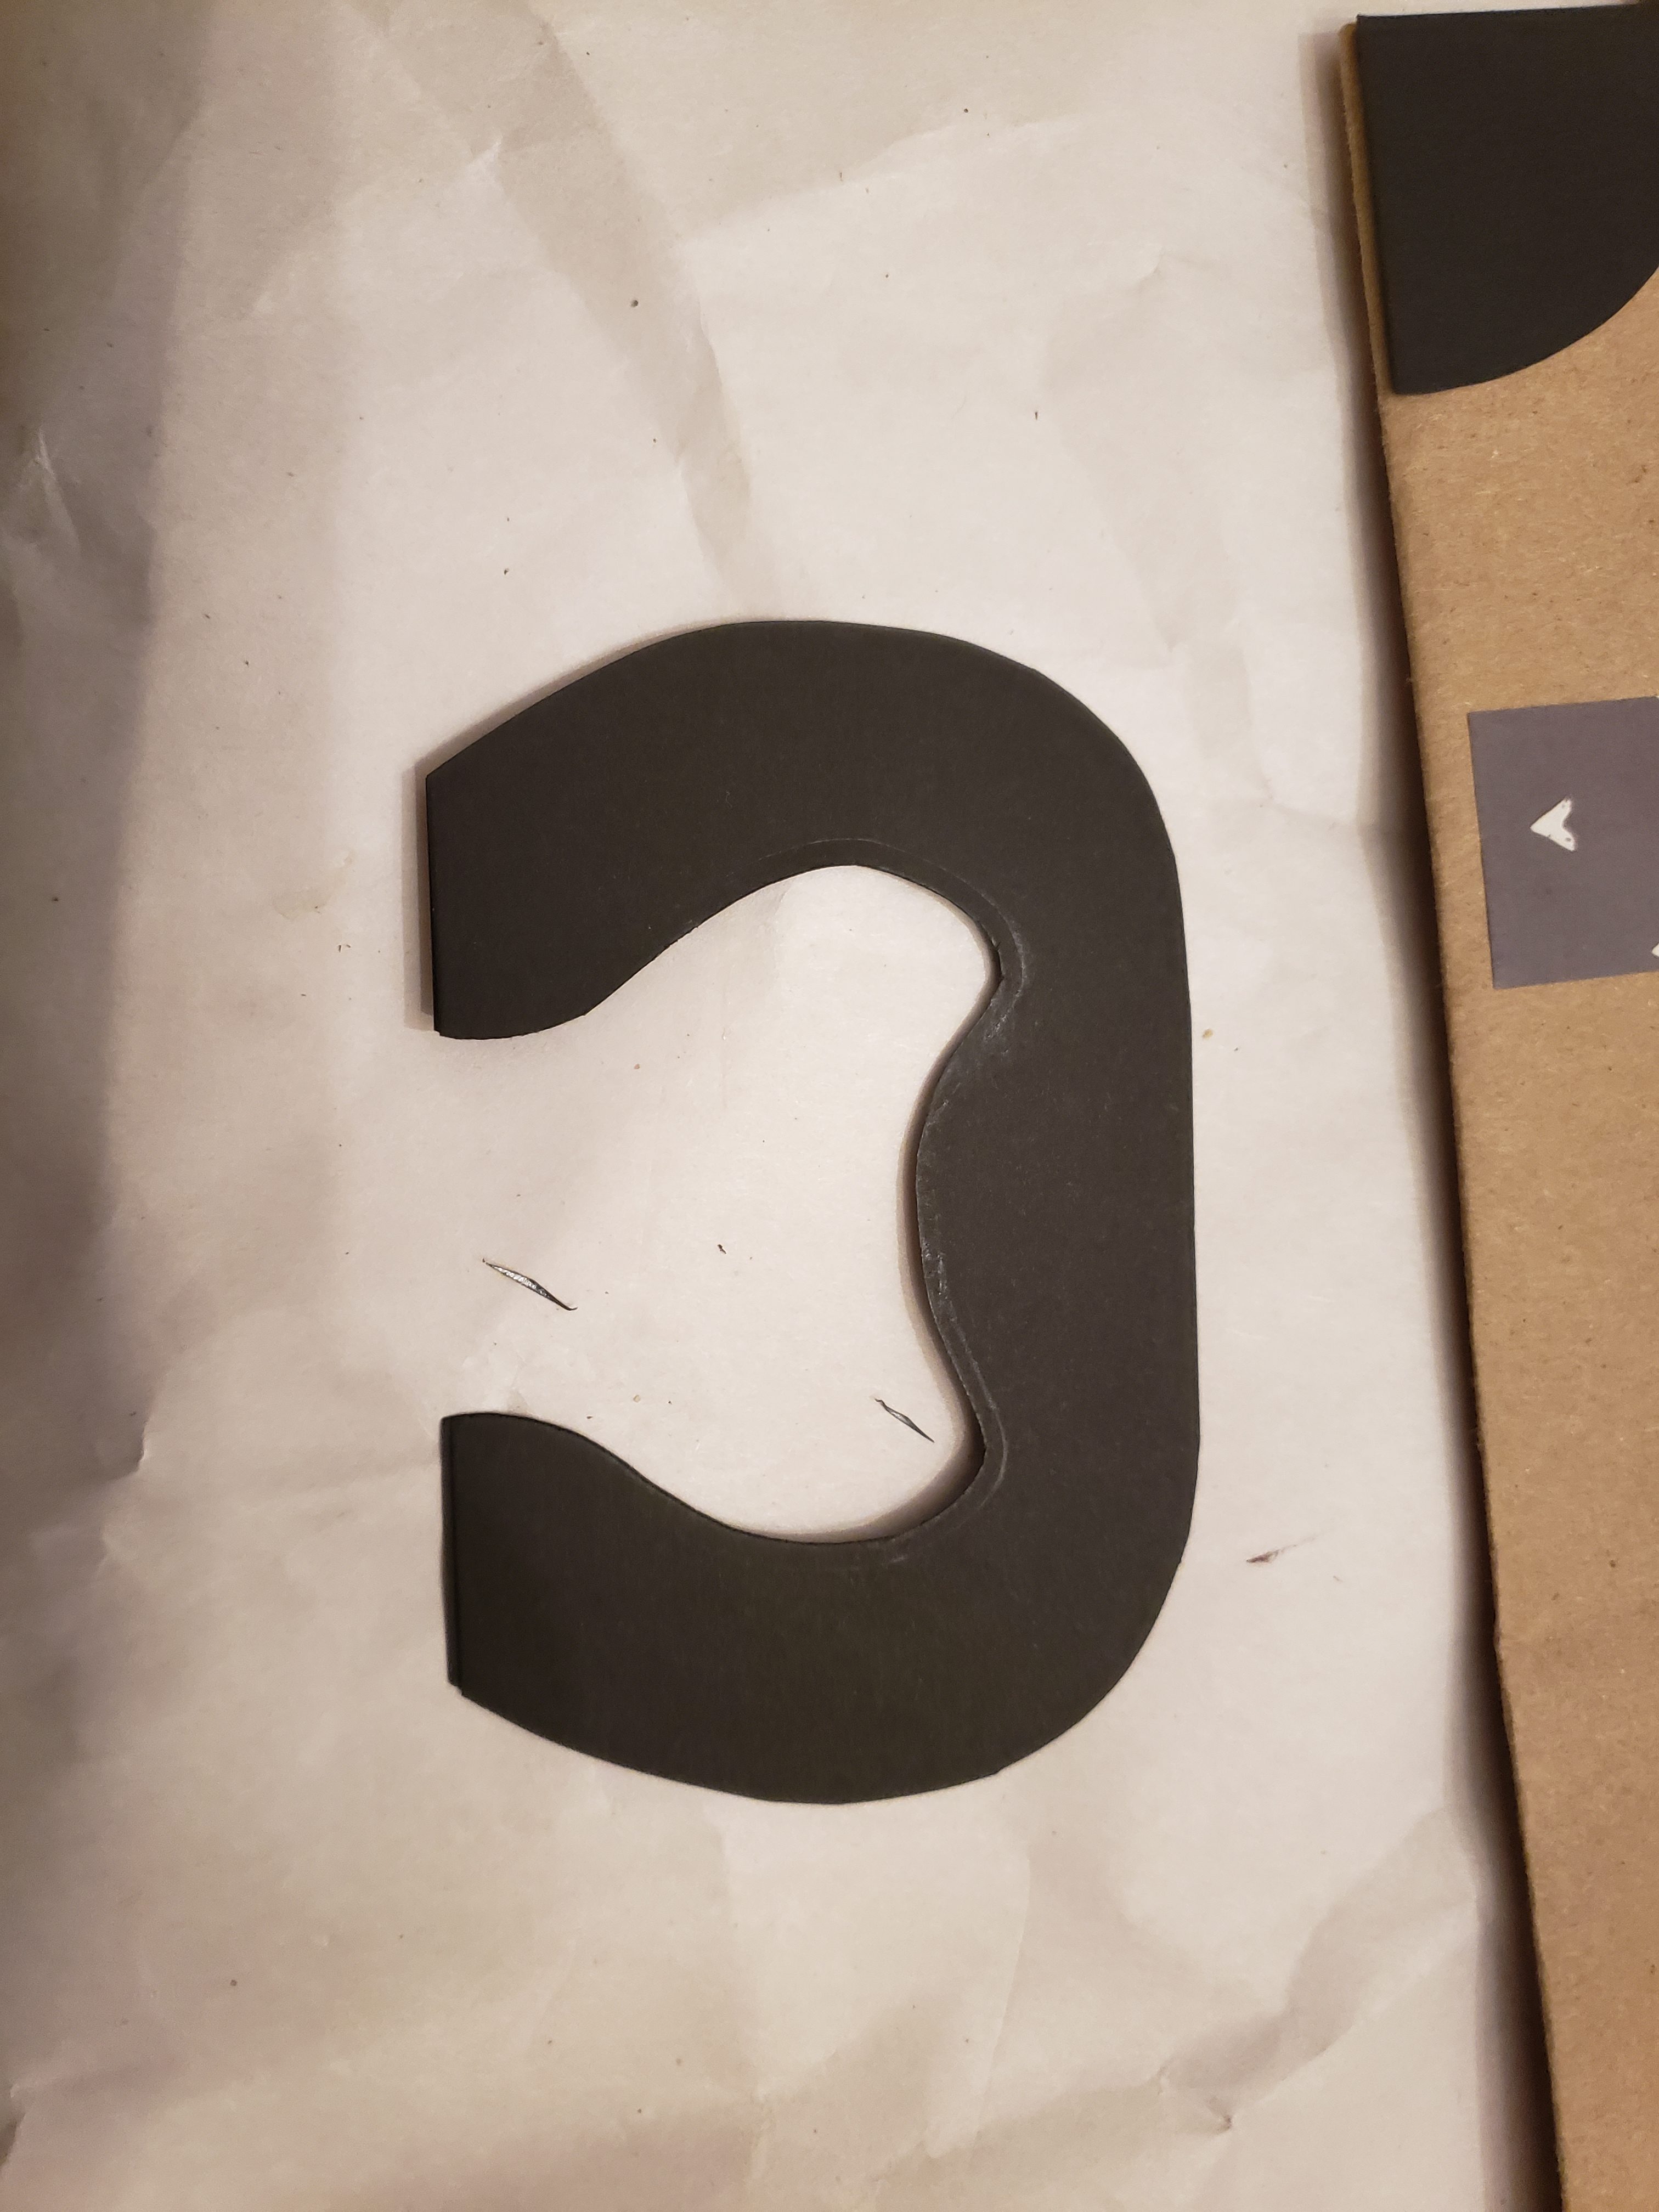
  • black cardstock for handle and corner supports
  • 4 brads
  • tape roller
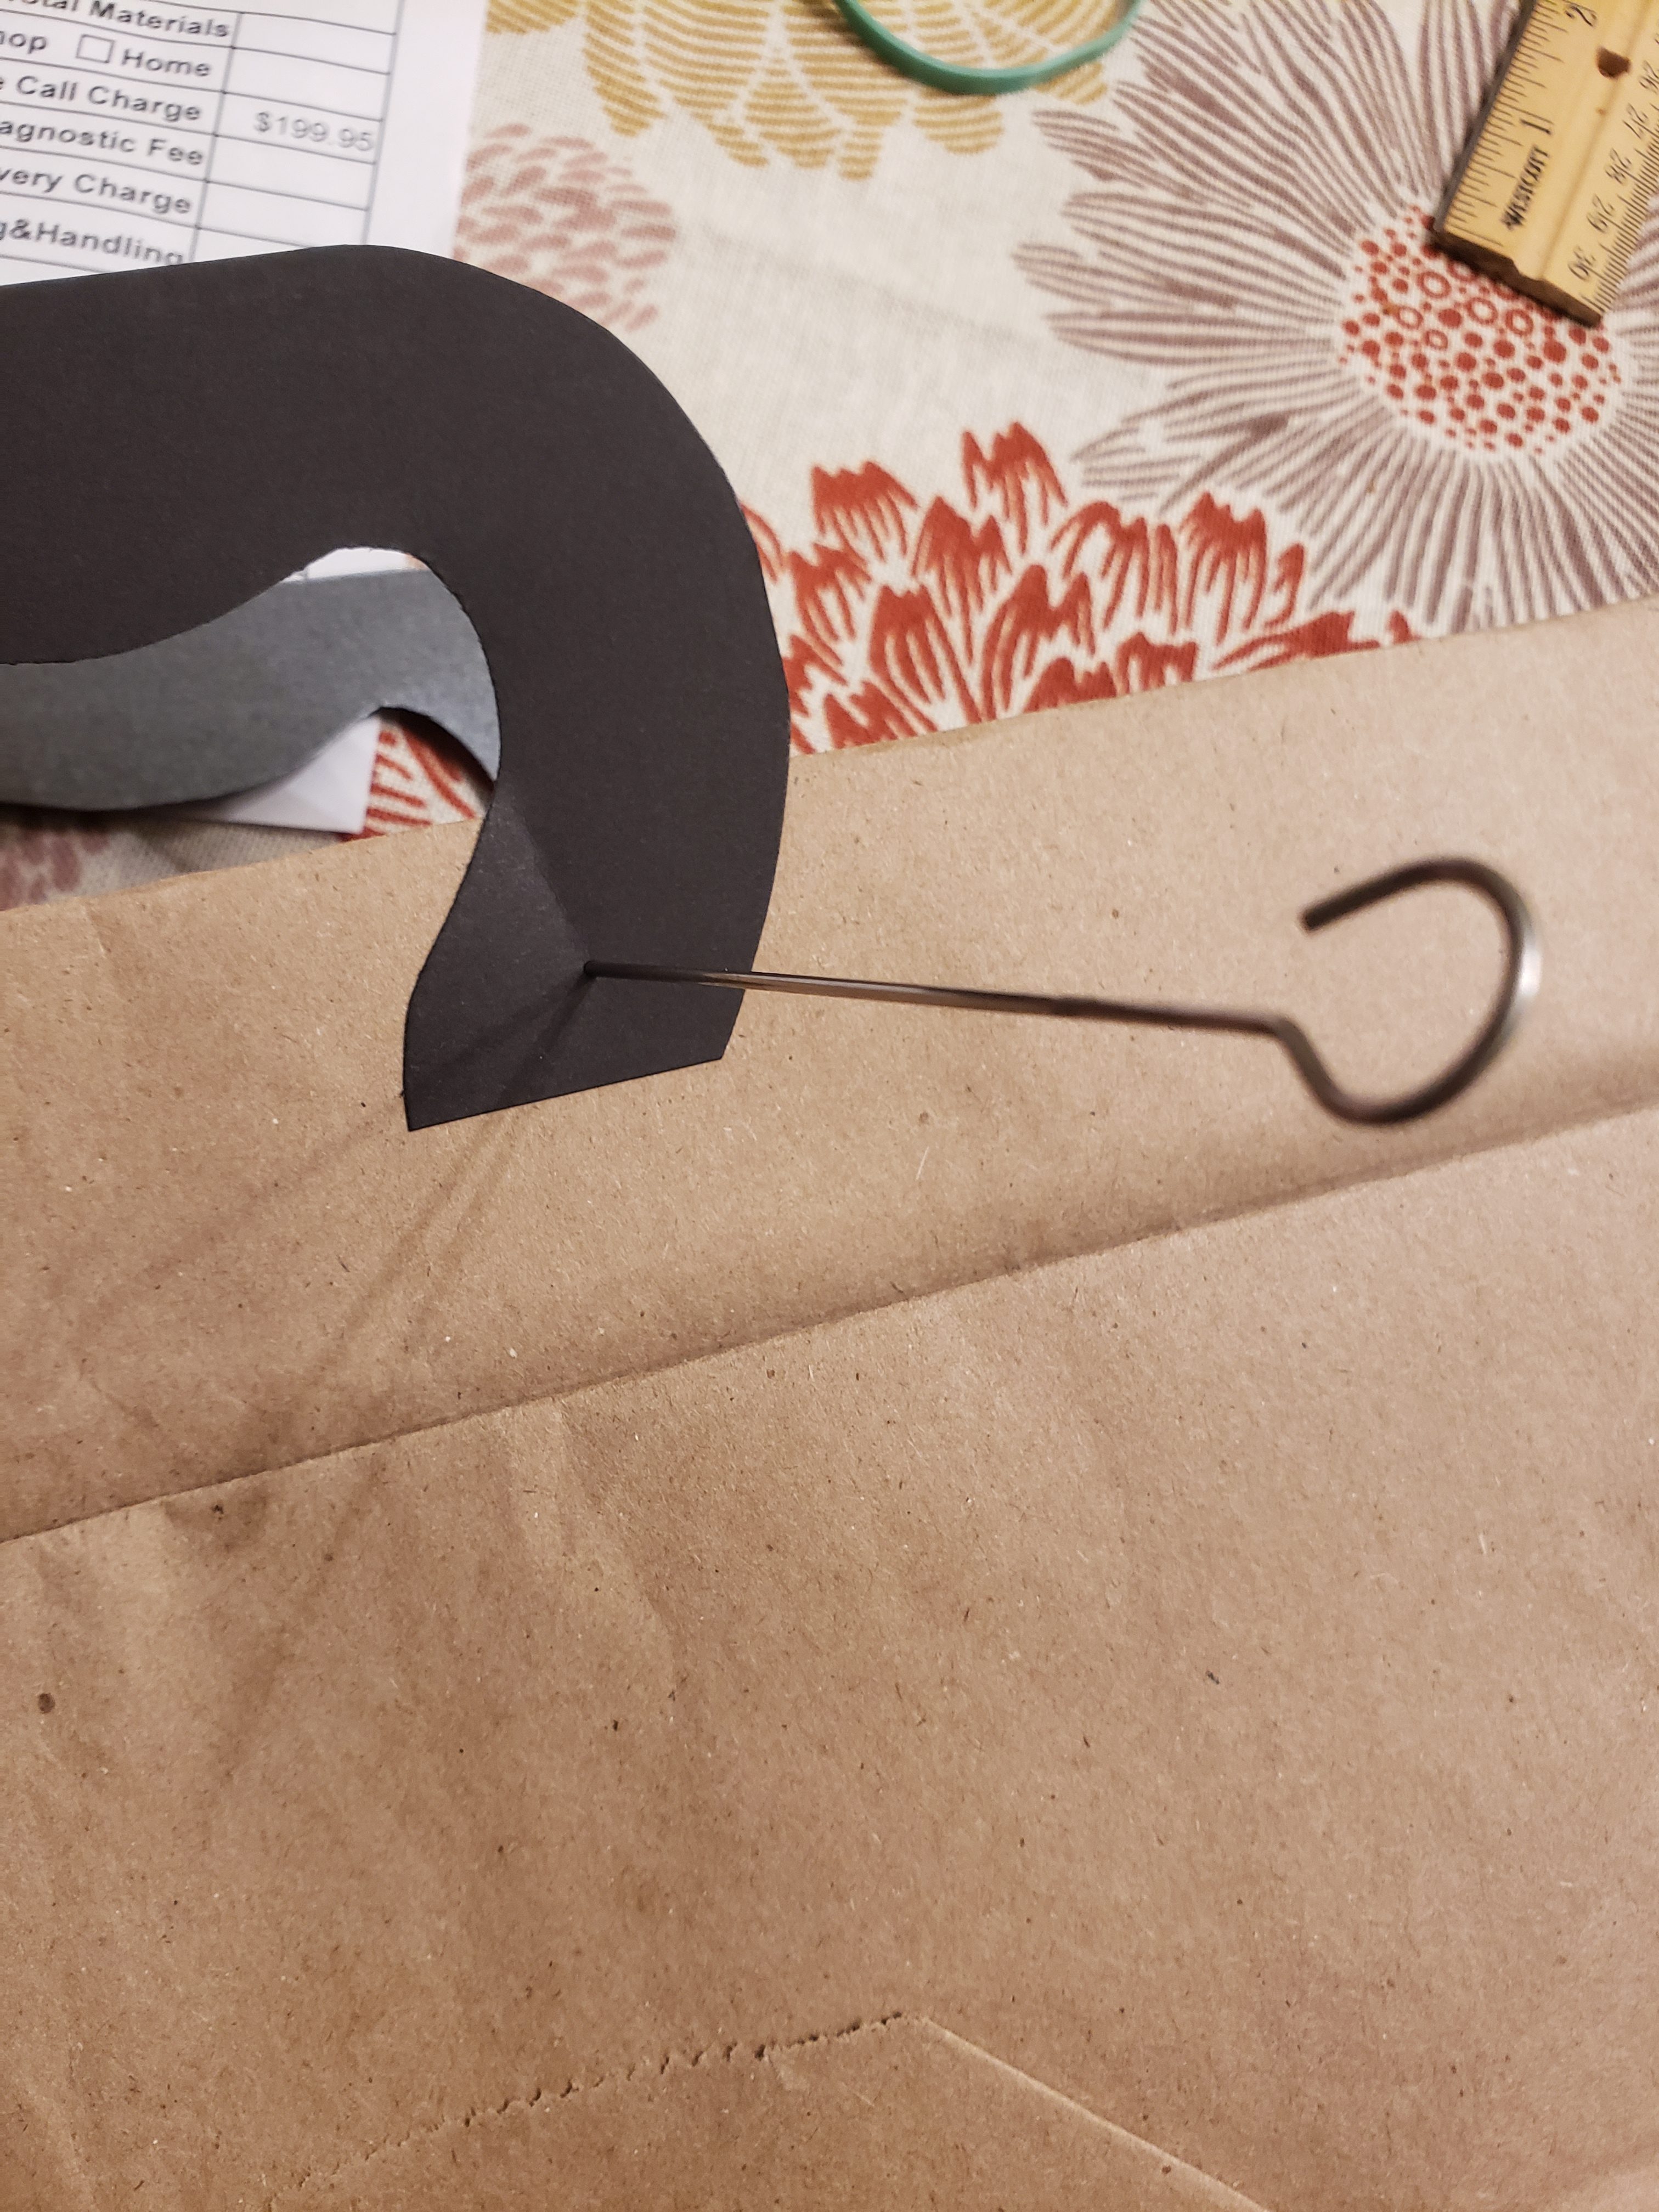
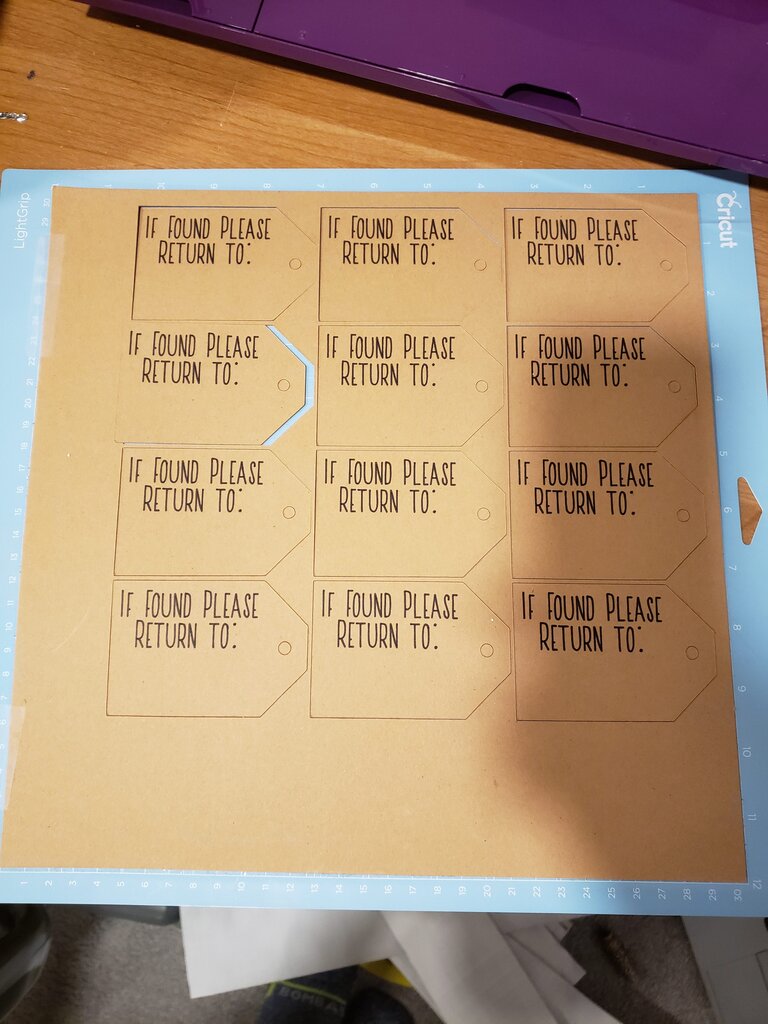
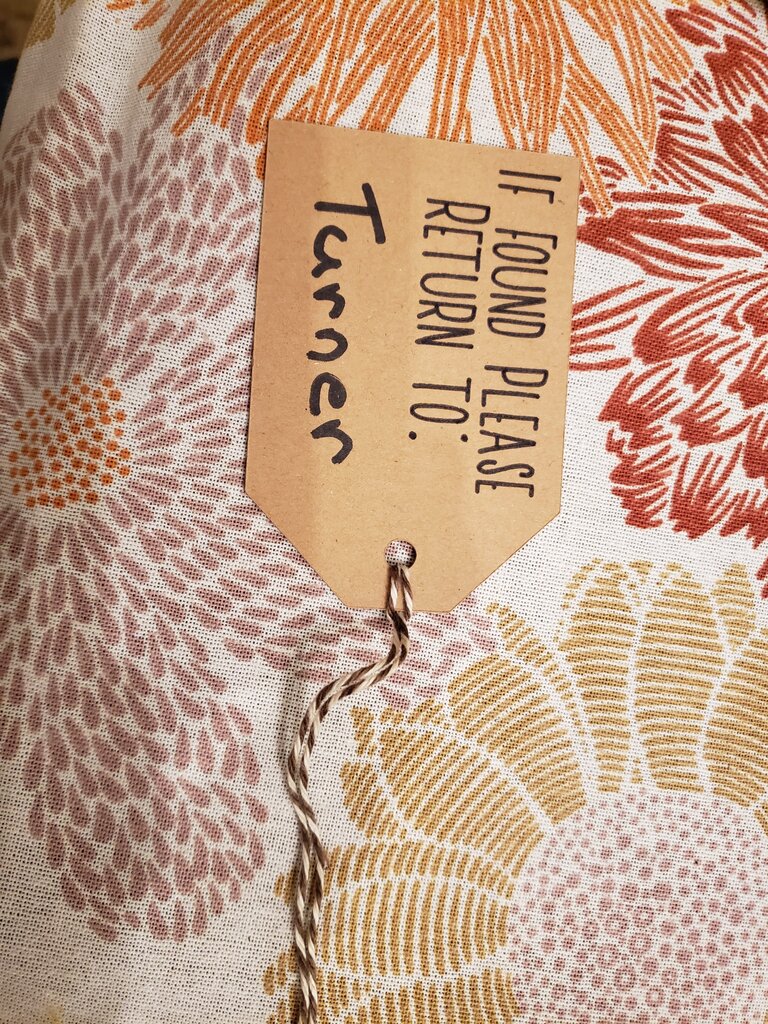
  • brown cardstock for luggage tag
  • string for luggage tag
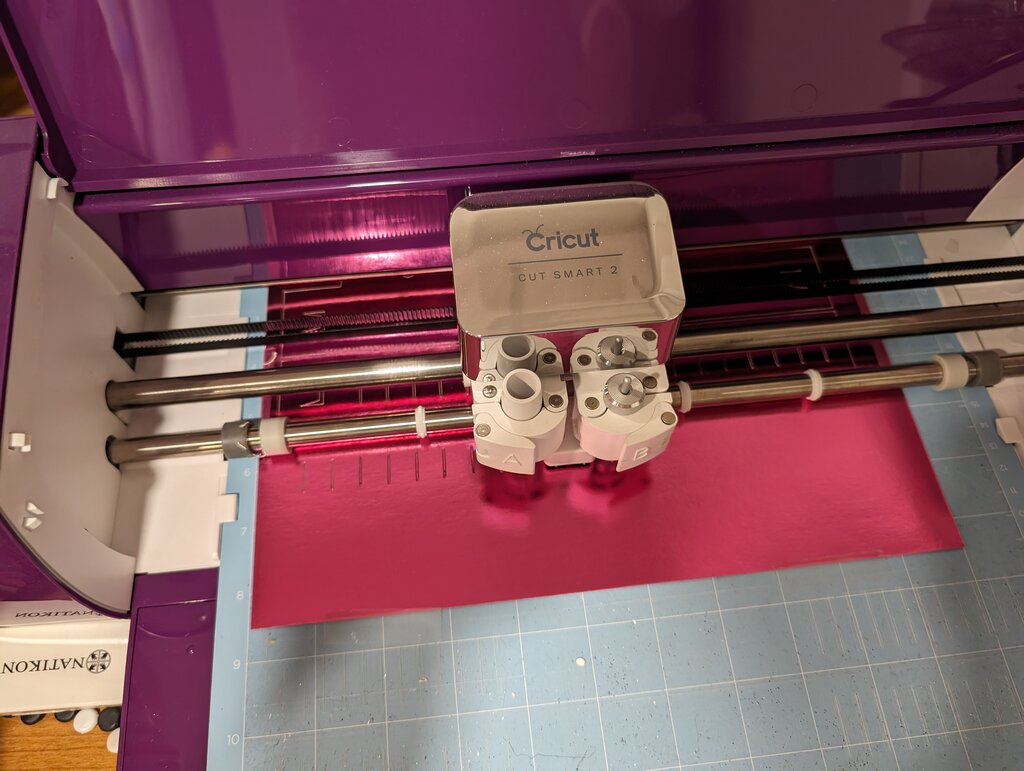
  • Cricut pattern for luggage tag
  • stickers or stamps
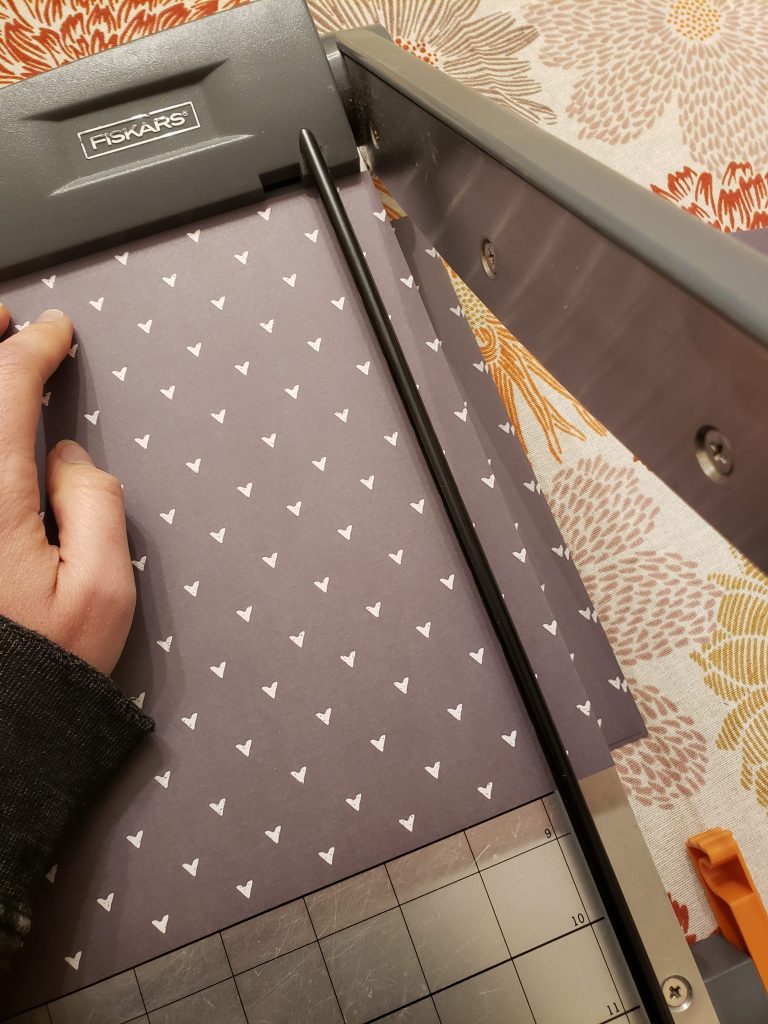
  1. Fold paper bag top down to a couple inches from the bottom of the bag.  
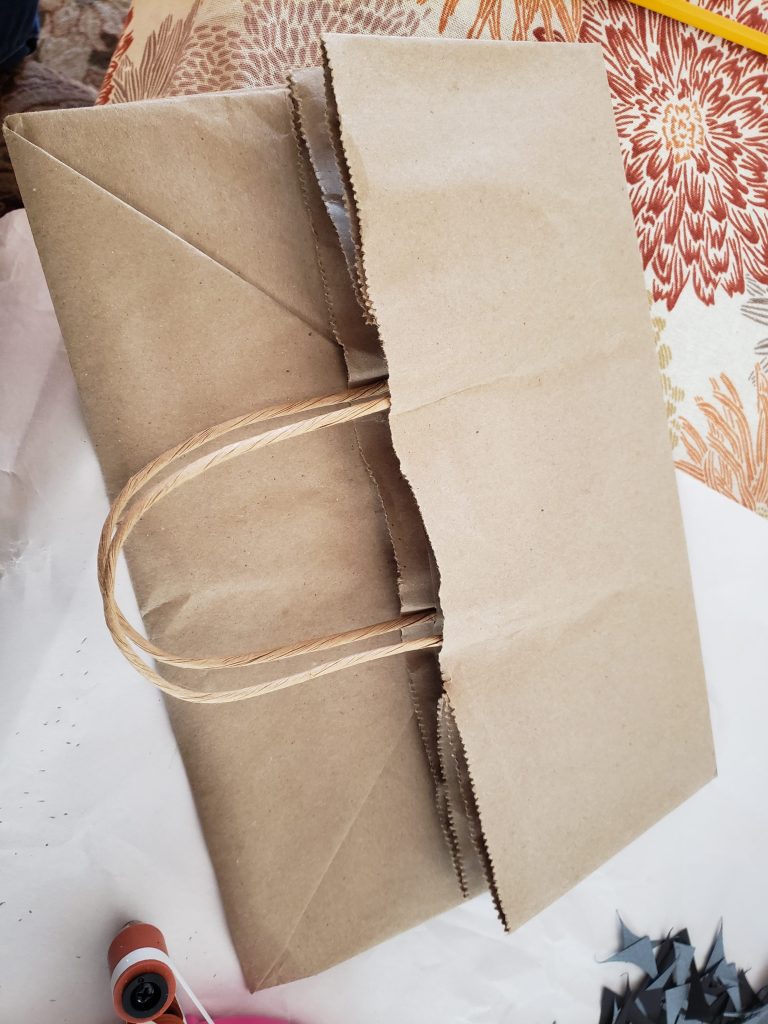
  2. Cut off the top of the bag 1″ above the fold.
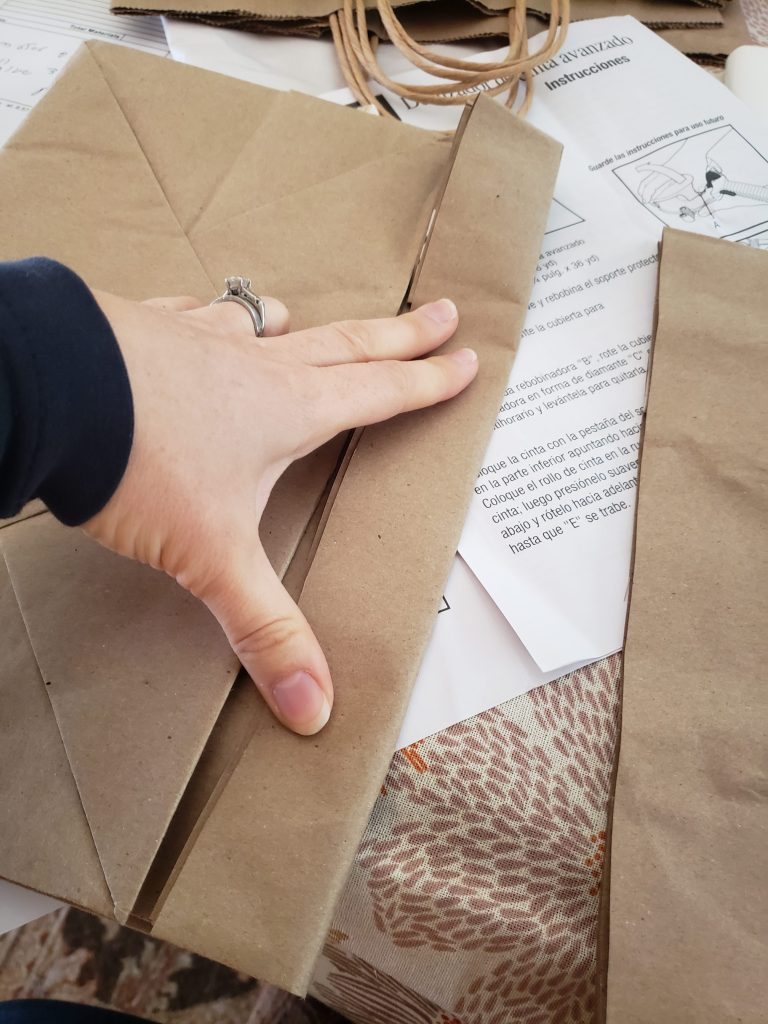
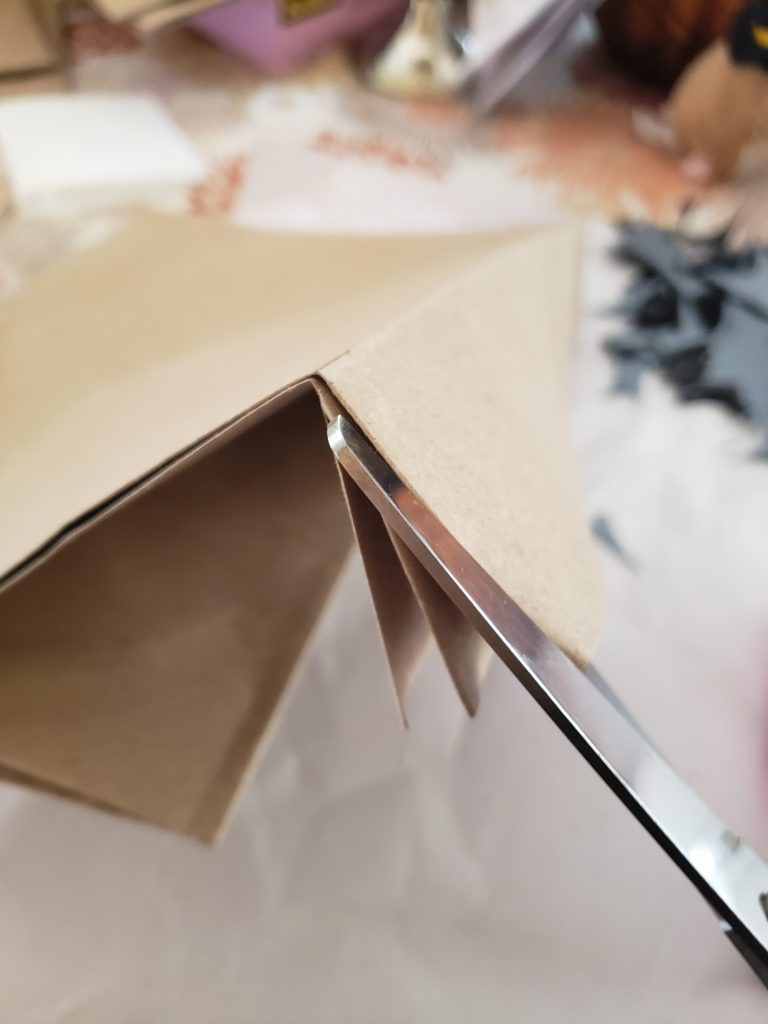
  3. Cut slits in the four corners of the bag down to the fold from step 1. 
  4. Fold each side into the bag.  Tape down using tape glider.
  5. Cut 1″ x8.5″ strips of paper for the straps
  6. Using the tape glider, glue the strips onto the front of the bag so they look like bag straps.
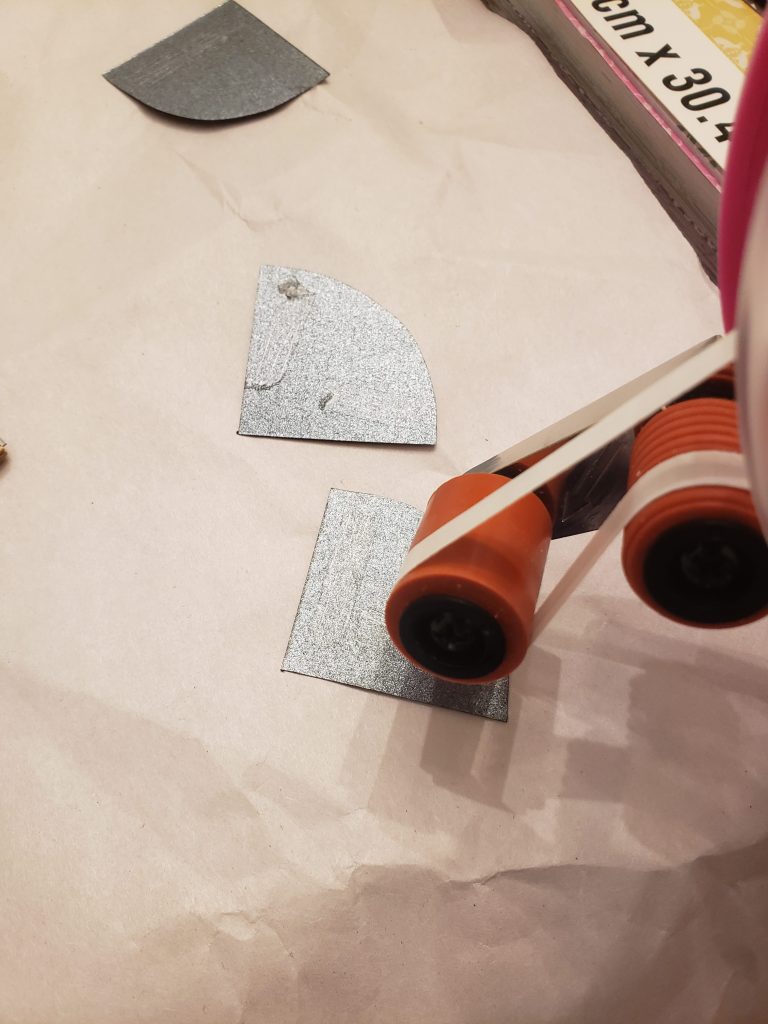
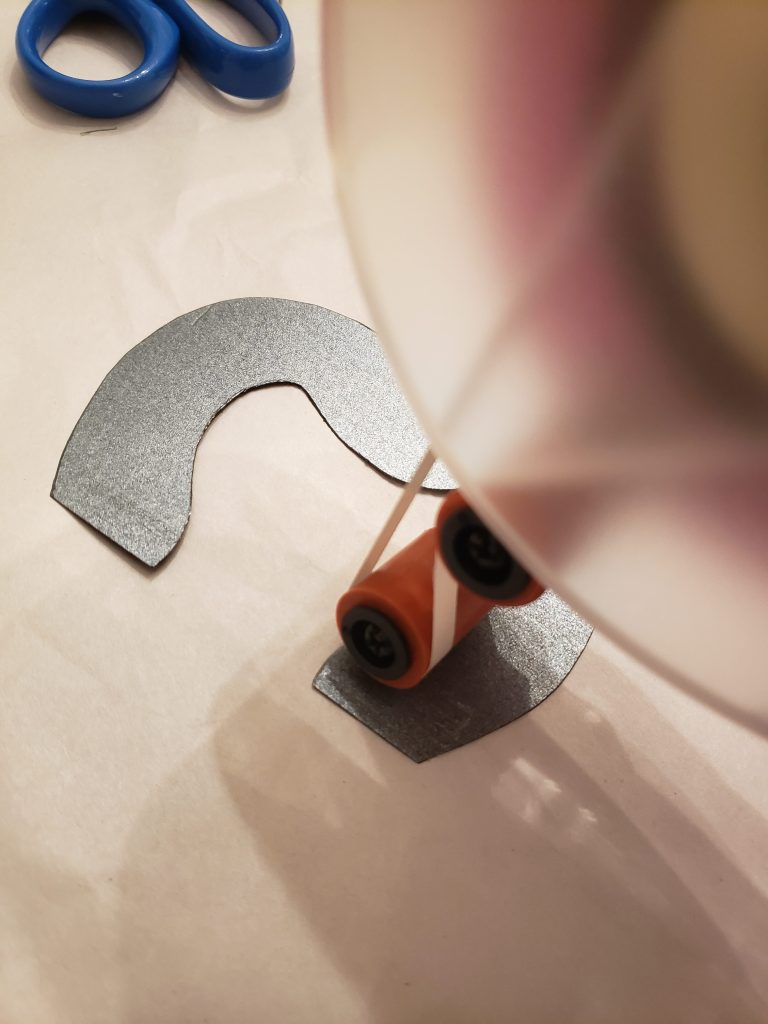
  7. Cut out 4 corner pieces (a triangle rounded on one end). 
  8. Glue the corner pieces to the front of the bag at each corner. 
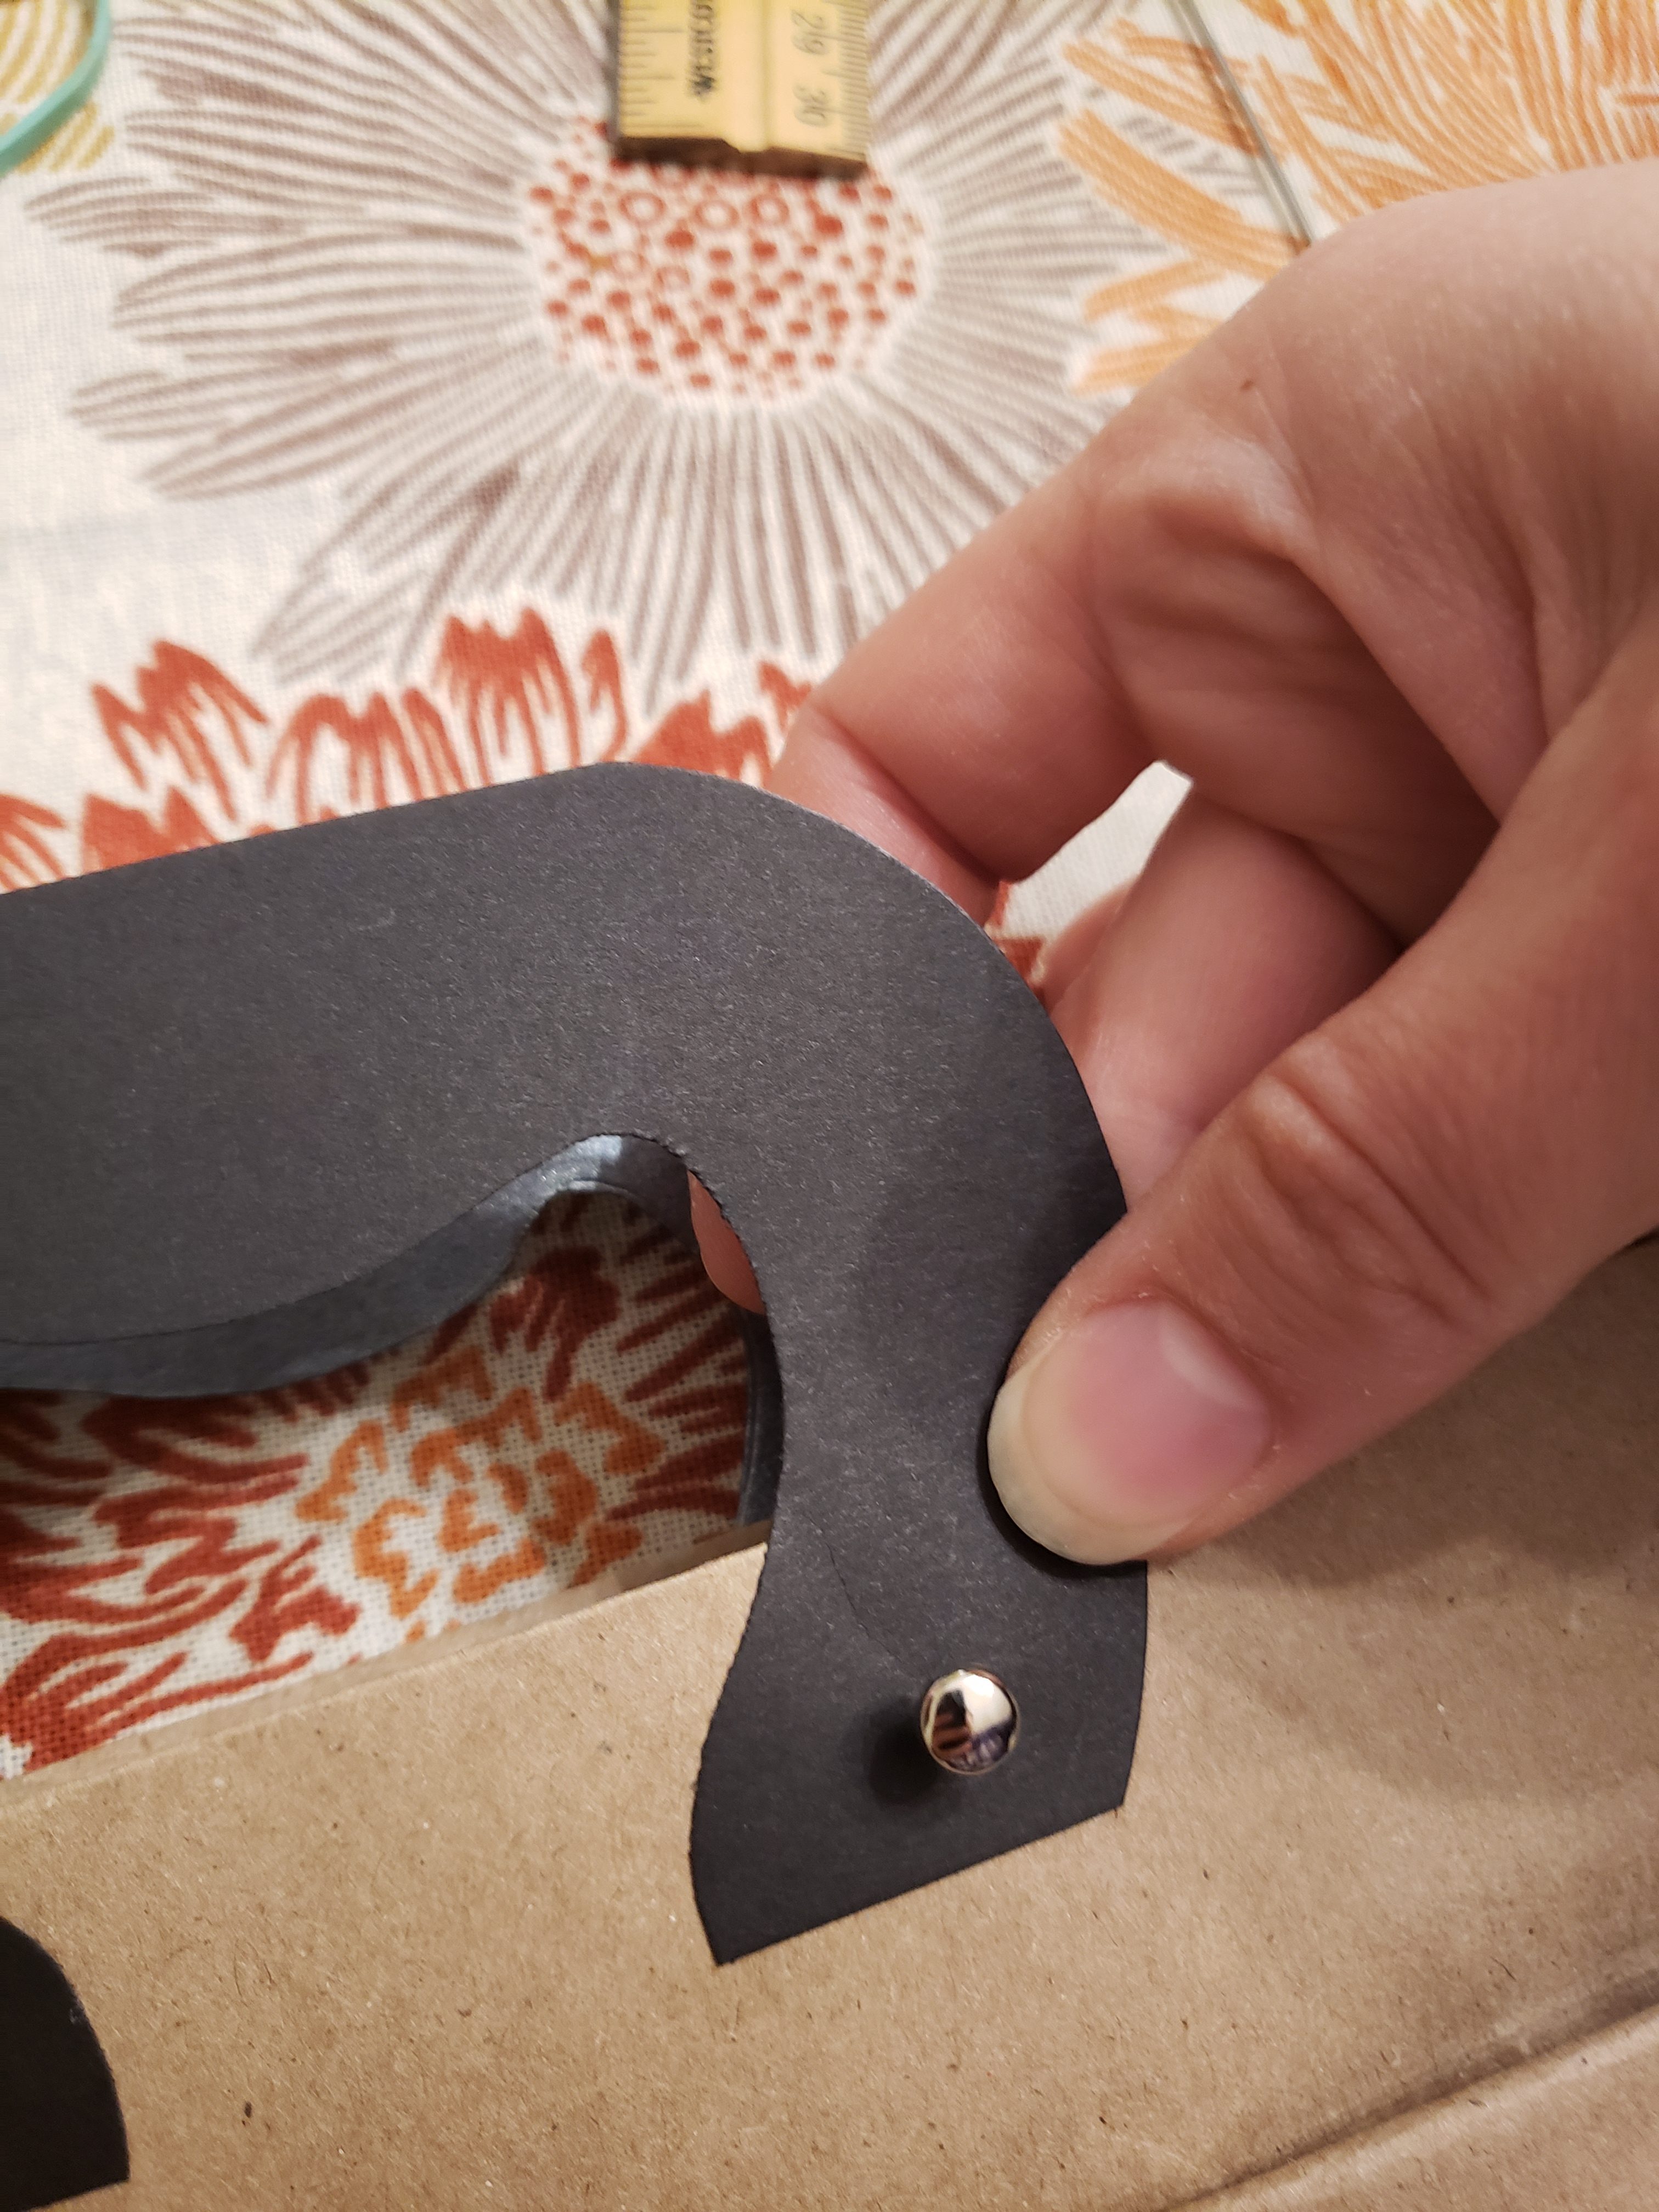
  9. Cut out 2 handle pieces.
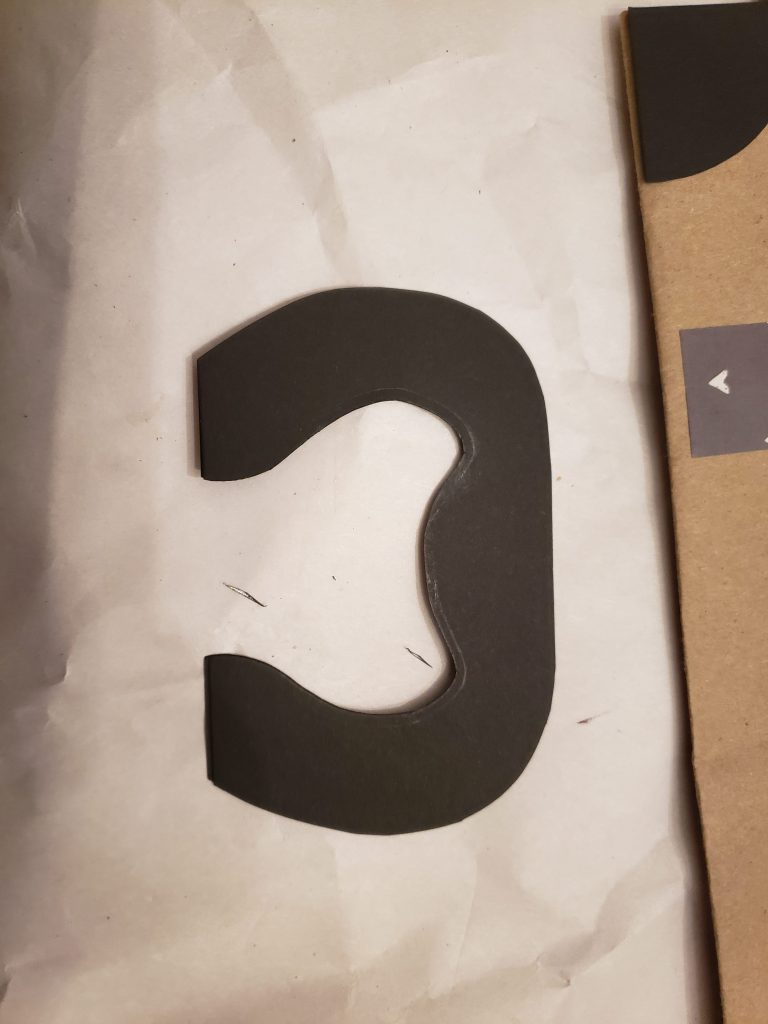
  10. Tape the handle pieces to the top center of the bag on the front and back. 
  11. Using a sharp needle (or other sharp pointed object) punch a hole thru the handle and the layers of bag on each place where the handle connects.
  12. Insert brads thru holes.
  13. Set your cricut to cardstock settings and then use the regular cutting tool and the fine tip pen as specified.  Cut/write with cricut. 
  14. Insert string thru hole and then tie to handle of bag.  
  15. Decorate with stickers or stamps if desired.
Posted in Crafts & Sewing | Leave a comment

Eclipsed

So we woke up at 445am (or I did at least) and then packed into the car at 5am to head to Vermont Monday morning to see the eclipse.  We brought breakfast, lunch and dinner because we were paranoid based on all the hubbub that things would be overwhelmed.  Despite a vomit incident and a bathroom run we made it to King Arthur flour 5 minutes before they opened.  We bought some delicious baked goods and I got King Arthur flour merch (did I mention I’ve been buying like 2 bags of KA flour a week?!). It was a slice of heaven for me.

Then we headed over to Ben and Jerry’s and managed to get there 20 minutes before it opened, but they turned us away.  So we found a spot in the Best Western parking lot next door for 20 minutes making our sun masks (great idea from my friend Katie who is a teacher!)  Then we left and got a parking spot in Ben and Jerry’s!  What a great spot to spend the eclipse.  We checked out the grounds (no factory tours).  Then we had a nice picnic lunch overlooking the mountains.  After lunch the kids played in the playground and then we had some ice cream before heading to a picnic blanket on the hillside.  For the eclipse we watched from the parking lot where there were no trees to eclipse our eclipse view.

Julius took this picture!

Yes even I needed one of these plates. My glasses kept falling off!

Holy cow it was so cool!!  I’ve never seen anything like it!  The sky was black, all the streetlights came on and we could look at the sun without the glasses (for a second we were confused because you couldn’t see anything through the glasses anymore).   Then the sun looked like this bizarre dark orb hanging in the sky backlog by fire (of course it was actually the moon but you know). The moon looking unnaturally dark with the  juxtaposition of the halo of light from the sun’s corona.   It was super surreal since you have been told never to look at the sun directly your whole life.  And there it is smoldering there behind the moon the whole effect was like some dark angel crowned by light.  (Basically my favorite male character archetype right there.)

It only took us about an hour and a half longer than usual to get home too so it wasn’t so bad!  I have been exhausted all week though!  No excuses I’m sorry I didn’t post Monday.  I should remind everyone that this is Earth Month.  While we should treat everyday as Earth Day it is nice to set some goals for the next year in honor of our mother and home!  I thought this craft would be a good one to show you during Earth Month… this is how I made the goody bags for Patricia’s party!  As a bonus I’ve been using these as gift bags for birthdays.

Mermaid Gift Bags

What you’ll need:

  • Brown paper grocery bags
  • Teal and purple paint
  • A foam roller and spouncer or sponge
  • A piece of thin plastic (like those from vinyl backing)
  • Spray adhesive (that can be repositioned)
  • My cricut pattern here
  1. Using my cricut pattern cut out the stencil on the thin sheet of plastic
  2. Spray the back of the stencil with adhesive then position in the middle of the bag
  3. Using the roller roll a small amount of paint onto the foam.  Roll around until it is mostly absorbed and evenly dispersed (not wet looking) then start rolling on top of the stencil.
  4. Continue rolling until the entire tail is covered, being sure to add more paint as necessary.
  5. Switch to the purple paint.  Using the spouncer or sponge get a small amount of paint on the foam.  Sporadically dab the purple over the scales as desired.
    1. Remove the stencil then let dry.
Posted in Crafts & Sewing | 6 Comments

Mending Managed

I am SO SORRY I didn’t post last week.  I planned to post, but Mondays have turned into cub scouts day, and this particular cub scout day I had DOUBLE cub scouts so I didn’t have time to write.  Then the next two days I had a procedure (don’t panic it’s probably just stress related like everything else) then was catching up on home activities and work stuff and let’s be honest, doom scrolling.  Then finally on Thursday I was cleaning up a bit before a friend came to visit on Friday.  And then it was the weekend and Easter activities.  Before I tell you about all that let me jump back to the Tuesday before Pax.

Will’s parents gave us this awesome Christmas gift this year to fly out to visit and watch the kids for a weekend while we did something fun by ourselves!  Basically the only thing we ever want/need anymore.  And it’s an extra bonus for Julius and Patricia who get to spend some quality time with Sugar and Daddy-O.  Well on Monday night I stayed up late tidying up around the house but figured I’d do the bulk of the clean up on Tuesday night before his parents arrived.  Well… at 2pm on Tuesday Will comes down and tells me (while I’m on a call), “my parents are at the airport right now.  I got the the date wrong.”  I was really, really close to homicide.  Instead of committing murder I finished my last call of the day, then scrambled to do whatever clean up I could in the hour I had before I had to get Julius and Patricia to gymnastics (inconveniently it is the day of the week I have to leave work earliest).  I was just starting to think the house didn’t look completely a shambles and that I could mostly live with it when Will and I both had to leave (Will to pick up his parents from the train station, me to get the kids).

Will and I are both leaving the garage at the same time something that almost never happens.  I usually judge my garage being opened by the puller noise and chain movement ceasing.  This time I was in a rush.  I had hit my garage door opener before Will walked out since I walked out first.  There was still a motor whine but I thought it must have been Will’s door because I looked up and saw the chain on mine had stopped.  I then threw it in reverse and backed into the door.  We’ve lived in the house for over 12 years and this has never happened to either of us so I was now really, REALLY upset.  Luckily Will hadn’t left yet so he was able to pull my garage door up manually so I could get out.  I got Julius off the bus and then sobbed silently on the way to get Patricia.

Julius and Patricia were so happy to see Sugar and Daddy-O when they got out of gymnastics that it made it all worth it.  And then we got to spend a night with Will’s parents before we left for PAX the following night.  We had a great time!  Ka and Joe were there Thursday so we hung out with them and ate potatoes.  When they left I got to play a great session of D&D (as a paladin!)  Mark came in late Thursday and we played a lot of great board games (with Mark and Francisco) and ate more potatoes.  I bought more dice that I don’t need and some earrings I didn’t need and some cute shirts and pins that I also didn’t need!  Basically it was everything I could want and more!  I’m so sad it’s over already.

PAX!!!!!!!!!!

Happy 20th PAX (Prime)!

Clefairy and Wigglytuff

PAX!!! Fireball island

Meowth, Vileplume and haunter (you can’t see him but he’s top left)

I’ve got a potato problem

This past weekend we celebrated Easter with an Easter egg hunt in the yard, Easter baskets indoors followed by a brunch that consisted of scalloped potatoes, asparagus and Eggs Benedict/Eggs Irish/Asparagus Eggs Benedict for the vegetarians (aka me).  I made the English muffins, prepped the asparagus, and even poached the eggs the night before.  All I needed to do before serving everything was:  heat up the Canadian bacon (ham), heat the hash, cook the scalloped potatoes, cook the asparagus, heat up the eggs (3 min in water at 150F), and make the hollandaise sauce.  It all worked out rather well!  I’m sorry I didn’t take a picture though.

Easter dress

Easter egg hunt!

Easter brunch!

Oh and Mending March is over!  But I ended up mending a bunch more things including:  the hems on several shirts of mine and Julius’, my eye pillow, a stuffed animal bunny, 2 of Patricia’s dresses, my PJ pants, a pair of my shorts, another pair of Julius’ pants (he wanted stars on these), Patricia’s blue sweater, my white and blue sweater, one of my Bombas (I KNOW RIGHT) and a favorite pair of grey pants.  I feel pretty accomplished overall.  Many things saved from the landfill for a while at least.  I want to show you how I mended my grey pants because I kind of love it and was complimented on them the first time I wore them.

I’ve been experimenting with the Japanese sashiko technique – which is a running stitch used in the art of visible mending.  I don’t think there is any wrong way to do visible mending.  The point is that you want mending to make your clothes look cool.  And sashiko is the ultimate way to do this.  (Just google sashiko, trust me you’ll be tearing holes in your pants just so you can patch them up).  So for me I did kind of a crazy pattern that started out symmetric but didn’t finish up that way.  I knew I wanted stars.  (I will be honest the pants are dark grey so the first thing I thought of was the night sky and ACOTR.)  So I used a black felt patch on the inside, bold white cotton thread and silver thread for accents.  I also had a rip on the butt where I only used a few stars.  We’ll see how they hold up.  Julius liked them so much that the next day he came home from school with a rip in yet another pair of pants and requested I fix them up “but with stars this time”.

Julius’ star mended pants.

Velaris would be proud.

Star Jeans Mending

What you’ll need:

  • thick cotton darning thread (or embroidery floss)
  • silver thread
  • a long needle with an eye long enough for your thread (I don’t have a very long one, I wish I did, but the longer the better for sashiko to keep your stitches straight)
  • felt for mending
  • pins or safety pins
  • ripped item of clothing
  1. Cut a patch slightly larger than the area you want to mend or reinforce.  I decided to reinforce the entire knee, since even though it isn’t ripped it was showing signs of wear.
  2. I next pinned the patch in place inside the pants (I used safety pins because I kept putting my project away and picking it back up again during PAX and I didn’t want to stab myself)
  3. Then I started in on the mending.  I tied a knot in the back of my cotton thread and starting from the inside of the pants where the patch was, I stitched a straight running stitch down the pants.
  4. When I got to the bottom of the patch I moved the needle over a few mms then continued up the other way. 
  5. When I’d covered the whole patch I switched to horizontal lines along the patch, crossing the other lines in strategic places.
  6. Finally I added in some x’s on top of the plus marks in a few places to look sort of like stars.
  7. Lastly I added some silver thread for more show.

    Finished mending.

    Star mending on my booty.

    You get a pass for looking at my mending here.


Posted in Crafts & Sewing, Culinary Delights | Leave a comment

Beautiful Sole

Okay so mending March has started to pick up (about time since we’re over halfway through!) I’ve now mended Julius’ comforter, a pair of Julius’ pants, a mushroom hairstick, a Christmas ornament, a beloved fridge magnet, a beautiful maternity shirt that I thought would be better mended for the thrift store rather than sent to the scrap heap, a remote control and, if you count it, ceiling tiles.  (Though I really just replaced those so not sure that counts.)  I have a LOT of things left to mend.  The problem with mending is that it is a never ending process.  For instance today Patricia went to school with a perfectly good shirt and came home with a shirt with a huge set of holes in it.

I’ve also found that a large amount of my solid colored long and short sleeved shirts have frayed hems or have developed small holes in them all over the place.  The holes are usually along the seams making it very difficult to mend.  I had a bunch of those on my list to fix, but I’m starting to think they will NOT be worth it.  People talk all the time about fast fashion vs. quality clothing and how fast fashion has invaded the thrift shops.  What I don’t know is what brands are actually considered good quality?  I never used to pay much attention to clothing brands, but that also means I don’t understand what to look for in high quality clothing.  For instance a lot of socks I bought for Will were what I considered “name brand” but they are total garbage.  I was so sick of Will going through like a pair of socks a week that I invested in some crazy expensive brand of wool socks called Darn Tough.  They have a lifetime warranty so I don’t mind paying more up front.  Honestly I’d pay a premium for all my clothes to come with a lifetime warranty!  If anyone has suggestions of some great brands that last and have cotton long and short sleeved solid colored tees let me know!

Oh speaking of socks, I have to tell you all the sock incident.  I have apparently never posted about the original sock incident because it was so long ago it pre-dates the blog.  That and it was almost a marriage ending saga (joking, mostly).  The sock incident is very simple.  I used to own a bazillion pairs of those cheap novelty socks that people seem to love.  I hated them.  They are cheap and deform when you put them on and slouch or wiggle around in your shoes.  And they have almost no padding.  They are awful.  (Note:  I am really a glutton for punishment because I kept self declared awful socks until 2 years ago when I decided enough was enough and I sent them all to the textile recycling bin.) In addition to these awful novelty socks I also had about 4 pairs of really great socks (honestly not as great as the Bombas I have now, but it was a different time in my life).  Anyway I noticed that my really-great socks had been starting to fit not-so-great lately.  I thought maybe they were going the way of the other cheaper socks and I was saddened.  And then I caught Will wearing my socks.  My really-great socks.  I have large feet for a woman of my stature (apparently) and I wear a women’s size 8-8.5.  That’s like a 7 in men’s.  Will has large feet. He wears a size 12 in men’s.  You may have noticed that there is a 5 size difference between my foot size and his foot size.  The mystery of the warped socks was solved but I was FURIOUS that Will had ruined my really-great socks.  From Will’s side of the story I’m sure he will tell you that he didn’t even realize they were my socks and that I brought up him wearing my socks way too many times (I did).  An embarrassing number of times (I was really mad about those socks).  I brought it up so many times in fact that Will finally told me we could never talk about the sock incident again.  So I mostly didn’t.  Until last week.

Last week I caught Will wearing a pair of my socks again.  My really, really great socks that I got for Christmas.  (I know what you’re thinking, “why does she care so much about socks”.)  For some reason the socks were mismatched, but I knew they were mine because in pink writing one of them said “I am beautiful”.  Okay, maybe he could have believed this was his sock.  Will is beautiful; a beautiful man with a beautiful soul.  But the other sock said “I am a great mom”.   I know he doesn’t identify as a mom so the jig was up!  I said “don’t you remember the sock incident”.  His response was that he has no socks left and these were in his drawer.  Well I let it go, but then Friday he was wearing a pair of my BOMBAS.  The crème de la crème of socks!  I did not murder him.  I instead took the high road and ordered Will 6 more pairs of Darn Tough socks for him to try to destroy.  (To Will: Surprise! They were finally shipped today so hopefully you get them for PAX.)

Mending March might make for some boring tutorials so let me show you a cute one I did.  Julius is constantly getting holes in his pants.  I’ve been struggling to figure out what to patch with because I usually try to match the material I’m patching, but it doesn’t always hold up (or will sometimes require more work to finish the patch to prevent unraveling or fraying itself).  Some folks said wool felt was a great patching medium since it doesn’t fray so I decided for the next few patching jobs I’m going to use felt and see how it goes.  I just so happen to have way more felt than I can ever use in my lifetime, so I grabbed a scrap of red felt and got to work!

Note: this rip is about 1/2″ wide on the unstitched side and 1″ long total. Another side note, I do not remember adding those stitches on the left side, was it Julius?

Monster Patch

What you need: 

  • A torn pair of kid’s pants
  • thick red felt (mine probably isn’t wool)
  • thread to match the pants
  • white embroidery thread
  • black embroidery thread
  1. Cut out a patch to fit 1/2″ in all directions beyond the hole/tear.  Place patch on side of pants, covering the hole.   Pin.  (Note:  you may want to open the hole slightly so some of the red is coming thru.)
  2. Using the matching thread, stitching around your patch, 3/8″ from the tear with very fine stitches.
  3. Stitch two white eyes (in a size proportional to your mouth/rip) using a satin stitch.
  4. Add French knot pupils in black (unless rip is huge, then use another satin stitch.)

I wasn’t sure Julius would like him because the monster is a bit derpy (I’m not a great hand embroider-er.)  Well Julius told me after school today that he doesn’t like it he LOVES it.  So I would say that’s a win!

  1. Oh and I’m on my 7th loaf of sourdough.


Posted in Crafts & Sewing | 7 Comments

Night Lights

So… I pulled a (nearly) all nighter for bread this past weekend… I think it’s safe to say I’ve lost any marbles I had left.  To be fair it was sort of normalized because I’ve been working way too late for actual work the last few weeks.  Good news though my bread came out GREAT.  And as of today (Thursday because I’m behind on posting… on account of the working way too late thing) we have already polished off 2 entire loaves.  I made soup just so I could have bread with it.  Yum.

I get a freezer tomorrow too!  Yes that’s right our downstairs freezer, the only large appliance in our house to survive the pandemic, has been slowly getting warmer and warmer.  I’m pretty sure right now we’re approaching fridge temp.   All this to say… more space for bread!!!

So I realized while I was looking thru my notes that I haven’t told you the bed story.  So Will and I broke the bed.  I know that’s not like a thing you’re supposed to admit in public but much as I wish this were a quirky story from a romance novel, alas, it’s not.  Will and I were just sleeping in bed minding our own business when all of a sudden I woke up on the floor at the foot of the bed.  I was having a near heart attack sitting there jogged awake from sleep when I realized I had a gash in my leg and the footboard had sheered away from the rest of the bed.    Will’s story is slightly different.  He remembers me shouting “oh my God help!  It’s really happening!” So he jumped out of bed to turn on the light which is when he also discovered that the bottom of our bed had been ripped away from the sideboards.  The next day we realized we were both covered in bruises.  It’s a mystery what happened but I suspect I may have sleep-bed-destroyed (that’s next level sleep-walking).

This is the footboard that ripped off the sideboards. Not mending that sadly.


And the preferment!

And this beautiful wheat boule!

Ironically we kind of like the mattresses on the floor.  It’s way less bouncy and doesn’t wake the other person up when someone gets in after the first has gone to sleep.  I moved the footboard down to the headboard spot for now to make it not look so terrible.  (Or maybe it looks worse now I have absolutely no idea.).  Either way I sort of consider that a mini repair so I wanted to tell you about my new idea (that I haven’t had time to do yet): March Month of Mending!  Next month is Earth day and the best thing we can do for the Earth is repair and reuse.  I always have piles of mending and repairs sitting around that I never get to.  For a while I was darning socks on airplanes but Will puts holes in socks faster than I can darn them so I started finding new uses for old socks.  Since then I am trying to go thru my backlog of repairs and mending.  I haven’t accomplished much so far but I’m holding out hope that I’ll make progress over the next couple weeks.

In lieu of mending I’ll show you a recycling craft!  This is how I put together the lanterns for Patricia’s birthday.  You can use any clear jar you want but I used these little twinings tea infuser containers that I got off the free site because they were plastic.

Mermaid Lanterns

  1. Clean jars, then let dry.
  2. Remove lids then paint the clear portion with frost effect glass paint following bottle instructions.  Let dry and recoat as necessary.  I found it easiest to dab it on with a spouncer. 
  3. Using your cricuit fitted with the standard cutting tool and lightweight cutting mat, mount your vinyl.  Select vinyl and then cut.
  4. Weed the background material so the stickers are easier for little fingers to remove. 
  5. Insert batteries in the lights and wrap the lights around the battery pack.  Insert into jar.
  6. Let kids decorate to their heart’s desire!
Posted in Crafts & Sewing, Culinary Delights | Leave a comment

I Loaf You

Well friends, it’s time to tell you about a new hobby I’ve started.  Or rather an old hobby I revisited.  You probably don’t remember, (because even Will didn’t remember) but before Julius was born I started a very short foray into sourdough making.  Bees to yeast was a logical leap (in my head at least) and there is something so ancient and wild about making bread rise by cultivating millions of micro-organisms that you can’t even see.  It’s basically magic.  Anyway, back 7 years ago I made a few loaves and then stuck the sourdough starter in the back of my fridge to feed every few weeks for a few years until the fridge saga started, and I finally had to say goodbye.

If I’m being perfectly honest I wasn’t too happy with my sourdough attempts back then and I’ve been wanting to give it another try for a while.  In my first attempts my starter never really gave my bread a good rise.  Probably, it is because I live in New England and my house is generally what normal humans would describe as cold.  (For the record I am a mostly normal human and I do think it is cold.)  Anyway, one of my BFFs started baking bread as a side project for baking pizza (he might be more crazy than I) so it was the perfect opportunity to get back into sourdough.

So this time I decided I was going to do it RIGHT.  I started with the same sourdough starter recipe as last time, and this time I put it in the warmest place in the house, on top of my oil burner.  After day 3 my starter was already starting to show signs it was starving after 24 hours.  So I did a bunch of research and decided to move it to over my hot water heater (also lots of residual heat loss from pipes) and switch to the King Arthur Flour starter method which discards half every time you feed (which makes way more sense).  The KAF method warns that your starter may not be perfect for a while.  So I patiently fed my starter twice a day… for 24 days.  On day 24 I started doing experiments.  I split my starter into 2 and started feeding each different ratios of flour:water.  I was like a mad scientist.  It seemed my liquidy starter didn’t rise a great deal, but when I used a greater amount of flour to water my starter doubled.  Oh I also moved it back from the water heater to on top of the oil burner.  I was finally ready to bake some bread…

Check out those bubbles

My starter is finally ready to be used! (In a vintage ball jar from my grandma)

While this was all going on I was accumulating sourdough discard.  I was desperately trying to keep up with baking things to prevent waste and I ended up making sourdough pancakes, sourdough biscuits, english muffin bread, english muffins, sourdough chocolate chip cookies, sourdough biscuits, sourdough buns, sourdough pizza, sourdough discard naan and… crumpets.  (Yes the British things that look like American English Muffins.)  I also went through like 4 bags of flour on creating this starter.  My entire house was a gluten free diet’s worst nightmare.  I hadn’t thought about that at the time and during the middle of all this we had a friend with celiac’s over to watch a movie.  I basically told him that nothing was safe and he could touch nothing in the kitchen.  I was sort of joking because I’d wiped down everything before he came, but then he touched the countertop where Julius sits and he was like, “so should I really wash my hands now”.  And after I moment’s hesitation I decided, “yes, it’s probably a good idea”.  I think I might have scared him.  I really hope he didn’t get sick.

Well, I finally baked a loaf of bread last weekend and it came out GREAT!  I mean it wasn’t quite perfect but it was beautiful!  This weekend I made another loaf and it was even better!!!! I’ve been using the KAF no knead sourdough (thanks to Ryan for trying 3 recipes first and telling me this was his favorite).  The second time I made it, I accidentally cooked it for 20 minutes at 500 before lowering the temperature to 450F.  I think it came out better!  So I probably will do that again (on purpose this time).  Some other tips I’ve found seem to help – I always mix my starter with liquid then add flour.  This seems to help distribute the yeast better and was something I didn’t do before.

My first loaf with my new starter!

The inside was dense in one spot! No one seemed to mind though.

Loaf attempt #2!

Yum. This bread is perfection.

Just so I remember my first loaf I accidentally let it come to room temperature in the bowl before I shaped it then plopped it directly into the dutch oven into the oven.  The second time I let it come to temperature into a basket/towel combo after shaping and then moved it to the dutch oven to bake immediately.  It was more difficult to move so I probably won’t be doing that again….

Posted in Culinary Delights | 2 Comments

Fit for a Queen

We had a fun week with Patricia.  I think it is the first time that she’s ever been with both parents without Julius for more than a few hours (aka an only child).  She was a very good girl the whole time.  She was quite upset when she learned she would be apart from her playmate so we tried to do some fun things to keep her entertained.  Like we did a movie night, let her pick dinners, and declared the whole weekend “Patricia weekend”.  It was great!  I don’t know if life is just that much easier with one child, or if she was just a lot easier last week!  We didn’t have to rush around as much which certainly helped.

We planned to have a weekend alone with Patricia but Julius ended up coming home around 1pm on Saturday so that didn’t leave much alone time.  She was happy to see her buddy though and wanted to completely forgo all the plans we’d made.  I decided to drag her to them anyway which ended up being fun (I think).  One of the activities was pottery painting which both kids usually love to do but we had a bit of a debacle when leaving.

Patricia had just changed into a very fancy dress (that she wore to Will’s cousin’s wedding) so before we left we convinced her to change into clothes we “didn’t care about getting paint on”.  Will helped her change and she ended up in some hand me down jeans and a top from Julius.  When we went to get shoes on she refused to put on her favorite shoes (these crazy sparkly shoes she always wears).  When we asked why she said she wanted to wear boy shoes.  We found her some appropriate “boy shoes” but she was sobbing when she put them on.  I asked her why she wanted to wear boy shoes and she said it was because she looked like a boy.  I asked if she thought the clothes make her look like a boy.  She said yes.  It almost broke my heart.  I explained to her that there is no such thing as boy clothes and girl clothes (which is funny because she always says things like “girls wear dresses and so do some boys”).  I asked her to tell me what I was wearing (jeans and a sweatshirt).  And I asked her if I looked like a boy or a girl.  She said I looked like a girl and I said, “see, so do you because we both want to look like girls”.  And she gave me a big hug.  It was incredibly sweet and also heartbreaking that she is so concerned about her appearance and femininity.

Julius is the total opposite he would wear the same thing every day if I let him and I have to nag him to comb his hair.  Julius’ latest thing is that he doesn’t want to cut his hair.  I don’t want to force him to cut his hair, but he is 6 and he looks like a total ragamuffin.  Then again so does Patricia, and so do I more than half the time, so why not embrace it?

For Patricia’s Valentines I decided to make all the kids paper crowns they could decorate.  Patricia loves crowns so I figured this would be right up her alley.  I asked her what animal she wanted on her cards and she said “a little tiny piggy”.  (And she squished her fingers together so there was nothing between them to indicate the size of the piggy.)  I don’t think I fully comprehended what she was asking for so she was a little disappointed with the pigs I gave her though she said something like “yeah they’re good”.  She had a great time picking out which card went to which person.  She didn’t completely divide the class into pink for girls, red for boys, but it was pretty close.  A few boys Patricia decided, “they like pink” and a few girls she declared, “they like red”.  So I felt pretty good about that.  She didn’t pay attention to the pigs on the cards.  I really need to up my pun game.  You’d think with pigs AND royalty I would have been able to come up with multiple puns.  But I couldn’t think of anything… that was appropriate for toddlers.

Royal Piggy Crown Valentines

What you’ll need (for each crown):

  • one 8.5″x11″ sheet of 65lb foil cardstock
  • puffy stickers (I gave about 5 or 6 per kid)
  • #10 envelope
  • printer
  • cricut with regular (premium fine point) blade cutting tool
  • Envelope template here, here, here , here, here and here.
  • cricut template here
  1. Take envelope and load it into printer (in my printer you need to load upside down).
  2. Print by selecting #10 envelope and fitting to page.  (I used paint.net to open the .jpg and print.)
  3. Load 8.5″x11″ sheet horizontally onto lightweight 12×12 mat.
  4. Select material as lightweight cardstock
  5. Cut. 
  6. Weed and remove the crown then assemble by slotting one part of the band onto the tabs on either side of the crown.  
  7. Place tape over the connecting tabs to secure if desired.
  8. To fit into the envelopes, fold the side with the tab along the first unused slot near the crown peaks.  Fold the other side at the first crown peak and trim excess that hangs beyond the other edge.

    Can you see how one end is folded to the edge of the crown, the other is folded two bars away from the end?

  9. Address envelope, place crown into envelope with stickers and seal. 

    Here’s a finished crown

    Julius showing off his crown

    Patricia showing off her crown

    Stuffing the envelopes

    They even fit adults! (Even crazy wanna be queens.)


Posted in Crafts & Sewing | Leave a comment

Time for Valentine’s!

We are heading home from Maine with one child fewer.  Julius is spending February vacation skiing with my parents.  He is doing an amazing job skiing.  Yesterday we went down two blue runs and he did great.  When Patricia found out Julius was staying in Maine she was filled with grief.  She was both upset she didn’t get to stay and that Julius wasn’t going to be home to play with her.  It is adorable watching he two of them play together.  Before we left for Maine I wrote down a few snippets of their morning imagination games…

Julius and Patricia started playing a game where the floor is lava. Julius laboriously helps hoist Patricia onto the couch.  After she’s settled in the couch they introduce themselves, “hi im Julioso.” “Hi I’m Jon. I’m a girl.”

Later Patricia says “let’s play princesses and knights!” (This is a game they play A LOT.)  Julius replies, “I want to keep playing this game.” Patricia graciously defers, “oh yes we will play after this one!”

Several minutes later…

Julius: “Princess Odd is getting arrested!”

Still later…

Julius: “Patricia the roof is on fire!”

Julius having a ski waffle break.

For Valentine’s day I made the kids stuffies (I’ve been learning to crochet) and a box of homemade truffles (I had a truffle making ladies’ night).  We had cheese fondue with bread, carrots and apples for dinner followed by chocolate lava cakes with ice cream for dessert.  The kids opened all their Valentines from classmates after dinner. I was surprised by the number of cards that were printed out at home!  Definitely less store bought ones this year.  My cards fit right in!

Valentine’s dinner

Look at my 3 Valentine’s!

This week I’ll show you the ones I made for Julius’s classmates.  At Target’s after Christmas sale I found these cute mini wooden handled rubber spatulas in red and pink.  They were $.10 each!!!  I thought immediately that they would be perfect for Julius’s Valentines.  He loves to cook (or at least read cookbooks).  So I thought we could give the spatulas with little packets of mix for mug cakes.  Then I found out that the entire school district has a no food gifts policy… so we decided to just give the recipe for the mug cakes with the spatula.

Julius still loves sharks so I sketched a shark with a chef hat for his cards.  I’ve never seen a shark with a chef hat but I’m kind of obsessed and I think they came out really cute!  And my puns are only mediocre this year not bad.  (Okay I may be wrong there.)  Anyway, I have the document below if you want to make some next year.

Shark Valentine’s!!

Chef Shark Valentines

What you’ll need:

  • White 65lb cardstock
  • Color printer
  • Paper cutter
  • Xacto knife
  • Small rubber spatulas
  1. Print front of cards.
  2. Insert paper with printed fronts back into the printer (this may take some time to figure out for your individual printer so make sure you do a test page with scrap).
  3. Cut paper into 4 sheets 4.25″x5.5″ wide using a paper cutter.
  4. On a piece of scrap cardboard place a one card (shark side up).  Using the xacto knife slice a 1.25″ cut at an angle above his fin.
  5. Slice another cut parallel and 3/4″ below that (below his fin).
  6. Remove the top on the spatula and carefully insert the spatula into the slot you made.  (Julius helped with this).  Replace spatula
  7. Address and hand out!

    Julius addressing his Valentine’s.

Posted in Crafts & Sewing | 2 Comments

Upgrad Stranth

Julius and I did our first round of maple sap collecting!  One of the cool things about Julius’ pack is they tap maple trees all over our town and then collect the sap then boil it down to make syrup.  They then sell it to fund the troop!  Tonight Julius and I put our headlamps on and poured and hauled 28 gallons of sap around in the dark.  I have a terrible sense of direction so it probably took us 30 minutes longer than it should to first find the buckets then the trees marked on the map.  But I was pretty proud of myself that I succeeded.  I am so directionally challenged that we walked the completely wrong direction for at least 5 minutes before I realized I had the map upside down.  Thank goodness for GPS or I probably would never have made it out of Rhode Island.

Patricia took one of the shells from our bathroom decor and decided she was going to give it to her teacher.  It was so sweet that I had to let her do it.  Watching her give it to her teacher was so funny.  It went something like this:

Patricia:  Ms. Laura here’s a shell.

Ms. Laura:  Wow that is such a pretty shell, do you think an animal lived in it?

Patricia:  Yeah.  It’s shiny.

Ms. Laura:  It is so shiny, where did you find it?  (Probably thinking Patricia would answer the beach).

Patricia:  My house.

Me:  Patricia wanted to give it to you.

Ms. Laura:  You wanted to give it to me?!

Patricia:  Yeah.

Did I tell you I began another sourdough starter?  I’ve lost track of how many days? I’m at day 15 I think… It seems to rise about 50%, but it doesn’t double yet.  I’ve got so much discard that I’ve been making boatloads of sourdough discard recipes.  I’ve made multiple batches of crumpets, English muffin bread, multiple batches of sourdough pancakes (my kids say they are the best pancakes ever and that is high praise).  I want to make English muffins next and freeze a bunch of breakfast sandwiches (oh and pizza dough and pasta).  You may remember me talking about eating too much bread last time I made sourdough.  Well that is certainly going to become a problem if I don’t get this starter established soon.

Much like “if you give a mouse a cookie”.  If you give a Lexi a piece of bread she’s going to want some soup to go with it.  (Or butter, I mean it honestly would probably go the butter route, but let’s say for the sake of the story I went the soup direction.)  The bread might explain why I’ve been thinking of soup so often.  That or the fact that it is feeling like an actual New England winter these days!  Julius and Patricia are usually pretty good soup eaters.  Will’s favorite soup is my original acorn squash soup.  It’s delicious, but there is no protein in it.  Since Julius needs protein packed into every meal (and really so does Patricia since she’s 99% tomato) I decided on a whim to re-do the squash soup with protein.  I think the added cannellini beans make the soup creamier and don’t distract from the flavor of the squash at all.  Will actually didn’t notice I’d done anything different when I first made it.

Acorn Squash Soup 2.0 or Acorn Squash Protein Soup

Serves 4

Ingredients

  • 2 medium acorn squash
  • 2 carrots, peeled and diced
  • 2 celery, diced
  • 1 small onion, diced
  • 2 tbsp butter or olive oil
  • 3 cups veggie broth
  • 4 cups cooked white beans (cannellini etc) – 2 cans.
  • 2 tbsp lt brown sugar
  • Salt and pepper to taste
  • ¼ cup whole milk or heavy cream
  1. Cut acorn squash in half, scoop and discard insides.  (Actually I lately make roasted squash seeds with the seeds!)
  2. Place cut side down on a pan drizzled with olive oil, poke holes in skin of squash with a fork.
  3. Roast at 400 for 35 minutes or until soft. Let cool then scrape squash from its shell into a bowl.  Set aside, discarding shell.
  4. While the squash is roasting, chop your veggies.  Saute the veggies in 2 tbsp butter or olive oil in a heavy bottomed stockpot until soft.
  5. Add in 3 cups veggie broth.  Bring to a simmer.  Simmer for 10 minutes.
  6. Add in squash from step 2 and beans.  Simmer for an additional 15 minutes.
  7. Remove pot from heat and puree with an immersion blender until smooth.  (Or puree in batches in a blender).
  8. Stir in 2 tbsp brown sugar and salt and pepper to taste.
Posted in Culinary Delights | 2 Comments

Balls to the Wall!

We took out the Valentine’s decorations this weekend.  This was after cleaning the entire house top to bottom (okay middle out).  I am ashamed to divulge the last time I’ve really cleaned the house.  Luckily I couldn’t even tell you if I wanted to because I honestly cannot remember how long it’s been!  After we finished the cleaning, the house was immediately overrun with toys and crumbs and paper scraps and other flotsam from young children.  But it is okay because I now also have hearts hanging all over the place.  And who could be disgruntled about their chaotic house situation while they have hearts staring them in the face?!  No one.  If you need convincing, just let me know and I’ll send you some decor.

Valentine’s day, or Lupercalia, (if you’re into Rome, ritual goat sacrifice and random coupling – don’t look at me, I’m not one to kink shame) is only a couple weeks away.  For us that means I’ve pulled out the Valentine’s backpacks for the kids again and started leaving them little love notes for the mornings I sleep in.  Julius loves it but Patricia told me several times that she wrote last night’s note for me. I don’t know why she was trying to convince me of this, but I can tell you that she did not succeed.

One quick tangent before I show you the craft I’m desperate to show you this week.  Silly Julius quotes are so rare these days since he’s such a learned kindergartener, so I have to share this one.  He was telling us how they settled a playground dispute earlier in the day,   “they did rocks, paper, scissors, shoes.”  We then asked him the rules of the game, which he had completely down pat.  We then played a game, during which he chanted “rocks, paper, scissors, shoes”.  I am ashamed to say I did not correct him.  It was too cute.  Much like I quickly stopped correcting Patricia’s word “cupcapes”.

Okay, speaking of cute, I really hope you think my latest project is cute.  But if you don’t, it’s okay, because I think it is SUPER CUTE.  And I’ve still got the hearts to cheer me up.  First, some backstory because everything on my blog has backstory.  During the pandemic I took a free needle felting class that was remote and lead by our local library.  I got hooked!  (I’m sure you realized this if you’ve seen any of my silly creations over the years – examples here, here ,here and here.)  Since the inaugural class, I’ve taken several other wool fiber classes including wet felting.  Last year I couldn’t help myself and went to Walmart after Christmas to see if they had any ornaments for the kids that I could put away for the following Christmas.  In the pile of cast offs I found a 5 foot garland of ~1″ white wool balls that was 75% off.  I showed it to my mom and soon I had 7 garlands at 75% off (thanks Mom).  I swear I had a plan for them all.  So I went to the thrift shop and bought a couple of wreath forms for $4 each.  Fast forward to 2 weeks ago when I finally decided I was executing my amazing plan.

My amazing plan was to make a wreath of wool balls.  Yes, I know, you probably figured that out by now on account of the wreath form and the wool balls.  Well anyway, this is not a unique idea.  I’ve seen and coveted these adorable colorful wool balls wreaths all over pinterest (yes I get lots of pin suggestions of wool balls).  But I’ve needle felted my own and it took me forever.  This is why I wanted 35 feet of wool balls.   These balls are not colorful though, so originally I thought I would dye them.  Unfortunately I realized wool doesn’t take my favorite dye (fiber reactive) well since it’s an animal fiber.  Instead, I finally put my plan into action using the cut off bottom from that team rocket shirt I made, a bit of additional colored wool roving and the aforementioned wreath form and wool balls.

Super Awesome Wool Ball Wreath

What you’ll need:

  • A crap ton of 1″ wool balls (I used around 420 wool balls)
  • A straw wreath form (mine was 15″ wide)
  • sharp needle and thread
  • wool roving dyed in various colors (you will only need a small amount, enough to cover 16-20 balls)
  • fabric to cover the wreath form (mine was knit fabric from the bottom of an old tshirt)
  1. Wrap your knit fabric around your wreath form to cover all the straw.  Stitch in place.
  2. Next, if your balls are not strung on a thread, string onto a thread.  Tie the ends so the balls cannot fall off.  Mine were already threaded so it saved me a step.
  3. Lay the wreath on a flat surface and place one end of the ball chain to the outside of the wreath along the table.  Affix with needle and thread by stitching thru the wool ball and thru the fabric covering the wreath.
  4. Pull the string of balls over the wreath and affix to the wreath by stitching into the fabric, securing the thread, then looping it between two balls over the string or thread used to hold the ball chain together and back into the fabric.  Secure. 
  5. Affix the center of the line of balls you just attached, by again stitching into the fabric, securing the thread, then looping it between two balls in the center of the line then back into the fabric.  Secure.
  6. Bring the balls back across the front of the wreath towards the outside again and again affix on the outside of the wreath using the technique in step 4.
  7. Again follow step 5.
  8. Repeat steps 4-7 until you come to where you meet on the inside of the wreath form.  Here you will need to be a bit more creative, and fill and stitch things in a ‘v’ pattern instead of in a line pattern.
  9. Once you get to the last gap, stitch down the last ball you secured, thru the wool.
  10. Next cut off the string of remaining balls, 3″ or 4″ down from where you secured the last ball.  Remove the balls that are not secured and then knot the string/thread holding the balls on the wreath.  Secure the knot on the underside of the wreath.
  11. Add a loop of string on the back side of the wreath form.
  12. Needle felt colorful roving on top of 16-20 remaining balls – you can make them various colors and sizes.  I made mine in shades of purple because it felt very snowy and wintry. 
  13. Take your needle and thread and attach each ball to the wreath by stitching thru the wool ball and the balls where you want to attach. 
  14. Voila!

Note – my wreath is huge – it’s probably 18″ wide.  You can always make a smaller one with less balls and a smaller wreath form!

Posted in Crafts & Sewing | 7 Comments