Julius has started asking “why?” He seems to be using it in context, but I’m not entirely sure what he expects to get out of it. Frequently he’ll ask “why” to which I’ll give him an answer and he’ll ask “why” again about the next thing, in an infinite chain of “whys”. Honestly I love it. I have been waiting for him to ask me why for months! I know lots of parents complain about the “why” phase, so ask me in a month what I think of it, but right now it is just the bee’s knees!
The little guy is just so darn cute. He is picking up more and more words every week. A few weeks ago he finally started saying “Dany”. He was saying “Deedee” because ‘n’s were difficult. Yesterday I told him to ask Dany if she wanted to go for a walk. He walked right up to her crate, knelt down, stuck his head all the way in and shouted “Dany”? I could not stop laughing. I eventually had to explain that he needed to move so Dany could get out of her crate and take a walk. Thank goodness Dany likes him.
He of course has his negative moments as well. Today I had to buckle him into the high chair and told him he couldn’t leave until he ate a small amount of peas and chicken. He had eaten exactly nothing before I gave him the ultimatum and was trying to squirm out of the chair to go play. Julius eventually ate all the required food to leave his chair, but it took 30 additional minutes. But I won’t let that get me down – I consider the eventual eating of his dinner a win!
Another win is this mailbox makeover I completed! I’ve been wanting to upgrade my mailbox for a while now, but I finally got the time to sit down and do it. I created the stencil by hand sketching the line and vine art on my Lenovo yoga. I got the laptop partially for drawing, and I’m really happy I did. It’s fun to sketch on! If I’d had this years ago when making mine & my friend’s wedding maps, things would have been so much easier. I love that after sketching I can resize easily and now – send it to my cricut for cutting! The one frustrating thing about this design was that I had to split the design in 2 so it would fit on the mailbox. I split it into two horizontal pieces, but if I did it again I would split it on the vertical so the seam is on the top of the mailbox.
DIY Mailbox Makeover
What you’ll need:
- Sticky vinyl – I used leftover contact paper
- black spray paint
- gold spray paint
- cricut or die cutting machine (or if you are extremely adventurous an Xacto knife)
- Remove hardware (flag) and measure your mailbox – mine was 18″ long by 20.5″ circumnavigating the top.
- Set up your electronic drawing space to be proportional to your mailbox dimensions.
- Start by writing your name in cursive on the bottom of the page. Add vines, leaves and flowers as desired.
- Thicken all lines so they are no narrower than 3/8″.
- Transfer your design to the Cricut and increase/decrease the size until it fits in the dimensions of your mailbox from step 2. Split design onto two mats if necessary (I found this link helpful). I recommend doing split between the top and bottom of the design (instead of right and left) so the seam is along the top of the mailbox where no one will see it.
- Use the cricut to cut out your design on sticky vinyl. (Technically you could use and Xacto knife…)
- Tape off the area around the mailbox and it’s pole, so nothing will accidentally get painted.
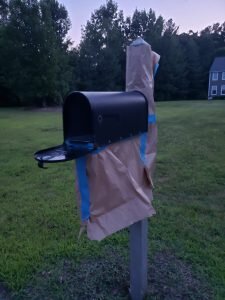
- Spray the mailbox black. (I used flat paint first, but decided I hated it and switched to a glossy spray paint which I liked a lot better.) Let dry.
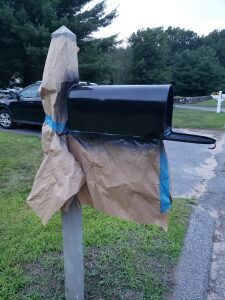
- Apply stencil to mailbox and press firmly at the edges of all the cuts to adhere. Tape off any areas on the mailbox that you don’t want painted gold.

- Spray paint the stencil gold. Let dry.
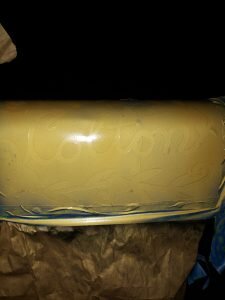
- Remove the stencil, admire your handiwork!


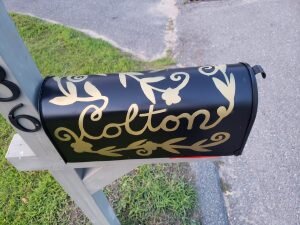
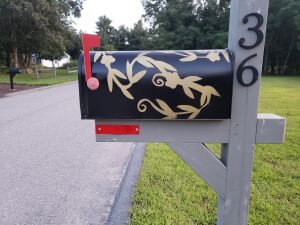

Ooo! Came out so pretty!
Thanks Ka!!!!! I was a bit nervous while I was doing it, so I’m glad it worked out. Worst case I guess I could have just painted it black again.