(No) Ups and Downs

Wow what a weekend.  This was the first weekend in over a year that we’ve had plans with multiple groups of friends in person.  It was so much fun but I am exhausted!  I am starting to think I have become a total introvert…  In person conversations are exhausting!  Actually, if I’m being honest I only had in person conversations 2 of the 4 holiday weekend days.  My exhaustion probably stems from the fact that since I’ve been back at work for 4 months I’ve forgotten how tiring watching 2 kids by myself all day is…

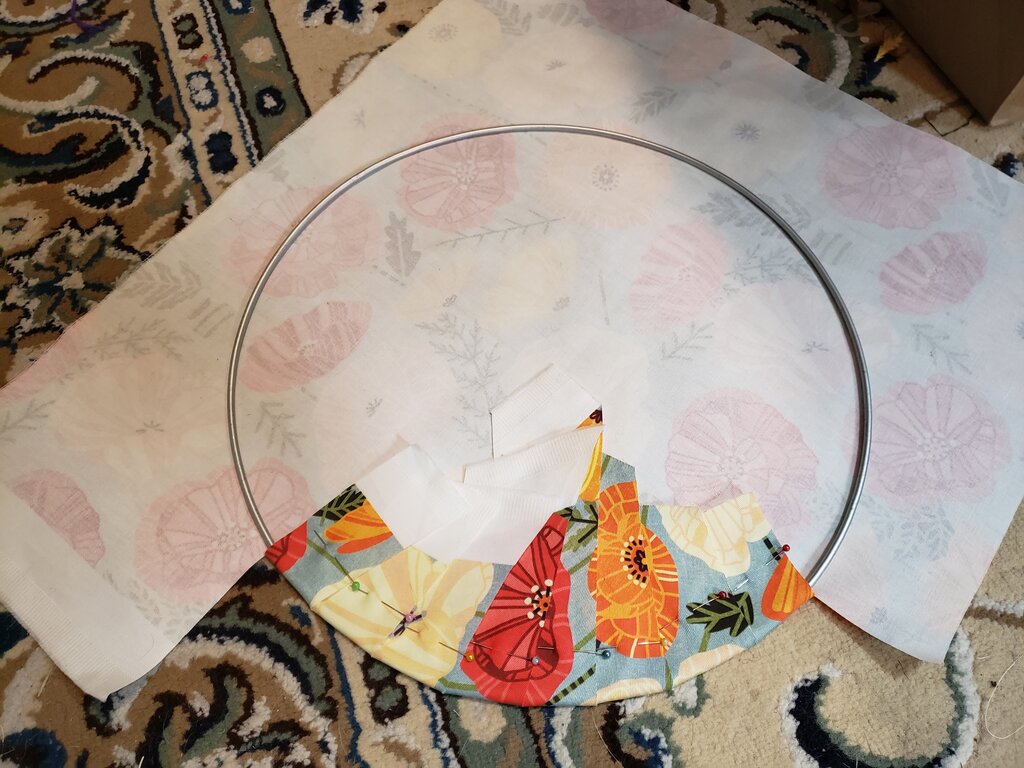
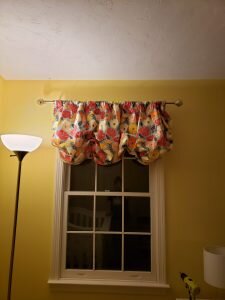
Well you’ve probably forgotten by now, or maybe you’ve been waiting with baited breath… but here is how to make those fabulous balloon valances that I put up in Patricia’s room!  Like Julius’ curtains, I adapted a pattern that my mother-in-law gave me for fully functional shades.  Since we have actual black out shades on our windows these are strictly for decoration and completely nonfunctional (though with slightly different mounting and by increasing the length they could very easily become functional…)  *In the interest of laziness I designed this pattern to be used to minimize cutting; if you have only 54″ fabric to work with, use 54″ fabric, it will not affect the finished product’s fullness much.  The original pattern also called for lots of hand stitching to make invisible seams, but having done 3 sets of shades by hand I did these completely by machine and will never go back.  No one will notice the seams, not even you.  Unlike all the other shades I have made for my house these are mounted using a simple curtain rod instead of building a shade board.  This also makes them MUCH easier to mount!  (Well it would have made them much easier if the darn curtain rods I had bought from Home Depot had not been missing hardware!  Thankfully a very nice man at the Home Depot took pity on me for being so close to my due date tracked down some hardware and walked it out to my car for me!)

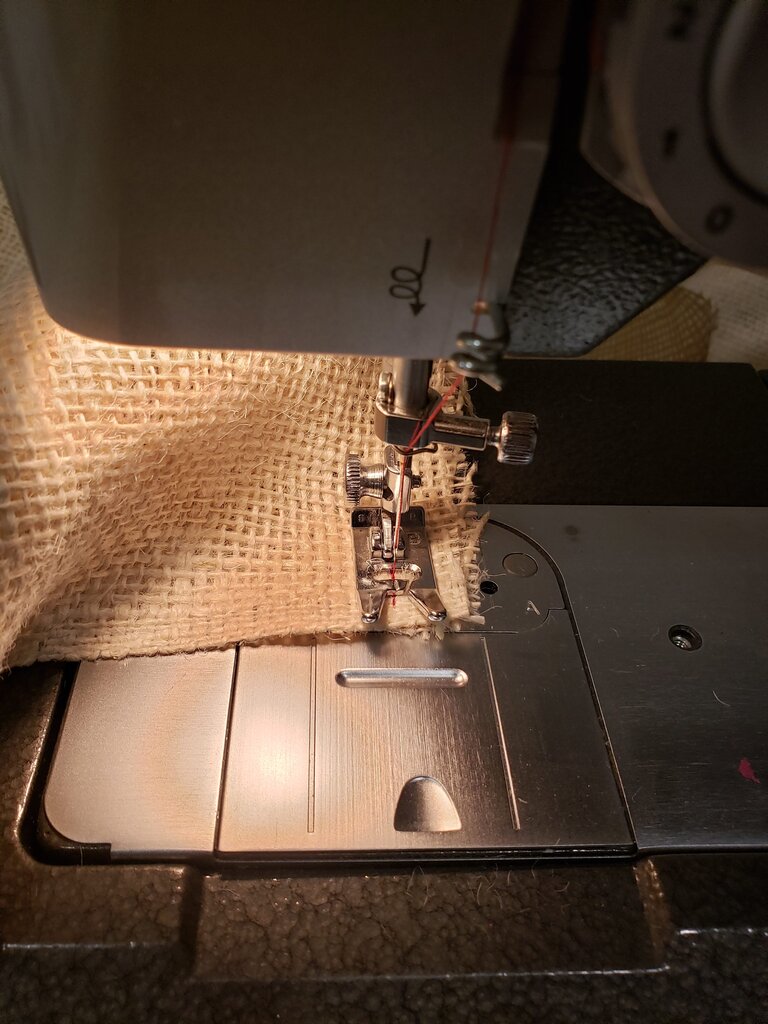
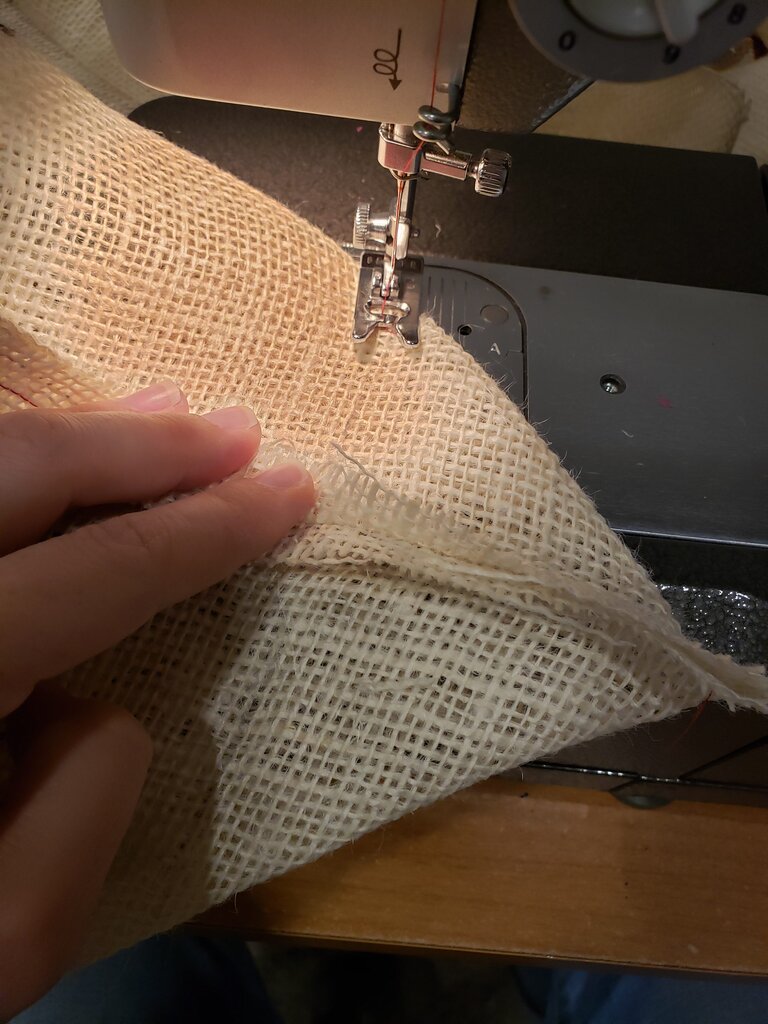
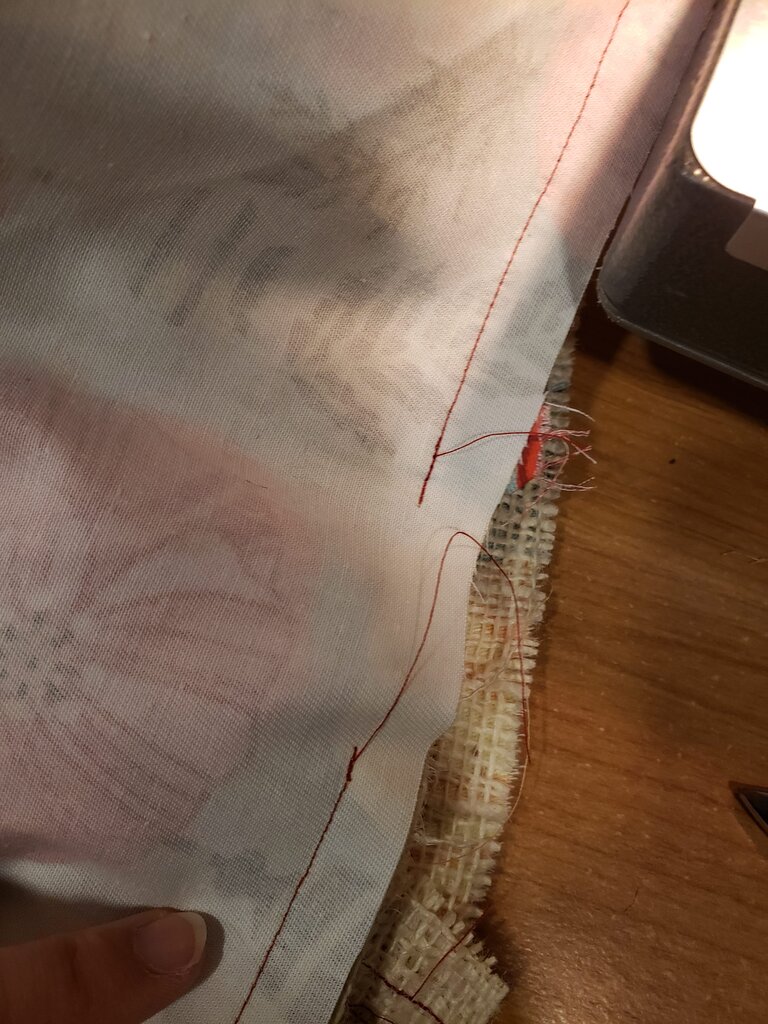
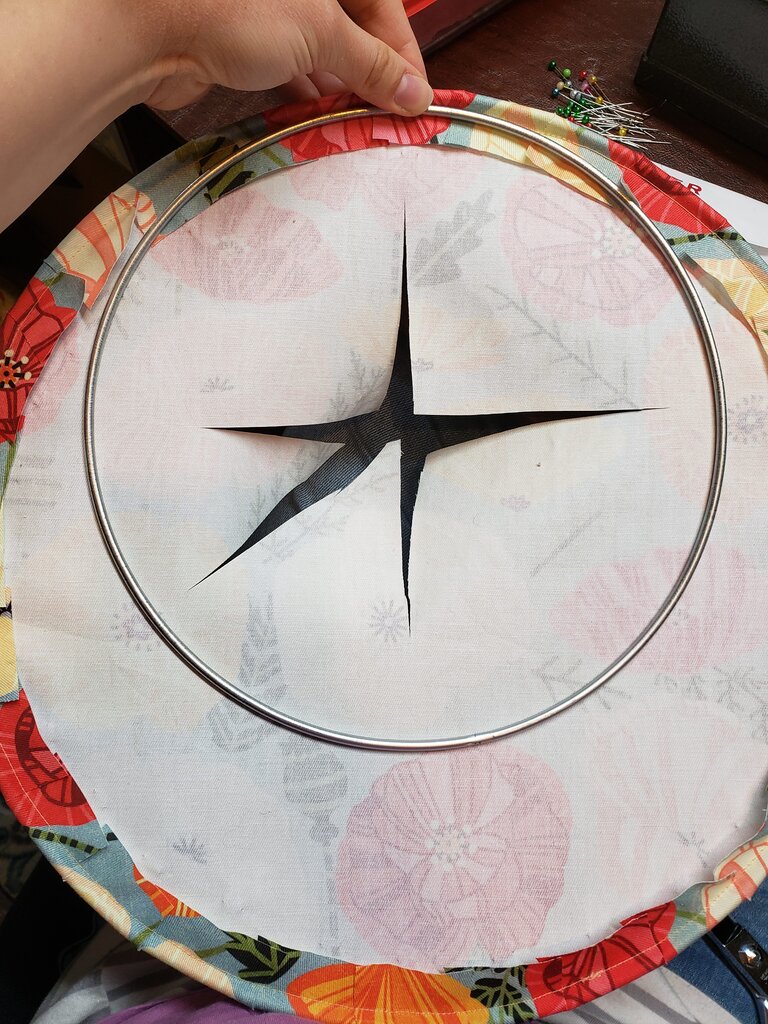
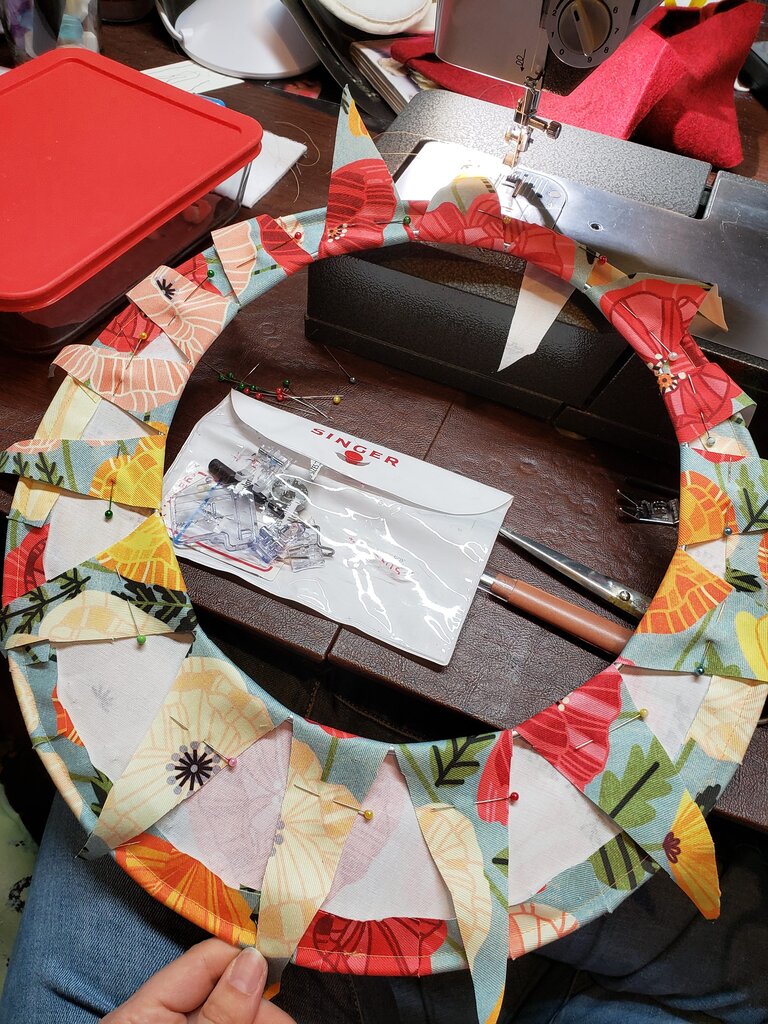
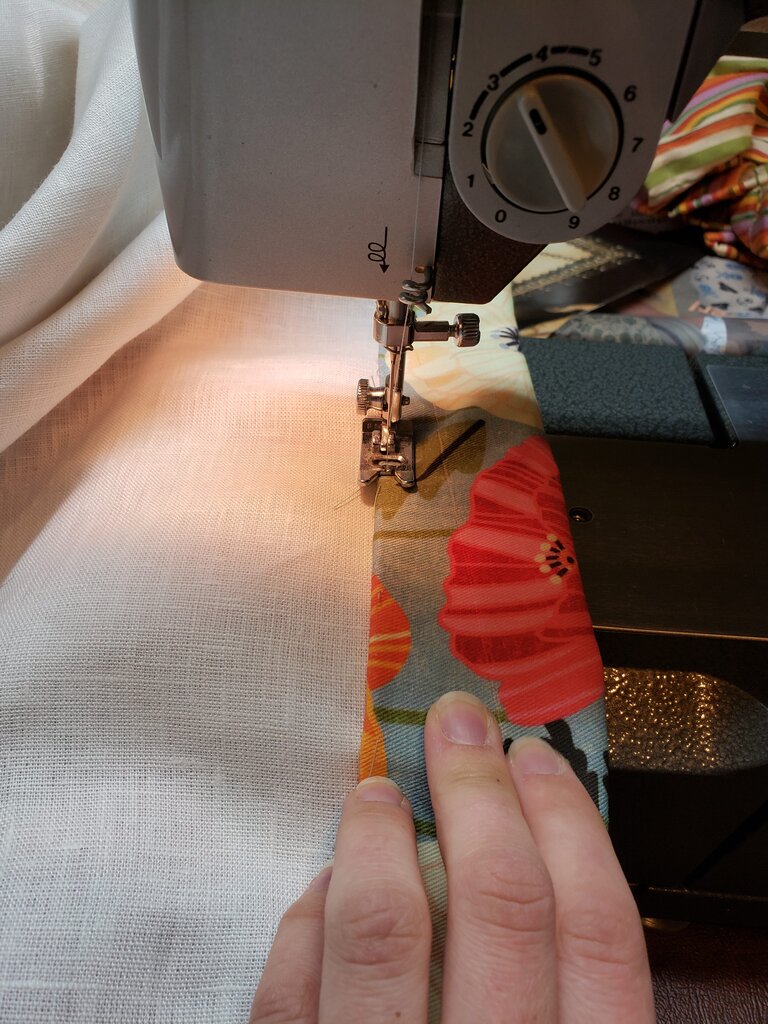
Weirdly I only have a couple pictures of me stitching some non-descript seams.  I guess that’s what happens when you do projects at 40 weeks.  And, more tragically, I don’t have any pictures of 40 weeks pregnant me mounting the shades on a step ladder with a drill.  You’ll just have to imagine that I guess.  So without further ado…  my DIY Balloon Valances!

DIY Balloon Valances

For each valance you will need:

  • 48″ of 58″ wide fabric* – I used this beautiful poppy fabric from spoonflower in lightweight cotton twill 
  • 48″ of 58″ wide white cotton fabric for backing
  • 24 plastic rings for roman shades
  • several yards of string or yarn for tying up the curtains, preferably white
  1. Place white cotton fabric on top of curtain fabric, right sides facing out.
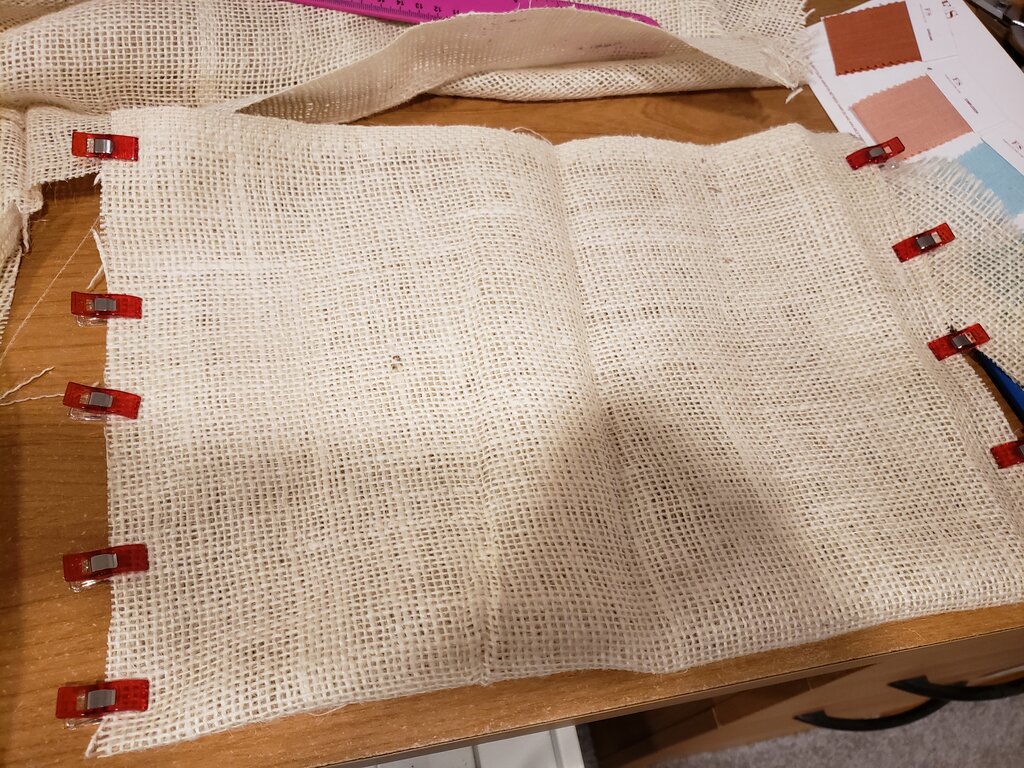
  2. On the long edges of the fabric, create a 1″ double fold hem.
  3. Machine baste the unfinished top edge of the fabric at 1/4″ mark so it doesn’t wiggle around.  Repeat for the bottom edge.
  4. On the bottom edge create a 1″ double fold hem.

    Here’s the one mystery picture of me sewing a seam? Bottom hem?

  5. Fold under 1/2″ at the top, press, then fold under another 2 inches.  Stitch close to fold to form rod pocket.
  6. Here is where you will need to hand stitch.
  7. Place your curtain on the floor so you can spread it out.  Mark a line in tailor’s chalk or disappearing ink 2″ from the left and right edges.
  8. Mark 2 more lines 17 1/3″ from each of the 2″ lines.
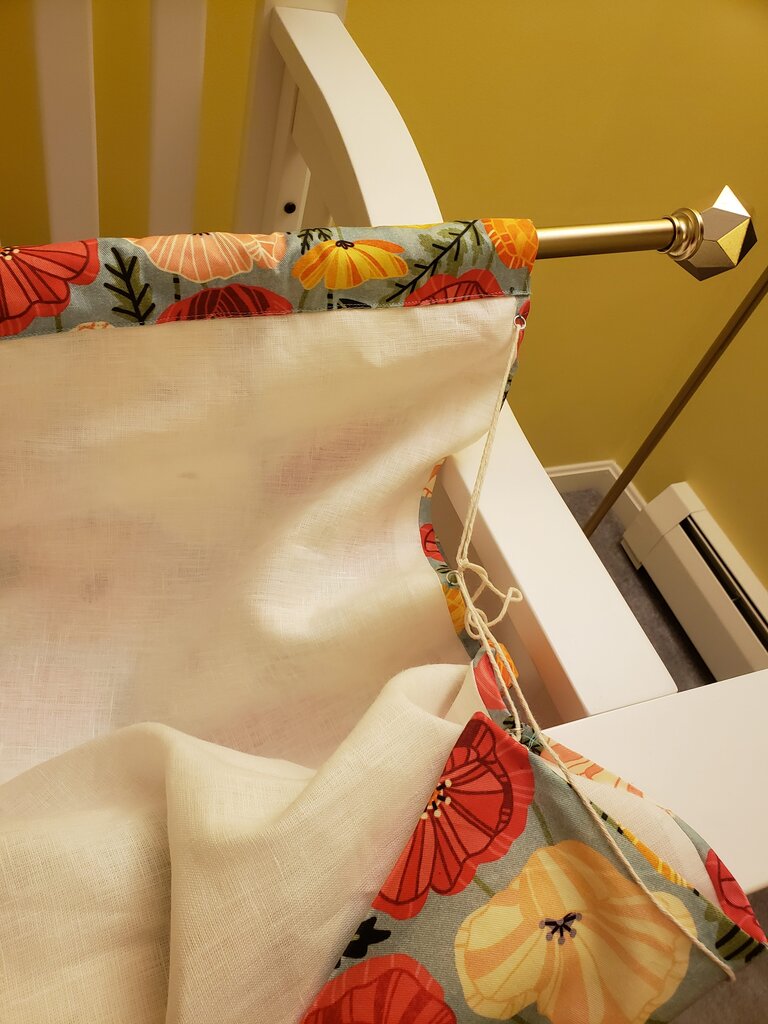
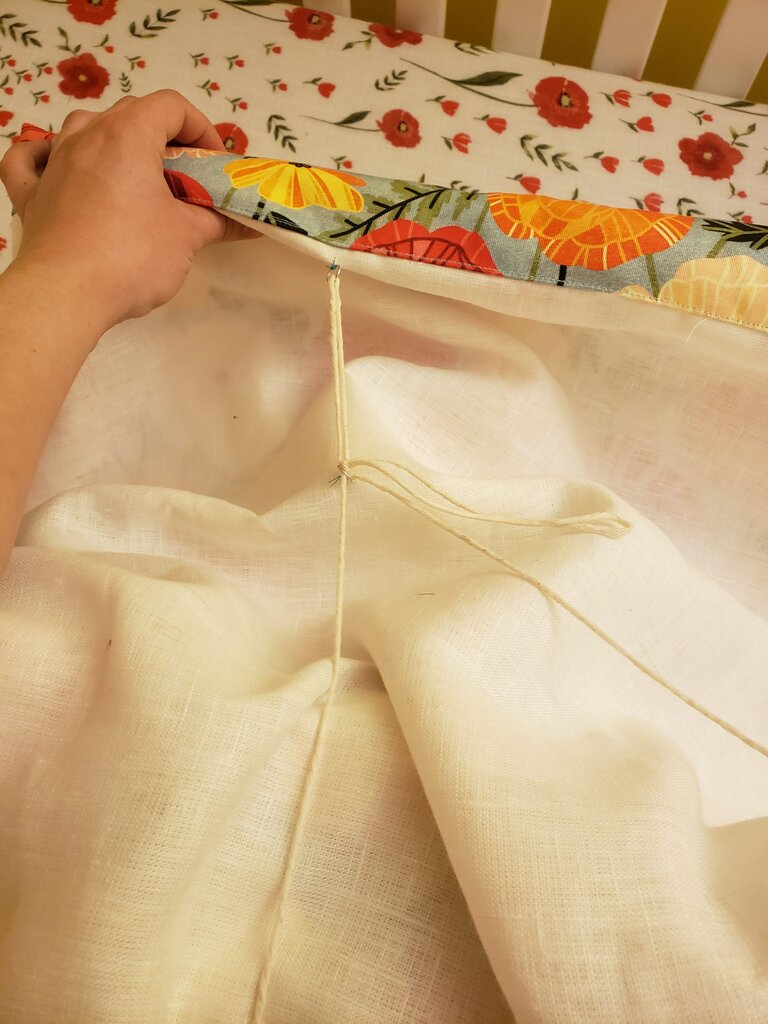
  9. Starting along the bottom hem stitching line, mark an x where your tailor’s chalk lines intersect.  Hand sew a ring to each of these 4 points.
  10. Measure up each line 6″ and place another ring.  Repeat until you are out of rings.

To hang the curtains:

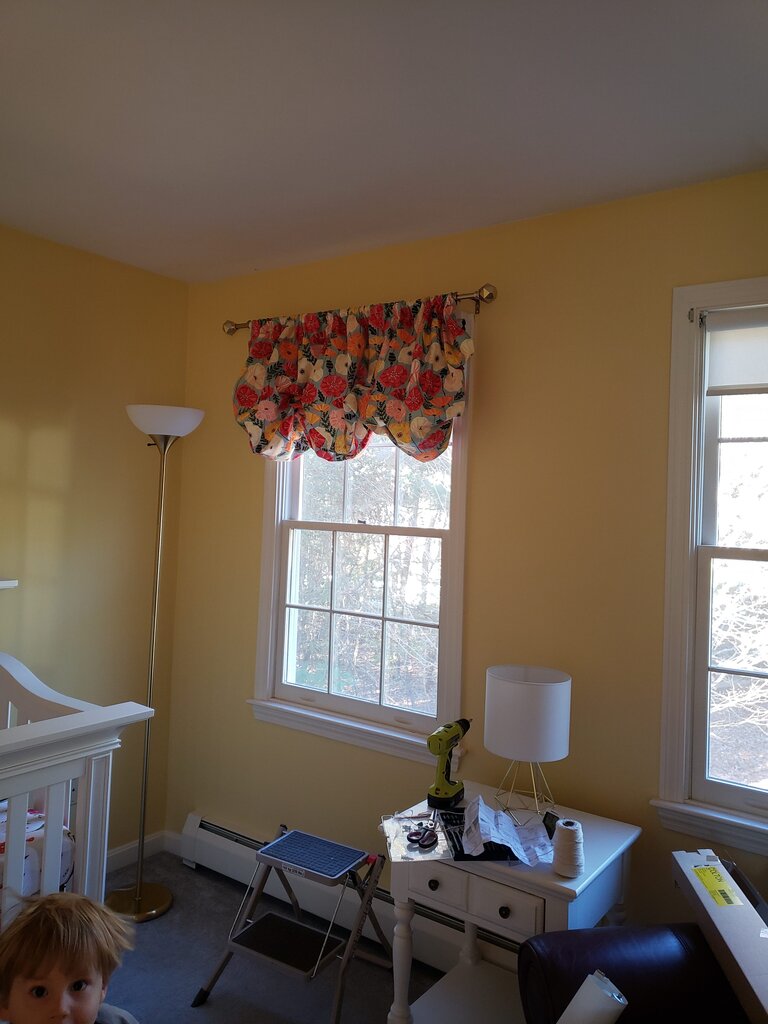
  1. Mount curtain rod as per instructions for your curtain rods, you will want the rod holders to be just slightly outside your window frame.
  2. Insert curtain rod through rod pocket, you will need to bunch fabric in the rod pocket to make the curtain fit just slightly wider than your window.
  3. Before you hang your curtain, thread string through each of the vertical lines of shade rings, pull together slightly to make fabric bunch and loosely tie.

    Loosely tie each vertical set of rings.

  4. Repeat for each set of vertical shade rings.

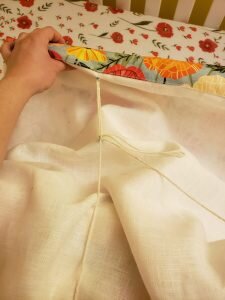
    Thread string through curtain rings (I didn’t have any curtain rings so I used chain maille links… :D)

  5. Hang curtain and manually adjust each set of ties so the valance is as low as you desire, and the height for each set is equal.  Knot each set of ties when you are satisfied.

    If you zoom in on the window glass you can see 40 week pregnant Lexi taking this photo… you’ll have to imagine me hanging these and fiddling with the ties.

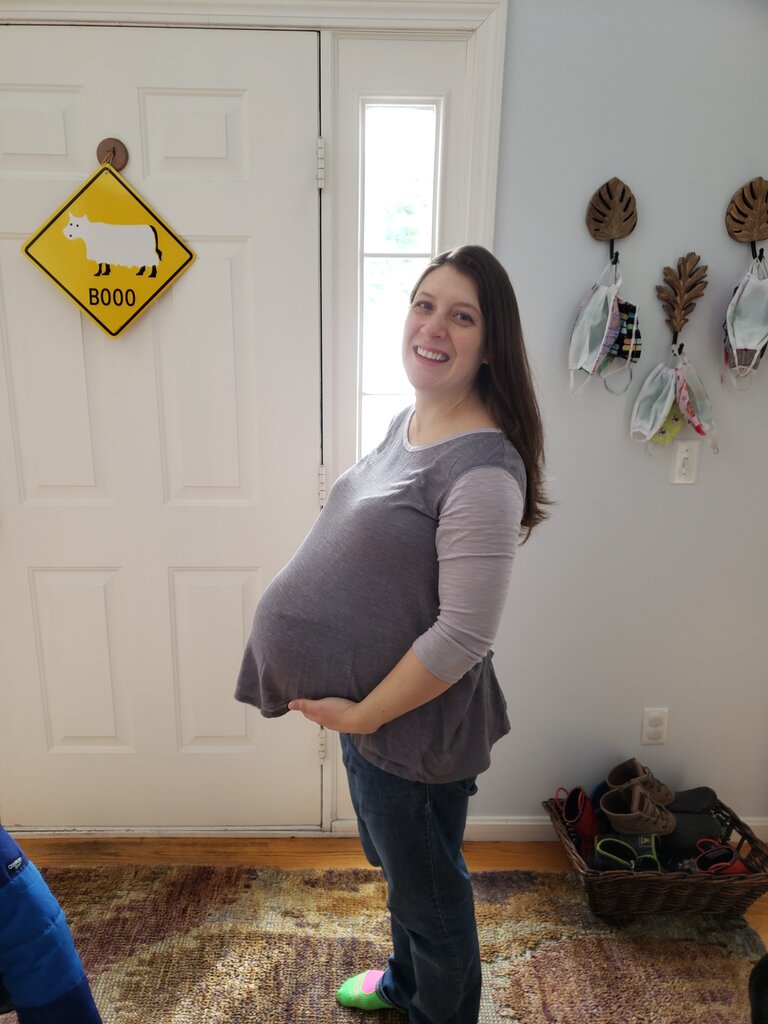
    Here’s a photo of me 4 days before I hung the shades for perspective.

    Julius (featured bottom left) helped me hang the second one.


Posted in Crafts & Sewing | Leave a comment

Meeple People

Well we just spent the last week hanging out with Will’s parents, siblings and cousins.  It was a fun trip and nice to be able to see some family that we haven’t seen in over a year.  Julius and Patricia loved the extra attention and were so happy to see people other than their parents.  We loved not having to cook or shop for ourselves!  It’s so nice to be doted on.

I worked most of the week again unfortunately, but I got to go for a couple nice hikes in the green mountains.  I also spent some of my down time planning and creating things for DanyCon 2021!  Because none of the kiddos are vaccinated and that makes travel hard, we’ll once again be hosting a virtual DanyCon for our siblings.  That doesn’t mean it will be any less great though!  We are going to have lots of new activities to keep us all occupied.  I can’t wait to share in a few weeks…

Just like I can’t wait to share this hilarious Julius-ism from one of our hikes.  On one of my days off the family decided to take the gondola up to the summit of Killington and hike back down.  Julius was very excited about the whole prospect and did a great job hiking most of the way himself.  The hike down the mountain wound between ski trails and snowcat roads.  At one point Julius, who was at the very front of the hiking at this point, shouted “there’s a road!”  So I asked Julius if I could tell him a joke, and our conversation went something like this:

Me: Julius can I tell you a joke?

Julius: Yes!

Me: Why did the chicken cross the road?

Julius:  Hahaha!  Mama that is so funny.

Me: I haven’t even told you the funny part yet!

Julius: Oh.

I guess jokes come later.  Makes sense considering everything they do is so darn funny.  Speaking of darn funny, check out Will’s pandemic hair in this picture. 

This was taken during Will’s birthday in July 2020, several months into the pandemic back when we believed that he would be able to go back to a hair dresser soon.  Funny hair aside, check out that sweet shirt Will is sporting!  That’s one of the gifts I made for his 30th birthday.  *Looks at the year.*  Wait no, we are way older than 30!  Where has the time gone?!  Well this project is something I thought of well before I bought my embroidery machine.  Honestly it was the reason I bought my embroidery machine.  My idea was to make geeky symbols to sell on polo shirts.  Only 5(? 6?) years after I bought my embroidery machine I finally accomplished my original goal!  If anyone wants to buy one from me just let me know… ;)  (Wait, I need to find an appropriate GIF for that.  I’ve been trying to use GIFs since will accused me of being 3 forms of communication behind everyone else since I still use emoticons.  You know what I say to that?  There are no GIF hotkeys!  GIF and emoji use severely limits my WPM.)

(RIP Jessica Walter)

Super Stylish Meeple Polo

  • 1″x2.5″ hoop (like this one)
  • Blank Polo Shirt – I love Jiffyshirts.com for shirt blanks.
  • tear away stabilizer
  • White (or desired color) machine embroidery floss
  • chalk
  • Embroidery file here (Note you will need to unzip it first)
  1. Mark where your meeple will go on your polo shirt using the chalk using a large cross.
  2. Hoop the shirt and stabilizer, centering the hoop over the cross.
  3. Thread embroidery machine with white floss, load embroidery file then embroider.
  4. Remove shirt from machine, remove from hoop, brush off chalk, and tear away stabilizer on back of shirt.


Posted in Crafts & Sewing | Leave a comment

Reverse, reverse

We went to our second outdoor birthday party in the last 2 years.  It was so much fun and my friends went above and beyond planning.  Not only did we have a fabulous time hanging out with friends, but Julius had a great time.  I asked him the morning of the party if he remembered Enzo (who we saw many months ago when he was born).  He shook his head yes (I was a little skeptical).  I told him that today we were going to his birthday party.  He squealed with delight and asked, “Is that guy going to have a cake?! And we will sing ‘Happy Birthday’?”  I guess we can safely say the guy likes cake.

Patricia ate more than Julius did at the party.  She eats far more than Julius ever ate at this age.  (I guess that’s why she is in the >99th percentile and Julius was in the 10th.)  She ate multiple types of cheese, a pile of grapes, broccoli and pizza.  And this was after she’d already had an entire can of kidney beans for lunch.  That’s 3.5 servings of beans for those who are curious.  The lady loves beans.  We started giving her beans as a protein source when we realized she was consuming 90% her calories in solid food instead of milk.  I’m so glad she is a great eater and I hope it continues.

It’s been two weeks since our basement was finished and we’ve been moving things slowly  We managed to squeeze my hand-me-down sewing desk from the unfinished side into the finished side.  This meant I could finally do my first project down there.  For the last 2+ months my stuff has been packed away in the garage or compressed in the basement, which has really put a damper on my crafting.  Most of the last several months of blogs have been old projects that I had done in preparation for when Patricia was born and I am almost out!  Maybe now I can start stocking up!

This project I started to finish off a little home improvement that I started months ago.  The idea was to create some little baskets as storage for hats and gloves.  I ended up with this cute little reversible basket that I think would be adorable for storing lots of things!  It didn’t work for what I wanted, but I am going to put it in Patricia’s room or on my sewing desk.

Reversible Storage Basket

  • 1 yard of burlap fabric
  • 1 yard of heavyweight upholstery fabric (or similar)
  1. Cut 16″x16″ square of burlap and upholstery fabric
  2. Fold burlap in half.
  3. Stitch along both sides with 3/4″ seam allowance.
  4. Fold out corners so finished seam is in the center.  Press flat with your fingers.
  5. Mark a 6″ line perpendicular to the center seam to form a triangle.
  6. Stitch along the line you marked.  Repeat for other corner.
  7. Repeat steps 2-6 with upholstery fabric.
  8. Turn burlap fabric so it is right side out.
  9. Place inside the upholstery fabric.  Right sides should be sandwiched in the middle.
  10. Match the unfinished edges of baskets up.
  11. Stitch along the edges of the basket, with 1″ seam allowance, leaving a 3″ gap.
  12. Turn basket right side out. Stitch along the top side of the basket 1/2″ from the finished edge to finish the seam.

Posted in Crafts & Sewing | Leave a comment

All the Bows

Julius started preschool last week!  Will picked him up from his first day and asked what was his favorite part of the day.  He responded, “Everything was my favorite!”  From there he told us multiple tales of the kids in his classes.  I guess he liked it!  Since the first day he has been a little bit more reserved in describing his day to us.  He actually won’t tell me ANYTHING that isn’t made up!  It is extremely frustrating to me, but as Will so thoughtfully reminded me, “get used to more of this for the next 15 years.”  Great!

First day of preschool!

Patricia is getting more Daddy 1:1 time throughout the day now.  For some reason that has lead to sleeping really terribly at night now.  I know I can’t complain too much since she was a champion sleeper from day one, but we thought we dodged this bullet!  She eats a TON of solid food now and really prefers solids to milk now.  We’ll see what her doctor says at the next appointment, but it seems that she’s getting bigger and sturdier every day.  Even so, she’s still a snuggle bug.  And lately she LOVES to bounce!  Bouncing baby girl I guess!

Big girl!

Well this bouncing baby girl has enough bows to last her a lifetime!  I bought a few soft ones in every color of the rainbow and then we have been gifted many, many more.  She mostly leaves them on if you put them on her, but I only do so for special occasions.  I was storing them all in a box on her dresser, but that very quickly started overflowing.  Now I only keep little clip on bow in the box, and I made a hanging holder for the rest of her bows.  I wanted something that looked like a basket of flowers and was easy to hang on the wall.  I came up with this holder, using some leftover hoops that I was contemplating using for Patricia’s mobile.  The holder does the job nicely and holds a lot of bows! If you were so inclined you could use the same sort of thing for a bow-tie holder.

Bow holder on the wall, box filled with socks on right, and clip on bow holder on left.

Baby Hair Bow Holder

What you’ll need:

  1. Wrap the square of fabric around your large hoop, by snipping from the edge of the fabric close to the hoop.  Pin in the center
  2. Using a zipper foot, stitch around the inside of the hoop, very close to the hoop itself.  Make sure to stitch through both layers of fabric to secure the fabric on the hoop and form a circle. 
  3. Place your large circle on top of your smaller circle, with the smaller circle 1″ below the rim of the smaller circle.  Cut a slit in fabric over the center of the  smaller circle up to the rim of the smaller circle itself. 
  4. Cut several more slits up to the other edges of the smaller circle.
  5. Wrap the fabric around the smaller circle so the smaller circle is empty and pin in place.  
  6. Using the zipper foot again, stitch very close to the outside of the smaller circle.
  7. Thread the cording through a tapestry needle. Stitch through the fabric, close to the outside edge of the smaller circle, then directly across the circle, and back down through the outside of the other edge.  
  8. Pull the elastic to a new spot and begin the process again, semi randomly weaving the elastic to form a spiderweb.  When you are satisfied with your spiderweb, knot the two unfinished ends of elastic together.
  9. Thread tapestry needle with scrap ribbon and poke through the top of the holder (wherever you deem the top to be).  Knot to use as hanger.

    Patricia’s room sporting her new bow holder.

    The finished product looks like a dream catcher…

    To hang bows, shove them between the elastic, so the tension in the elastic holds them in place.


Posted in Crafts & Sewing | Leave a comment

The Buzz

Well friends, we just spent the last three weeks driving around the southern USA.  We spent a week in Nashville, TN, a week in Dallas, TX, and a final week in Nashville, TN before heading home.  Will is still on paternity leave, but I worked from each place which meant I lugged my backpack, monitor and assorted peripherals around the country.  It also meant I spent most of my weekend days off driving, so I am mentally exhausted!  It was worth it though to see family and spend time with everyone.

While we were out, we had our basement finished!  I am so excited with how it came out.  The problem now is that all the stuff we moved to the garage from the basement needs to go back down there.  You might think it’s the moving we don’t want to do (and we don’t) but really we don’t want to spoil the beautiful space!  Will told me specifically that he didn’t want my costume closet down there.  Then he mentioned how ugly the desk I use for my sewing desk is (I’m offended, but to be fair it is a free desk the previous owners left in the basement).  He didn’t remember the desk Amy and I picked up on the side of the road while jogging, the kitchen island from my apartment in college or the hand me down gate leg table from my parents.  Huh I’d forgotten that all too.  Maybe we should just donate everything and start over… but who would want my island of misfit furniture aside from me?

Betta fish?  Oh also check out the felted diffuser in the background too…

Well, while my basement was in limbo for the last couple months I didn’t have a craft space to work in.  This is part of the reason I’ve been felting so much, because you can do it anywhere!  For instance I made this fish in the car on the way home.  It was supposed to be a betta fish, but I didn’t look up a picture before I made it and… well… it turns out it doesn’t really look like a betta fish.  Anyway, I did a little felting activity with my family (and Amy, who I have been trying to rope into felting for months now) for my birthday before we went on our trip to the south.  I called it Virtual Felt Fest.  Everyone made a silly little bumblebee (with the lady beekeeper) and I daresay everyone had fun and they all came out great!  The event was of course virtual, so if you want to make your own all you need is the following:

Here’s my finished little guy.

Felted Bumble Bee Tutorial

What you’ll need:

Here are the bags I sent that included needles, foam, roving and eyes for each person

Look at everyone’s cute bees

Can you believe Andrew had never felted before?!

Finished bee – side view


Posted in Crafts & Sewing, Parties | Leave a comment

Smashing


I’m writing this on Will’s laptop, which currently has a dead battery, since my laptop currently has a dead storage device.  Hopefully we can get that sorted out in the next month… We’ve been hanging out with family the last few weeks and Julius and Patricia have been having a ball.  This is the first time Patricia has been with her cousins while she is old enough to play with them and she was very excited.  Other people the same size as Julius?!  Ari and Finn were very cute and included her in their little games.

Julius had a grand time running around the house with Ari and Finn.  They dubbed themselves “the giggle gooses” (I call Julius and Patricia my silly gooses) and ran around the house shouting all sorts of silly things.  At one point before bed Julius came up to me and we had the following conversation:

Julius: “I love Finn, he’s my best friend.  He’s my grandson.”

Me: “You mean cousin?”

Julius: “Yeah.”

I guess he is trying to figure out the meaning of the word grandson through guess and check.  Well I’m running out of my backlog of projects during our world tour, so this one is a blast from the past.  For Valentine’s day this year I made Julius a mini “smash heart”.  The smash heart I made at the same time as the hot cocoa bomb and filled it with sprinkles and m&ms.  I added a tiny hammer and some fancy packaging that I made from some recycled wrapping paper to make things adorable.  Julius hasn’t used the tiny hammer but he carried the box around for weeks… so I guess it was worth making.

Mini Smash Heart

For the Smash Heart

What you’ll need:

  • Sprinkle mix of your choice
  • m&m minis
  • 6 oz of chocolate
  • white chocolate
  1. Temper chocolate.
  2. When chocolate is in temper, pour a teaspoon full in each cavity and use a silicone brush to gently drag the chocolate up the sides of the mold.  Level the top of the mold using a cake spatula.
  3. Put chocolate into the freezer for 2 minutes to set.  Make sure to maintain temperature of melted chocolate while you wait.
  4. Repeat steps 2&3 2 more times until you have a layer of chocolate about 1/8″ thick.
  5. Gently remove chocolates from the mold.
  6. Each heart will require two heart halves.  Fill one heart half with sprinkles and m&ms.
  7. Warm a skillet until warm but not hot to the touch. With gloves, take top unfilled half of heart and place on the plate to melt the bottom edge.
  8. Place heart on top of the half with sprinkles and mini m&ms, pushing down gently to adhere. Make sure no sprinkles or m&ms are poking out.
  9. Temper some white chocolate.
  10. Place white chocolate in a pastry bag and snip off a very tiny amount so you have a hole about 1 mm wide.
  11. Decoratively drizzle white chocolate back and forth over the heart.
  12. Immediately sprinkle some sprinkles over the white chocolate.

For the Box

You’ll need:

  • The cricut template for box top here and box bottom here (I’ll have to get this when my laptop is back)
  • cutting tool
  • scoring tool
  • wrapping paper
  • cellophane (I used a piece of food grade vacuum seal bag)
  • tape glider
  1. With paper face down on cricut mat and material set to paper, follow the instructions to cut the box top and box bottom.
  2. Fold inward along all the score lines, with the exception of the 4 end tabs, fold those out.
  3. For the top of the box, cut a small square of cellophane to fit into the lid of the box.  Just outside the heart and inside the center folds add 4 lines of tape.  Add cellophane to the top of the box on top of tape and press.
  4. Place tape on the end tab of one of the side flaps with side tabs.  Fold the side flap up then fold down in half and adhere the end tab to the bottom inside face of the box.  Repeat for opposite side flap.
  5. Place tape on all the side tabs. 
  6. Fold a side flap without side tabs up. Adhere adjacent side tab to the inside of the flap. Press in place.  Repeat for other side.  Place tape on the end tab, fold in half to the inside of the box and adhere the tab to the bottom of the box.
  7. Repeat step 6&7 for other flap.
  8. Repeat steps 1,2,4,5,6,7 for bottom box.

For the Mallet

You’ll need:

  • 1/4″ dowel
  • 1″ dowel
  • wood glue
  1. Cut the 1/4″ dowel to 4″ for the mallet handle.
  2. Cut the 1″ dowel to 1.5″ for the mallet head.
  3. Drill through the center of the 1″ dowel 2/3 of the way through.
  4. Sand edges of the two pieces of wood.
  5. Add a tiny drop of wood glue inside the hole you drilled and insert the handle into the head.  Let dry.

Julius smashing his candy heart

What’s inside?

Posted in Crafts & Sewing, Culinary Delights | Leave a comment

Dino Footprints

Back when I was on maternity leave and trying to do some theme weeks for Julius I discovered that one of the state parks in Massachusetts is called Dinosaur Footprints.  I’ve never been to it, but it sounded awesome!  I decided to make one of our weeks dinosaur themed.  In addition to taking out dinosaur books from the library we did lots of dinosaur activities.  We made a paper plate dinosaur craft, dug dinosaurs out of our kinetic sand, made dinosaur footprint cookies, and finally had a picnic at Dinosaur Footprints park.  I think it was rather successful week.  (Actually it spanned Easter so it was technically two weeks…)

Checking out the information on the dino footprints.

There are two footprints in this photo! The one on the left is the size of Julius, the one on the right is tiny!

Footprint photo

Roar!

For the footprint cookies, I wanted to make those jam thumbprint cookies with a dinosaur footprint instead of a thumbprint.  I was craving chocolate though so I wanted to use chocolate instead of jam for the thumbprint.  Luckily I didn’t even have to invent the recipe.  I used this complete recipe as is – it is completely fabulous.  The shortbread is amazing on it’s own and the ganache takes it up to spectacular.  My only changes to the recipe were to chill the dough for 30 minutes before baking, repress the footprint indent in the cookies after baking, and let the ganache set for A LONG TIME before pouring.  It took like an hour to set up, so this is not something you can whip together instantly.  My sister-in-law made the cookies for her dino week and confirmed my changes.  She also mentioned it was a bit tricky for Finn to press the footprints, so I think it might be easier for a 3.25 year old than a 2.75 year old…

Nom nom nom.

Chocolate Ganache Footprint Cookies

What you’ll need:

  1. Have your child give the dinosaur a bath, and clean the dinosaur thoroughly with dish soap.

    Washing the dinosaur

  2. Dry off the dinosaur.

    Giving the dinosaur a snuggly towel dry

  3. Roll dough by tablespoon into a ball and place on a cookie sheet.  Have the child flatten gently with their hand.

    Pressing the footprint into the cookie.

  4. Have child gently press the dinosaur’s foot into the flattened cookie about 3/4 way through the dough.  Take care to avoid pressing through to the cookie sheet, or cookie will break.

    Finished cookies ready to go in the fridge

  5. Chill dough in the refrigerator for 30 minutes.
  6. While dough is chilling, make the ganache.
  7. Bake cookies at 375 F for 8 to 10 minutes until done but still light in color.
  8. Re-press the dinosaur foot into the original indent (which will have puffed up slightly while cooking)

    Baked cookies, after being repressed

  9. Remove to cooling rack.

    Cookies after they’ve been re-pressed.

  10. While cookies are cooling, see if ganache has set – you want it to be a tiny bit liquidy so it will set flat in the footprint.  Carefully pour ganache into the footprint.

    Filling the cookies

  11. Let cookies set overnight until ganache has hardened.

    Dinosaur eyeing the goods.


Posted in Culinary Delights | Leave a comment

Bottlecaps

Well Julius and Patricia once again get the best kiddo award.  We took a long road trip this past weekend and they were real troopers.  I had low expectations for the trip, but they far surpassed them!  Let’s hope they can pull it off a few more times… but that might be a lot to ask of the little guys.

We’ve been having some renovations (understatement) going on for the past several months (read: 3 contractors at the exact same time, working on completely different projects).  This means I’ve had to pack up my craft room, my kitchen equipment, and my tool shop leaving very little in the way of blogging material.  I have lots of ideas stacking up on the backburner but I’ve had no time to execute.  I just can’t wait until I get my creative space back to usable!  Instead I’ll have to treat you to one of the projects from the archive.  This one is a bit of a recycle craft.

We have so many bottlecaps that we’ve saved over the years, that I’ve been trying to think of what to do with them.  Julius has no problem thinking of ideas; he loves to play with bottlecaps.  He sorts them, makes them into tiny boats, pretends they are people and just plain scatters them everywhere.  I haven’t come up with much to do with them, except making some tiny candles!  I thought they’d be a perfect addition to a relaxing bubble bath, so I made up a bunch of them for my spa ladies’ night.  Julius helped me perfect the recipe and even time how long they burned (he begged me to burn all of them after we made them).  It was pretty neat to watch them burn down, and the cotton string worked really well.

Micro Candles

  • 3oz beeswax, grated
  • 50 drops essential oils 
  • 25 bottle caps
  • 1 yard cotton kitchen twine – burns for 30 to 40 min
  1. Cut cotton twine into 25 1″ pieces.
  2. Place beeswax in a double boiler, heat until beeswax melts.
  3. Remove beeswax from heat and add in 50 drops of essential oil of your choice.

    Adding essential oils.
    This picture is so old… Julius is still sucking his fingers!! My big guy hasnt done that in months!!

  4. Dip end of cotton twine into beeswax, and place beeswax onto center of bottlecap to secure.  Let dry.
  5. Repeat step 4 for other 24 bottlecaps.
  6. If wax has started to harden, gently heat it again.  (Be careful not to get any wax on your burners, beeswax is extremely flammable!)
  7. Carefully pour the wax into each bottlecap, filling to the top.  Let dry.
  8. Repeat step 7 for other 24 bottlecaps.

Micro candles will burn for 30 to 40 minutes.  (Julius and I timed them)

Monitoring our candle burn

Posted in Crafts & Sewing | Leave a comment

Never Felt Better

My baby girl is 8 months old already!  I can’t believe it.  She crawls all over the place, and pulls herself up to standing constantly.  She’s even started moving between objects while standing, transferring from couch to coffee table to Dany’s crate etc.  Will is terrified she is going to walk any day now.

Julius is doing really great with his letter recognition.  He can tell you what different letters in books are, and what they sound like.  He is really close to being able to read I think.  I need to get some beginner reader books for him!

As for me, I’ve taken up a new hobby – needle felting!  I have described this recently as the equivalent of making sculpey animals, only out of wool.  Who knew that poking a pile of fiber over and over again with a barbed needle could produce such amazing things!  Here’s a few of my little creations – it all started with the little gnome in the center.  My library held a free virtual felting class a few months ago that included all the supplies for the little guy you see there.  I was so excited to sign up for a spot – it was one of the few organized activities I did while on my maternity leave (or really before I was vaccinated).

They key to felting is poking the needle semi randomly, while turning your shape.  If you randomly poke more in one single area, that spot will start to flatten out and then eventually indent.  The more you poke, the firmer your felted creations will become.  After I’d made a bunch of animals, I decided to make some essential oil diffusers for the car.  You just need to add a few drops of your favorite essential oil to the wool balls, and then clip to your vent.  When the air blows you’ll get wafts of essential oil aroma.

Wool Diffuser

What you’ll need:

  • 3 different colors of wool roving .1 oz each
  • felting needle and foam
  • kitchen twine
  • tapestry needle
  • tiny clothespin (mine was only 1″ long, but you could go larger)
  1. Take one color of wool and split it in half, to form two long strips.  Wrap the strip tightly around the handle of the needle.
  2. Slide the wool off the needle, and wrap the other strip of wool around the first, perpendicular to how you wrapped around the needle. You’ll have a blockish looking shape.
  3. Start poking the block all around the center doing one full rotation.  Turn the block and rotate so you are poking around the sides the contain the un-poked ends.
  4. Continue poking and rotating along the plane formed by corners opposite from each other.
  5. Continue poking and rotating along all axes until the wool has reduced in size by 1/3 and is ball like in shape.

    (Sorry I switched roving colors here)

  6. Repeat for the other two colors.
  7. When 3 balls are complete and roughly the same size, thread your tapestry needle with the kitchen twine
  8. Tie a knot in the end of the twine, leaving a tail of about 1.5″.
  9. Thread the three balls onto the kitchen twine (if you can’t get the kitchen twine through use something thinner like embroidery thread)
  10. Tie a knot 1″ above the last ball, then thread on the clothespin.  Tie another knot above the clothespin to secure it, and leave a tail 1/2″ – 1″ long as desired.
  11. Fray the ends of the tails of twine.
  12. Add a few drops of essential oil to each ball.  Clip onto your air vents and turn the air on slightly to let circulate.


Posted in Crafts & Sewing | Leave a comment

The Fridge Saga

Have you ever noticed that Will and I have a lot of sagas?  If you search this blog for “saga” you’ll come up with 4 different sagas… and those are only the ones I deemed comedic enough to post about.  Maybe we’re too melodramatic.  Well… another saga has made the list.  Get ready for the great refrigerator saga of 2020 (though this saga spans multiple years).  (Hint: you may want to scroll down to the craft so you can make yourself a beverage before you settle in to read this one.)

Well… let me start off by saying that our house is about 25 years old, and the previous owners left us with all original appliances.  We didn’t mind because those things are workhorses!  Unfortunately even workhorses get sent to the glue factory eventually (wow morbid! Animal farm much?)  3 years ago, I replaced an internal coil on our oven and managed to keep it in business, 2 years ago our washer and then dryer kicked the bucket (read: the drum on the washer actually rusted out and fell out the bottom of the washer).  The dishwasher died in April of 2020 and the refrigerator died in August of 2020. We honestly didn’t realize the fridge was dying; we just thought the new bread we got didn’t freeze solid in the freezer, which we considered a bonus.  Eventually we discovered that other items in the freezer weren’t frozen and we decided to order a new fridge.

Well… our house has this stupid built in cabinet around our fridge that is TINY.  It is a narrow, and short.  So short in fact that there is only one standard size fridge that really fits it – made by Whirlpool.  I ordered that fridge from my favorite local appliance store, and got a call back with a warning that the fridge was out of stock and there were 400 people on the waitlist for that fridge.  Wow.  He thought it would be around November before we could get the fridge. Yikes.  He was super helpful though and found us another model that would fit that they had in stock.  Great.  So we cleaned out the old fridge and they came to deliver the new one.  The delivery person luckily thought to measure – and for some reason this fridge was 1/2″ too tall.  I don’t know if it was me or the salesperson who messed up, but we were both annoyed.  We decided to just wait for the other fridge in November since there really were no other fridges that fit.

Our other fridge by this point was basically dead – we thought it was limping along but one day I thought to put a thermometer in the fridge and it clocked in at 55.  Terrifying.  I was pregnant with Patricia and kept having nightmares about listeria (as if I needed any more things to add to my nightmares).  So in a stroke of genius I called around home depots to see if they had anything in stock.  The only fridges they had available were apartment sized fridges so we ended up with this 10.1cu ft model.

Let me tell you, it is tiny.  7.4 cu feet of fridge space is not much for a family of 3… soon to be 4.  Going from a 22 cu ft model with 17 cu feet of fridge space to less than half of that space was challenging.  I think the only thing that made it work was the full size freezer we have in the basement.  So… skip ahead to November, and I don’t hear anything about the new Whirlpool fridge.  I call before Thanksgiving and they have heard nothing from Whirlpool – none of the 400 fridges on backorder have come in.  We have a minimalist Thanksgiving so we can fit it all in our tiny fridge.

I continue calling monthly to see if our fridge is in.  It is not in.  In February we get a call from the appliance store to say that they received a notice from Whirlpool that the model of fridge we have on backorder is no longer being manufactured at this time due to covid.  They expect to resume manufacturing in the future.  He asks if we want to stay on the waitlist and I say sure.  I stop calling monthly.  June rolls around and we get a call from the appliance store – by some crazy miracle our fridge is in!  Unfortunately he called us the day after Tesla started our house, and we were not allowed to have anyone else on site so we had to postpone delivery.  After Tesla rescheduled a couple times we finally postpone delivery the end of June.  The appliance folks call back and we finally reschedule to July on my birthday.

By this point our oven had died too (more on that maybe in another post).  So both get delivered without a hitch.  As the delivery people are leaving, I notice the fridge door isn’t closing properly with that satisfying suction feel.  The delivery person takes a look and notices that the door is not actually sealing – there is a 1/2″ gap around the seam of the refrigerator.  He thinks it is probably just the gasket.  The appliance store calls us and lets us know that they have asked their repair department to take a look, but that they are crazy backed up.  They also let us know that they told the repair department to prioritize us since we’ve been waiting for this fridge since the civil war.

We hear nothing that day from the repair department, so at 4:30pm Will calls.  They are very sympathetic and get us on the schedule for 7am the following day.  The repair person shows up and fiddles around with the door for about 15 minutes.  Will asks, “can it be fixed?”  He shakes his head sadly.  Apparently the internal hinge that mounts the door was installed crooked.  The appliance company calls me back again, trying to offer me more solutions and clearly feeling very bad about this fridge.  That’s where the saga ends.  We have a useless fridge sitting in our kitchen as well as our tiny Magic Chef fridge, which I have become very fond of despite its small stature.  Well that’s mostly where it ends – I did call a couple cabinet companies and I think maybe we have to replace our cabinets to get a bigger fridge.

Let me tell you, meal planning gets way harder when you have to figure out how to fit a week worth of groceries in a tiny fridge.  You can’t have leftovers, ever.  They just don’t fit.  On top of that, we were too scared to do take out (I mean we were even having our groceries delivered).  This meant that we cooked 3 meals a day every single day from March 2020 until we got vaccinated in May 2020.  It was ridiculous.  When we got vaccinated, Will and I started doing take out, and we’ve been doing it a bit too often.  I’d say we have been eating out at least 8 meals a week.  EIGHT MEALS.  That is a ridiculous amount of take out.  We still don’t like to go into the restaurants if we can avoid it (though we have made the exception for Indian food several times) so we usually do curbside pick up.  I’m completely sick of take out, but Will and Julius aren’t.  Actually I think the dead give away that we have overdone the take out was the conversation we had with Julius on Friday.

Me: Julius, we’re having grilled [vegetarian] sausages or hot dogs for dinner.  Would you like a hot dog or a sausage?

Julius: I don’t want that for dinner, I want curbside pick up!!!

Later we figured out that curbside pickup meant quesadillas from Moe’s which Julius loves.  He did eat a half sausage and half hot dog with cole slaw though, so I consider that meal a win.

Now, let’s calm your nerves with some tea!  I made these shaped tea bags for my virtual spa ladies’ night, but I think they would be great for mother’s day or another special occasion.  I made them all on the sewing machine, which took far less time and allowed me to make 30 of them in a relatively short amount of time.  I think if you were to sew them by hand they were actually look a lot better and you could make more intricate shapes.  I intend to try this at some point in the future…

Designer Tea Bags

What you’ll need:

  1. Place two coffee filters on top of one another.  Iron them flat (cotton), make sure to move the iron frequently to keep from burning.
  2. Thread your machine with organic thread and a bobbin with organic thread.  Insert fine needle.
  3. Free-hand stitch a heart onto your filters, starting at the side of the heart.  Leave a 1″ gap.
  4. Insert funnel into the gap, and fill with 1 tsp of tea.
  5. Return heart to sewing machine and stitch over the gap to close it, back stitching at beginning and end to secure.
  6. Trim around the heart stitching, leaving a 1/4″ border.
  7. Using a cricut (or a scissor) cut out little hearts from the pink paper for your tea bag tag. 
  8. Thread your hand sewing needle with organic cotton thread.  Stitch through the stitching on one lobe of the heart, then knot.  Stitch through a lobe of the paper heart (or circle cut out from cricut) and knot, leaving the thread 2.5 inches long. Trim. 


Posted in Crafts & Sewing, Culinary Delights | Leave a comment