Cinnamon Birds

So while I was writing up this blog post I started becoming concerned with the renewable-ness of cinnamon.  This lead me to a longer than usual perusal of Wikipedia because cinnamon is fascinating!  For instance, of course it is the bark of a tree, but I always assumed it was like a birch tree, where you peel off a strip to harvest it.  It’s not. It is actually the inner bark of the tree, so they remove the outer layer and scrape down the tree to extract the inner cinnamon bark.  This process (thankfully) does not kill the tree.  It seems (for a New England reference) similar to maple tapping, which to me always seemed like it would harm the tree.

The most interesting part of the Wikipedia page mentioned that in the Middle Ages the western world had NO IDEA where cinnamon came from.  They thought it was fished out of the Nile or mined from the nests of giant cinnamon birds.  Just imagining giant cinnamon birds every time I eat cinnamon really brightens my day.

Speaking of cinnamon birds, I think it is finally springtime in New England.  And by that I mean, we’ve survived fool’s spring, second winter, spring of deception, third winter and mud season.  Now it’s just full on spring for 2 weeks until we hit summer.  The sad news is that the bees did not survive.  And due to my serious lack of time (aka Julius), I’ve decided to go on a beekeeping hiatus for a while.  But I promise that the lady beekeeper will keep providing you with lots of content, albeit even lighter on the bees, until she returns to her calling.  If this saddens you, just try your hand at one of the nifty candles below, and think of cinnamon birds every time you burn it!  I made them for Erin’s shower and I think they looked quite cute!  They cost around $2.50 a piece to make.

Cinnamon Stick Votives

What you’ll need:

  1. Place your glass votive on a table or other flat surface.  Find a relatively straight cinnamon stick.  Cover one side of the cinnamon stick with a good amount of hot glue and press it onto the side of the glass votive, perpendicular to the table, making sure one end of the cinnamon stick meets the table.
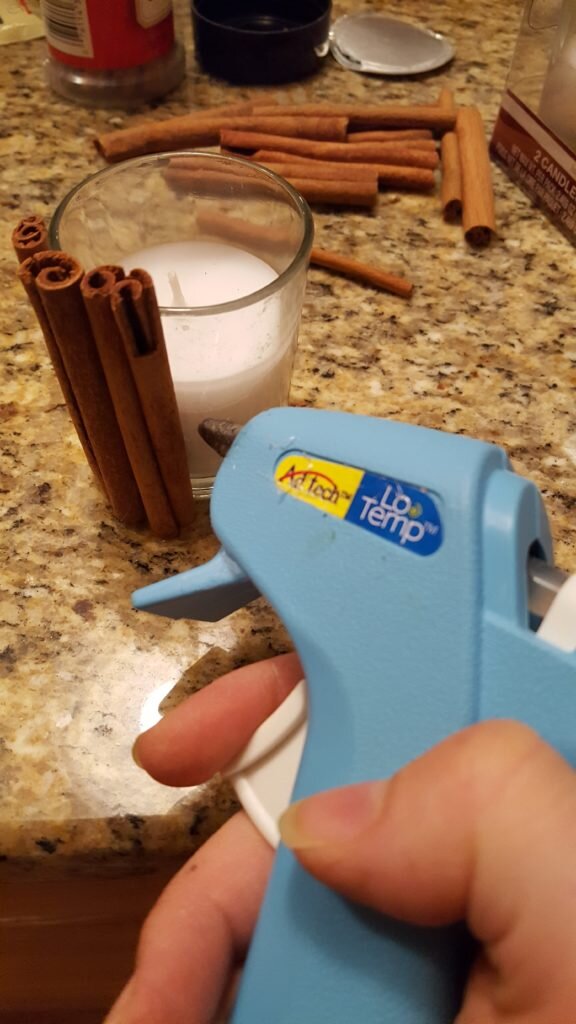
    Glue cinnamon sticks around votive, keeping sticks flush to one another.

  2. Choose another cinnamon stick and line it up on one side of the first cinnamon stick (without glue) positioning it so there is very little gap between sticks and the bottom of the stick meets the table.  After you are satified with the positioning, apply glue to the glass and glue in place.
  3. Repeat step 2 until you reach the place you started.  Here, place your last stick as best you can, and use a thin cinnamon stick to cover up the remaining gap between your first and last stick.
  4. Wrap twine around the center of the candle, tying in a bow to secure.
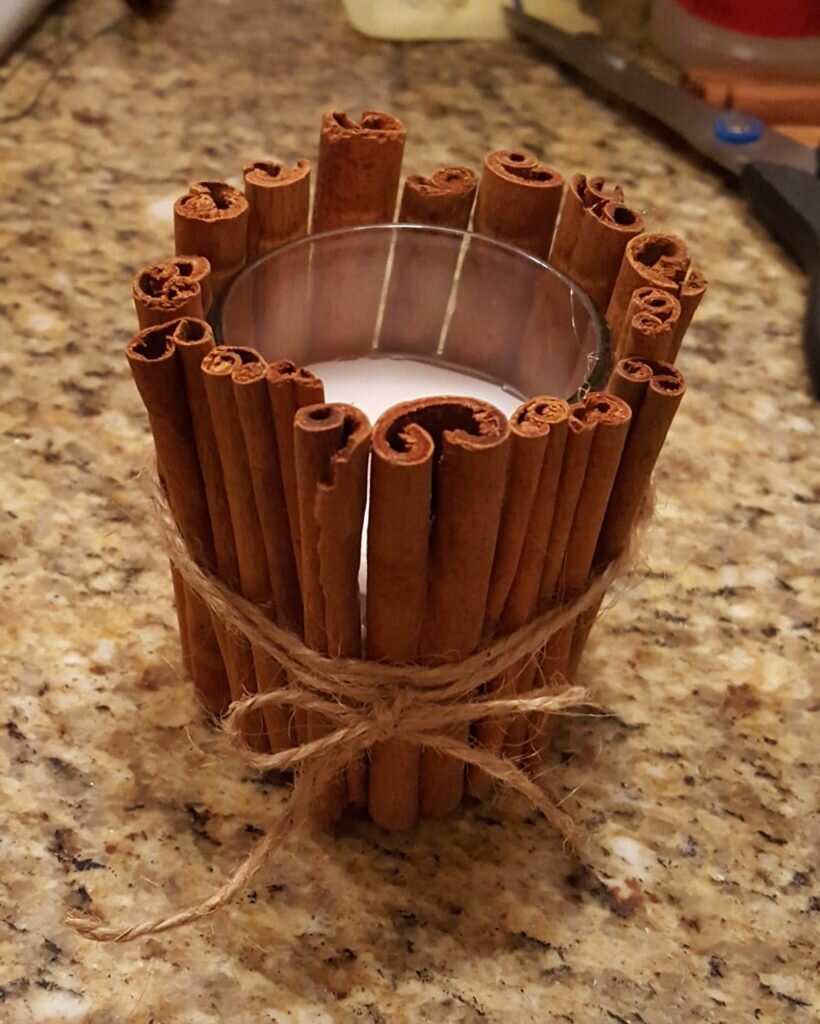
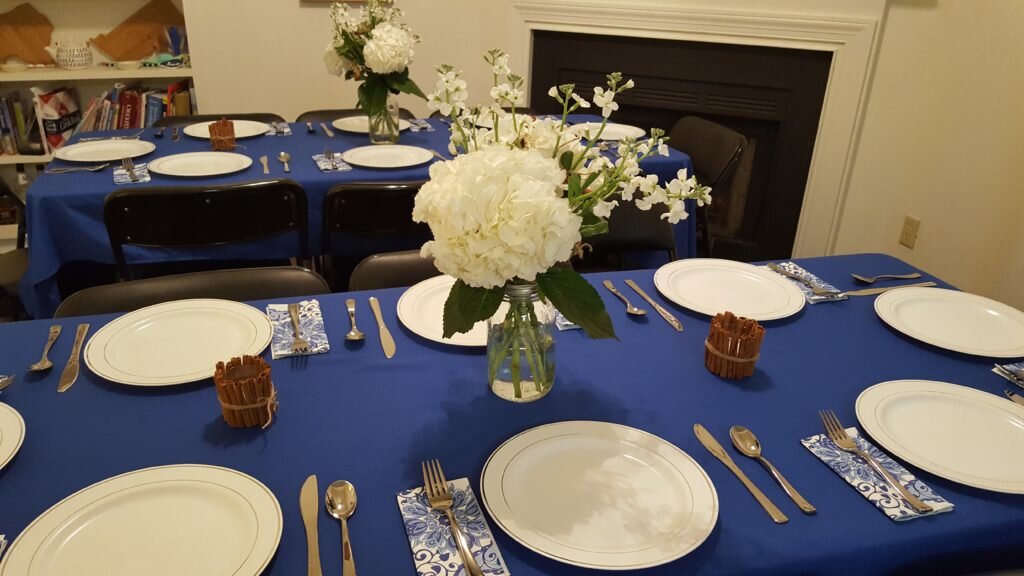
    Cinnamon votives flank a floral arrangement at the cinnamon bun themed shower

Posted in Crafts & Sewing | Leave a comment

There’s a Bun in the Oven!

Well I’m sure I’ve told you already that my wonderful sister-in-law, Erin, and my (equally wonderful) brother, Mark, are having a baby!  Their baby boy is due at the beginning of June, only weeks away!  In honor of Erin and her baby bump, my sister and I (plus my mom, Erin’s mom and sister-in-law) threw a baby shower brunch at Erin and Mark’s house in Chapel Hill.  Hopefully this will give you some ideas for a party of your own…

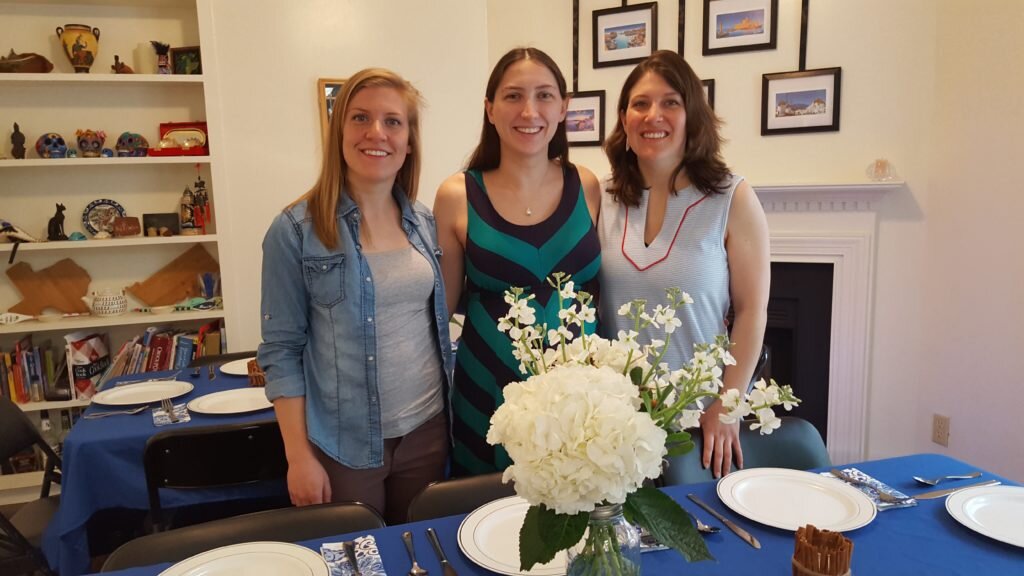
Mandy and I with Erin, the guest of honor (and the bun)

There’s a Bun in the Oven!

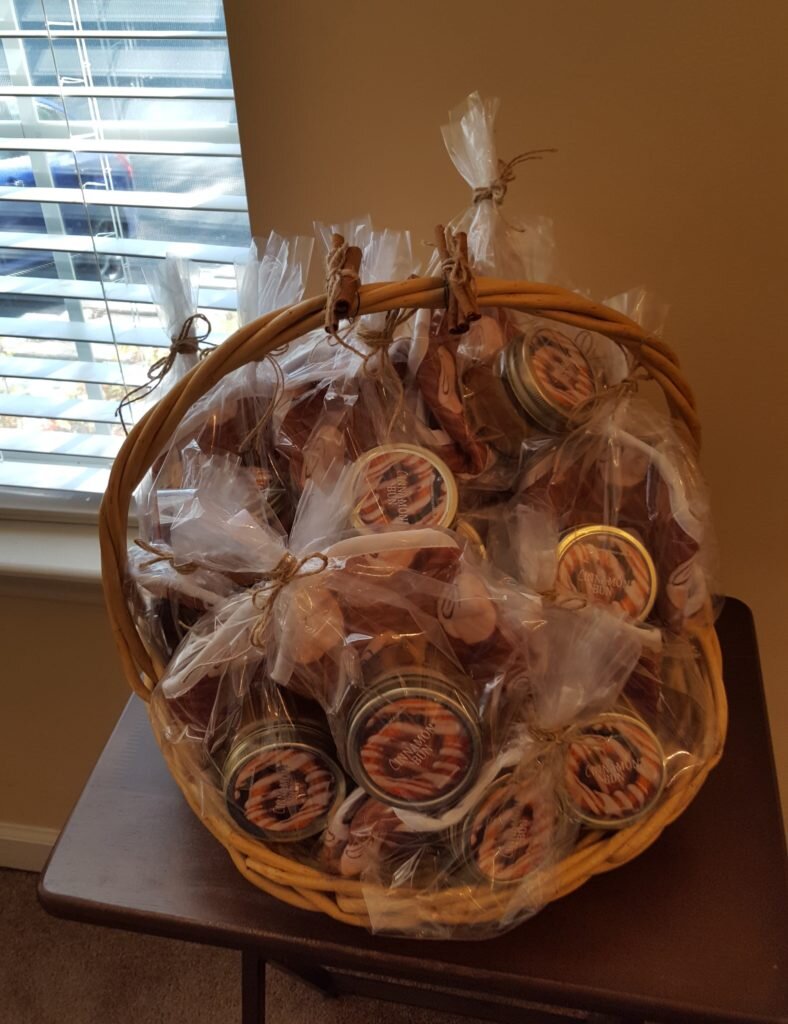
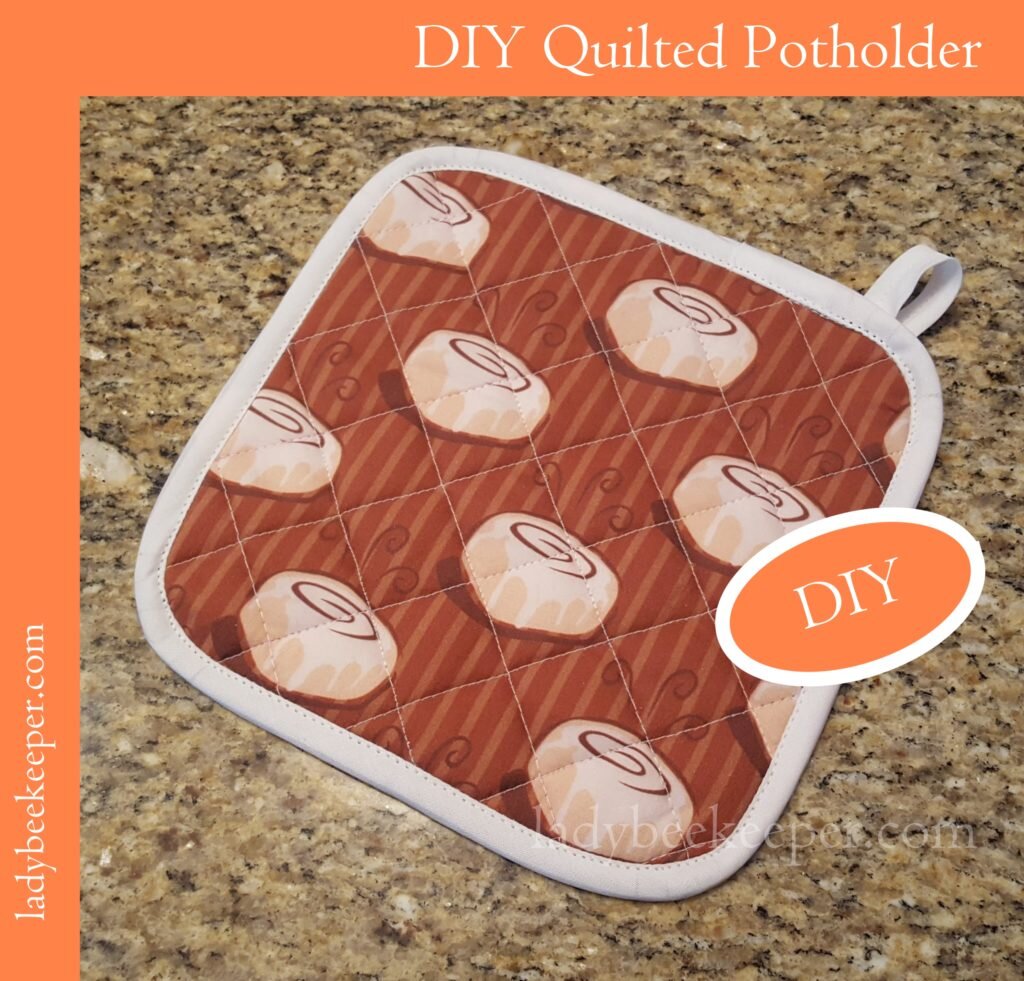
I love the expression “bun in the oven”, especially because Mandy called Julius my little bun everytime I talked to her.  We decided to theme the whole brunch around the phrase “There’s a bun in the oven!”   For invitations we decided to go green and send evites!  We found some that fit the theme perfectly here.  For favors, I made the potholders I posted a couple weeks ago in a cinnamon bun print from spoonflower, along with a cinnamon bun candle from the dollar store.

Cinnamon Bun themed favors

Decor

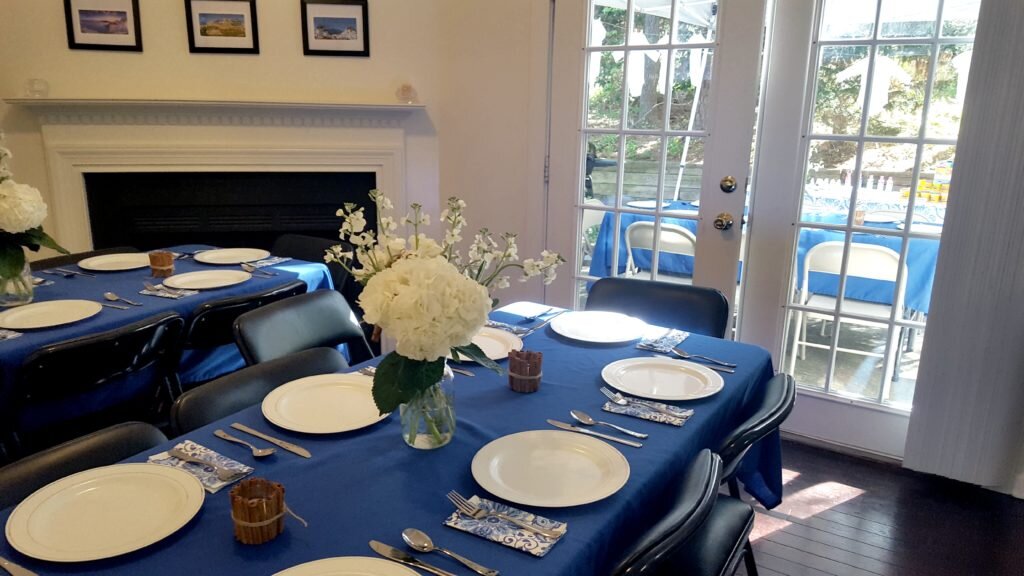
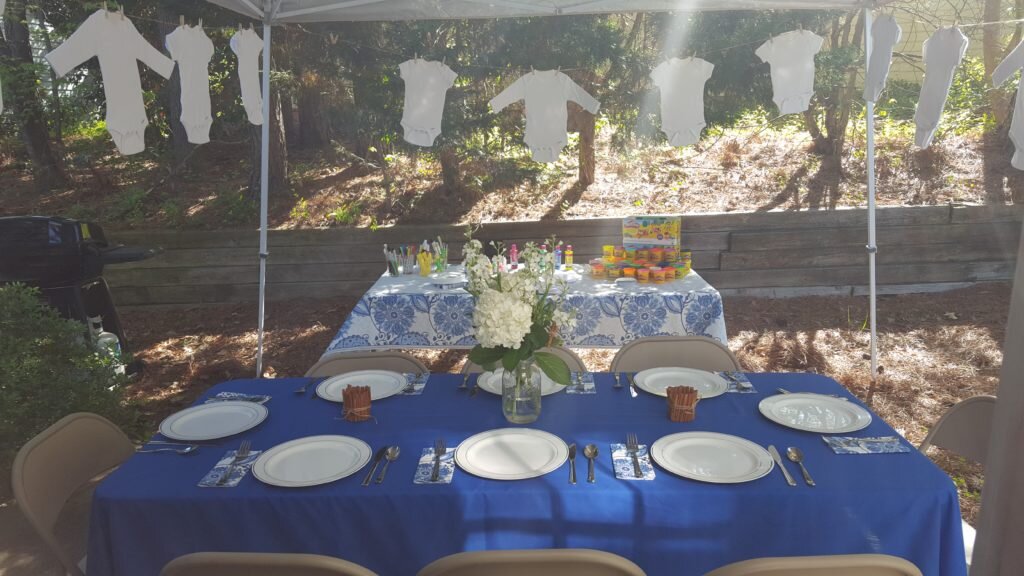
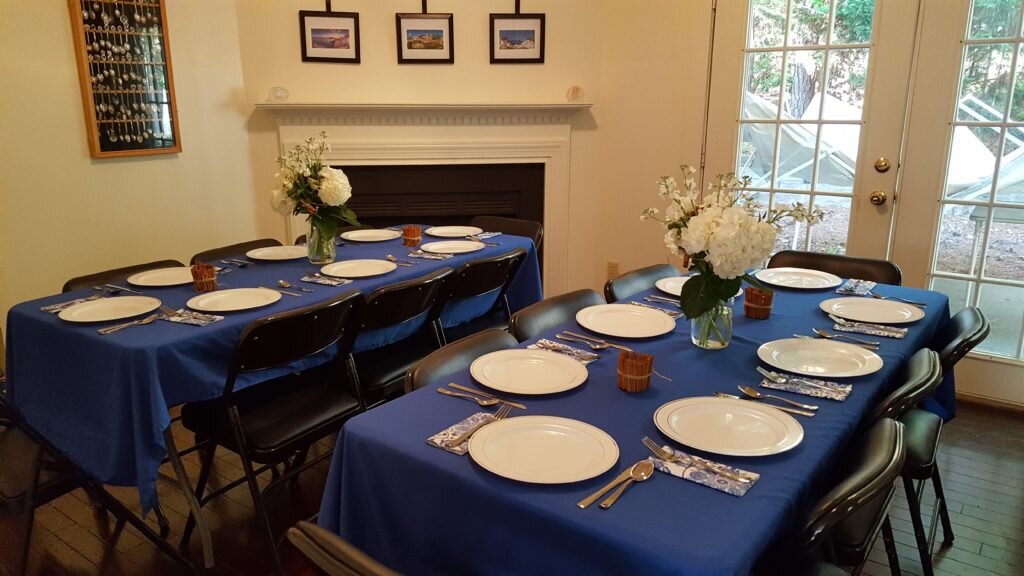
We took over Erin and Mark’s house and managed to seat 21 people at three large folding tables both indoors and on their patio under a tent.  It was a beautiful day so we didn’t have to go with our rain plan!  We chose a royal blue for the tablecloths, Erin’s favorite color, and an homage to the baby boy.  To go with our theme, we decorated the tables with cinnamon stick votives  and white flowers studded with cinnamon sticks springing from mason jars (later post).    White onesies, hung from a clothesline, adorned the tent and awaited decoration by guests.

Finished table set ups

Outdoor seating and onesie station

Tablescape

Food

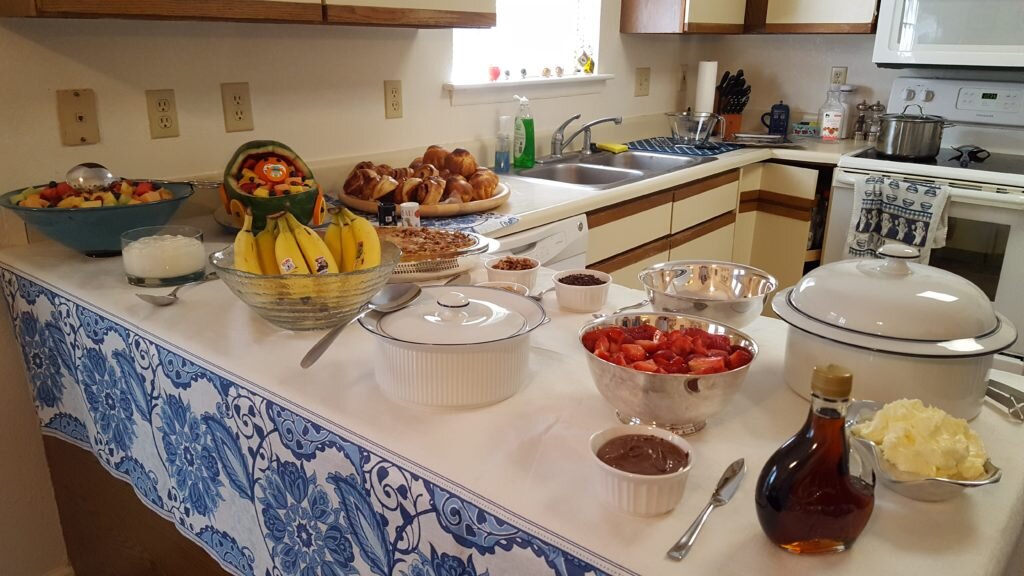
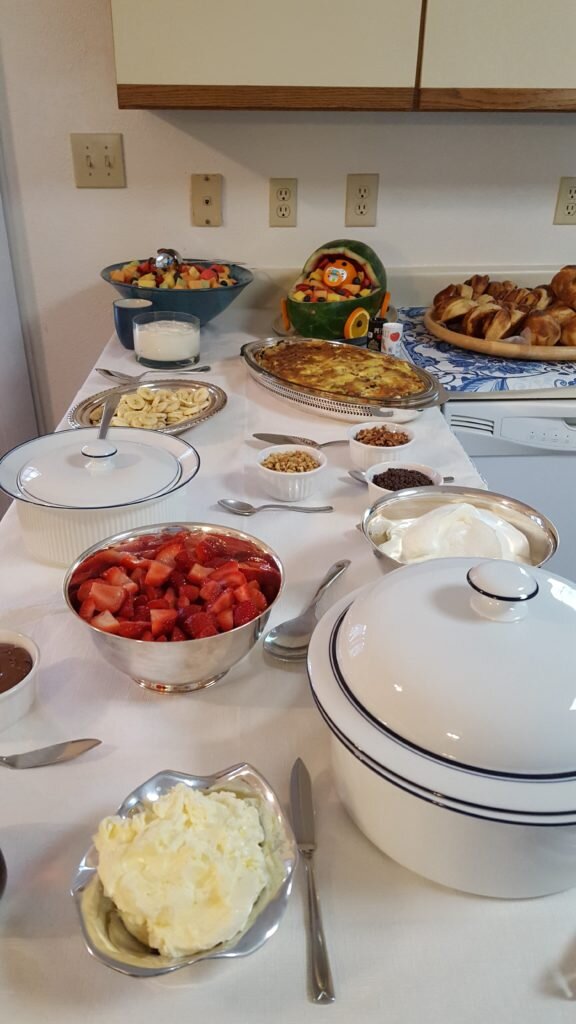
Because of our theme, we decided to host a brunch.  Obviously cinnamon buns would be featured front and center.  Then, totally independently, Mandy and I both came up with the idea of a waffle bar.  I honestly have no idea how it happened, but great minds think alike!  Since we hosted the party at my brother and sister in law’s house we were able to do much of the prep work ourselves.  Aside from the buns, which we ordered from a local bakery, we prepped everything the day before to make the day of party prep easy.  We decided on the following menu; links to the recipes are included for your convenience.

Hot Drinks

  • Coffee
  • Tea

Mimosa Bar

  • Champagne
  • Orange Juice
  • Grapefruit Juice
  • Cranberry Juice

Food

Waffle Bar Toppings

  • Maple Syrup
  • Whipped Butter
  • nutella
  • strawberries
  • raspberry coulis
  • whipped cream
  • mini chocolate chips
  • pecans
  • banana slices

    Drink set up

    Buffet set up

    Full buffet spread complete with Mark & DD’s watermelon baby carriage

Games and Activities

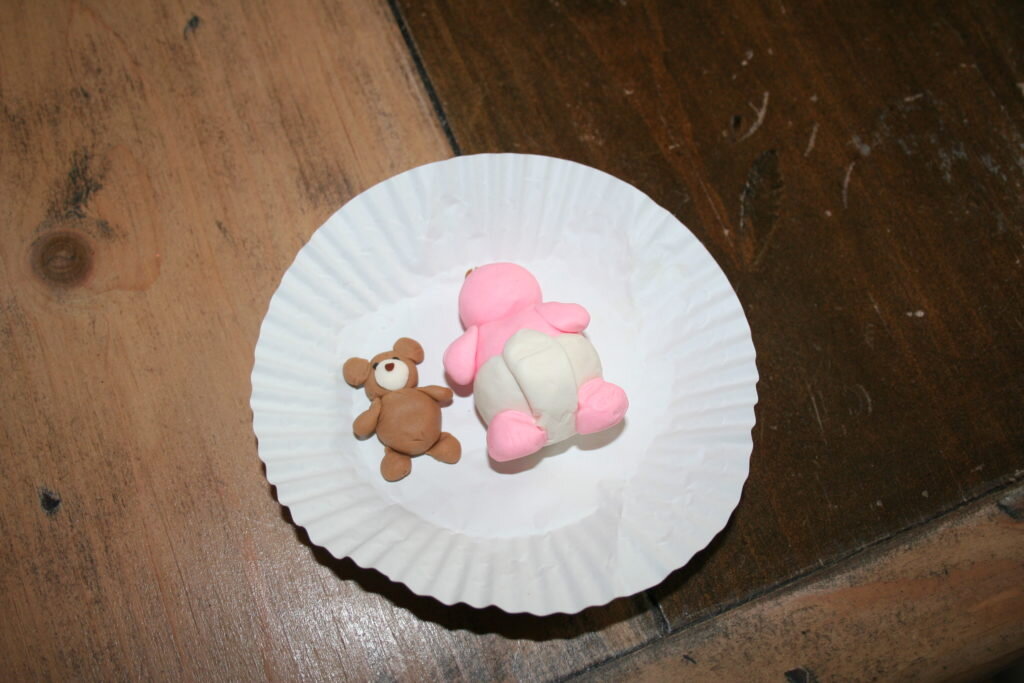
I find that games at showers are always controversial. Some people love them, some people hate them.  I’m personally always happy to play some tasteful games.  We did our personal favorite – “play doh baby”.  We gave everyone play doh and a set amount of time to create a “baby”.  Erin then voted on her favorite babies and their creators won a prize.

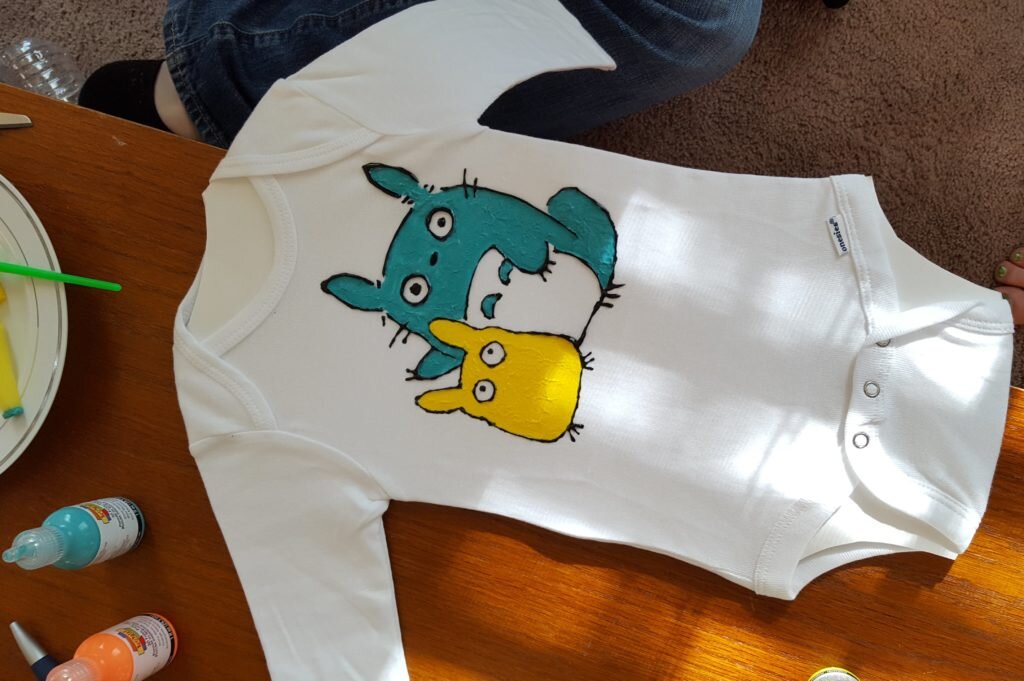
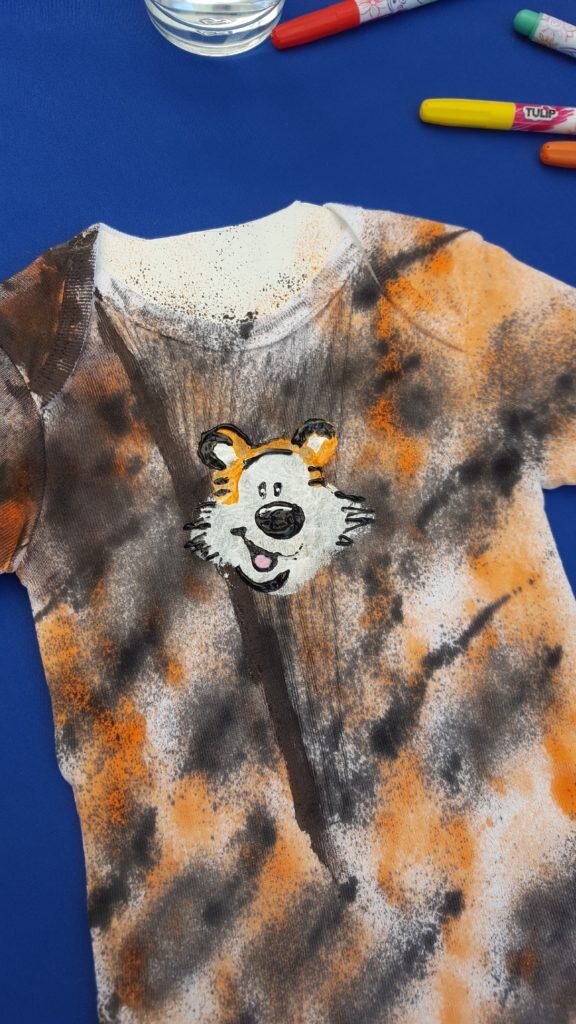
At my friend Morgan’s baby shower they had everyone decorate a onesie for the new baby.  We copied this shamelessly, and Erin’s mom went above and beyond getting the supplies.  We supplied plain white onesies (with a cardboard insert to protect the other side of the fabric), fabric paint, fabric markers, stencils and brushes and let everyone go wild designing a onesie for the little man.  We hung the finished onesies around the tent using clothesline and clothespins.  My onesie color scheme very nearly looked like vomit, but I think I managed to save it by turning it into Hobbes.

Mark’s totoro onesie

Full disclosure this is from my shower – my friend Amy made this winning play doh baby and teddy!

My attempt at covering up my onesie disaster

Timeline

The Month Before

  • Send out invitations
  • Make cinnamon stick candles (in future post)
  • Make flower decorating inserts (in future post)
  • Make potholder favors (if desired)
  • Make table cloths (if desired)

The Day Before

  • Go grocery shopping
  • Wrap favors
  • Arrange Flowers
  • Set tables
  • Set up drink table
  • Set up buffet with dishes – with post it notes in place of food
  • Make quiches
  • Make waffle batter
  • Prepare fruit salad

The Day of

  • Reheat quiches
  • Prepare waffles before/as guests arrive & keep warm
  • Make coulis
  • Make whipped butter
  • Make waffles
  • Set out buffet
  • Set out drink buffet

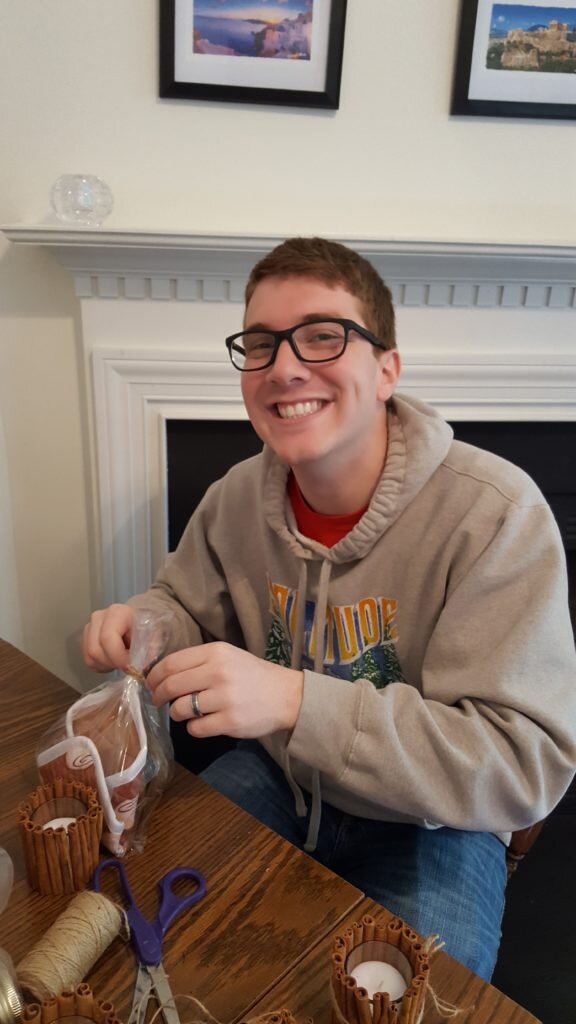
    Mark helps package thank you gifts

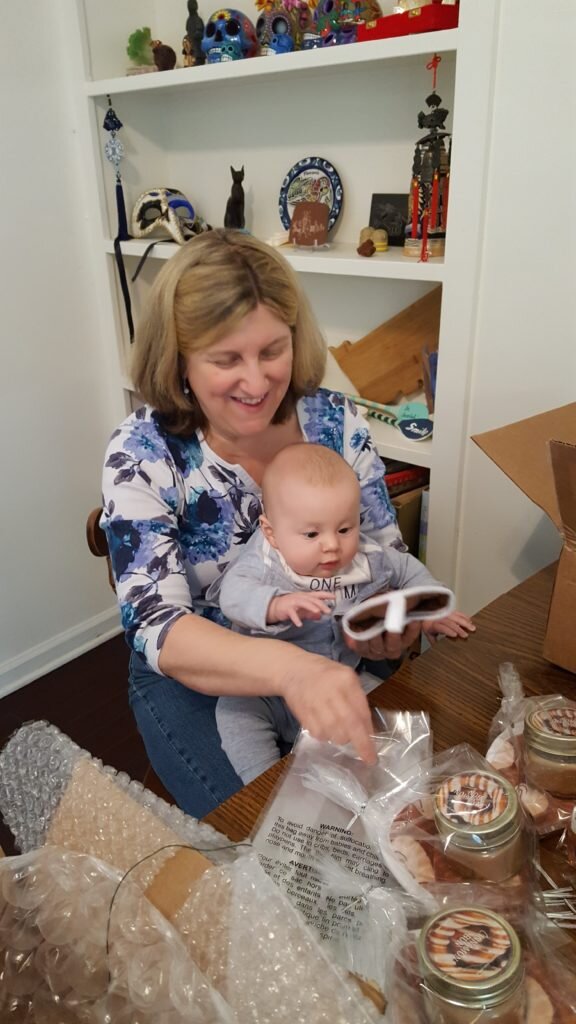
    Julius helps grandma package thank you gifts

Posted in Culinary Delights, Parties | 2 Comments

Tablecloths and Sleep Suits

This weekend was my first Mother’s Day!  We had my parents, grandparents, aunt, uncle and cousin over to celebrate and hang out with Julius.  He was good, as usual, and even took 2 naps!  I think he’s gotten much better at crib sleeping after a couple weeks of sleep training. Did I tell you about sleep training?  If not I must have mentally blocked it out!  What’s sleep training you ask?  Sleep training (also known as the Ferber method, cry it out method, or in our house group torture time method)  is a method where you lay your child down to sleep and don’t pick them up no matter how much they cry until they go to sleep.  I think the name “cry it out” pretty much sums it up.

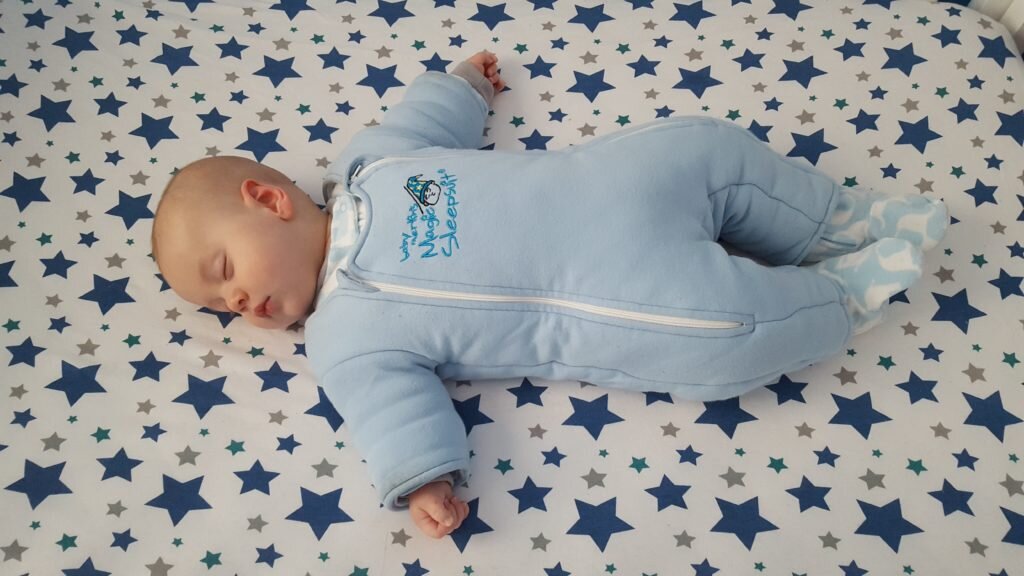
Julius started waking up every two hours a week before we started daycare (and before I had to go back to work).  Until this point he was a very, very good baby thanks at least partially (and potentially entirely) to the Baby Merlin Magic Sleepsuit.  This is a ridiculous looking padded sleep suit that lessens the startle reflex but allows babies to move their arms and legs around.  For Julius, it allowed him to suck on his fingers at night to comfort himself.  Many people swear to swaddling, but Julius hated having his hands tucked away from him.  (Even in the womb he sucked his thumb!)  My friend Maren told me about the sleep suit, and now I buy one for every baby shower I go to.  (I am not getting paid to tell you this but seriously, if you have an infant nearby, go buy one you’ll thank me later.)

Anyway this Magic Sleepsuit started losing effectiveness recently.  We originally believed it was due to teething, but I’m not sure anymore.  Enter sleep training.  The first night was truly horrible, listening to the little guy cry for several hours, but every night since has gotten better.  Sometimes he doesn’t cry at all.  Sometimes he wakes up in the middle of the night and cries.  But it definitely seems to be working, even though it is still torture for me to listen to him cry for 10 solid minutes in the middle of the night.

Sleeping baby (just days before he stopped sleeping in the suit!)

Speaking of sleep – did I mention that we don’t have naptime at work?  I mean seriously.  I am still off caffeine since I’m nursing (not that I was a big drinker before) so it has been a struggle for me to stay awake at work.  I find myself frequently nodding off in the nursing mom’s room.  Perhaps instead of focusing on getting Julius’ nap schedule in order before daycare, I should have focused on getting my lack of nap schedule in order.

The good news about the project I’m going to show you today is that you can finish it in a single naptime (as long as you skip the nap yourself)!  For all my parties I like to cover my six foot folding tables with tablecloths.  It makes things look so much classier.  The problem is that most commercial tablecloths are slightly too wide for the folding tables, so they drape too far down the sides of the tables and people pull on the excess fabric when they sit down.  My tablecloths not only have the perfect drop length but they are super easy to wash and come out wrinkle free from the dryer.  On top of that, they are dirt cheap.  I buy cotton polyester broadcloth from Fabric Wholesale Direct for $2.25 a yard, a grand total of $6.75 a tablecloth.

Folding Table Cloths

What You’ll Need:

  • 3 yards of 60″ wide cotton polyester broadcloth from https://www.fabricwholesaledirect.com/
  • polyester thread to match
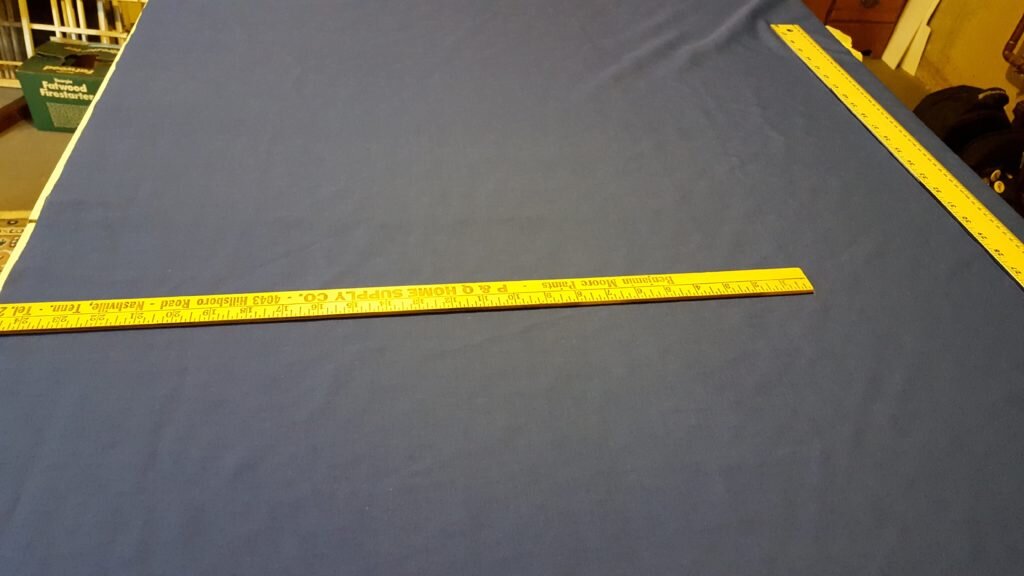
  1. Cut a 102″ length of broadcloth.

    Cut 102″ length of 60″ wide fabric.

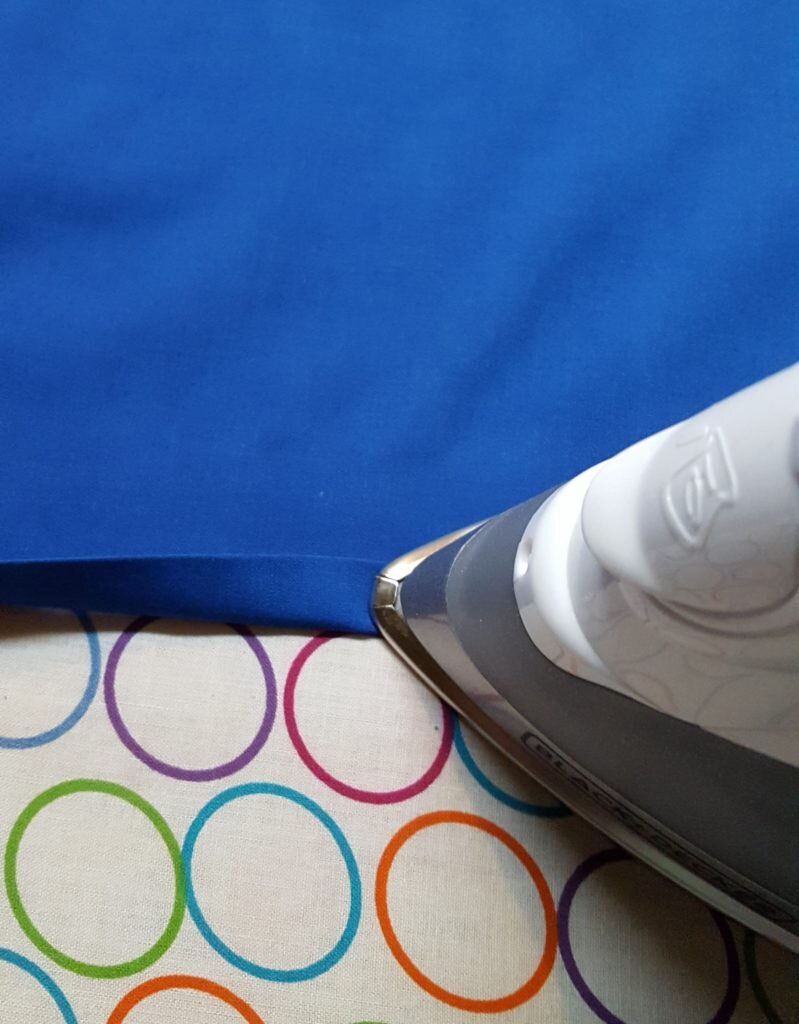
  2. On one side of fabric fold under 1/2″ of broadcloth, press.  Fold over another 1/2″ to form a rolled seam.  Press & pin.

    Fold an iron a 1/2″ turned hem.

  3. Repeat step 2 with other 3 sides of fabric.  At corners, I simply fold the corner of the fabric under so the unfinished edge isn’t showing.  But if you’re more motivated you can add a mitered corner.
  4. Stitch around the entire perimeter of fabric, 1mm from the fold line.

    Tablecloths covering two 6″ folding tables.

Posted in Crafts & Sewing | Leave a comment

Potholder

I survived my first week back to work!  It was about what you’d expect after being home for 6 months snuggling with a little cuddle bear.  That is to say that on the one hand there was no screaming (at least not last week) but on the other hand you can’t nap at your desk. It’s funny, the first time I walked up the three flights of stairs to my office I was shocked that I wasn’t out of breath!  Until now that I have my daily work routine back for comparison, I didn’t realize just how taxing carrying a baby was. How crazy.

While I was working, Julius went for his first “week” of daycare.  Week is in big air quotes because Thursday he was picked up early because he’d contracted pink eye and Friday he stayed home and was diagnosed with croup.  Two diseases in one week!  Apparently this is not a record of any sort.  Our pediatrician actually laughed out loud when Will told her that it was Julius’ first week of daycare.  She said that he’d be back in her office every week for a year, then he’d have perfect attendance come kindergarten.  Hopefully it’s not actually that bad!

Happy half-birthday baby boy!

Today is Julius’ half birthday!  Let’s hope he gets the gift of a full night of restful slumber!  He needs it after all that coughing…  But don’t worry, even if your little snuggler is sleeping poorly, I’ve got a quick project that will take less than an hour for times when you’re dying to get those creative juices flowing.  Make yourself a quick potholder!   You can use it to retrieve freezer aisle delicacies right from the oven, or nuclear temperature meals hot from the microwave.  (Or is that just us?!)  You can even make one to match the oven mitt pattern I posted!

Quilted Potholder
What You’ll Need:

  • 1 yard of wide bias tape (double fold bias tape)
  • 1/4 yd cotton material for front
  • 1/4 yd cotton material for back
  • 1/4 yd insulbright thermal material
  • 1/4 yd  warm and natural cotton batting
  1. Cut an 8×8 square of each front material, back material, thermal material and batting.
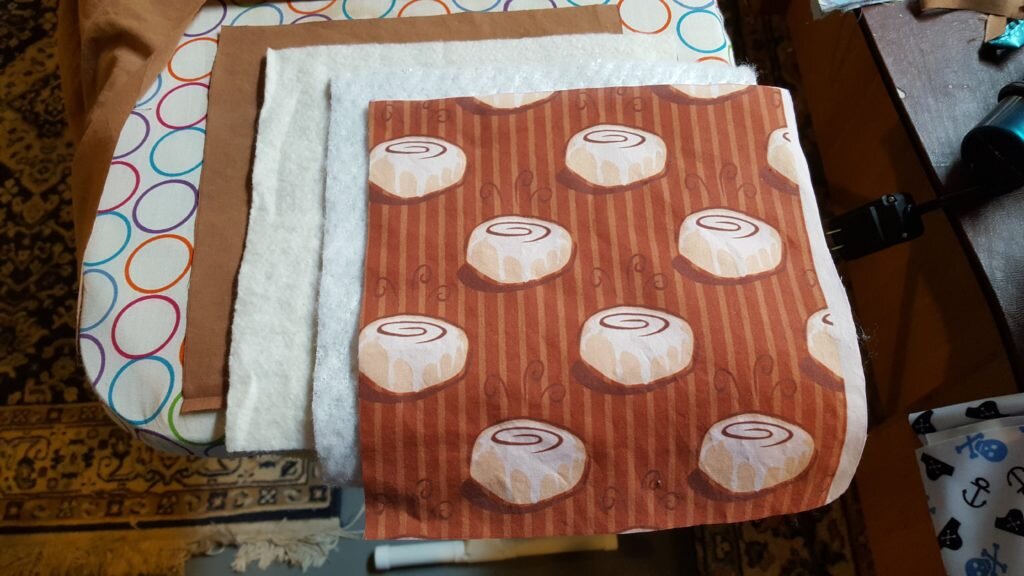
  2. Stack squares together in this order: back material (right side down),  thermal material, batting, front material (right side up).  Pin.

    Cut 8″x8″ squares of fabric and batting. Stack back fabric (right side down), batting, thermal fabric and front fabric (right side up).

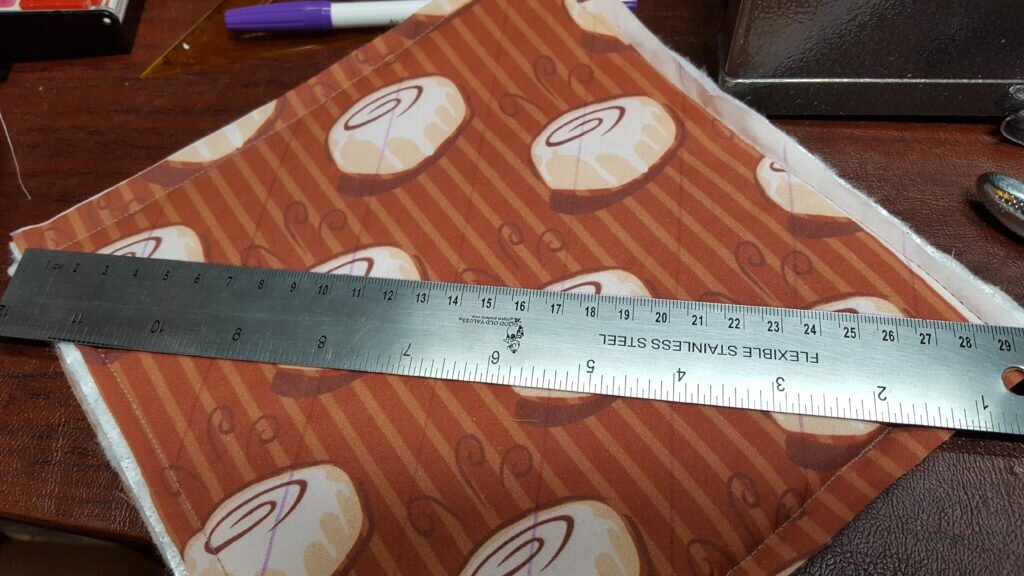
  3. Using a ruler, draw lines 1″ apart along the bias starting at the center.
  4. Draw more lines perpendicular to the first set of lines.

    Draw lines 1″ apart along the bias

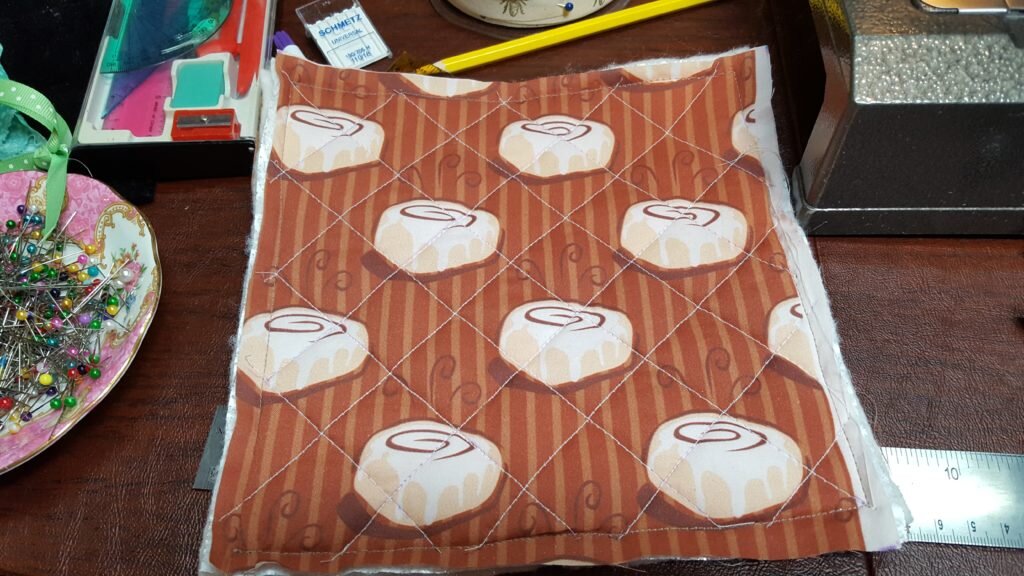
  5. Starting at the center line and using a long stitch, stitch along the bias lines you drew.

    Stitch along the lines you drew.

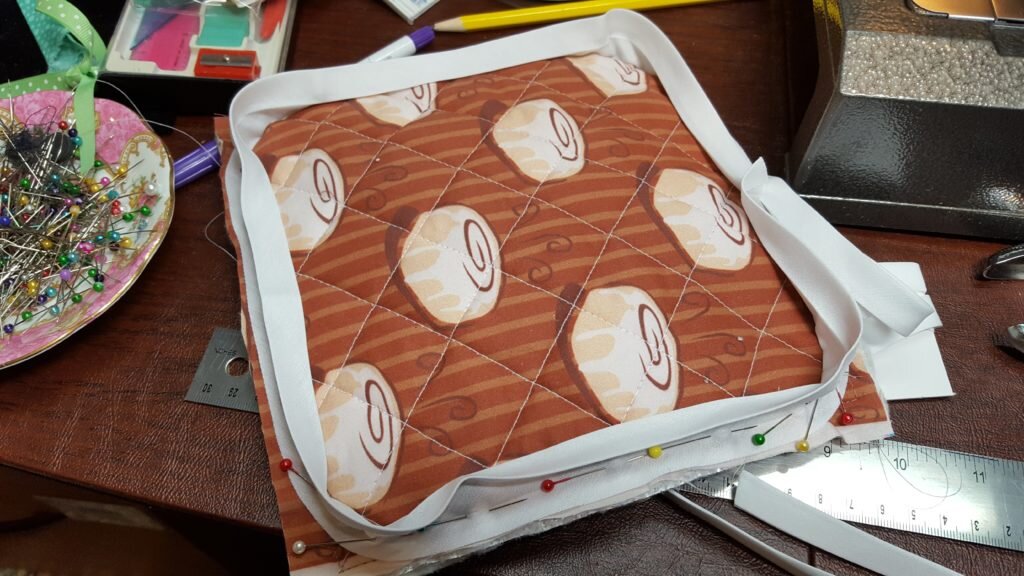
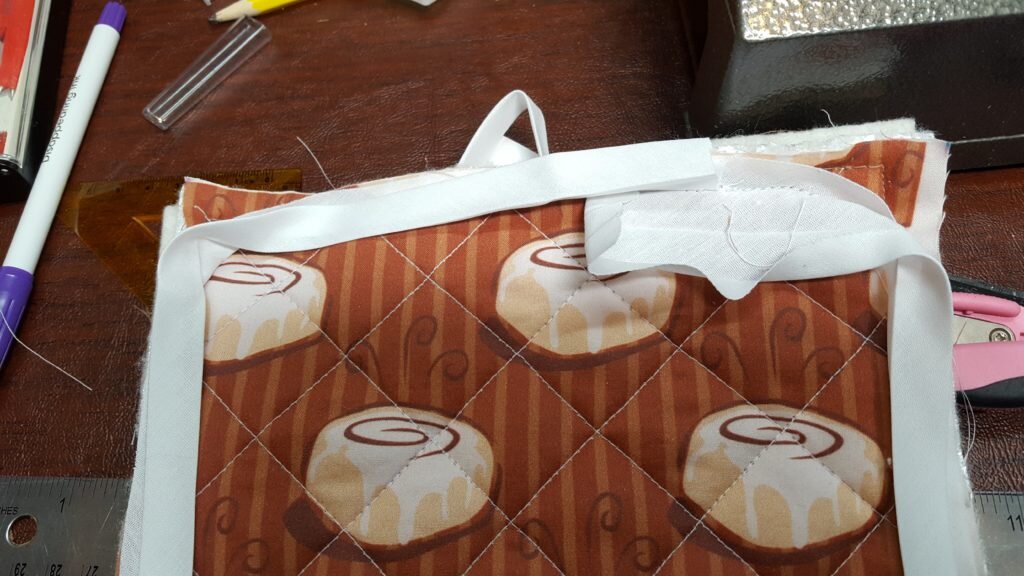
  6. Open out bias tape.  Pin fold of bias tape along the 1/2″ seam allowance mark of the potholder front, right sides together.  At corners of the potholder, curve the bias tape. When you reach the end of the tape, turn under 1/4″ of an inch and overlap with the beginning of the tape.  Stitch along fold line.

    Pin bias tape around edge of potholder, curving at corners.

    Close up of tape edges overlapping. Undermost edge is folded under.

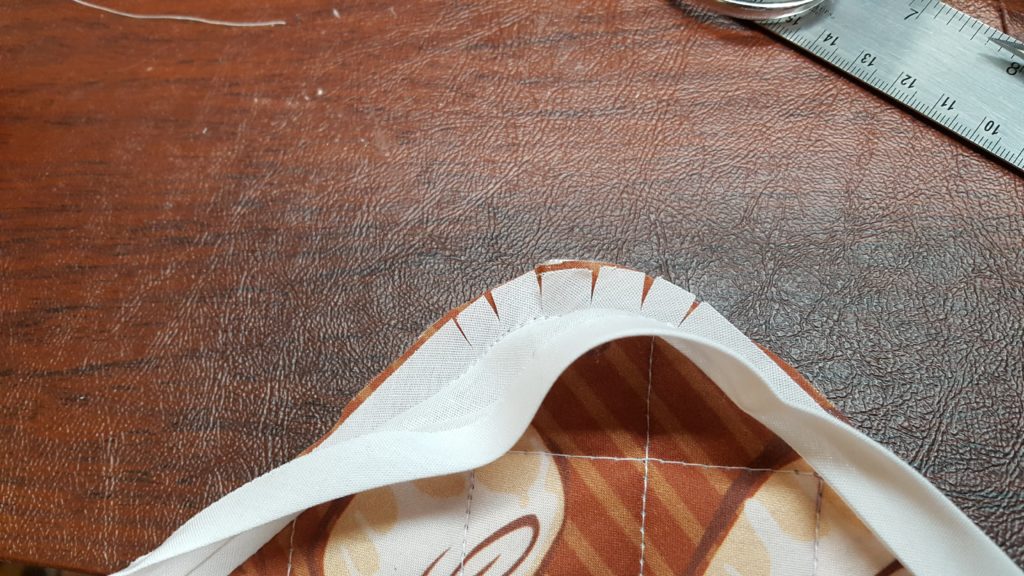
  7. Trim the corners of the potholder to 1/2″ curves.  Clip curves of bias tape.

    Trim the corners and clip curves of the bias tape.

  8. Fold bias tape over the unfinished edge of the potholder.
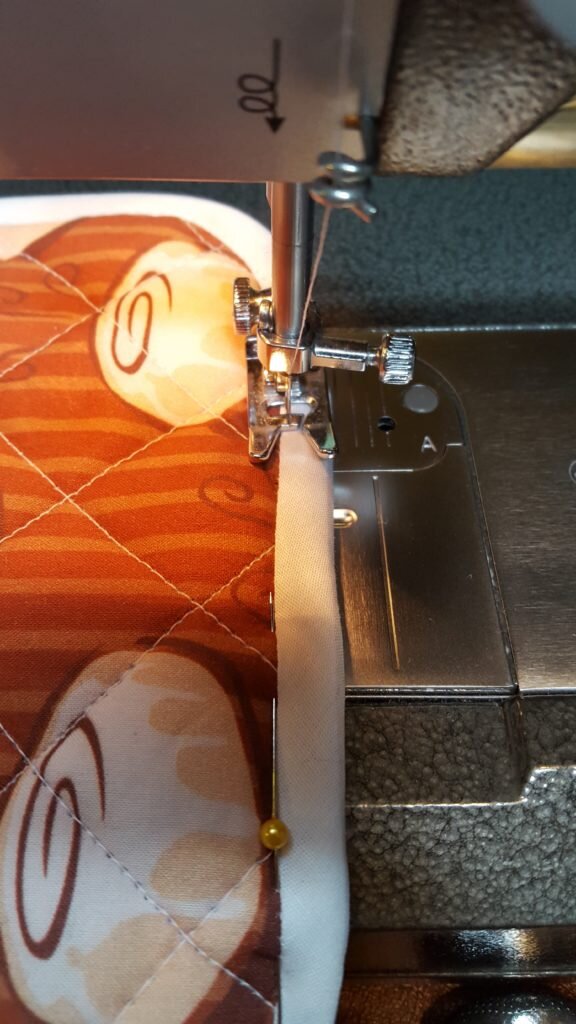
  9. Tuck unfinished edge of bias tape back at fold.  At the overlap of the tape, make sure to fold the unfinished edge of both pieces of tape.  Pin bias tape through front side of potholder.

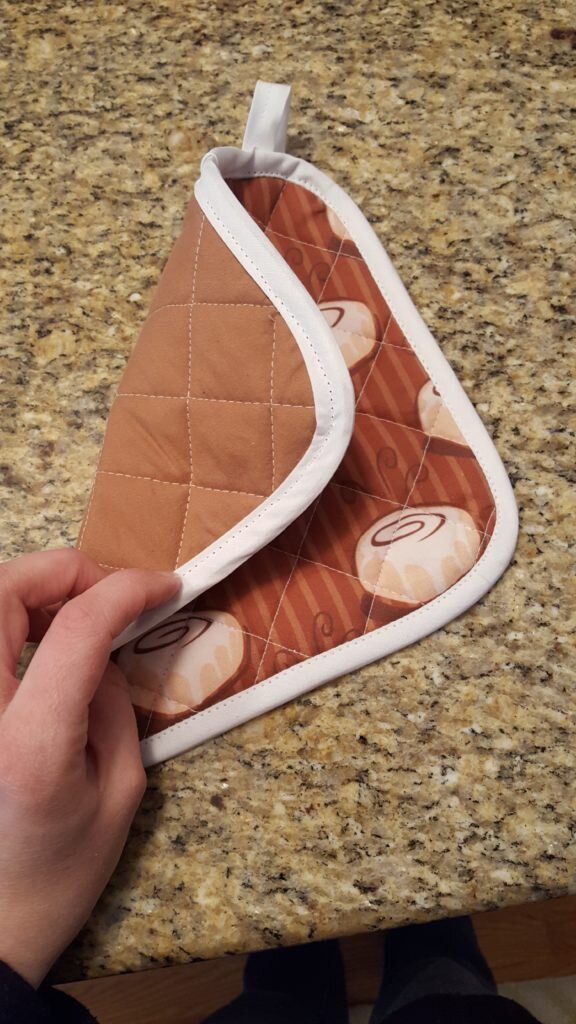
    Fold bias tape over unfinished edge. Pin through the front side of fabric, making sure you’ll catch the bias tape on the reverse side. Stitch close to stitching on front.

  10. Cut a 4″ piece of bias tape.  Leave folded and stitch 1mm from the unfinished edge to form a casing.
  11. Fold casing in half and insert unfinished edges under the unstitched edge of bias tape near one of the top corners of the potholder.
  12. Holding the unfinished edge securely under the bias tape, fold the casing up so the loop projects above the top of the potholder.  Pin.
  13. On right side of potholder, stitch 1mm from the original stitching of the bias tape to secure the bias tape and loop on the back side of potholder.

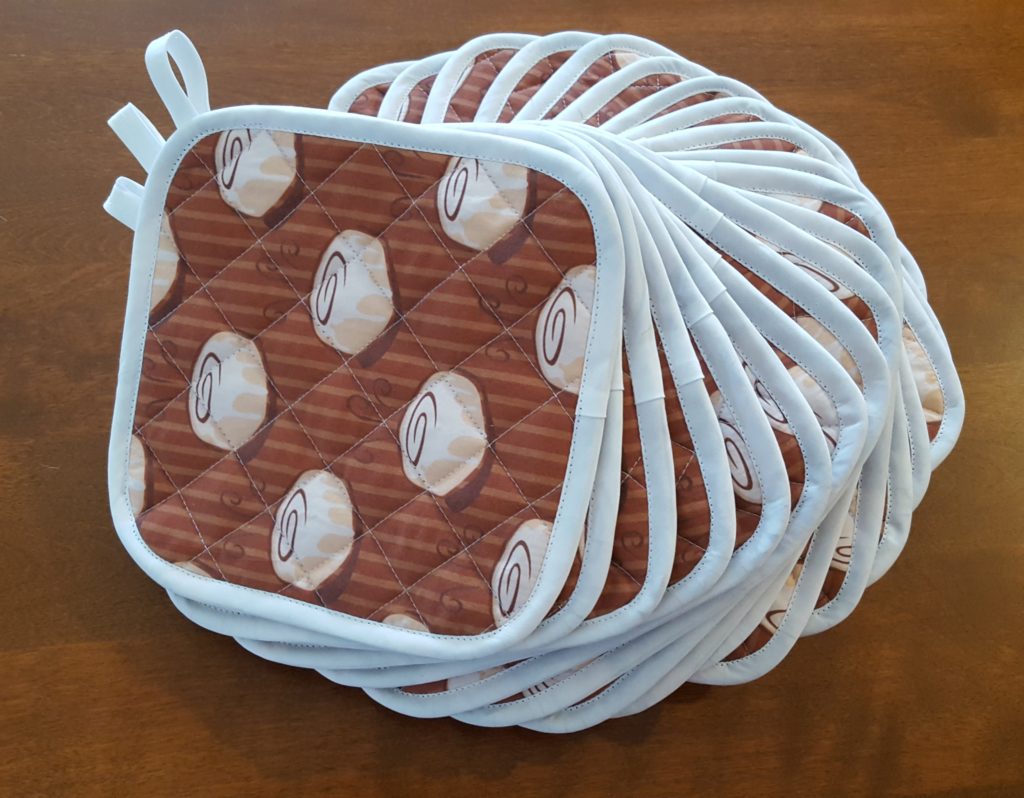
A stack of 21 potholders I made for Erin’s shower! (Post coming soon!)

Posted in Crafts & Sewing | 2 Comments

Upcycled Work Out Shirt

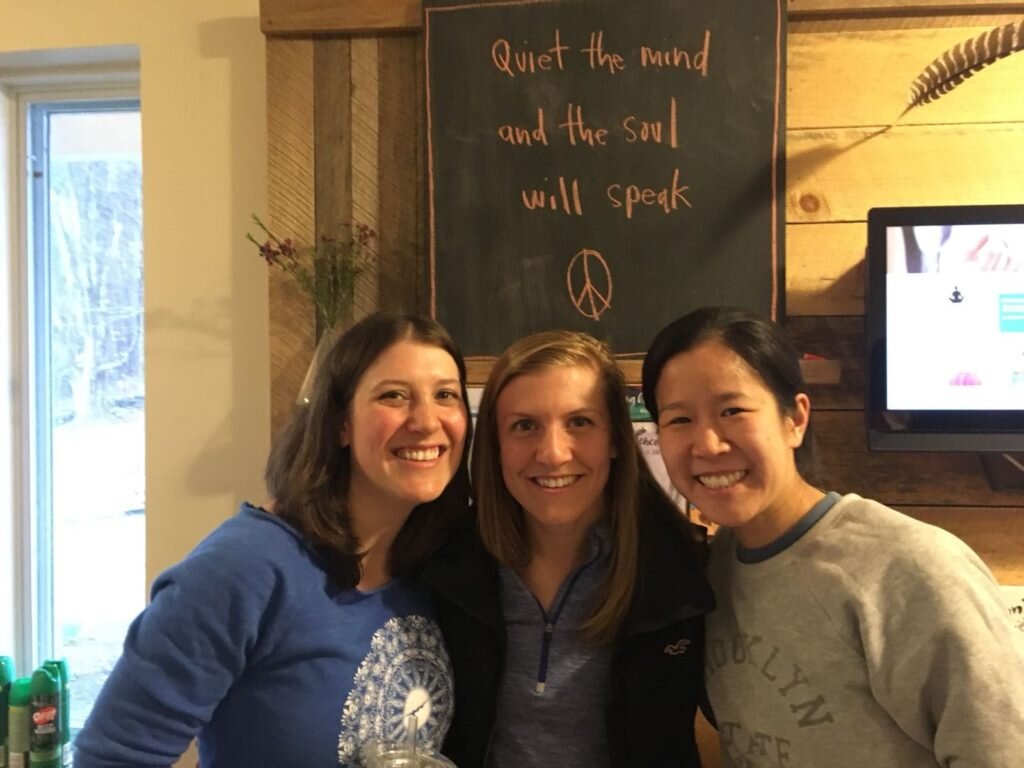
Mandy, Amy and I went to our first ever yoga and meditation retreat this weekend.  It was great fun and wholly refreshing.  I can’t wait to do another one!  This was also the first weekend I’ve spent away from Julius.  It seems Will and Julius got along fine without me (or as Will says “survived”), though Will mentioned it was very tiring.   Will sadly didn’t send me any pictures of Julius (he admitted that at one point he planned to take some pictures, but was embarrassed to send them when he realized Julius was still in his pjs and it was late afternoon).  At one point Mandy caught me back in our room watching videos I’d recorded of the little guy.

Yoga retreat

Did I mention that tomorrow is my first day back at work?  Scary, right?!  I can’t believe it’s already been nearly 6 months since Julius was born.  For the last couple months I have been communicating with our daycare director on ways to ease Julius’ transition to daycare.  Last Tuesday and Wednesday we agreed I’d bring him in for a bit to get to know the teachers and his new friends.  I guess I somehow hadn’t wrapped my head around the idea of dropping him off, so when I asked how long I should stay and she mentioned that leaving him for a couple hours would be good, I was slightly thrown off.  (Though not disappointed since I had plenty of things I could get done at home.)  Before leaving I glanced through the glass door into the infant room and saw how he was smiling and playing with some toys, and remarked to the director, “he looks so happy”!  A millisecond later I burst out crying.

How could you not miss this face?!

I didn’t think I’d be the type of mom to produce waterworks on my son’s first day at daycare.  I told the teachers just that while I stood there blubbering and apologizing as the director searched for tissues.  Their response was simply “they all cry”.  So those of you with children not yet in daycare – you’ve been warned!

Luckily it was just a one day waterworks session and I haven’t cried the next two times I dropped him off.  And more importantly Julius has been getting along just fine at daycare and he looks very happy and smiley every time I drop him off or pick him up!

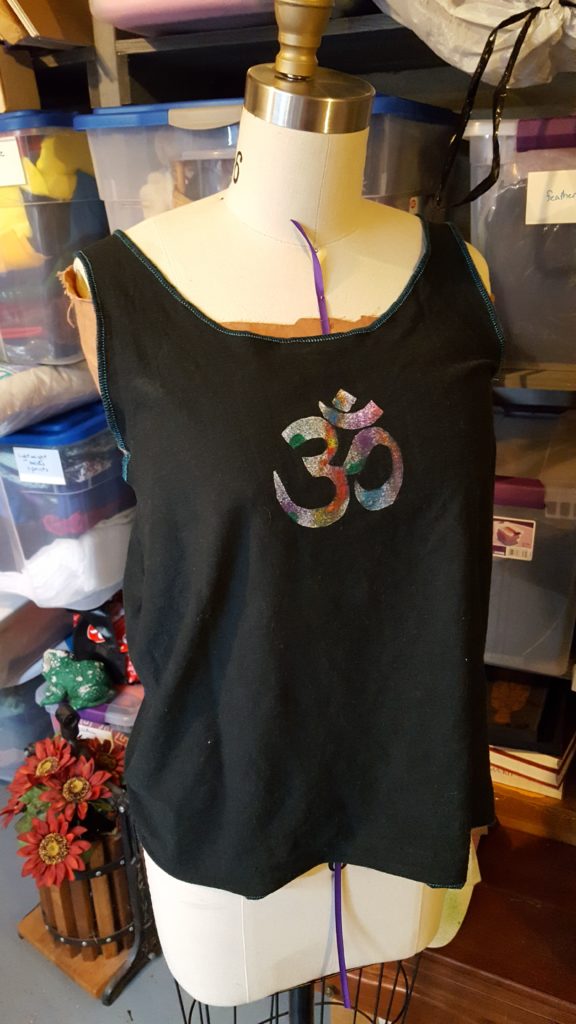
During one of the 2 hour sessions I left Julius at daycare last week I whipped up something I’ve wanted to try for a while – a t-shirt turned work out shirt.  Do you have 1000 free t-shirts from high school or college that you really don’t need anymore?  (My mom recently cleaned out all the remaining junk from our rooms and forced us to take our keepsakes, so I now have an embarrassing number of shirts.)  This is a great way to turn your t-shirt into something slightly different that is totally gym or yoga appropriate.  I wore mine to the retreat Friday.

Upcycled Racerback Tank from T-shirt

What you’ll need:

  • T-shirt
  • tailor’s chalk
  • optional fabric paints & contact paper
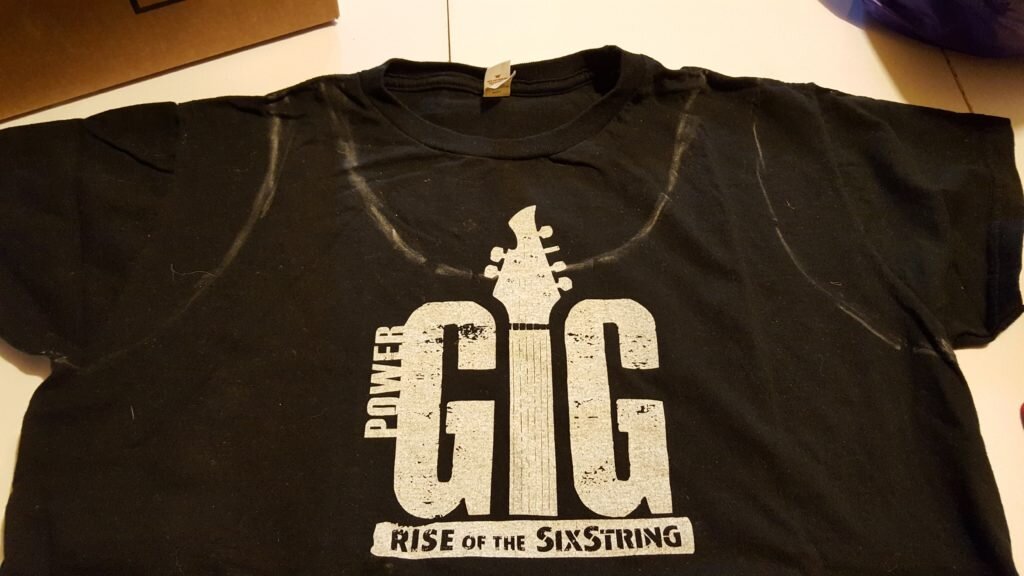
  1. Lay your tshirt flat on a table and mark 2 inches in from the sleeve shoulder seam and a half inch below the sleeve armpit seam.
  2. Draw a curve in the shape of the  tshirt armscye connecting the shoulder seam to the armpit seam.
  3. Mark 1.5 inches in from your curves, along the shoulder seams, and 4″ below the neckline at the center of the shirt.
  4. Draw a u-shaped curve for the neckline connecting the marks you made in step 3.

    Mark new armscye and neckline

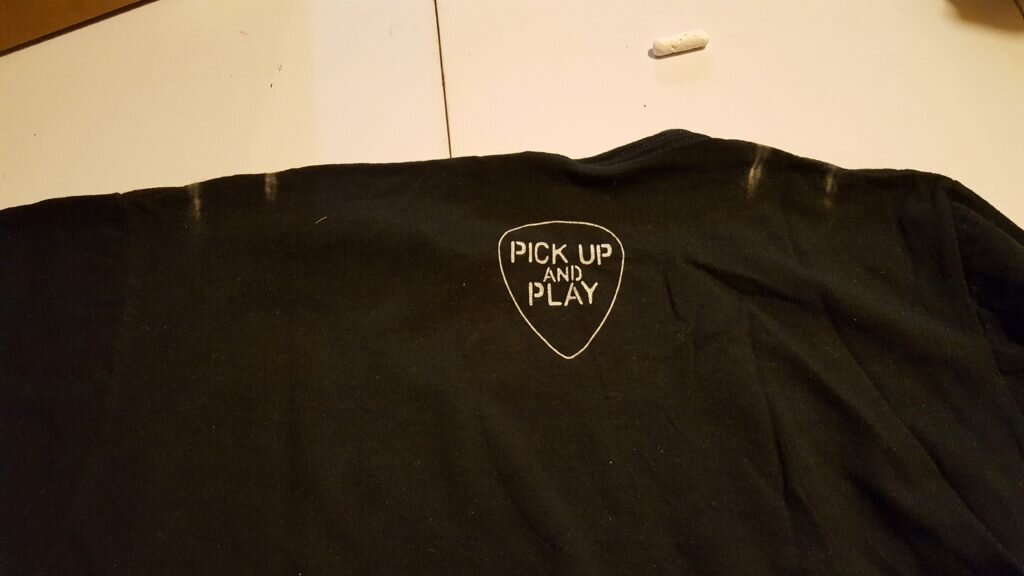
  5. Flip shirt over and move your mark at the shoulder and armpit  so it shows onto the back of the shirt.

    Transfer shoulder strap markings to back side of shirt

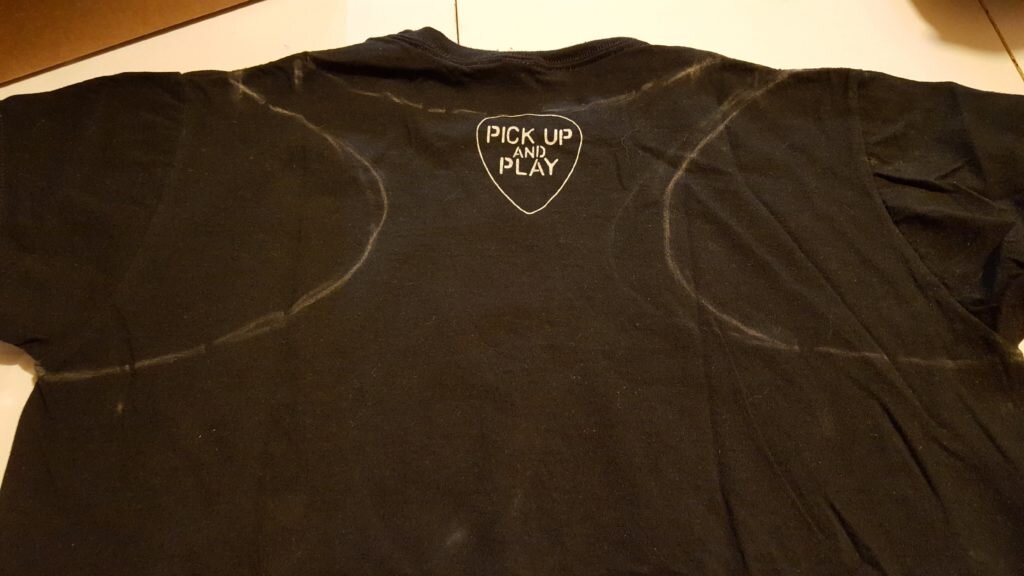
  6. Draw a deep curve connecting the outer mark on the shoulder to the mark below the armpit.
  7. Mark 2″ below the neckline at the center of the shirt.  Connect inner mark on shoulders with center mark to form a shallow neckline in back.

    Mark racerback shape.

  8. Cut along the markings you have made, being careful not to cut through the wrong side of the shirt.

    Cut along markings.

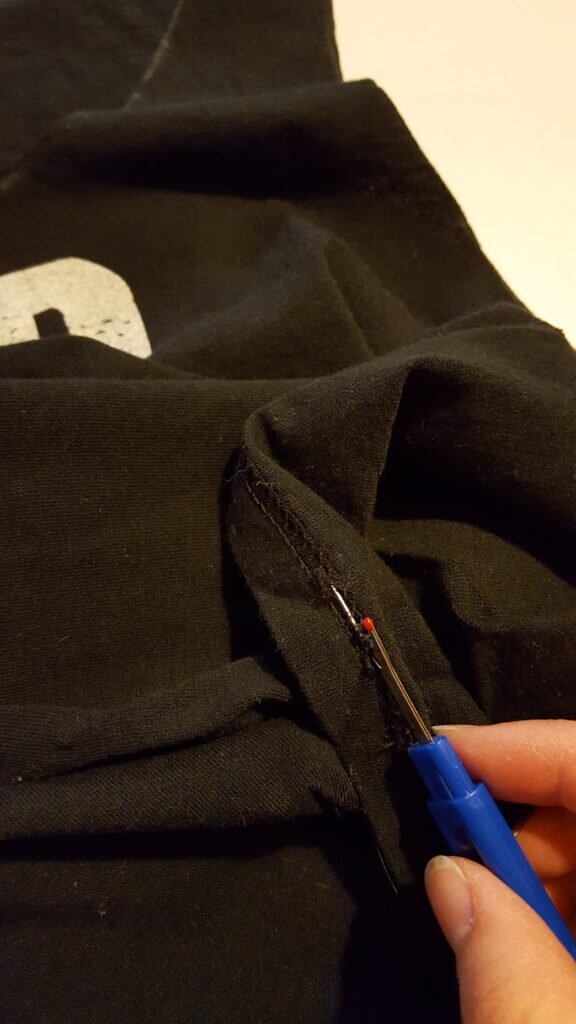
  9. Stitch rip the hem of the shirt, open it up and iron it flat to add some additional length to the tank (this is optional, but I always want more length in my shirts).

    Stitch rip the hem of the shirt

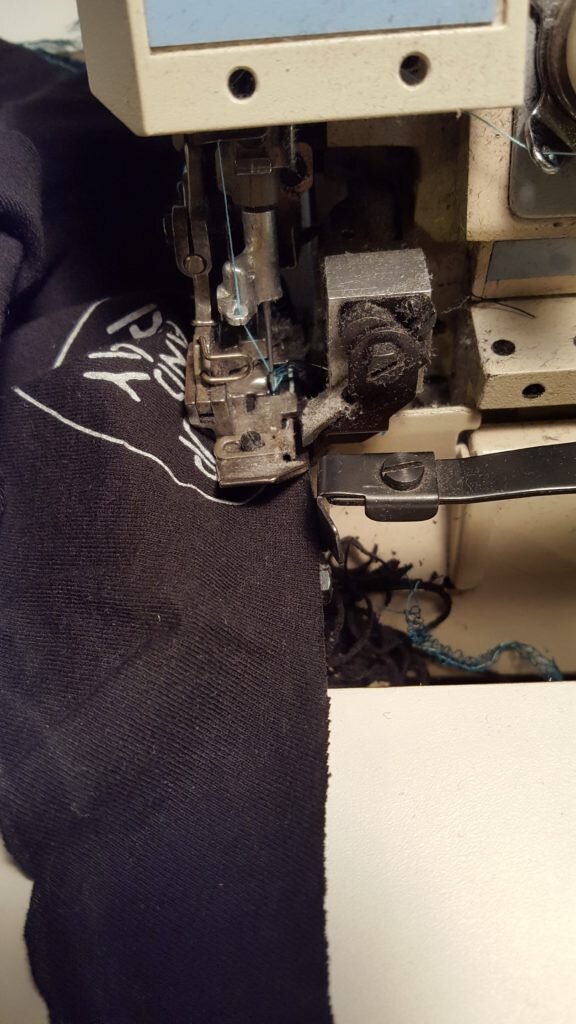
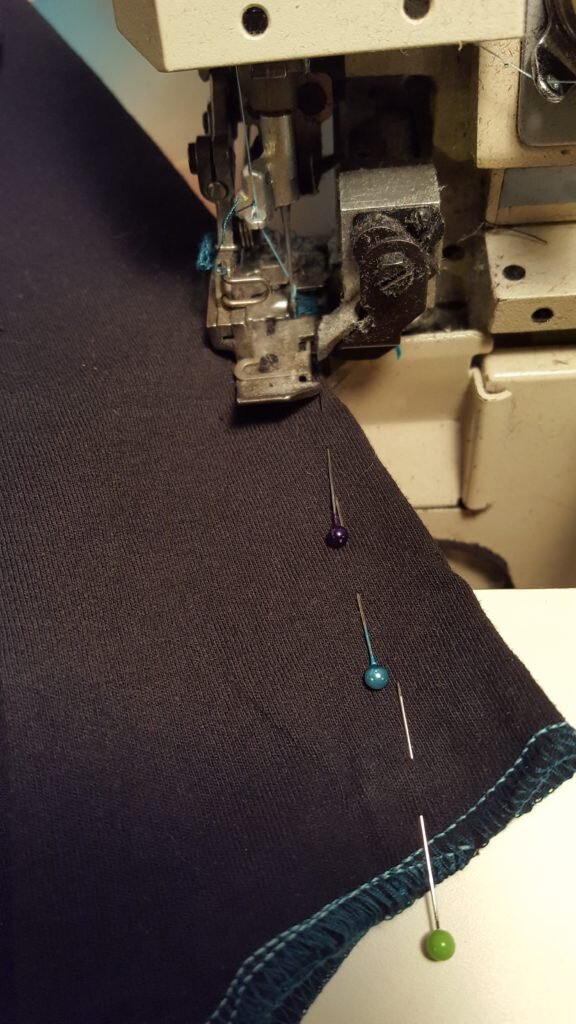
  10. Serge along all the unfinished edges.  (If you don’t have a serger you can use a long zigzag stitch instead).

    Serge all unfinished edges

  11. Just below the armpits form a dart 1″ wide and 3″ long.  Note, I formed this hem on the “outside” of my t-shirt because I wanted to turn it inside out so I could add my own decoration.
  12. Serge the dart, or zig zag stitch and cut excess dart material.

    Add dart to sides of shirt

To decorate

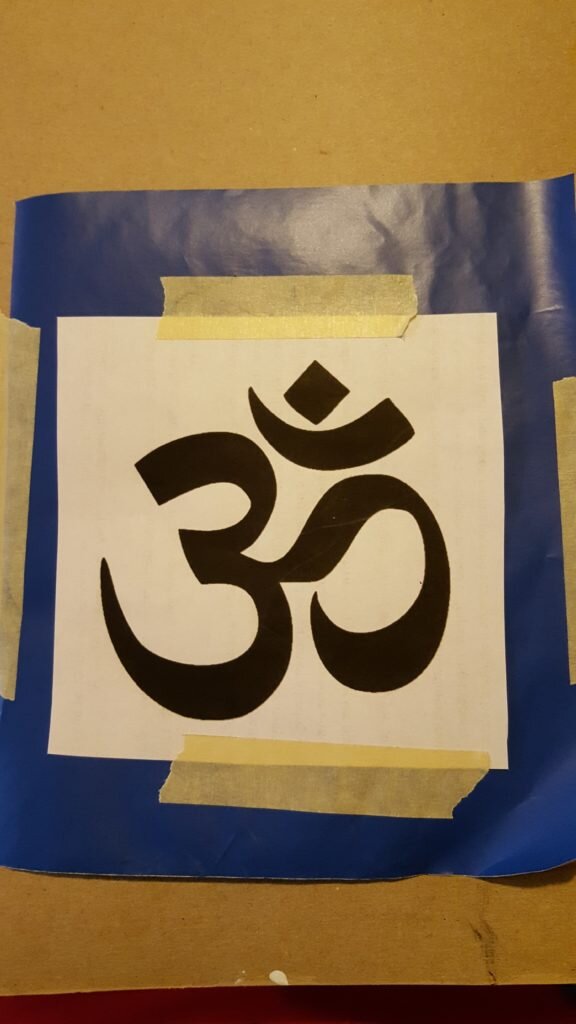
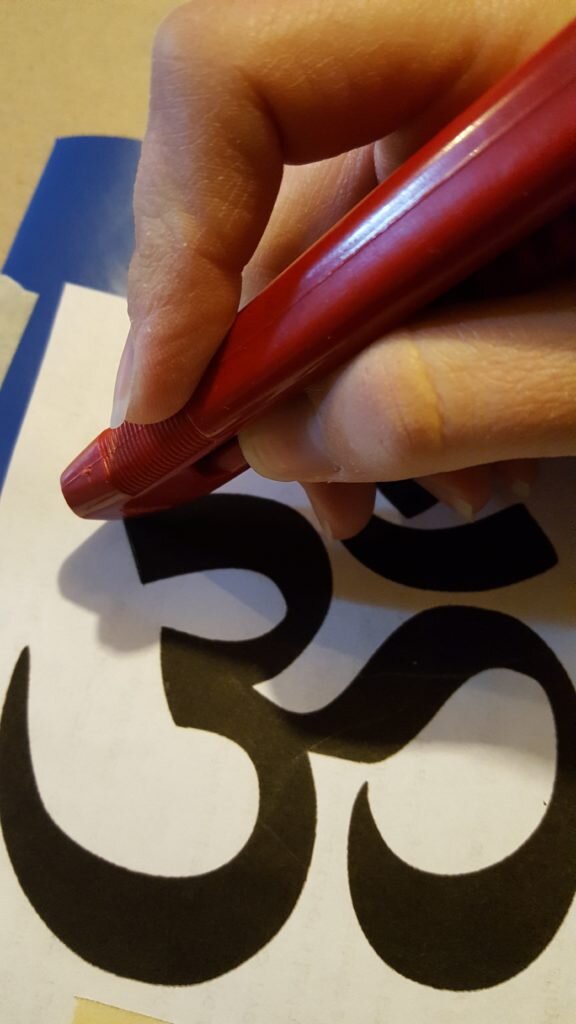
  1. Print symbol of your choice onto paper.
  2. Tape print out to contact paper.

    Print symbol and affix to contact paper.

  3. Using an X-acto knife, cut symbol into contact paper.

    Trace shape with X-acto knife.

  4. Stick contact paper onto shirt in desired location.
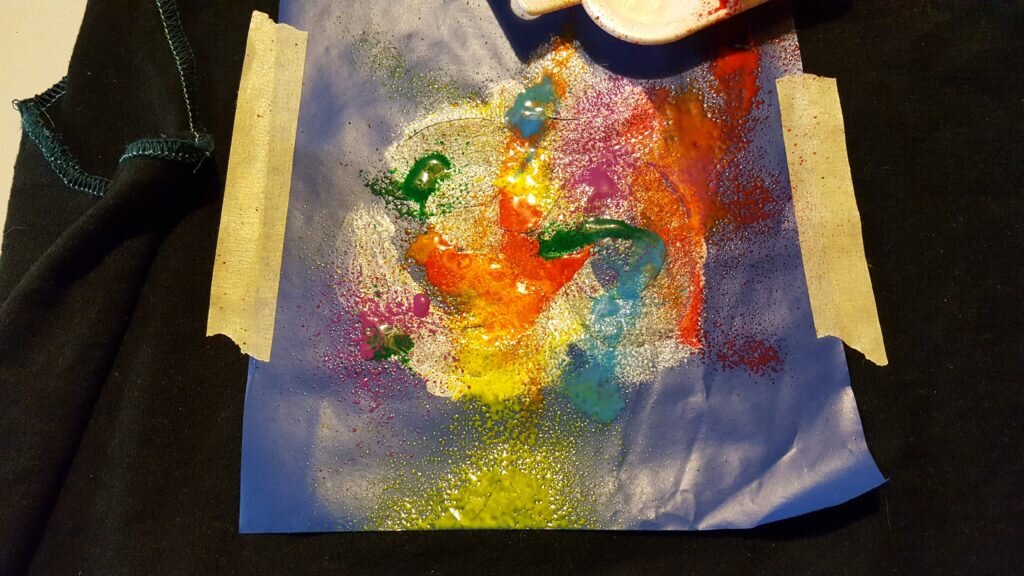
  5. Fabric paint on top of contact paper stencil.  Let dry.

    Affix stencil to shirt and paint over it.

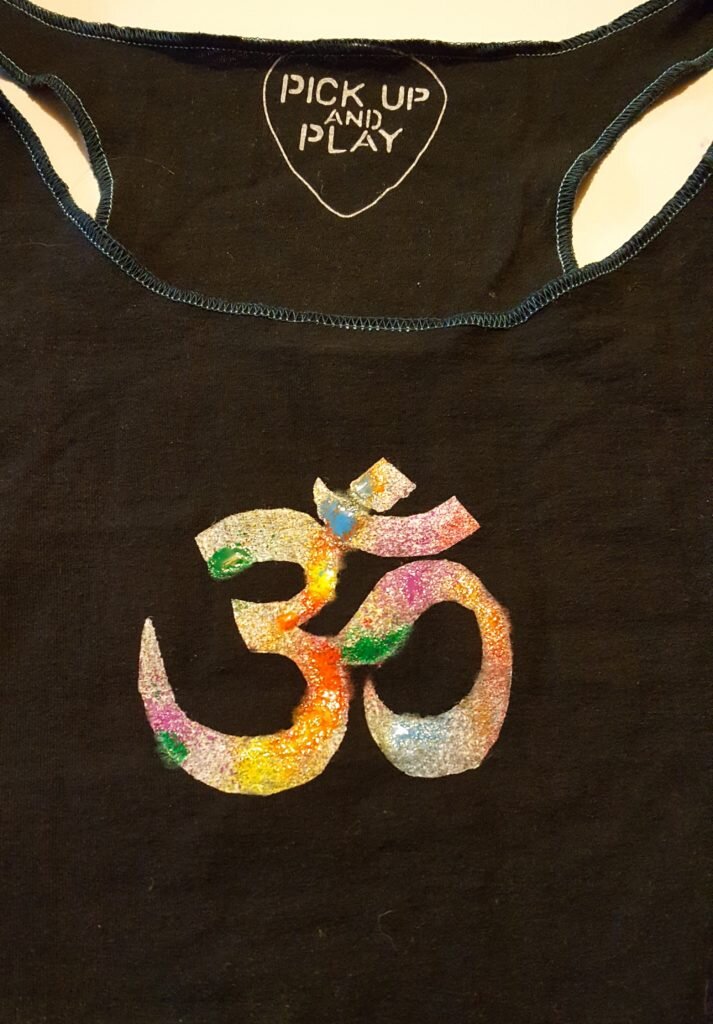
  6. Remove stencil and launder as per package instructions.

    Let dry and remove stencil

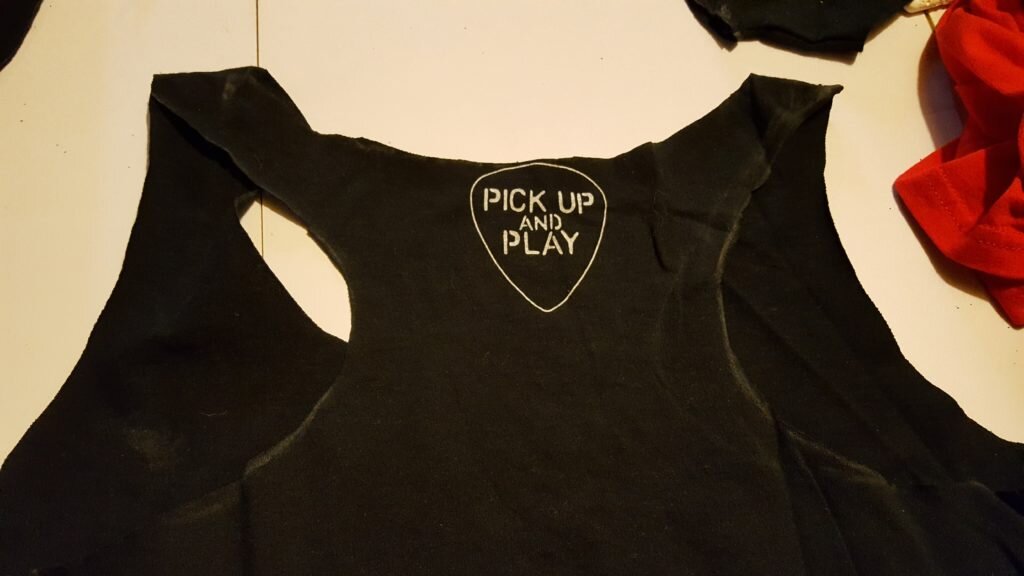
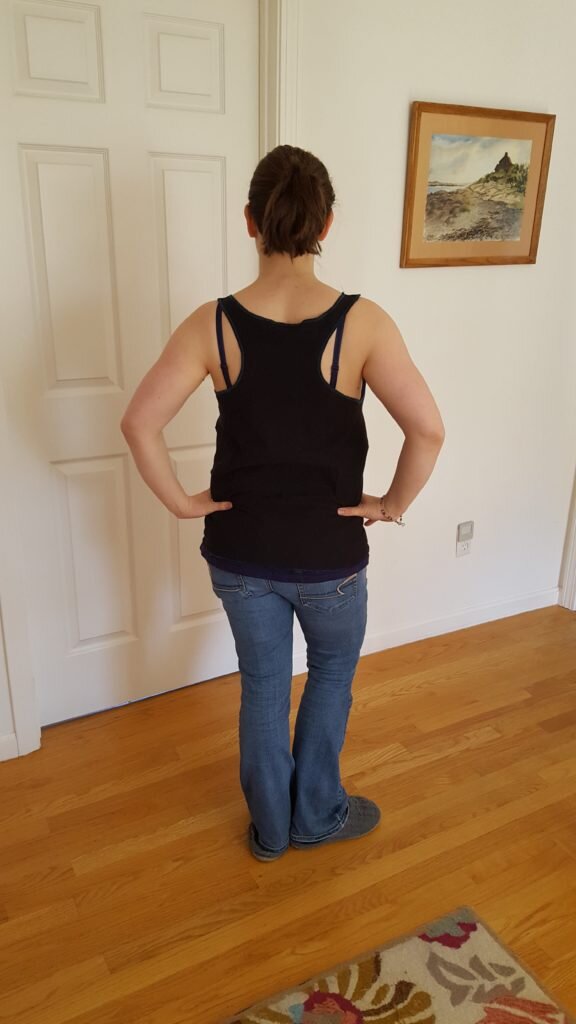
    Here’s what it looked like before adding the fabric paint.

    Back of shirt


Posted in Crafts & Sewing | Leave a comment

Crinkle, crinkle little star

Happy Earth day (one day late) everyone!  I hope you spent the day doing something green!  Or at least made an extra effort to recycle!  Will and I were less Earth friendly than usual yesterday and spent the entire day driving back home from North Carolina burning fossil fuels and wasting to-go containers.  I’ll have to atone for that later.

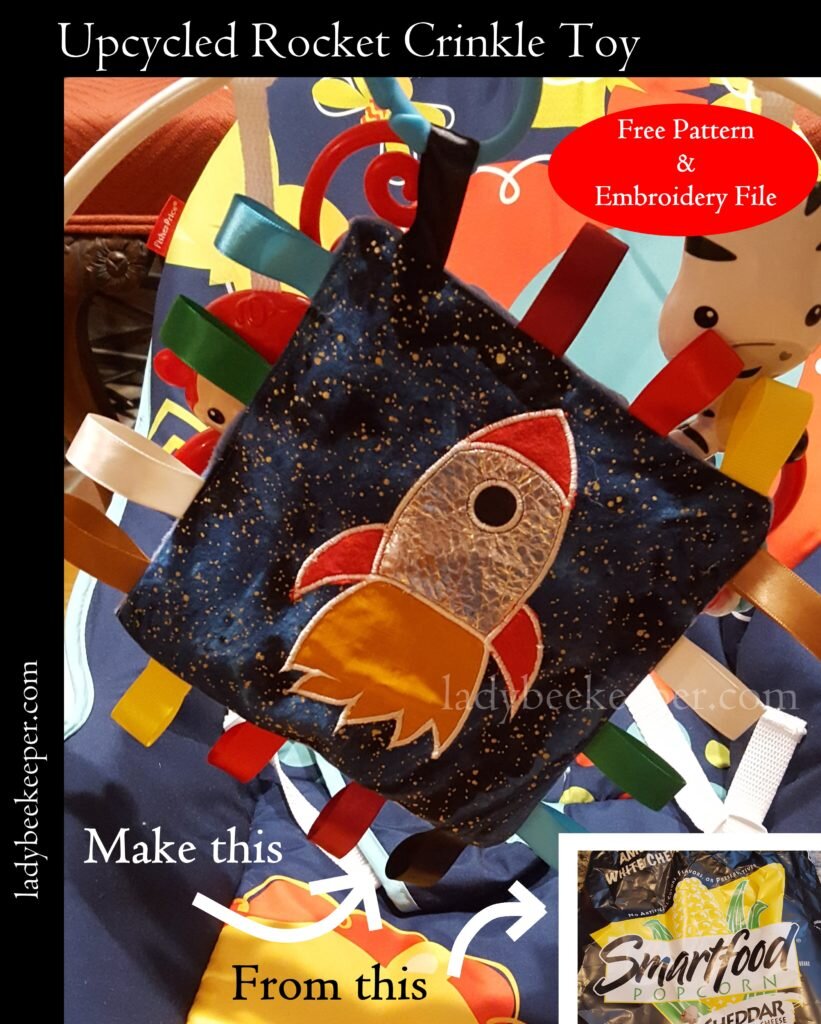
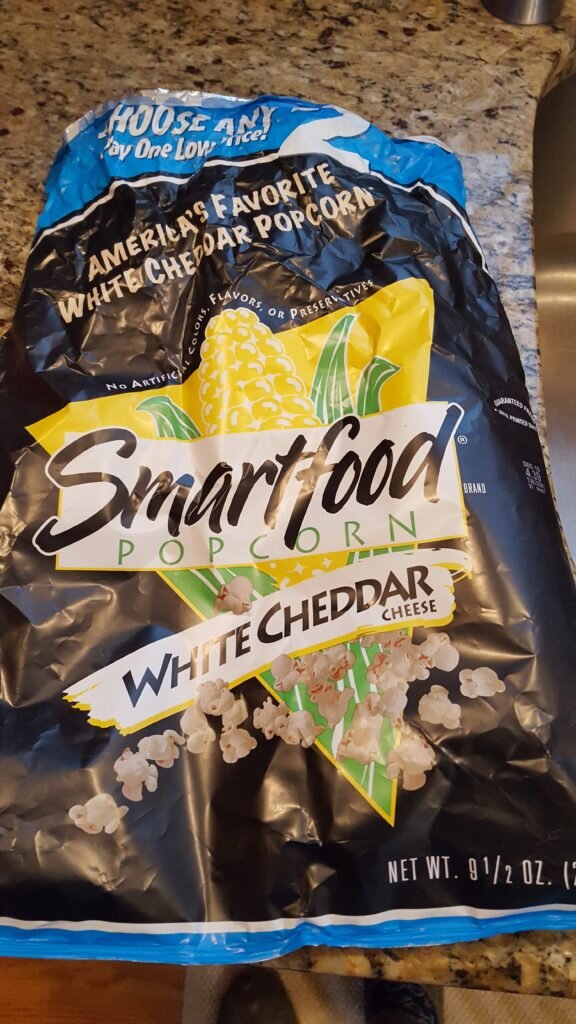
Why were we driving Sunday, you ask?  We spent the weekend in North Carolina for Erin’s baby shower!  I’ll have a post about that soon, but in the meantime I can tell you that it was lots of fun, and the party went more smooth than ever thanks to Erin’s wonderful mom and sister in law and my wonderful mom and sister!  I’m excited to show you some photos from the party in a few weeks.  I also made Erin a couple blog worthy items.  The first were cloth wipes – they are going to try cloth diapering!  Yay for going green!  And the second was a crinkle toy that I up cycled from smartfood popcorn bags (yay recycling!)

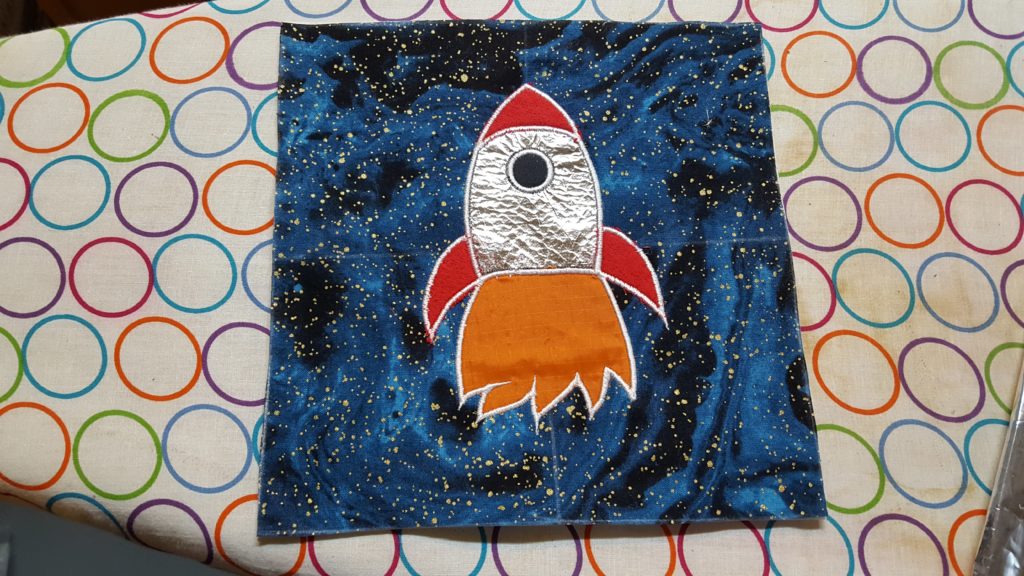
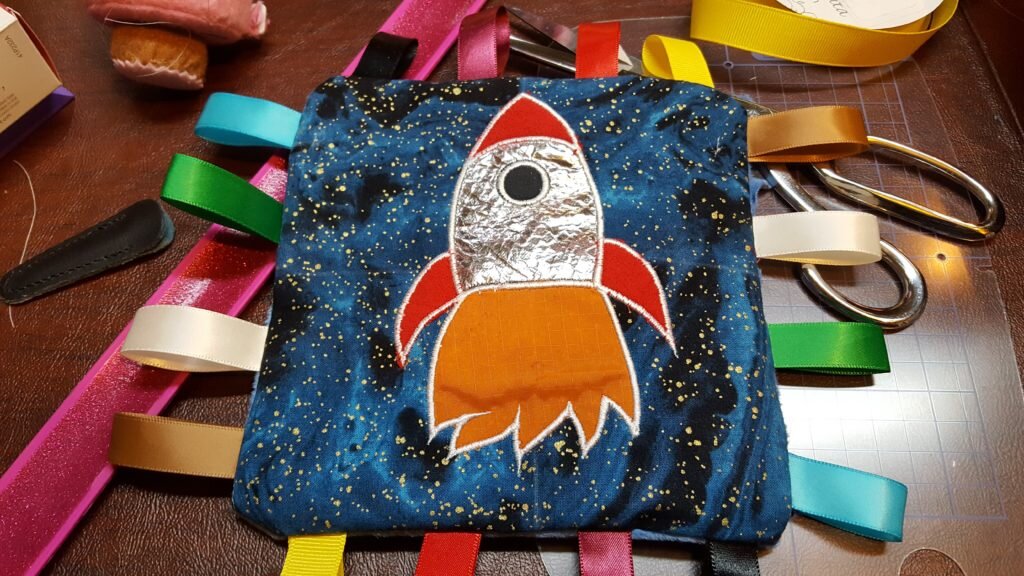
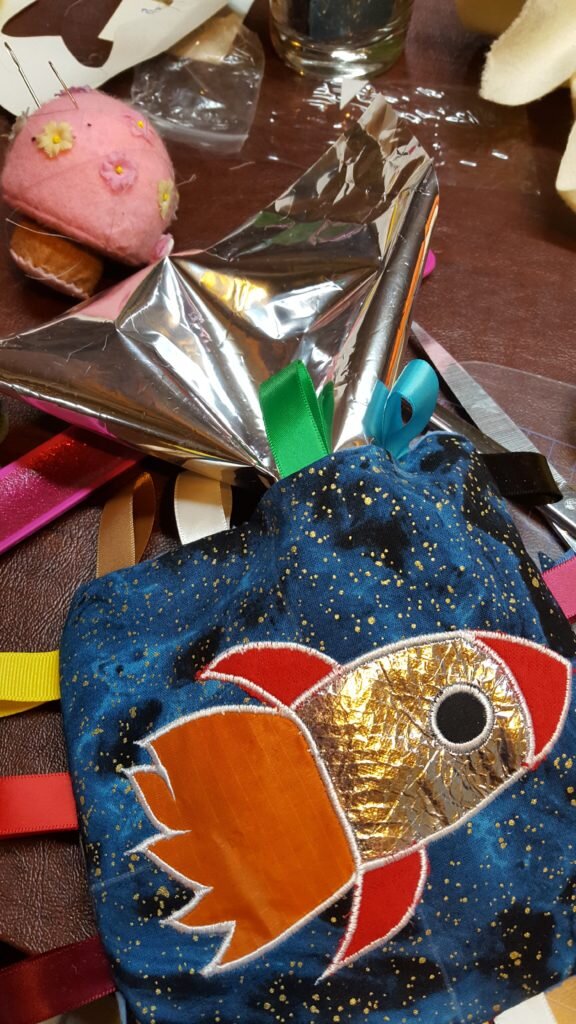
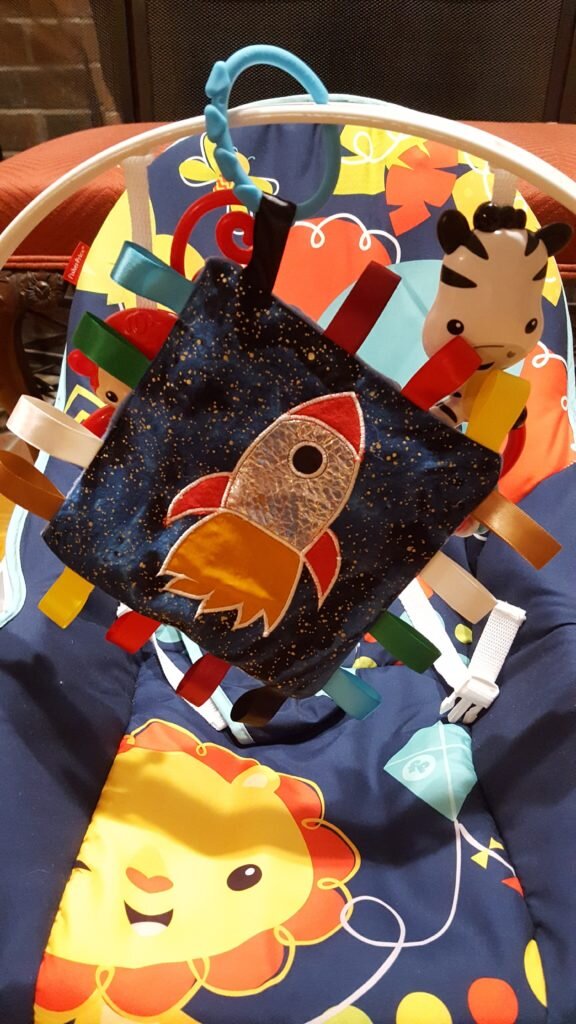
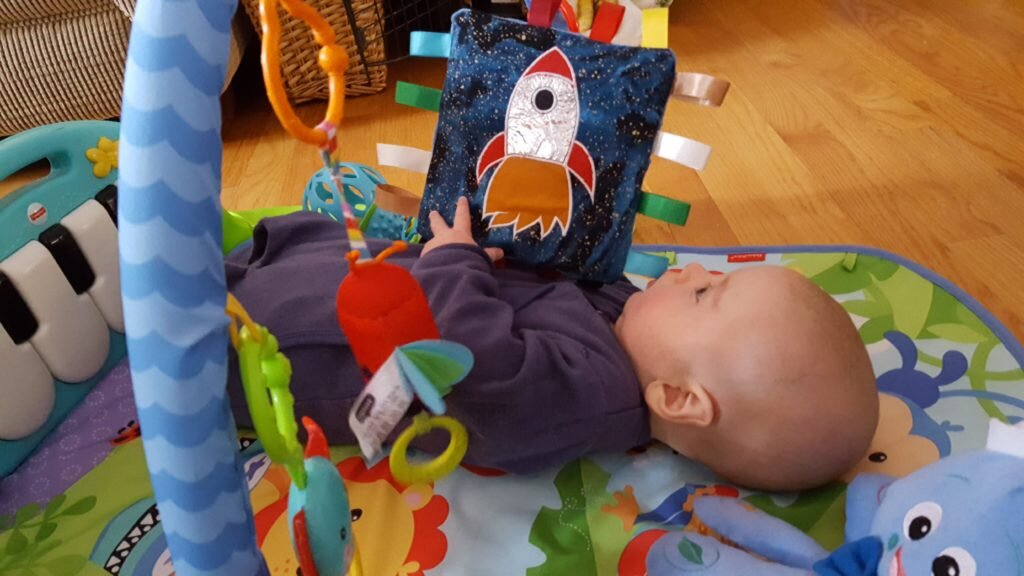
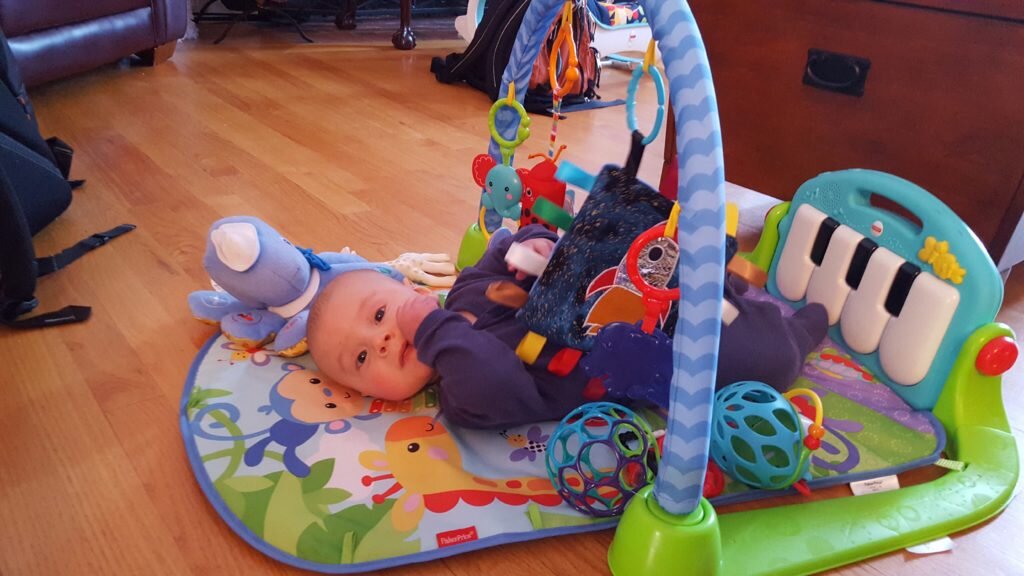
As I mentioned in an earlier post I’ve been experimenting with embroidery again.  Specifically I discovered the joys of applique.  My mother in law gave me some applique supplies for Christmas and some applique patterns.  After she explained the process and I tried it myself a few times I started moving up to applique design and creation.  It is so much easier to create applique patterns than embroidery patterns.  I’ve created a couple cute patterns that I’ll be sharing in the coming weeks.  This is actually the second applique pattern I created.  Since Erin and Mark’s baby room (plus two of my other friend’s baby rooms) was going to be space themed I decided to create a rocket ship.  I thought I could use some materials with different textures and colors to make the rocket eye-catching for a baby crinkle toy.  I’m happy to report that this toy is Julius approved!  He really likes his rocket ship.  Make your baby their very own a rocket ship crinkle toy and let them reach for the stars while saving planet Earth!

Rocket Ship Crinkle Toy
What You’ll Need:

  • PES embroidery file here
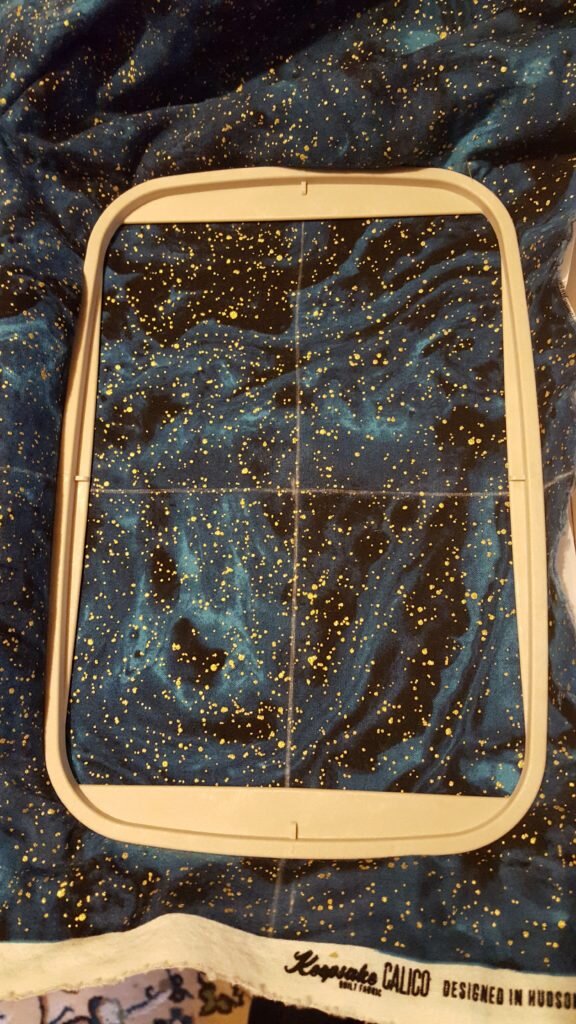
  • 12″x8.5″ cotton fabric with stars
  • cut away embroidery stabilizer
  • 5″x7″ embroidery hoop
  • scrap fabric for rocket ship
  • spray fabric adhesive
  • 2 yards of 5/8″ ribbon
  • minky fabric
  • smartfood popcorn bag or other very crinkly potato chip bag
  1. Prewash all fabric.  Wash smartfood popcorn bag.

    Thoroughly wash popcorn bag

  2. Hoop star fabric in 5″x7″ hoop with medium weight cut away stabilizer.

    Hoop star fabric in 5″x7″ frame with medium weight cut away stabilizer

  3. Unzip the embroidery file and load the embroidery pattern onto your machine.
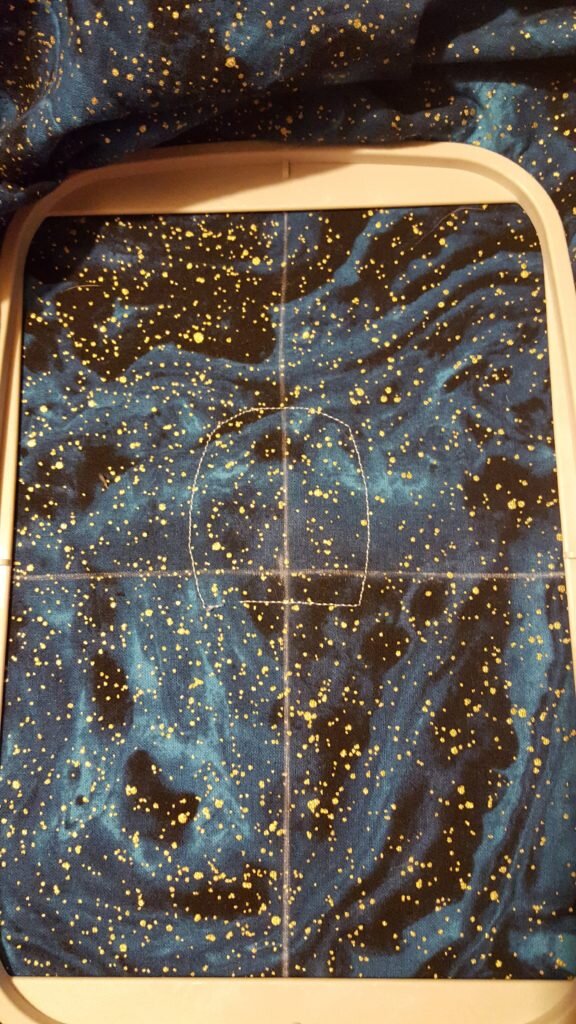
  4. Stitch the first guideline stitch for spacecraft body.

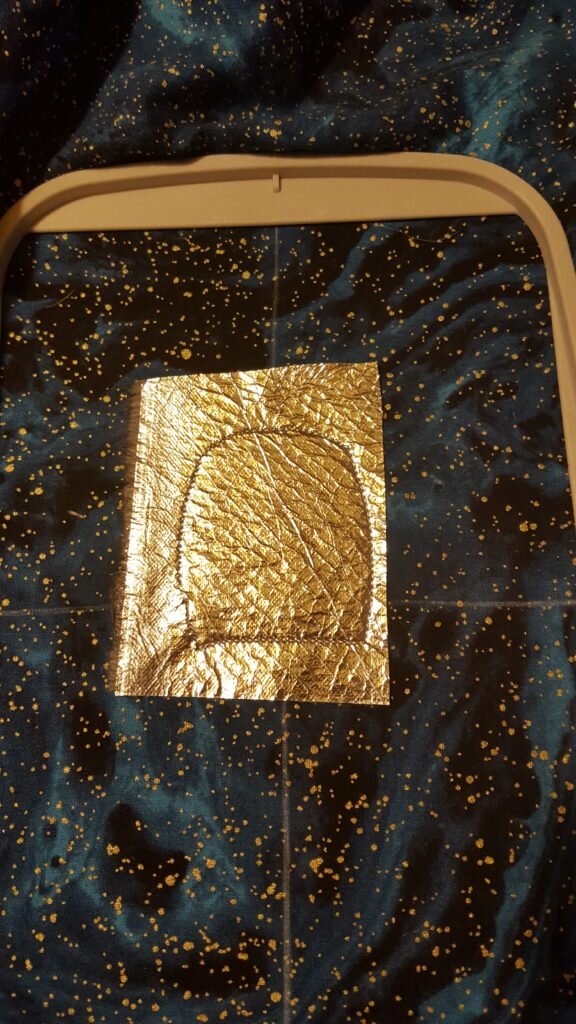
    Stitch guideline stitch.

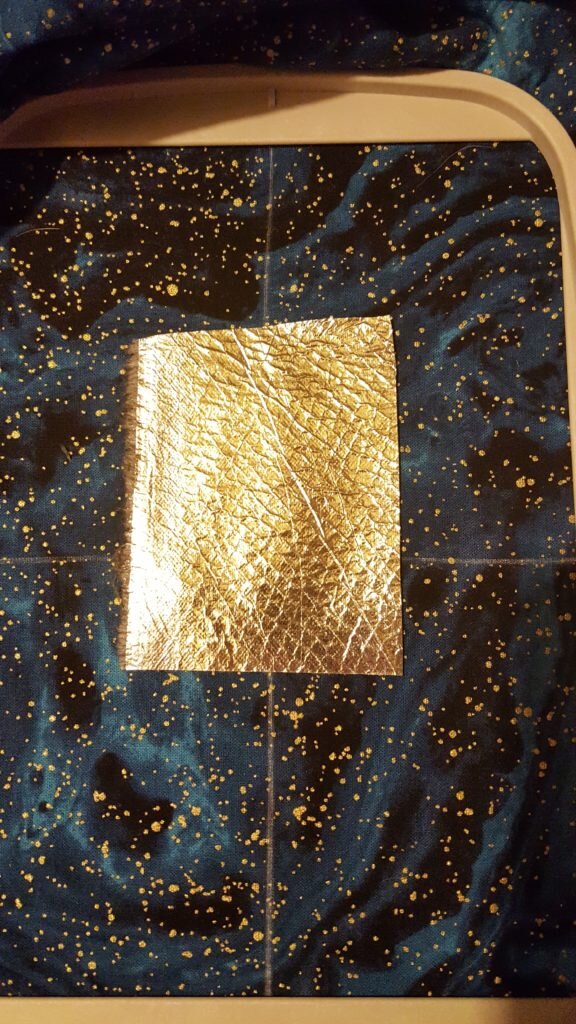
  5. Cut a piece of scrap fabric larger than this guideline, lightly spray with adhesive and secure to hooped fabric

    Spray scrap material larger than guideline with spray adhesive and adhere.

  6. Tack down stitch scrap fabric.

    Tack down stitch the rocket body.

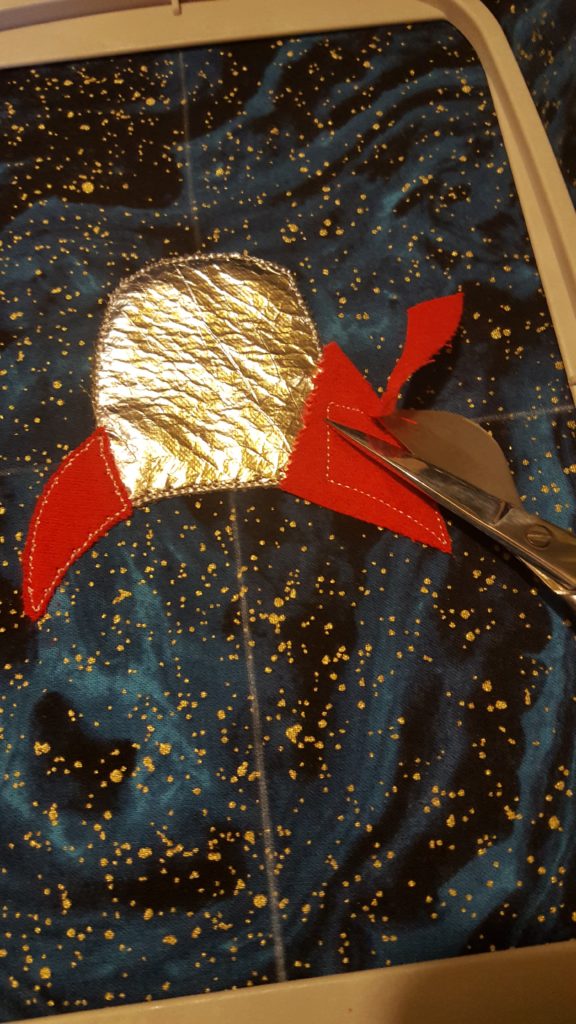
  7. Using duck bill scissors, cut very close to the stitching.  Take care not to cut any stitching.

    I don’t have a picture of cutting carefully around the body of the rocket, but here is how you use the duckbill scissors.

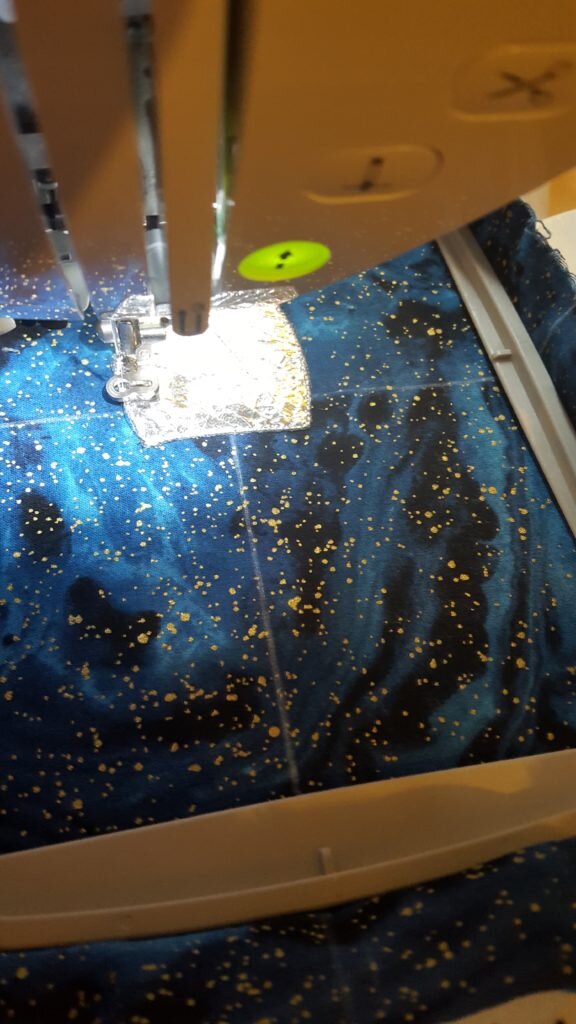
  8. Return to the machine and sew the final stitches to hold it in place.

    Stitch down final stitches to hold body in place.

  9. Repeat steps 2 thru 5 for fins, flames, nose cone and porthole.
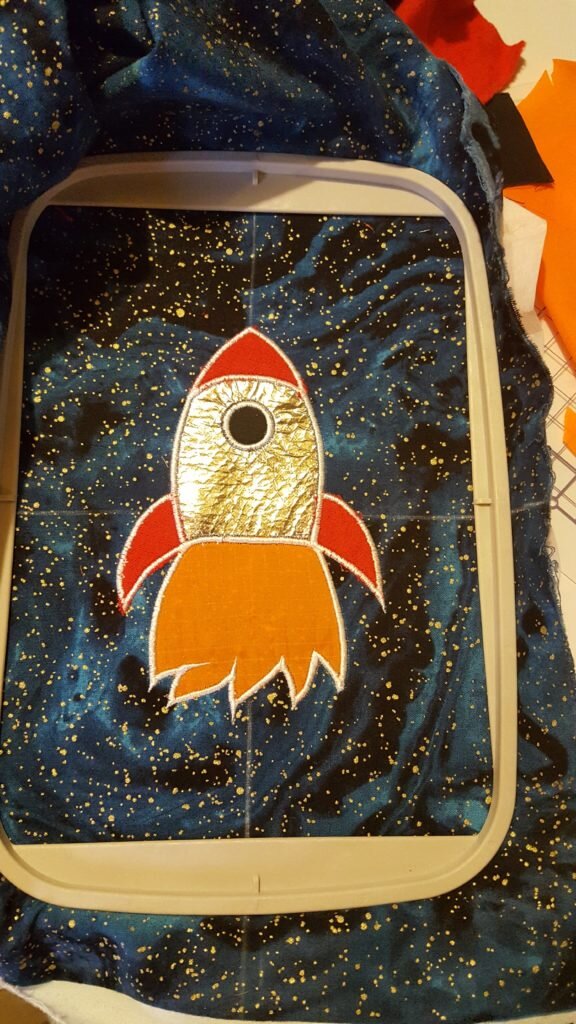
  10. Stitch final embroidery stitches outlining whole project.

    Finished rocket ship in hoop.

  11. Draw an 8″x8″ square around rocket ship and interfacing. Cut.

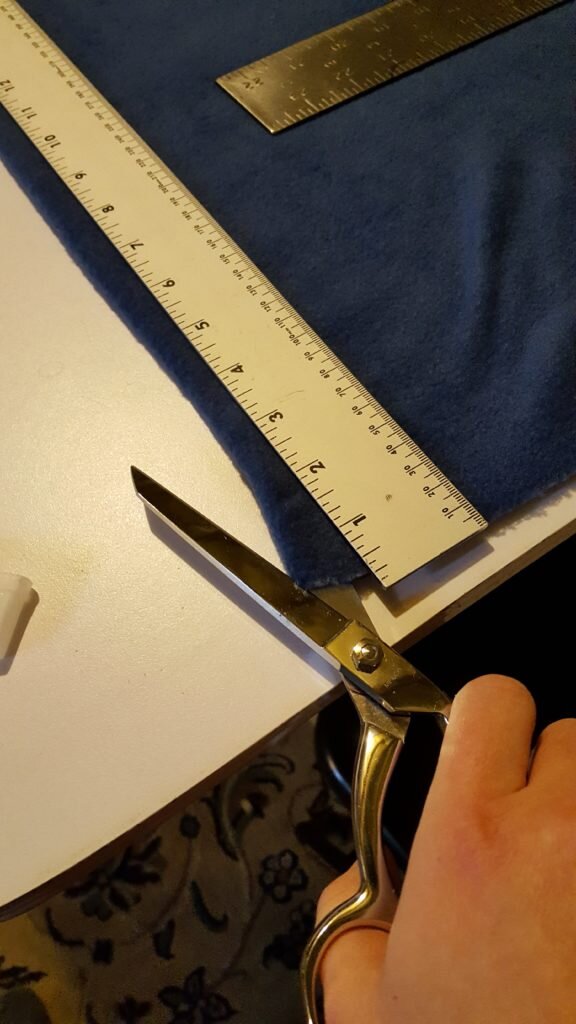
    Cut 8″x8″ square around rocket ship.

  12. Cut 8″x8″ square of minky fabric
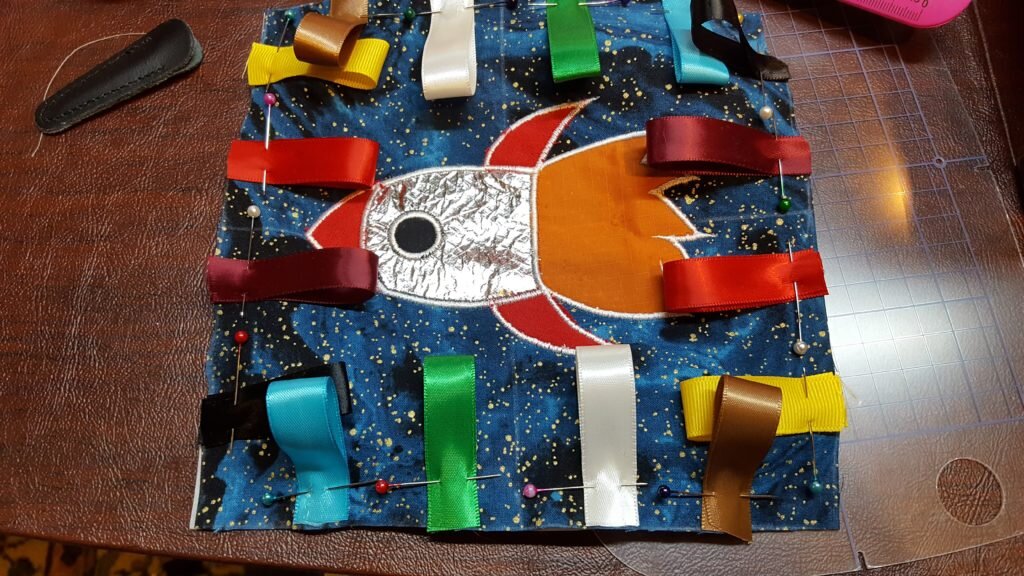
  13. Cut ribbon into 16 4″ segments. Fold segments in half, and pin around perimeter of rocket square’s face with fold facing towards the center.

    Fold ribbon segments in half and pin to outside of square.

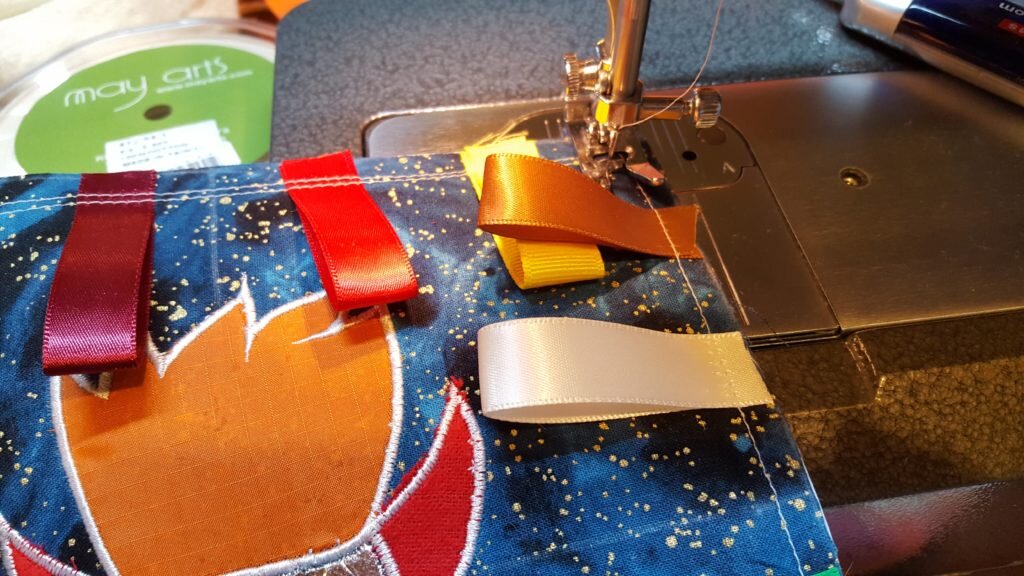
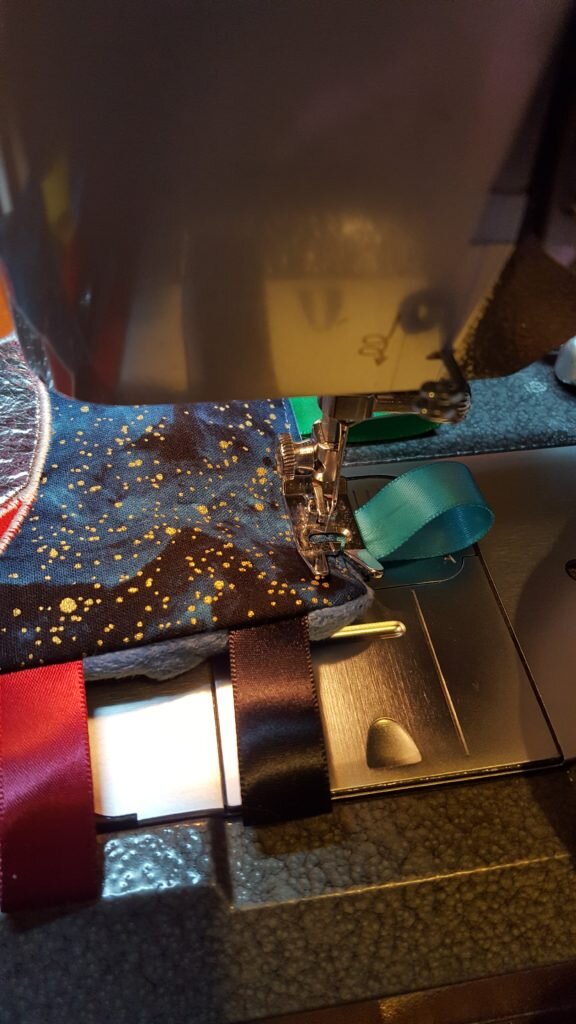
  14. Stitch around edge of the square along the 1/4″ and 3/8″ marks to secure ribbon.

    Stitch along 3/8″ and 1/4″ marks to secure rirbbon.

  15. Pin minky fabric square to rocket square, right sides facing in.
  16. Stitch around the perimeter at the 1/2″ line, leaving a 3″ gap on one side.

    Stitch minky fabric to rocket ship – right sides together.  Leave gap in fabric.

  17. Clip corners and turn right side out.

    Clip corners and turn inside out.

  18. Wash smartfood popcorn bag then cut an 8″x8″ square from a corner of the bag (leaving 2 layers of plastic).
  19. Insert plastic through gap in step 12, pushing the corners of the plastic squares into the corners of the rocket ship square. Plastic will not quite fit and will warp slightly while you are inserting it. This is expected and will make the toy crinkle easily when moved.
    Insert popcorn bag into rocket body.

  20. After inserting plastic, fold the seam allowance of the gap fabric inwards. Pin the open edges together and machine stitch closed.

    Fold seam allowance in gap for stuffing under. Stitch closed on the outside of the toy.

    Finished rocket ship!

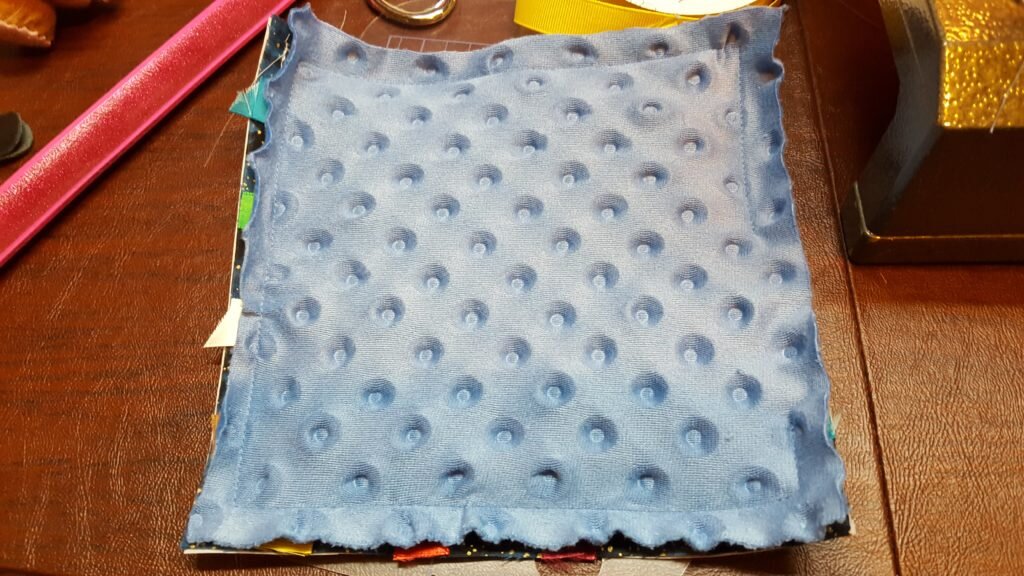
    Textured minky back of rocket ship.

    Crinkle toy action shot.

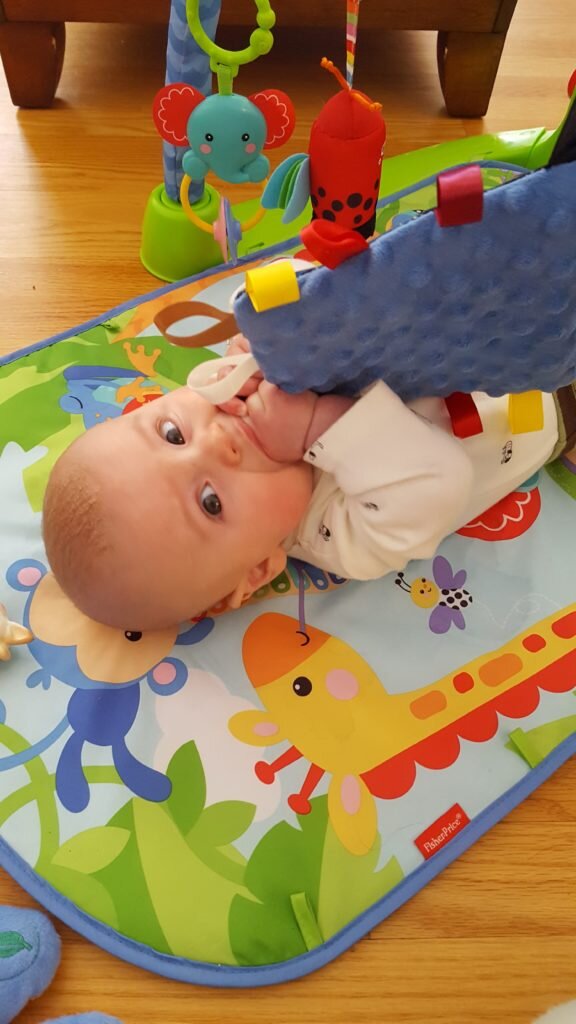
    Julius trying to shove the whole toy in his mouth

Posted in Crafts & Sewing | 2 Comments

Heavily Meditated

I am planning to take my first baby free weekend the week before I go back to work.  Eep.  I’m not sure yet if this is a good idea or a bad idea.  On the one hand, if I’m not ready to spend so much time away from him yet, it will be sad to force myself to do it early.  On the other hand, if he and I aren’t ready by that point, we better get ready.  For my first trip away, I am going on a yoga retreat in western Massachusetts with my sister and my friend Amy.  Worst case, it’s only an hour away, so Will offered to come meet me with the baby if it is a total nightmare.  (Hopefully it won’t come to that.)

I’ve always wanted to go on a yoga retreat.  This one is lead by my yoga teacher, April, who I credit with introducing me to the world of yoga.  The 3 day retreat includes meditation sessions and a reiki session.  Exciting!  Well since I’ve had the baby I’m way behind on my goal of meditating multiple times a week.  I was so good while I was pregnant, but I’m back off the wagon again!  This is really embarrassing but towards the end of my pregnancy and now that we have Julius I have the tendency to fall asleep while meditating.  Even before parenthood I could sleep almost anywhere (which lead to great concern one time from my friend Amy when I completely passed out on a rocky lawn in a park).  So I have to be careful to find that fine line between clearing my mind and passing out.

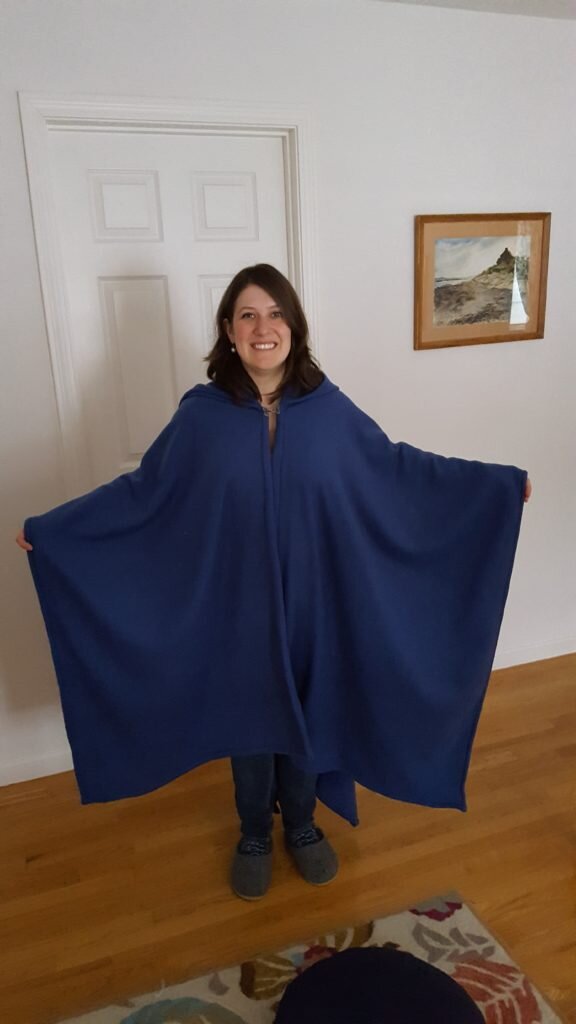
Either way, to prepare for meditation sessions I decided to make a meditation cloak.  The cloak is made of fleece and nice and snuggly.  Perfect for staving off a draft while you’re meditating!  And as and added bonus you look like a Jedi in it!  Since this is basically just a giant blanket with a hood, its pretty much one size fits all.

While meditating on my cushion.

Hooded Meditation Cloak

What you’ll need:

  • 90″ of 58” wide fleece (you can do wider fleece, the arms will just be longer, but definitely don’t do narrower)
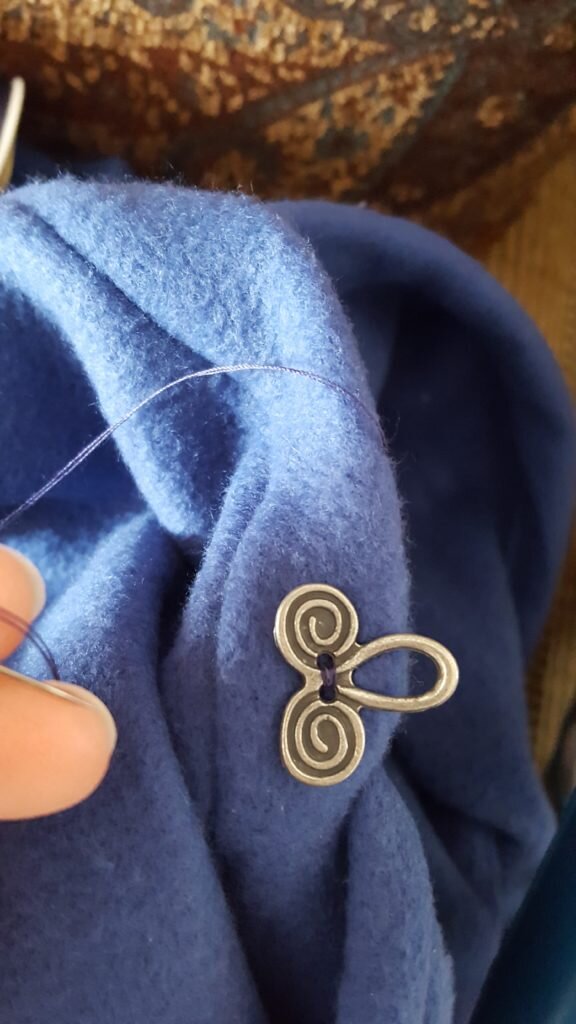
  • hook and eye closure
  • hood pattern here
  1. Cut a 90″ section of fleece.
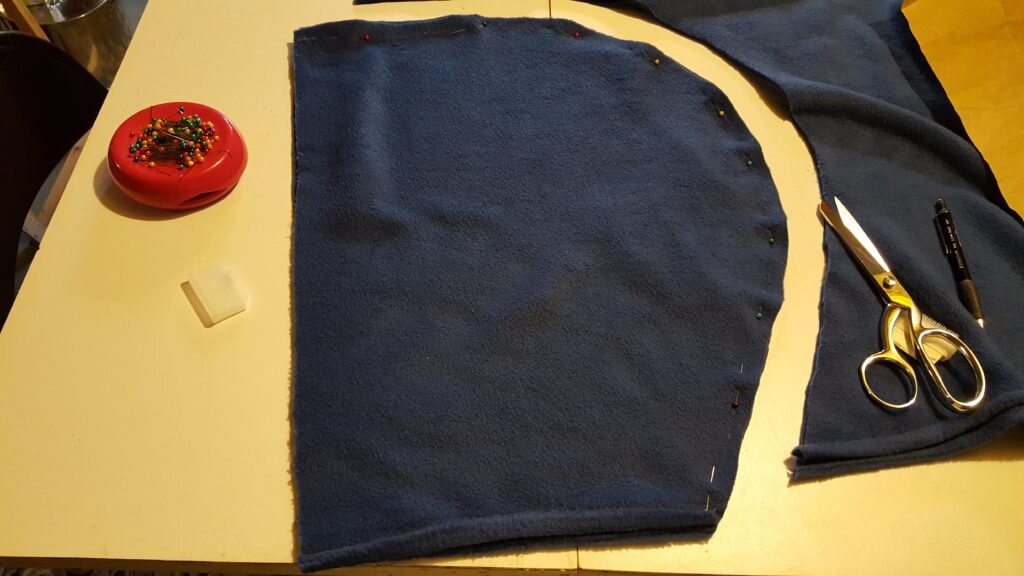
  2. Cut a 45 inch slit from the bottom of the fleece rectangle to the middle, perpendicular to the selvage (see picture).  The slit will be 45 inches long and 29 inches from either side.  Easiest way to do this is to fold in half the long way and cut a 45 inch long slit along the fold.

    Cut 45″ slit along lengthwise fold.

  3. Cut out hood.
  4. Stitch hood together along curve.

    Pin and stitch hood along curve.

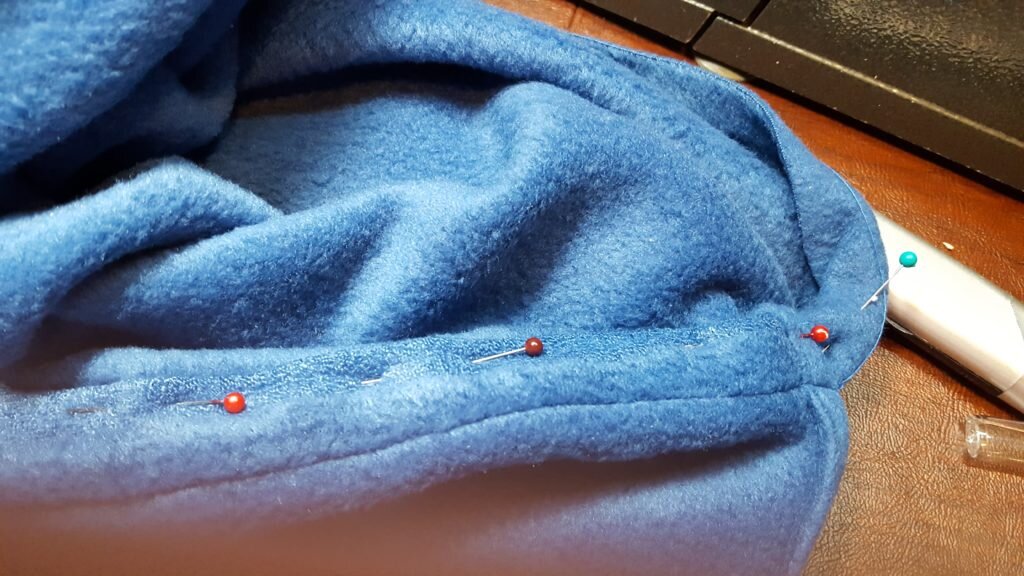
  5. Stitch a 3/4″ rolled hem along the face of the hood.

    Form 3/4″ rolled hem along all sides, and hood front.

  6. Stitch a 3/4″ rolled hem all along the perimeter of the square, stopping when you get to the slit.  At each corner, form a mitered corner.
  7. The portion at the slit is a bit tricky.  Line the hood seam up with the center of the slit, and pin, right sides together.
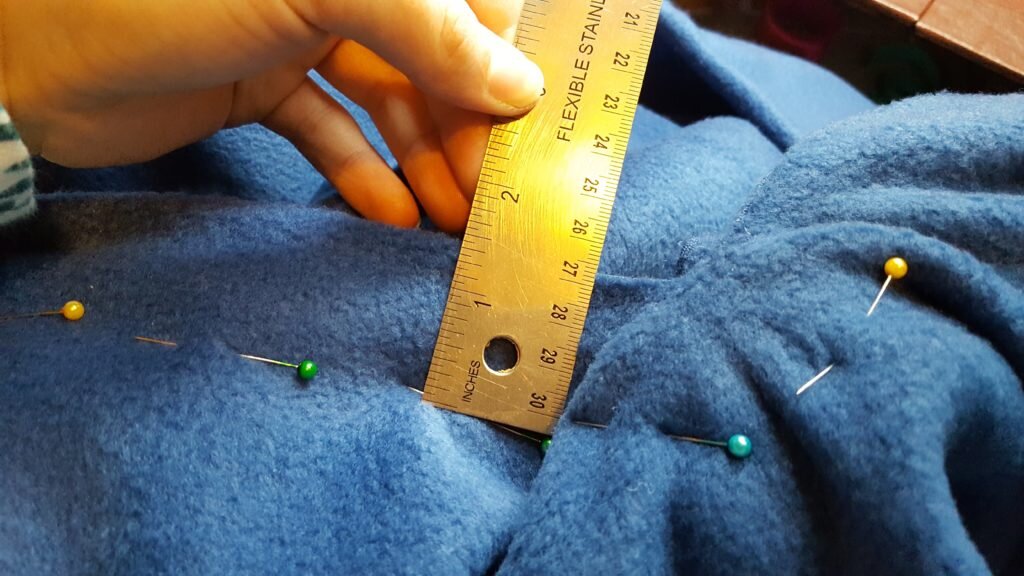
  8. Stitch the hood to the cape leaving 1.5″ seam allowance.

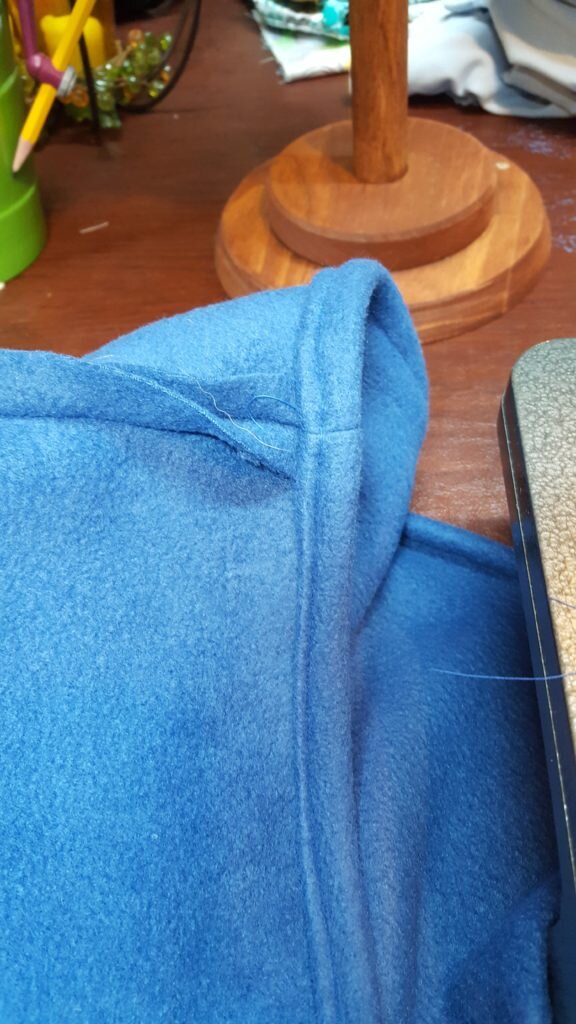
    Attach hood to slit (neck edge) right sides facing, leaving 1.5″ seam allowance.

  9. Turn the seam allowance under to form a 3/4″ rolled hem.  Stitch along the whole inner portion of cape from corner to corner (once again forming mitered corners.)

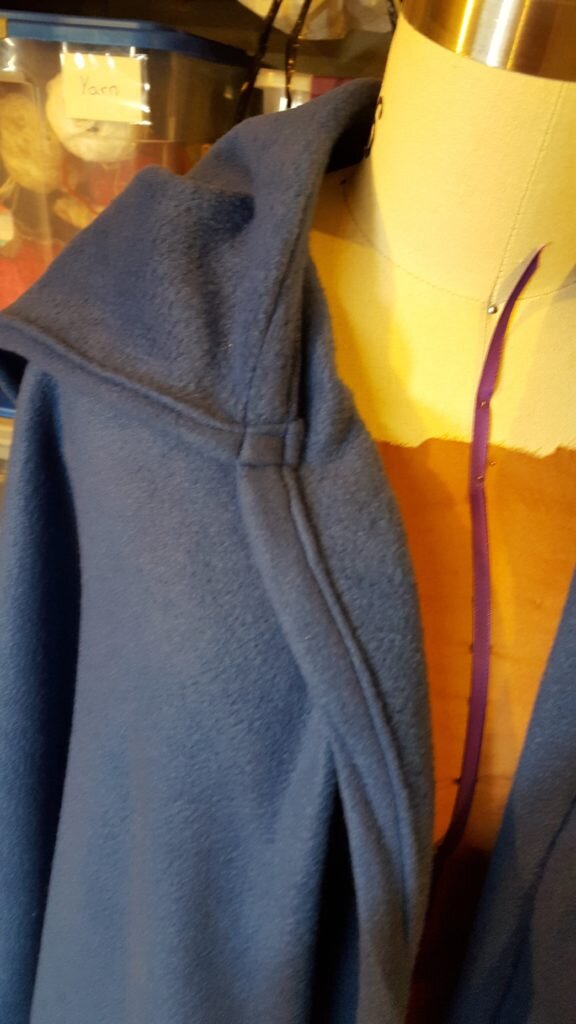
    A close up view of what the hood should look like when attached.

    Fold under seam allowance on slit all the way up to where it attaches to the hood.

  10. Hand stitch the clasp to either side of the cape directly below where the cape meets the hood.

    Hand sew closures on, just below hood.

  11. Zen out!

    Front view

    Back view

    What it looks like when I raise my arms…


Posted in Crafts & Sewing | 2 Comments

A Dicey Endeavor

So this past weekend was PAX!  PAX, for those who don’t know, is the Penny Arcade Expo; a convention for all things nerdy produced by the creators of a webcomic empire.  This year, we decided to take Julius along for the ride.  This was a bold decision, and one that we are overall pretty happy with.  We had a hotel room in the hotel that is connected to the convention center, which was extremely necessary.  On one hand the convention is so loud, and Julius is so distracted while eating, that I had to go back to the peace and quiet of the hotel room to let him eat.  On the other hand, the white noise was perfect for napping, so Julius napped in the stroller more than he has ever done during the course of a normal day.  This meant, as long as we didn’t mind occasionally waiting 20 minutes between turns, we could play anything we wanted.  Plus, after Julius went to bed, we could play anything we wanted.

Julius is ready for PAX.
(You may recognize the pink yoshi hoodie)

Julius and Will looking at a giant display I think.

Player 3 has entered the game (and he looks exhausted)

On the second day, we made a big mistake.  We checked out of the hotel.  This caused two problems: firstly we had nowhere quiet for Julius to eat and secondly, we couldn’t do anything after his 7pm bedtime.  That, combined with the fact that we didn’t want to subject our friends to the “occasionally waiting 20 minutes between turns” rule meant I did very little gaming.  I DID manage to buy some really sweet dice though, more on that later.  We both agreed that, PAX with a 5 month old baby is totally do-able and even enjoyable, but also agreed that if we were to do it all over again, we’d keep the hotel room one extra night.

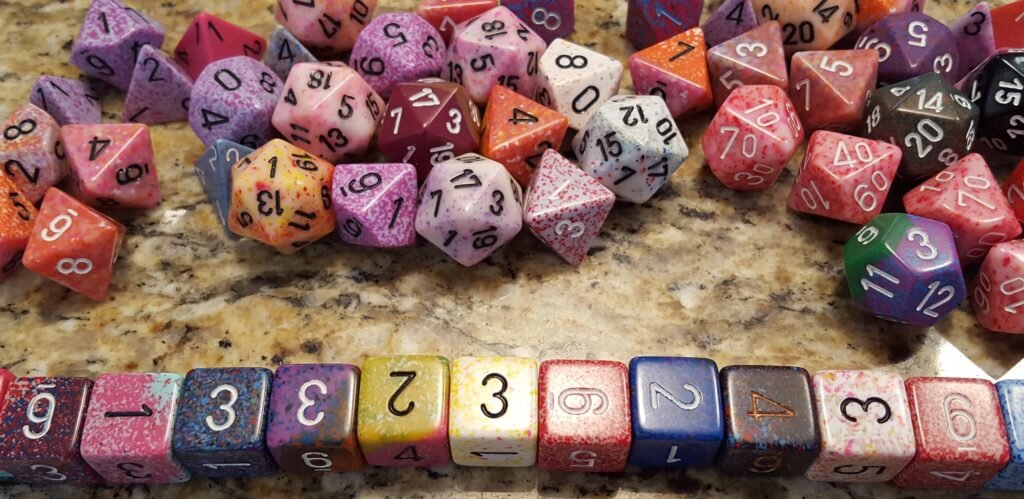
So many dice!

So more on those dice!  For a while now, I’ve wanted to make dice jewelry.  I have some sweet mini-d20 earrings, but I wanted more!  So I went to the chessex booth and searched through their seconds bin (.30 cents a piece!!) until I found some cute d4s to make into earrings.  Then I found some cool d20s, and some %ds and d6s and then I accidentally had a full cup of dice.  It was like looking for seashells or rocks at the beach.  You spend what seems like a few minutes, and actually turns into an hour, looking at one little patch of sand, to find you’ve a small mountain of discarded crustacean houses that would look great as jewelry, but in actuality you’ll never use.  Or is that just me?  I suspect it’s not just me because there were two other women and one man digging through the Chessex bin with me, but for an even longer period of time.  Bottomline?  Expect some upcoming posts on ideas for dice jewelry.  Additional bottomline?  If you pick out an entire cup full of dice, your dice only cost 20 cents a piece!  (Though if you randomly scooped a cupful they were only 13 cents a piece…)

D4 Earrings

What you’ll need:

  1. Put on safety goggles.  I don’t say this enough, but after a scary incident with paint thinner I ALWAYS wear safety goggles when doing anything crafty.  Drilling is one of those things where even before the paint thinner incident I would have worn safety glasses.
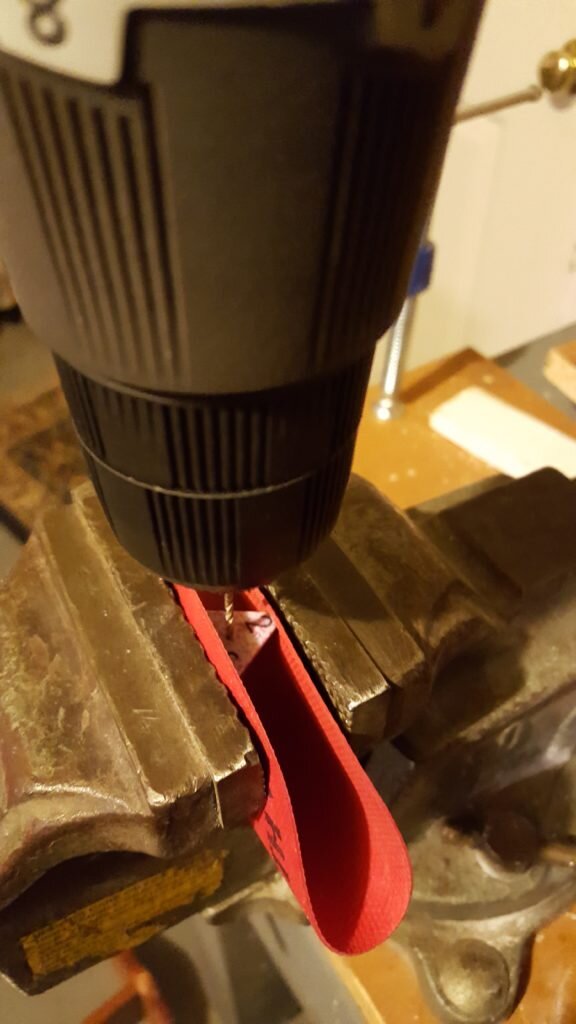
  2. First you’ll need to drill a hole straight through your D4.  It is highly recommended that you use a drill press for this.  Insert 1/16″ drill bit in drill.  If you have a drill press, clamp D4 so desired number is facing up.  Position drill bit over vertex of pyramid and lower drill press until you’ve cut clean through the die.  If you don’t have a drill press, clamp D4 upside down in your vice, so desired number is facing down, and flat plane is facing up.  Position your hand held drill over the center of the die face and carefully drill through the die, readjusting to guarantee you’ll drill through the tip of the die on the bottom.

    Drill straight through face of die.  I used a rubber jar opener to cushion my die in the vice.

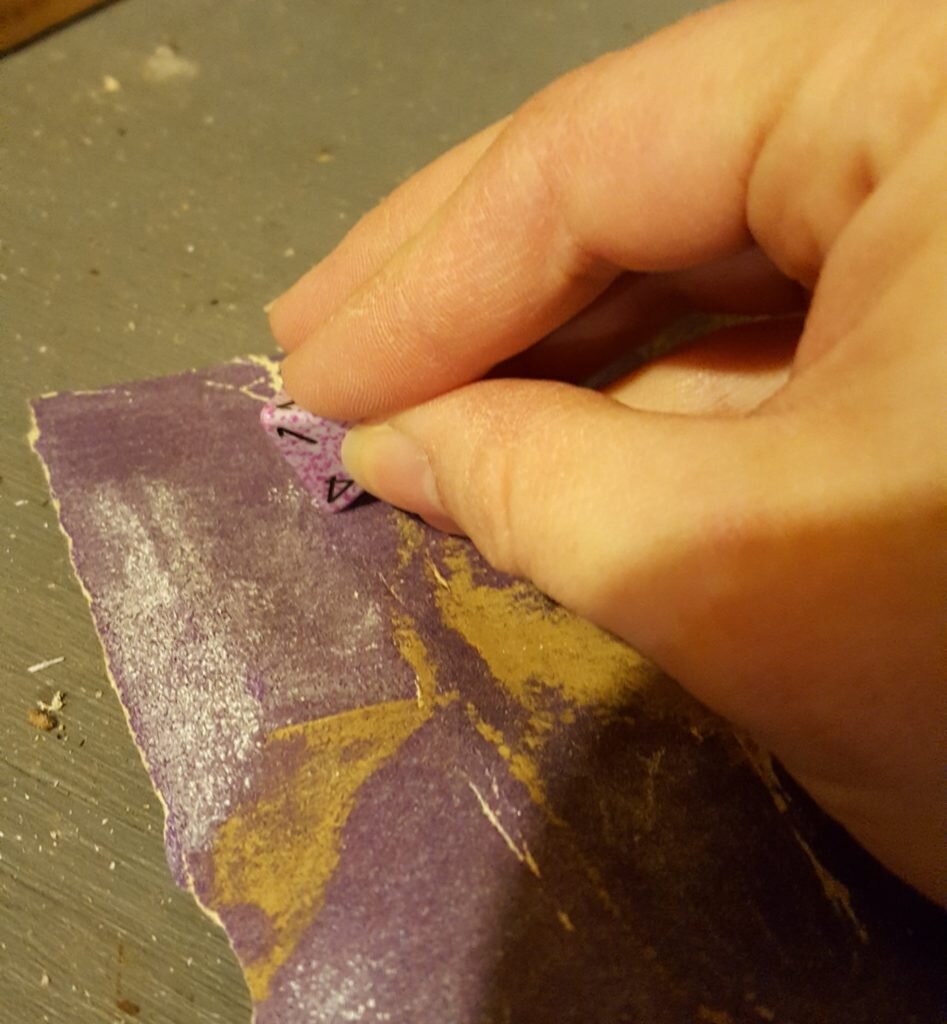
  3. Sand any sharp edges caused by drilling.

    Sand any rough spots caused by drilling

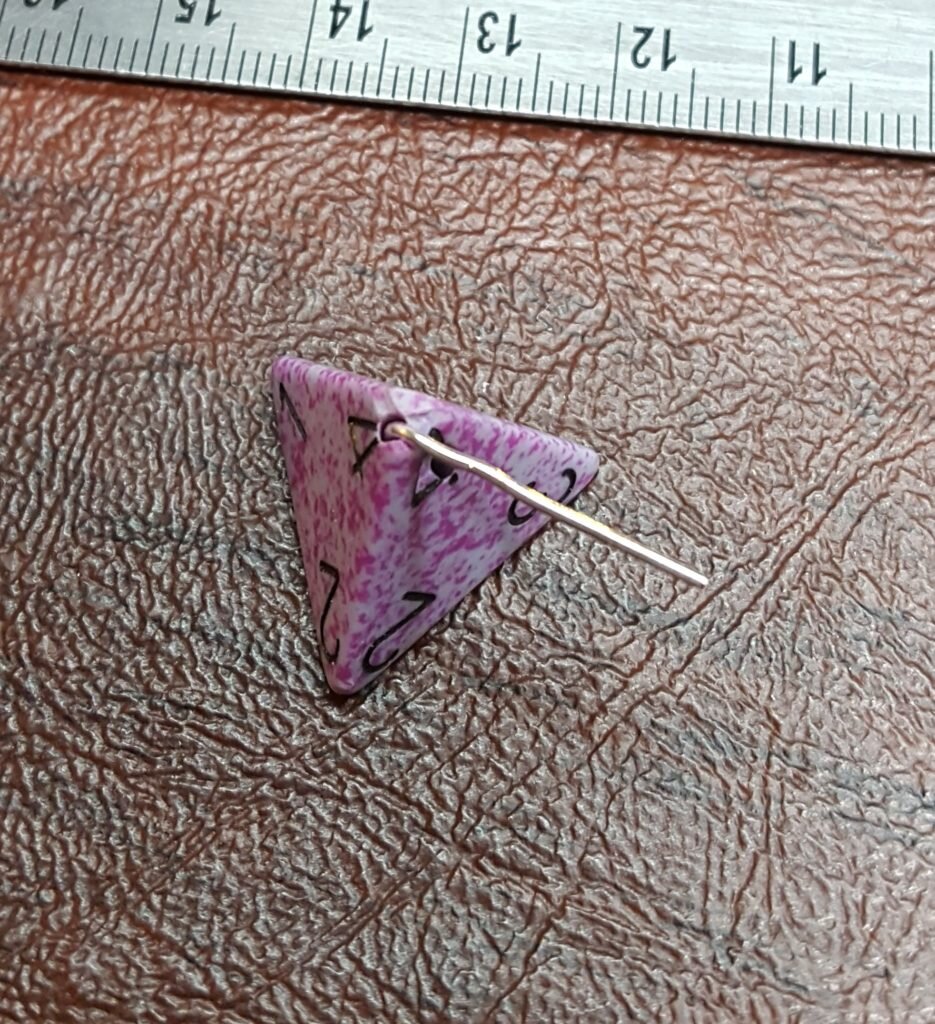
  4. Insert head pin up through the bottom of the D4 so the flat side of the die rests on the head of the pin.

    Insert head pin through bottom of die

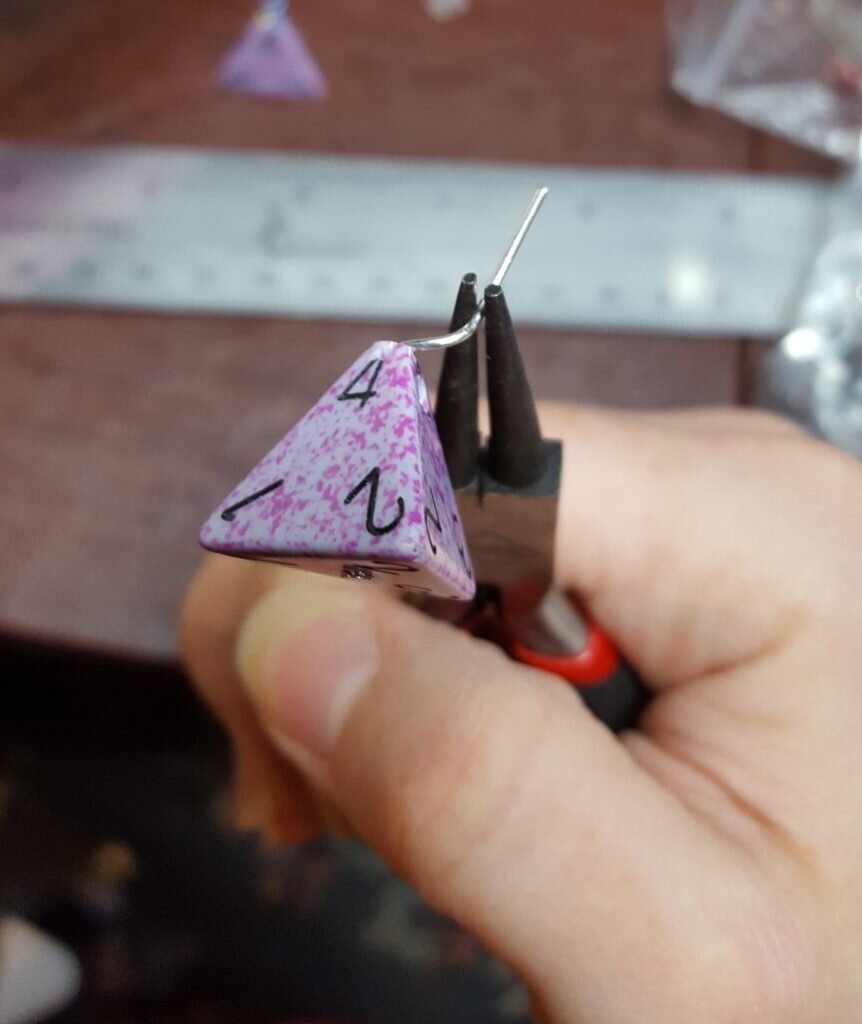
  5. Using your pliers, shape the excess wire into a 3mm ring.

    Shape excess wire into a loop.

  6. Insert ear wire into ring.

    Insert loop onto ear wire.

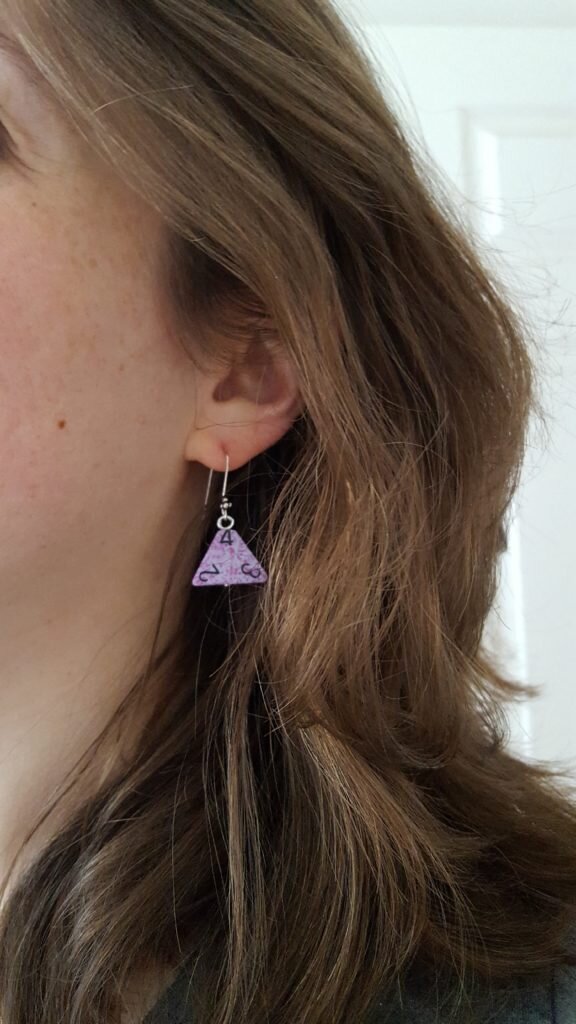
  7. Wear with pride!

    Wear with pride!

Posted in Crafts & Sewing | 2 Comments

Plant Night

Let me tell you that daddy day care has been going great!  Or at least from my perspective it has been.  Julius has been taking bottles!  Will has also been working to educate Julius or at least Alexa has.  That’s what it seems like when listening from the basement.  I keep hearing things like, “Alexa, define gravity” followed by Alexa rambling off a paragraph of text.  Maybe Julius will absorb some of it through educational osmosis.

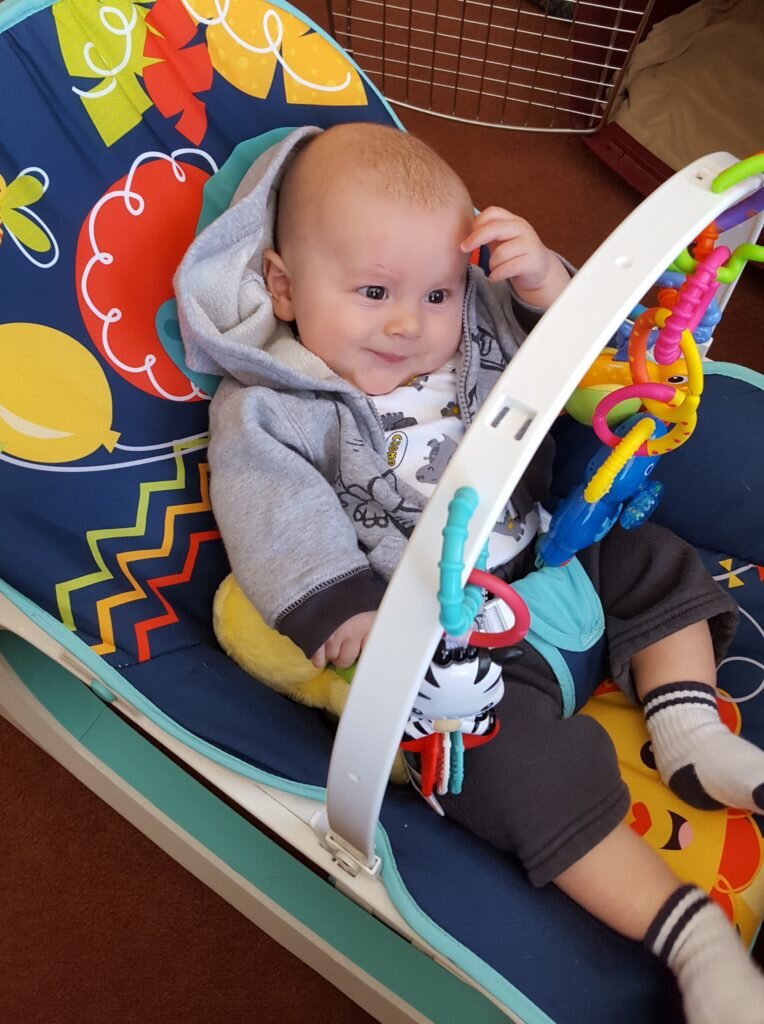
Julius, what do you really think of Daddy’s schooling?

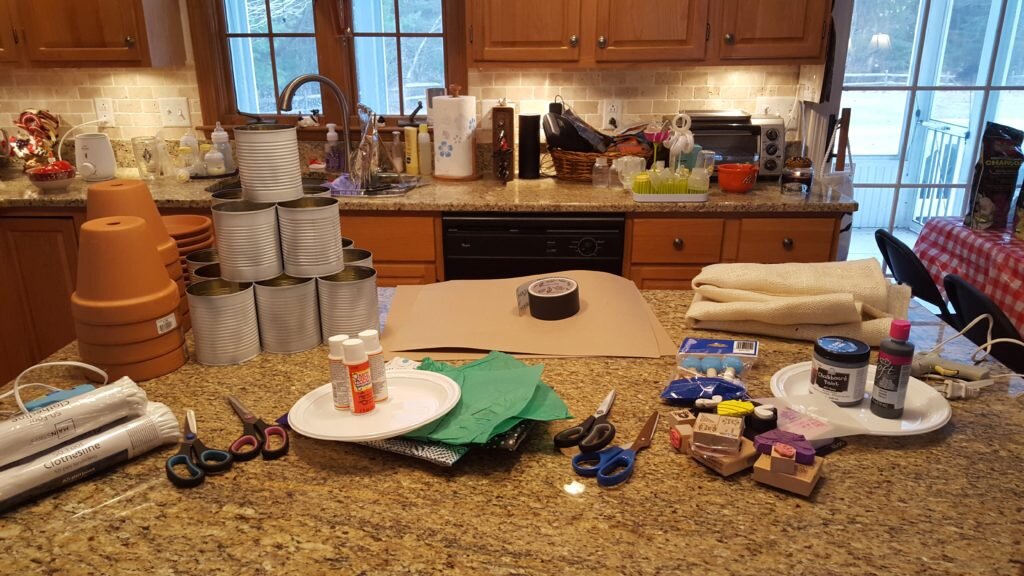
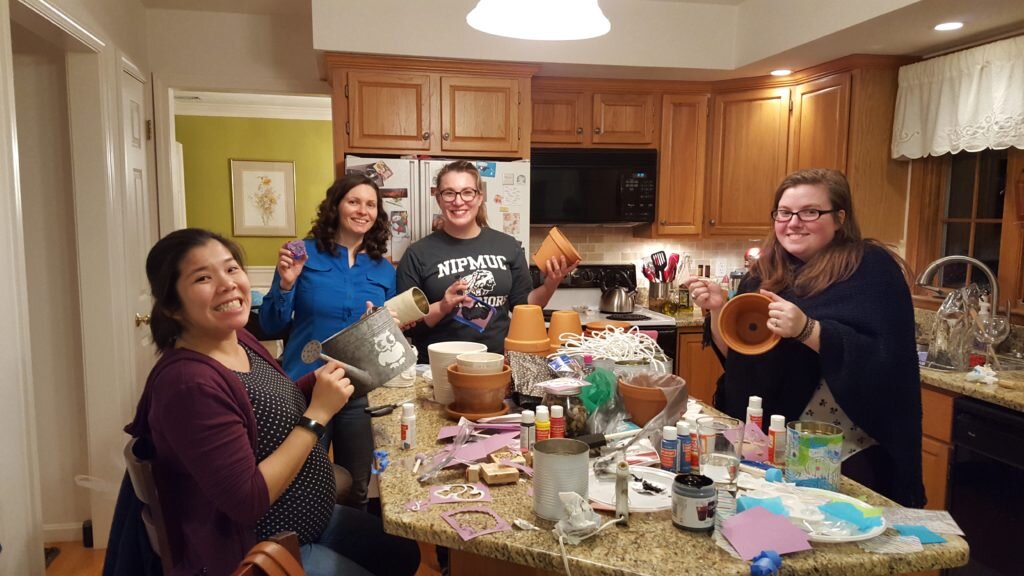
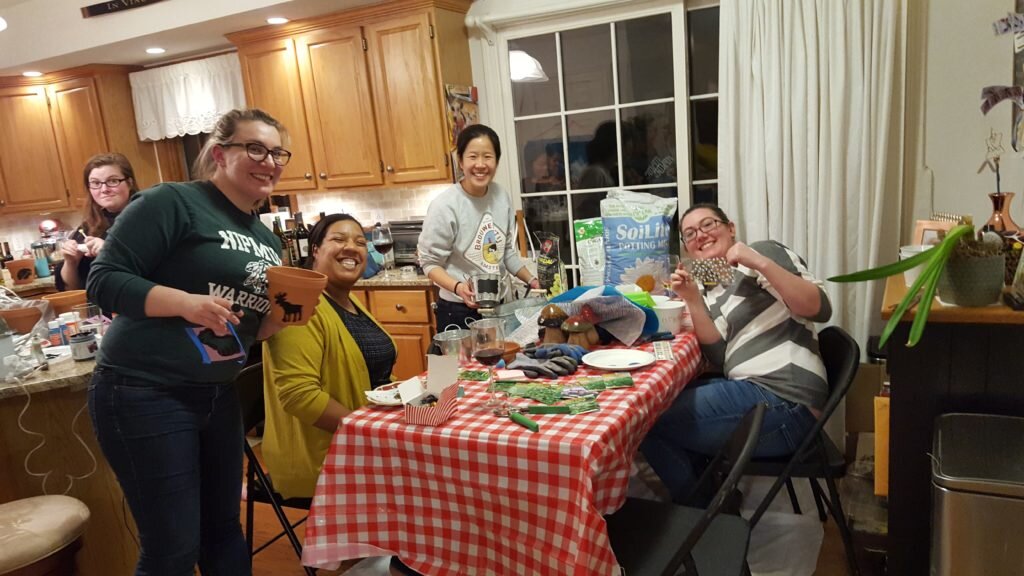
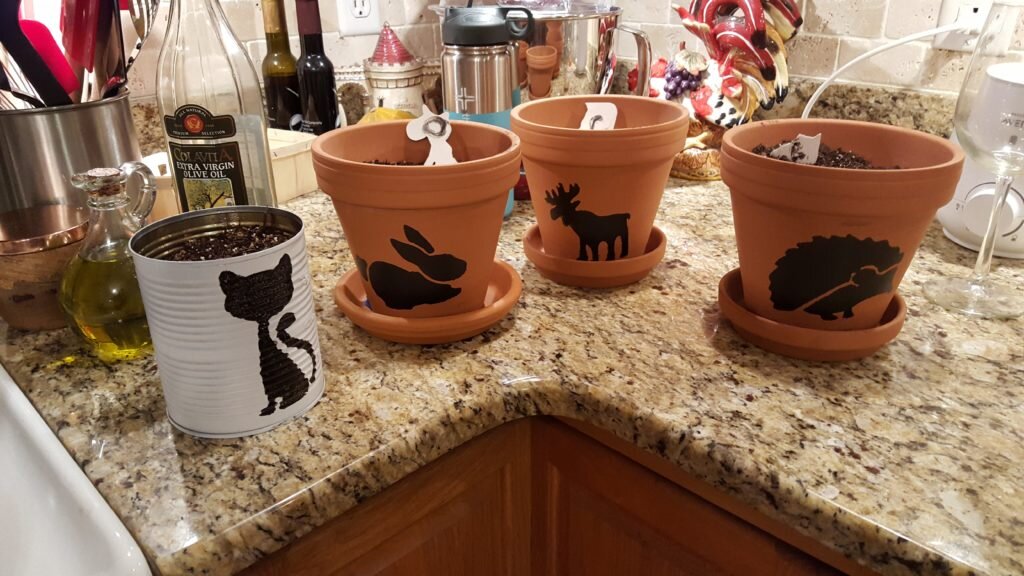
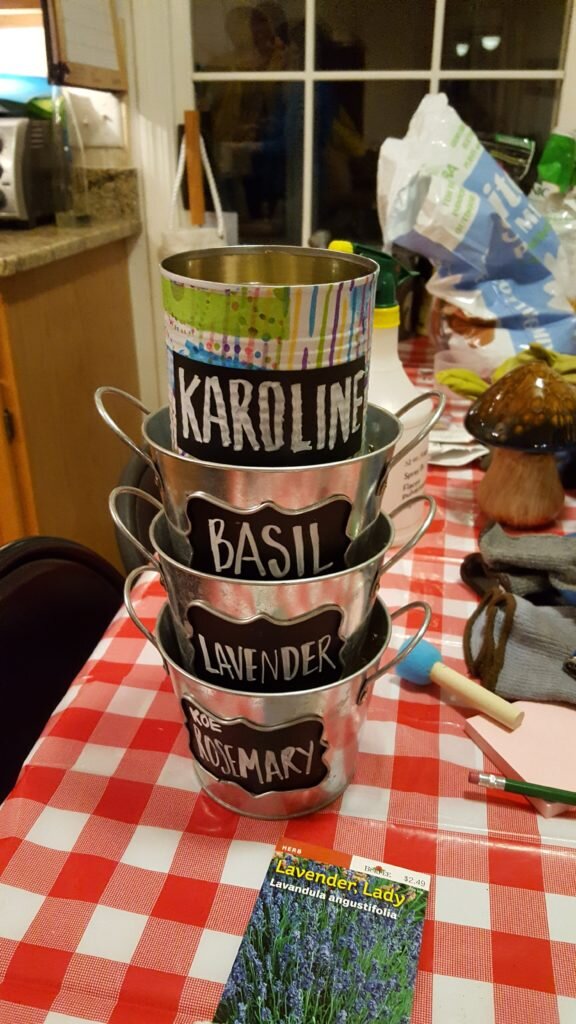
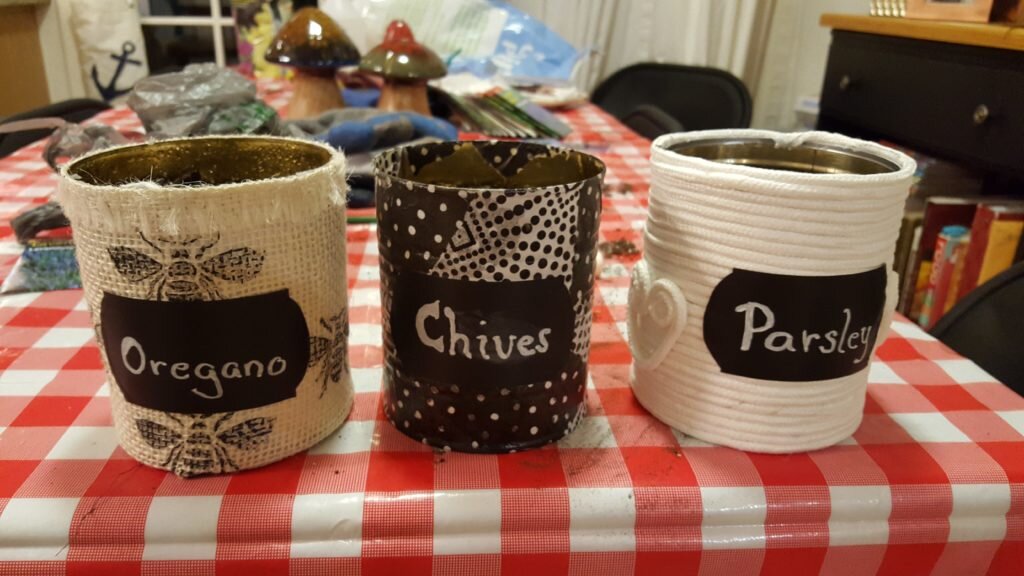
Since daddy daycare was going so well we decided to host a Ladies’ Night (plus board games in the mancave with Will).  For a while I’ve been wanting to host a “Plant Night” where we plant a counter top garden of some kind.  Everyone wanted to plant an herb garden, so that was what we decided to try.  To keep costs low and reduce waste, we used 28 oz tomato sauce cans that I picked up from the town recycling center.  Since I could only obtain 16 cans and I wanted everyone to have 3 planters each I also purchased some 6″ terra cotta planters from Job lot for only 1.80 a piece.  With the exception of the activated charcoal, I purchased all the planting items from Job Lot.  All the craft items were purchased from Walmart, Joann Fabrics and Dollar Tree (and several people brought their own supplies and containers if they wanted something specific).  The supplies below were for 10 people and cost a total of $70 (excluding the cost of the terra cotta pots) which includes plenty of leftovers.

Plant Night

Menu

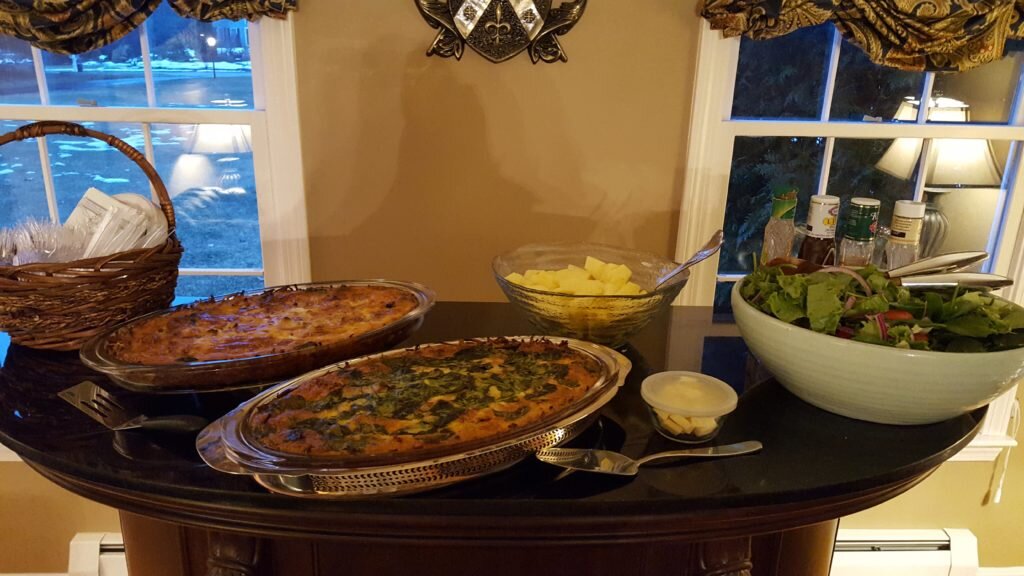
  • Bacon quiche with hash brown “crust” (GF)
  • Onion quiche with hash brown “crust” (V, GF)
  • Garden Salad

    Simple quiche and salad dinner.

Preparation

Purchase all crafting supplies and planting supplies (see below).

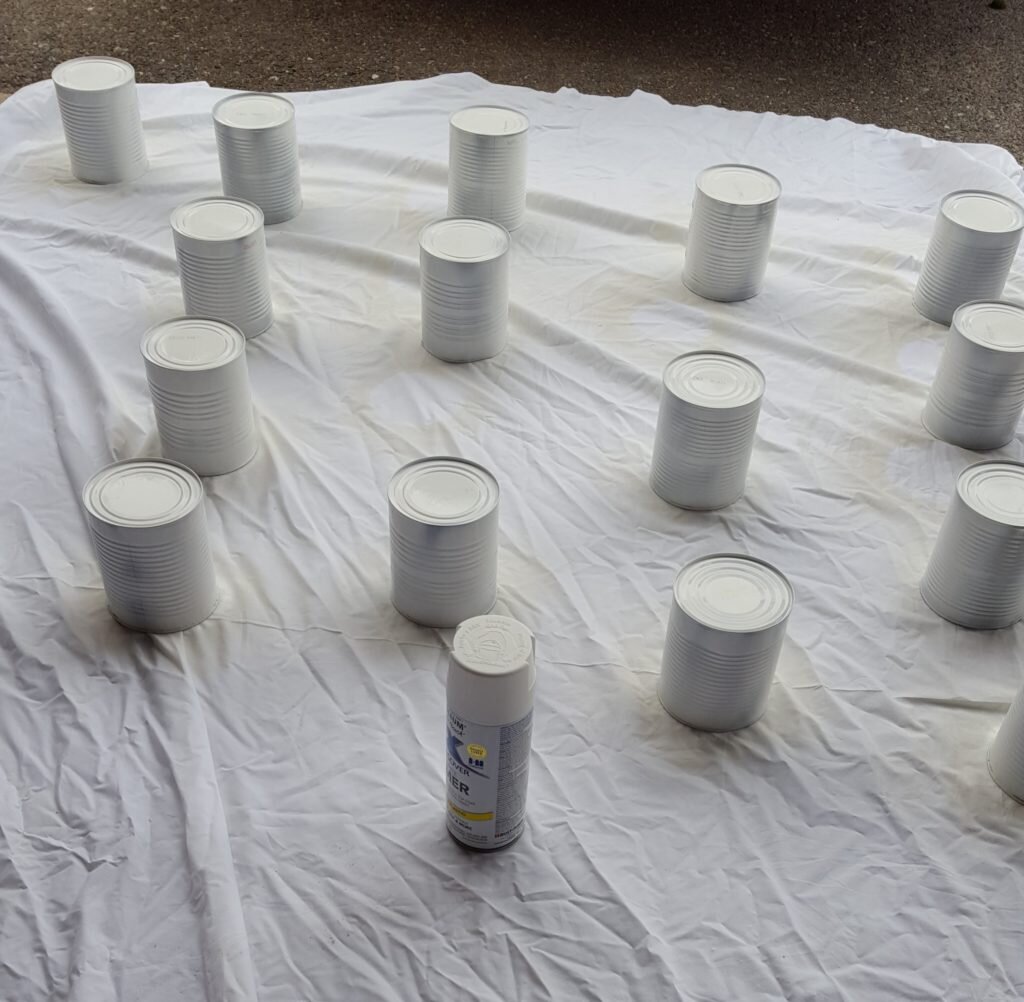
The day before the party, wash the cans thoroughly then dry.  Make sure the tops of the cans are not sharp, by using a can opener and sandpaper to thoroughly remove any burrs.  Then spray paint the outside of the cans with white primer.

Prepare the quiches, cool and then refrigerate.

Set parsley seeds (if using) in a bowl of water to soften seed shells.

Spray paint washed and dried cans with primer

Day of the party Set out a crafting table with glue guns and other crafting items.

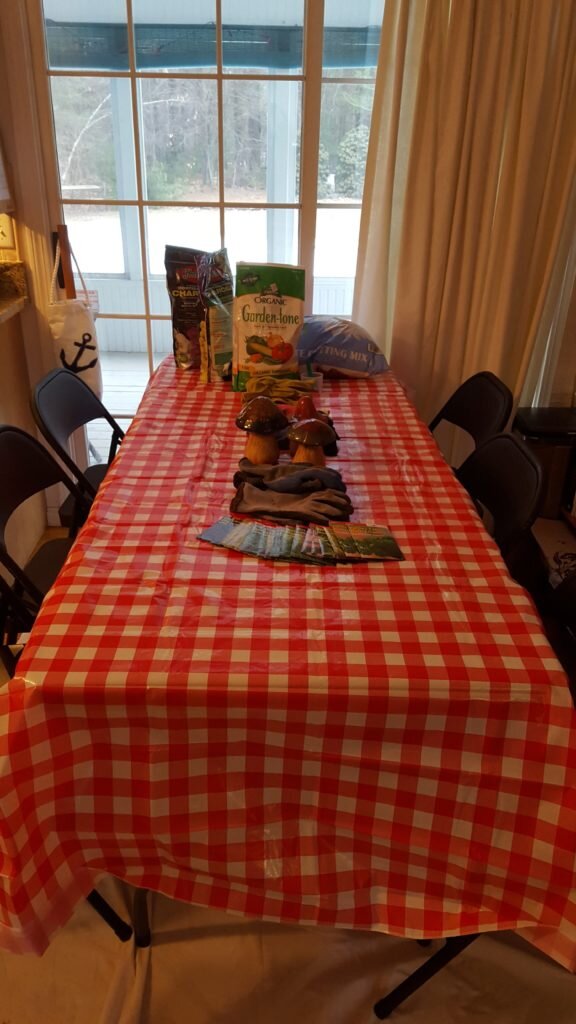
Set a separate table with planting supplies.  Cover table with a plastic table cloth and the floor with a drop cloth.

Prepare salad.

Place the quiches in the oven an hour before the party at 350 F.  After 20 minutes drop the oven temperature to 150 F to keep warm.    If the quiches start to brown too quickly, cover with aluminum foil.

Craft materials all set up and waiting for guests

Planting table set out with plastic table cloths and drop cloths under the table.

Making the Planters

What You’ll Need:

  • 30 28 oz cans
  • white primer spray paint
  • several packages of clothesline
  • 1.5 yards of burlap fabric
  • black fabric paint
  • chalkboard paint
  • chalkboard duct tape
  • stencils
  • stamps
  • foam brushes/spouncers
  • disposable plates or palettes
  • tissue paper
  • mod podge glue
  • glue gun
  • scissors

Let your guests be creative with decorating their planters!  Some folks only wanted to add chalkboard tape labels, others decided to do decoupage or other fancy things!  Here are a few ideas to get your guests going.

Decoupage:

Rip tissue paper into rough 2″x2″ squares.  Coat a 2″x2″ square on your can with mod podge using a spouncer.  Apply tissue paper square over the glue and press firmly.  Apply more glue to on top of the tissue paper square using spouncer.  Repeat, overlapping squares slightly until the whole can is covered.

Morgan and Mary showing up stenciling and decoupage

Rope/Twine Wrapping:

Hot glue a row of rope to the can along the very bottom.  Wrap rope snugly around can, tacking with hot glue to can in 2 to 3 spots along every turn.  When you reach the top of the can, affix the final row to the very top of the can, hot gluing around the entire perimeter.  Cut rope, then secure the end of the rope to the inside of the can using hot glue.

Alie did some lever multi-colored stenciling, and rope works of art.

Stenciled/Stamped Burlap:

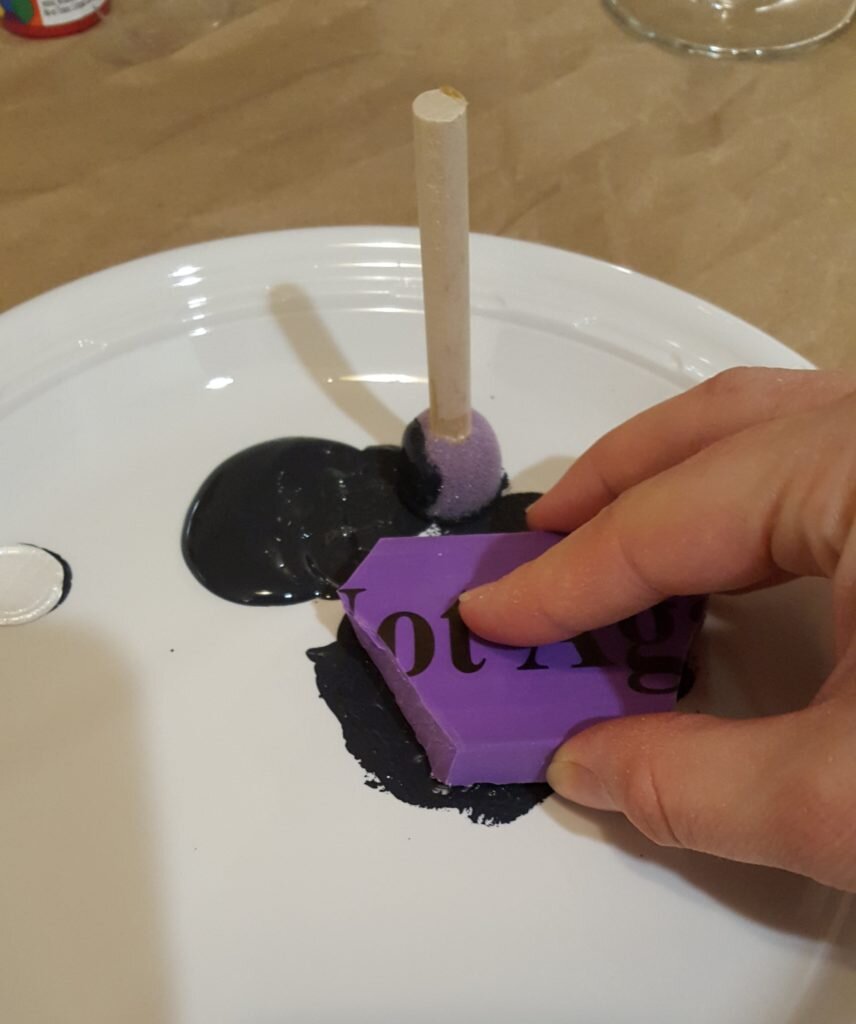
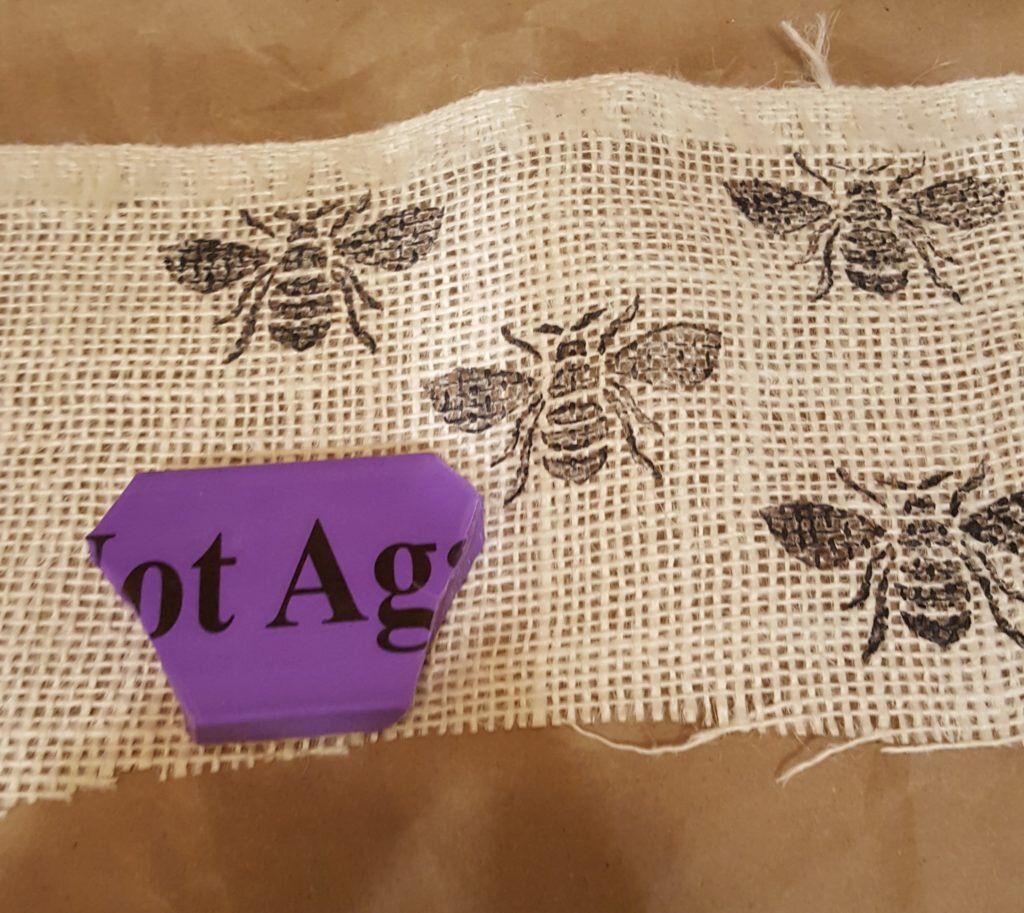
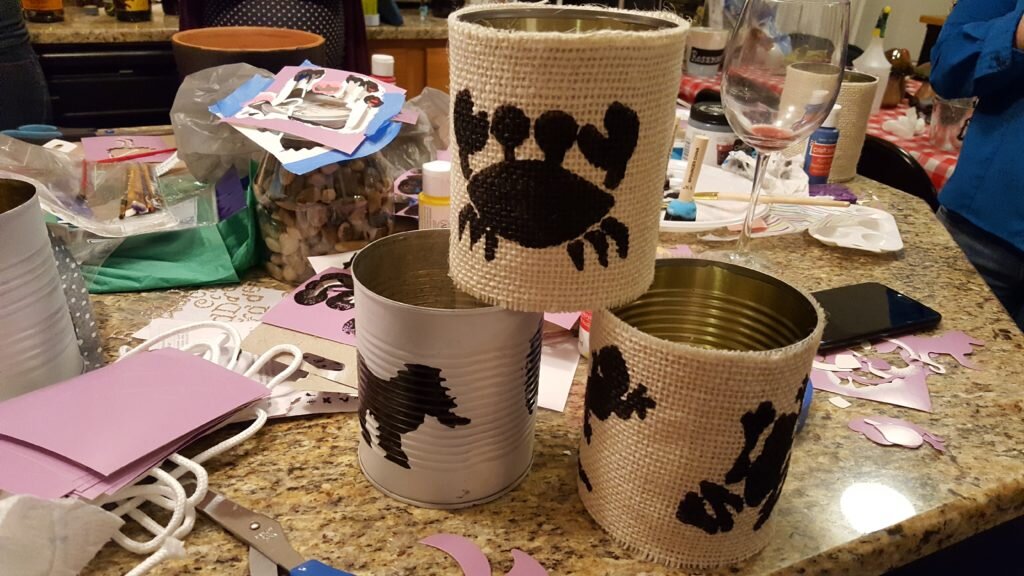
Cut a piece of burlap 2″ wider than your can’s height and 2″ longer than the can’s circumference.  Stamp or stencil onto your burlap using fabric paint.  For stencil: place stencil on fabric, use a spouncer to apply paint evenly over stencil.  For stamp:  Apply an even layer of paint to a palette or disposable plate, press stencil onto paint then onto fabric.  Let fabric dry, then glue to can with a hot glue gun, overlapping at the seam.  Glue excess fabric on bottom of can.

Place even layer of paint on palette and press stamp into paint.

Stamp burlap.

Planting the Herbs

What You’ll Need:

  • 32 quarts of indoor potting mix
  • fertilizer for indoor plants (optional if your potting mix includes this)
  • 48 oz planting charcoal
  • 5 packets of container friendly herbs, such as dwarf varieties

Place 1 inch of planting charcoal in the bottom of your pot (only necessary if your pots don’t have drainage)

Fill the rest of the pot with potting mix and fertilizer (as specified by package directions).

Plant and water seeds as directed on package.

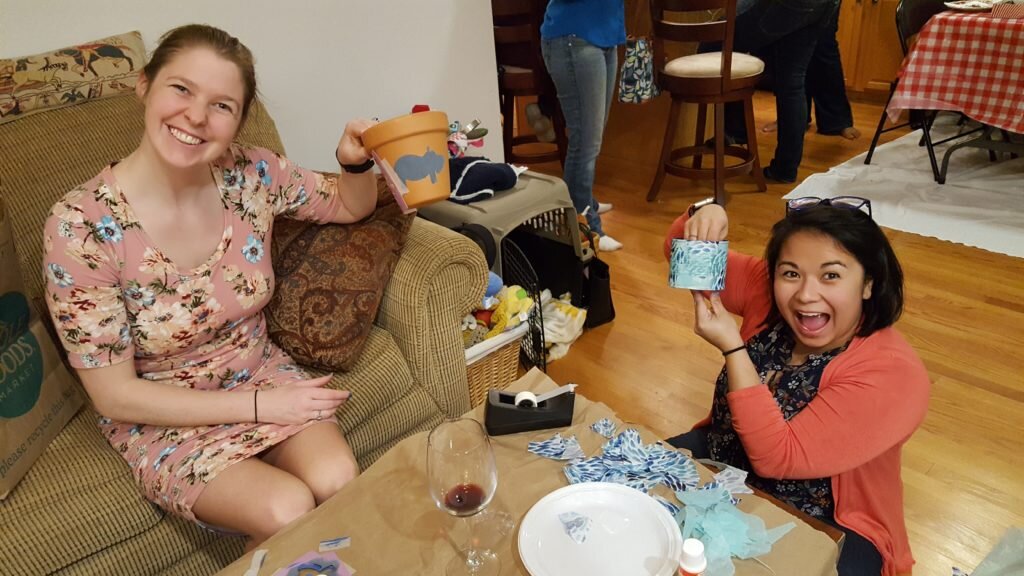
Full crafting mode.

Planting and crafting!

Cute stencils!

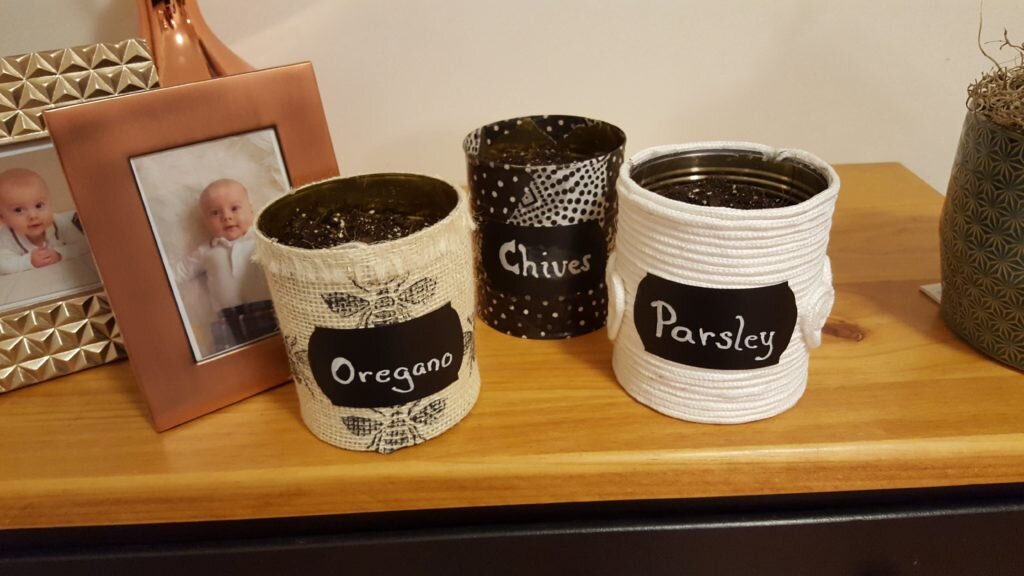
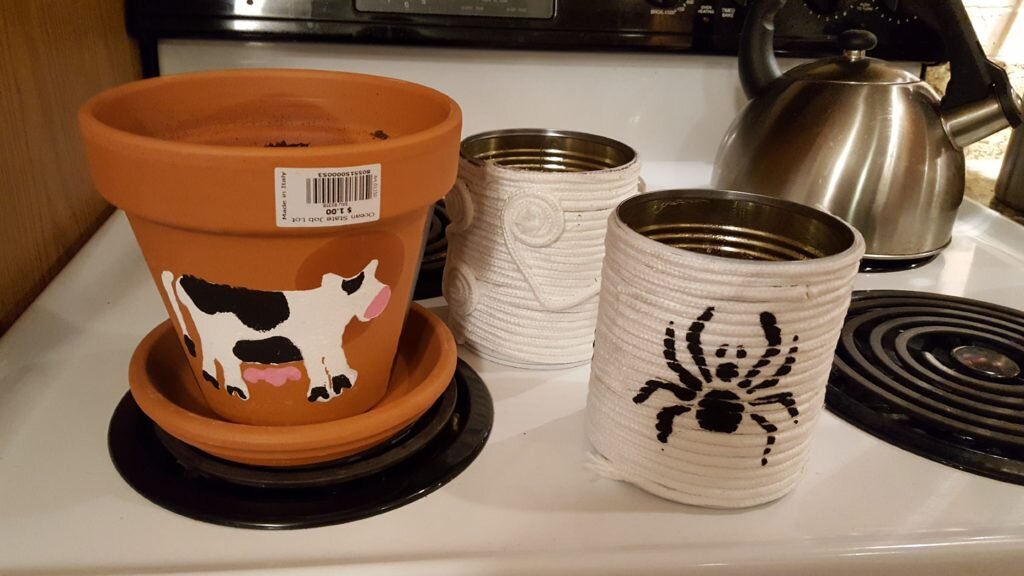
Tin planters plus a decoupage “party” can planter.

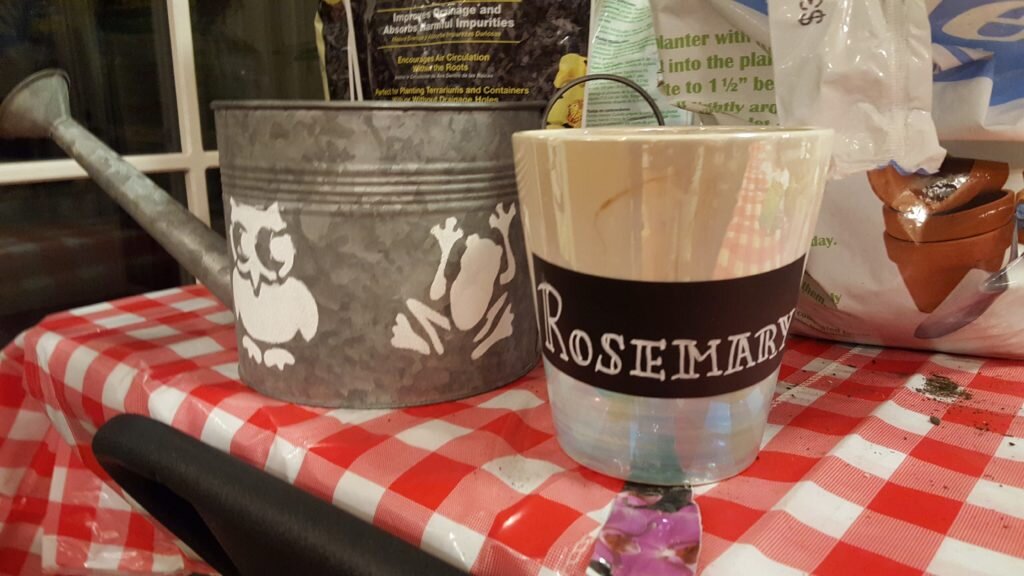
Clever use of chalkboard tape and stenciling.

My finished planters

Posted in Crafts & Sewing, Culinary Delights, Parties | Leave a comment

“Vacation”

Before I left on maternity leave, I cannot tell you the number of times co-workers would ask me when I was leaving on my “vacation”.  These were never co-workers with children, and furthermore whenever the term “vacation” was used in front of a co-worker with a child the perpetrator would be swiftly corrected.  I laughed it off everytime.  Sure I knew it would be tough for a while, but we have had a dog (our practice kid) for a few years and she figured things out very quickly.

Well, if you haven’t realized it by this point in the blog, I’ll just spell it out, humans are a lot more difficult to raise than dogs.  I envy having to teach Dany to avoid peeing on (most) rugs in our house.  To be fair to mama dogs, in the beginning puppies are bigger squishes than humans but even in dog years that helpless period is short compared to that of a human baby.  Anyway, the point of this paragraph is to educate anyone, like my former self, who believes that raising an infant is like training a pet.  Cats and dogs are a heck of a lot less needy and infinitely more independent.  So dear, misguided co-workers, while extremely fulfilling and joy-bringing, parenthood is not a vacation.

But, I am on vacation now!  That is, Will has taken his two weeks of paternity leave!  Also known as Daddy Daycare!!  After 139 days, it is Daddy’s turn to take the wheel of this fender-less, dented jalopy!  As it stands today, I plan to feed and care for Julius before and after “work” (or what would be work on a normal day).  For the other 8 hours he is Daddy’s baby.  Mostly we decided to do this because Julius has a little problem taking bottles.  I know, you’re probably thinking, “but I thought he was exclusively fed by bottle for over a week after he was born”.  Well it’s true, but to curb some of that overproduction problem I switched to exclusively breastfeeding him a couple weeks after we got him to latch.  A month after that he no longer would take a bottle.  We’ve (Will’s) been struggling almost daily to try and feed him by bottle when he gets home in the evening.  (This is what I refer to as “Daddy torture time”, since both Will and Julius are never happy during this time.)

I can report however, that despite many tears, I don’t think Julius completely starved today.  Though I did find it quite comical when Will asked me how I have time to shower or brush my teeth during the day.  I just simply explained that I didn’t.  (For reference, I do shower but I just do all those things before he wakes up or after he goes to bed.)  Just to be totally clear, I know it sounds like quite a sob story that Will is taking two weeks of time to do what you now know (if you didn’t before) is not at all a vacation and in some cases closer to torture.  But for perspective, he just returned from a 4 day, real, honest-to-god vacation in the Caribbean while I kept Julius and Dany alive and happy.  And on top of all that I managed to accomplish several projects!  This project you can complete in just one naptime (that is if you’re baby naps at all, unlike mine).  Plus it is super easy, inexpensive, and produces great results!

DIY Rubber Stamps

What you’ll need:

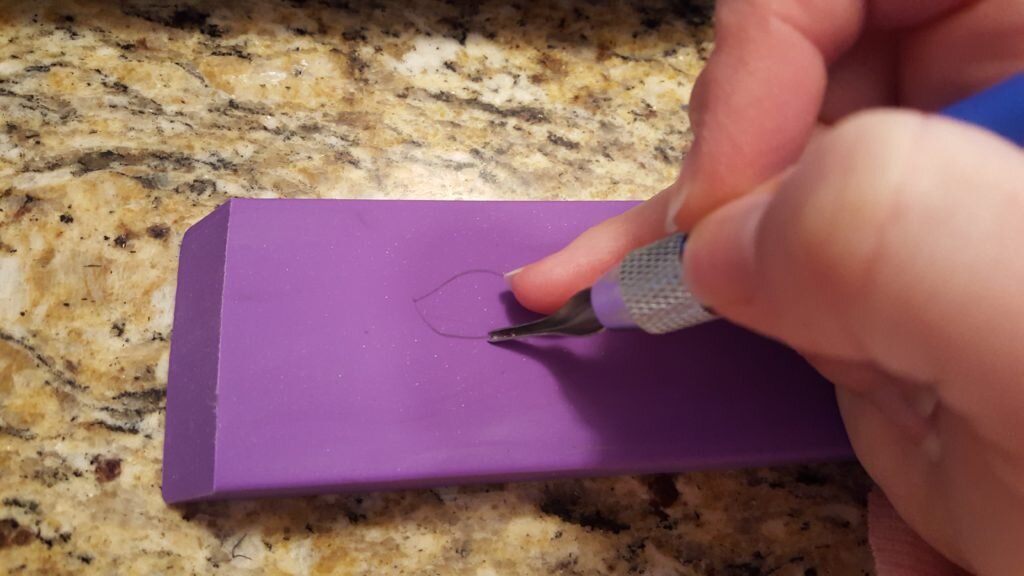
  1. Draw a design on your rubber eraser.  Make sure to specify the areas that will be removed.  Keep in mind that you’ll need to remove rubber to form any “whitespace” in your design.  If you want to make a mark on the paper, you’ll need to leave the rubber in those spots.  I find it easiest to color the areas to be removed black so you know it needs to go.  This sounds simple but is very easy to mess up.  Take your time analyzing!

    Draw design on stamp

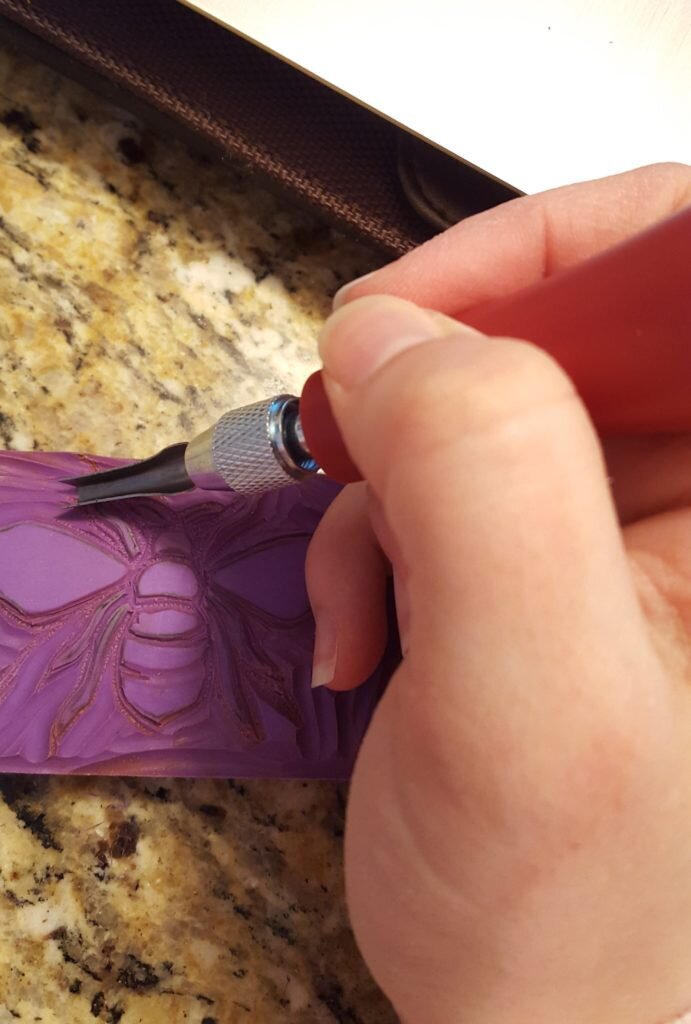
  2. Use your linoleum cutters to start removing the areas you have marked for removal.  Start with the smallest size to define the edges of your design, and move to a larger sized cutter from there.

    Cut out design using linoleum cutters

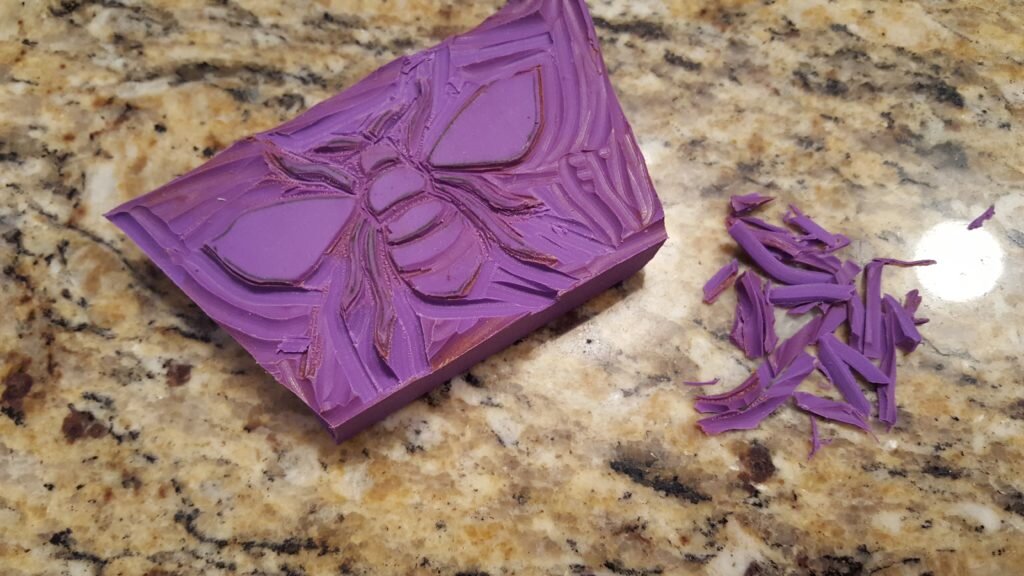
  3. Cut off any excess edge of the eraser, using a scissor or knife.

    Cut off excess edge of rubber stamp

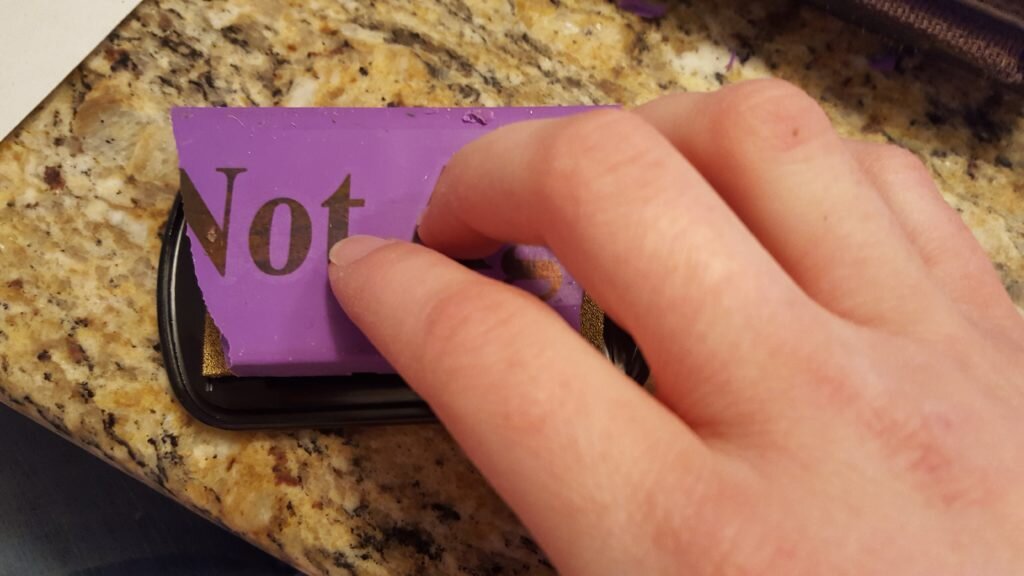
  4. Test your stamp.  Use an inkpad (or acrylic paint applied thinly to a sheet of aluminum foil) and press your design onto the pad.  Firmly press stamp to scrap paper.  If ink lands on the paper in a location it shouldn’t remove additional rubber using the linoleum cutter.

    Test your stamp


Posted in Crafts & Sewing | 2 Comments