Mini Cosmetic Case

Well I’m happy to report that I’m feeling much better and my motivation has now gone up quite a bit!  I got a few things on my long list accomplished including a couple craft projects.  Also, by now many of my co-workers have noticed that I have a belly so I’m getting weird stares from people who have presumably not found out directly that I am pregnant.  It’s gotten to the point where I’ve forgotten who I have and haven’t told.  Several people have come up to me in the last week and in a low voice muttered that they have an embarrassing question for me.   I have spared them and exclaimed, “I’m pregnant!” before they can ask.  Hopefully no one was trying to ask me an actual embarrassing question to which I so rudely interrupted “I’m pregnant!”

Thank you to those of you who responded with your favorite blog projects!  I greatly appreciate it!  Anyone else who wants to chime in, feel free!  I have another week until the Maker Faire and I started getting things together to bring.  I hope to unveil a few new projects at the faire itself – we’ll see how far I actually get.

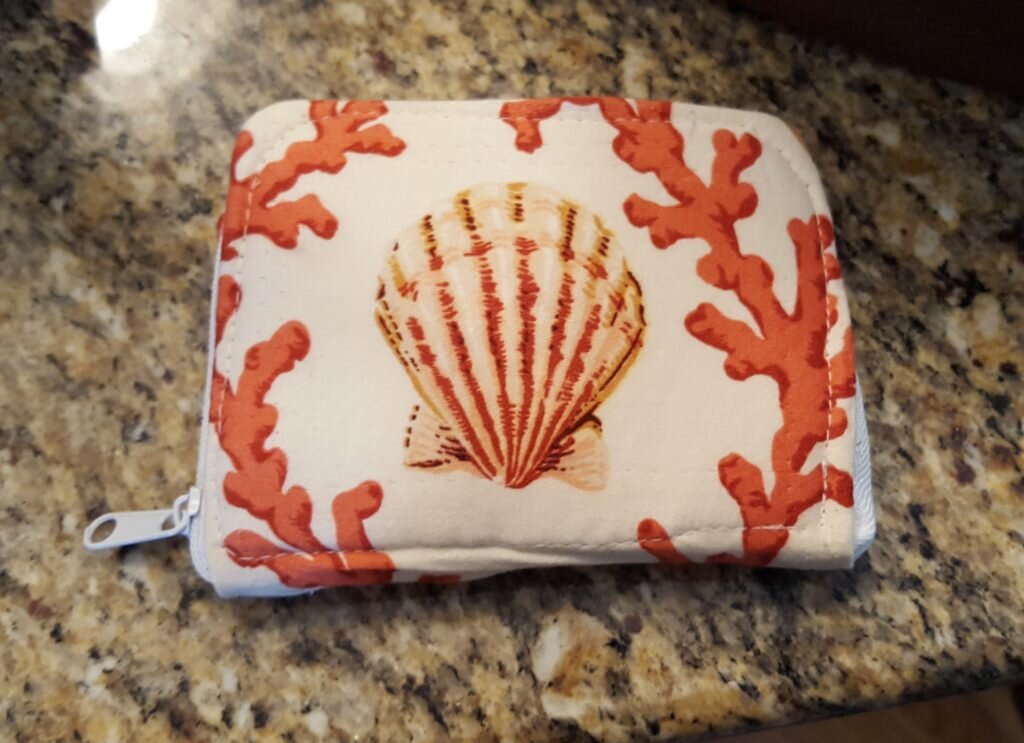
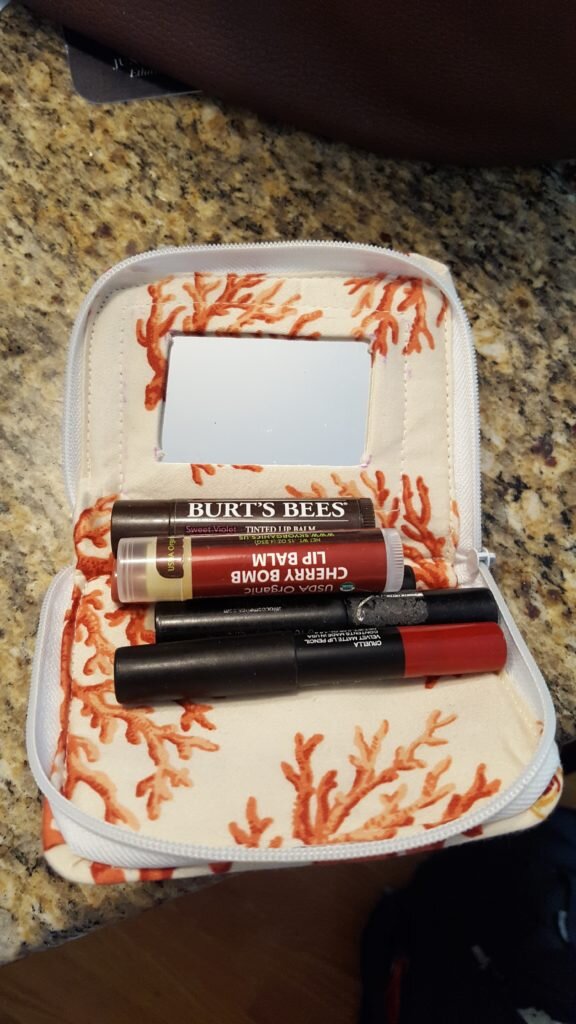
One of the random things I wanted to make the last couple weeks was a little mini make up holder to put in my purse.  I can never find my lip gloss or lip stick when I need it and I end up rummaging around for several minutes before giving up.  This is why I never wear lip stick!

  • 1/2 sq foot of scrap material for outer shell
  • 1/2 sq foot of scrap material for inner lining
  • 1/2 sq foot scrap Peltex 70 thick interfacing
  • 1/2 sq foot scrap fusible interfacing
  • 12″ zipper
  • 2″x3″ small mirror
  • Pattern here
  1. Cut out all pattern pieces as specified on the pattern.
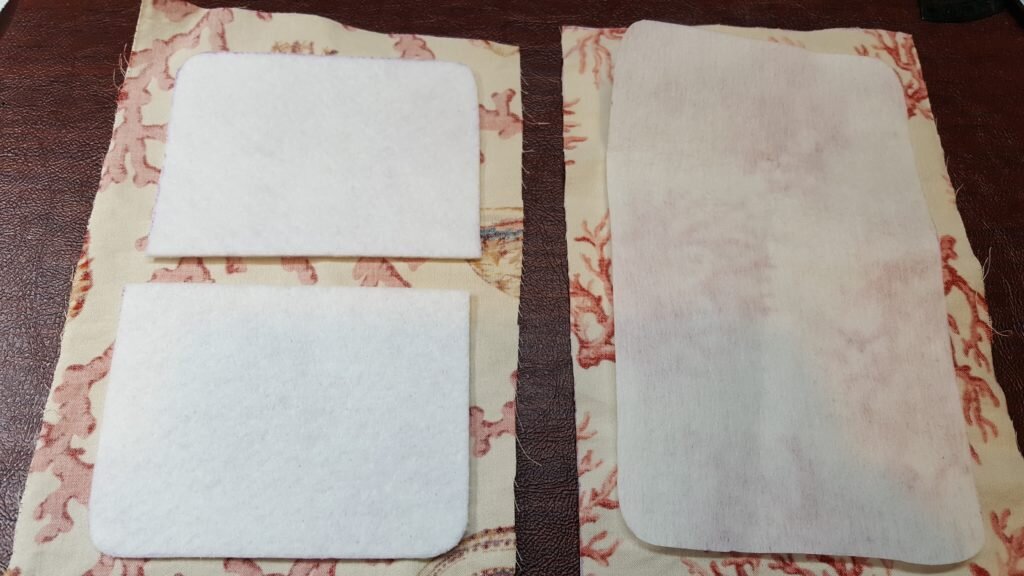
    Cut out all pattern pieces

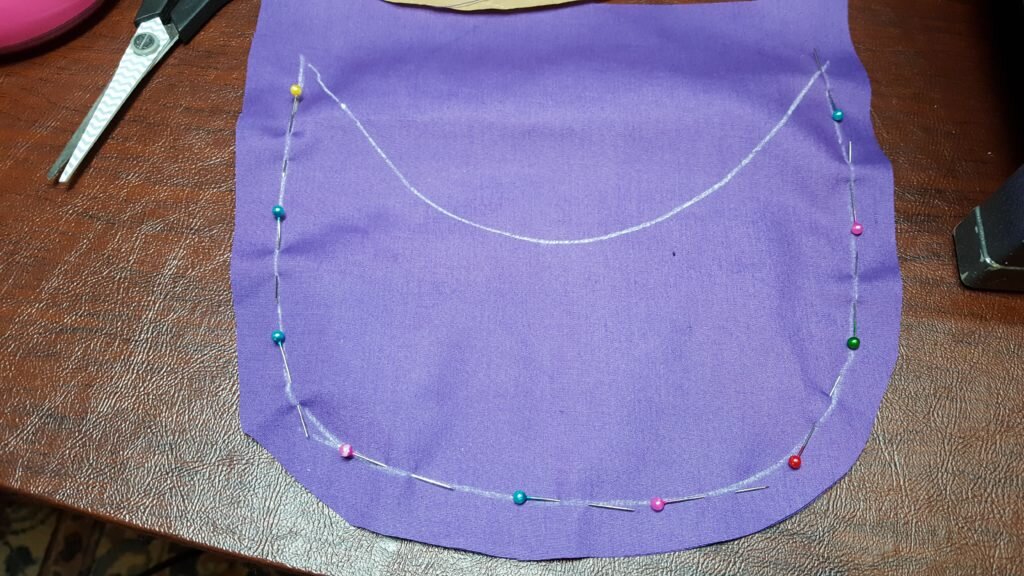
  2. Position thick interfacing on wrong side of outer shell material, leaving a 5/8″ gap between the two pieces.  Machine baste to hold in place.
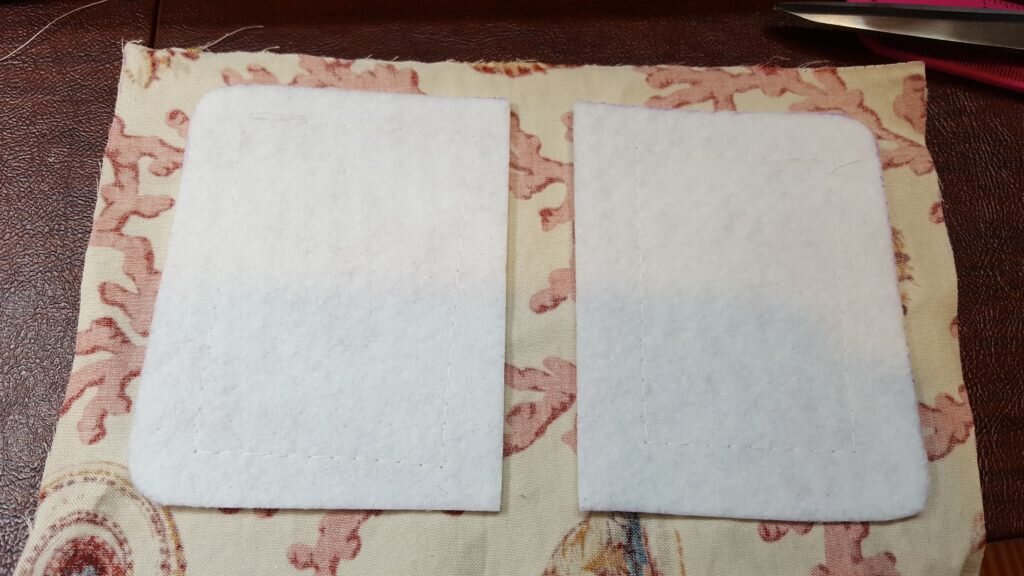
    Baste interfacing to outer fabric.

  3. Turn up seam allowance and clamp as shown.  Machine baste.
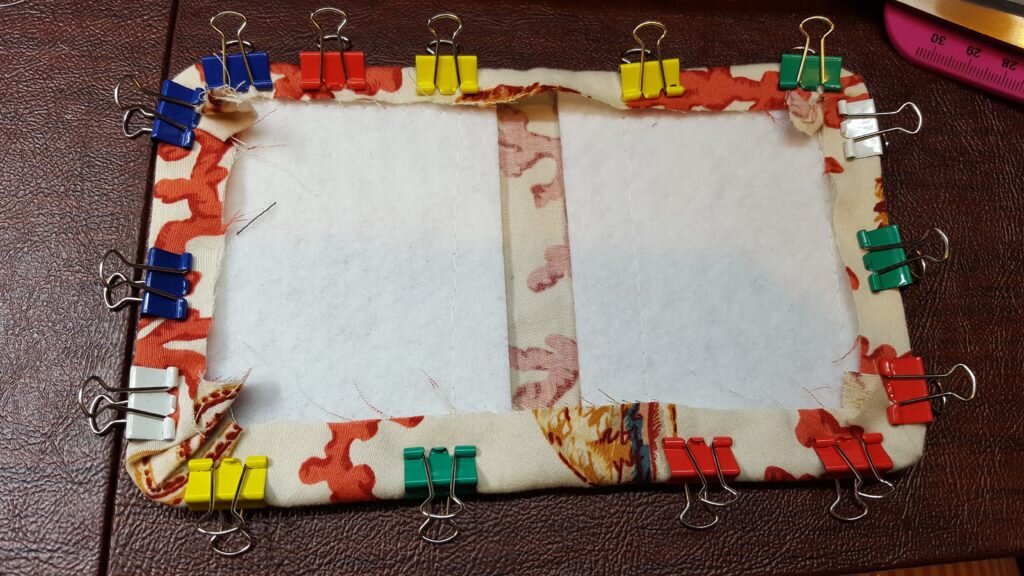
    Clamp and machine baste seam allowance.

  4. Switch to your zipper foot.  Baste one side of zipper to one side of make up holder, placing 1″ along the edge of the inner part of the interfacing.  (See picture.)
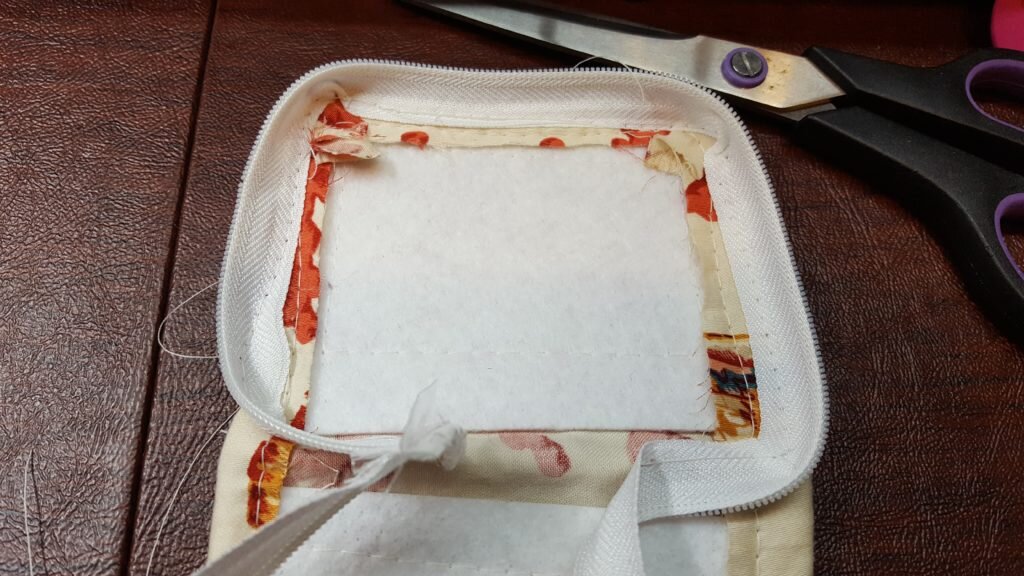
    Baste one side of zipper to one side of bag.

  5. Repeat step 4 for the other half of the zipper.
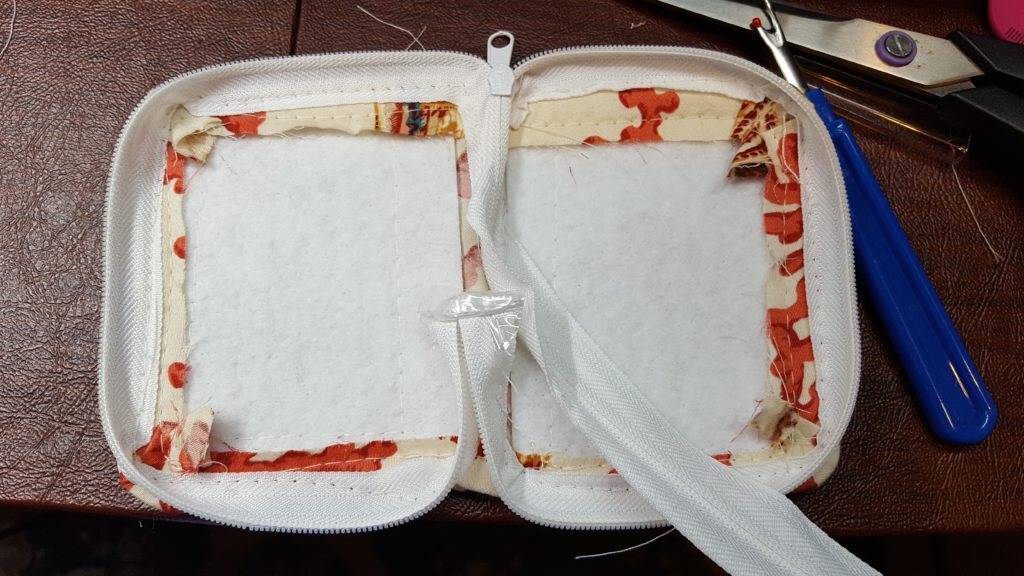
    Baste other half of zipper.

  6. Fuse fusible interfacing to wrong side of inner lining following manufacturers instructions.
  7. Mark a 1 1/2″ x 2 1/2″ rectangle onto your lining fabric.  Cut an ‘x’ diagonally from corner to corner.
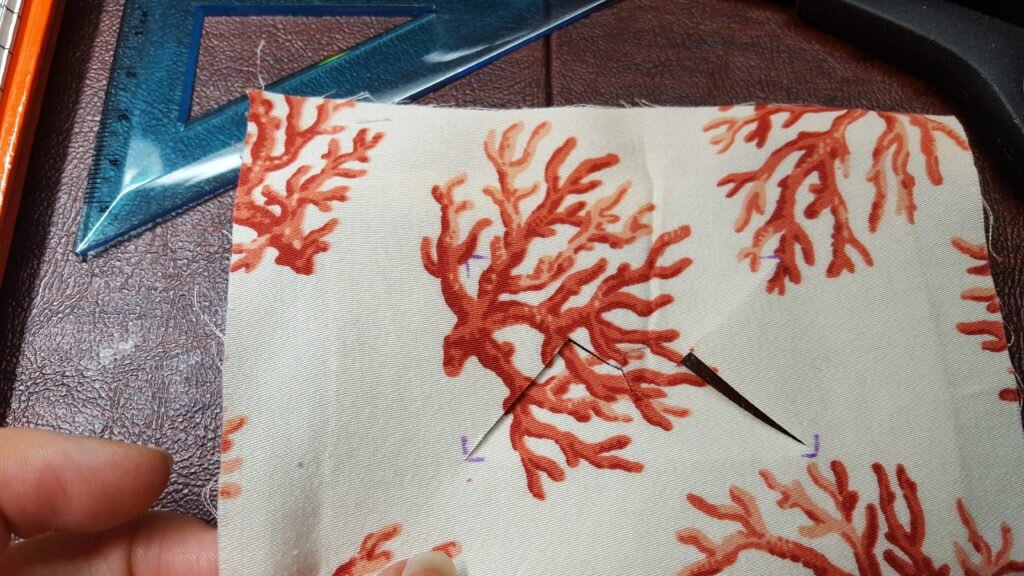
    Mark rectangle for your mirror. Cut from diagonal to diagonal.

  8. Fold back each triangle to form a frame.
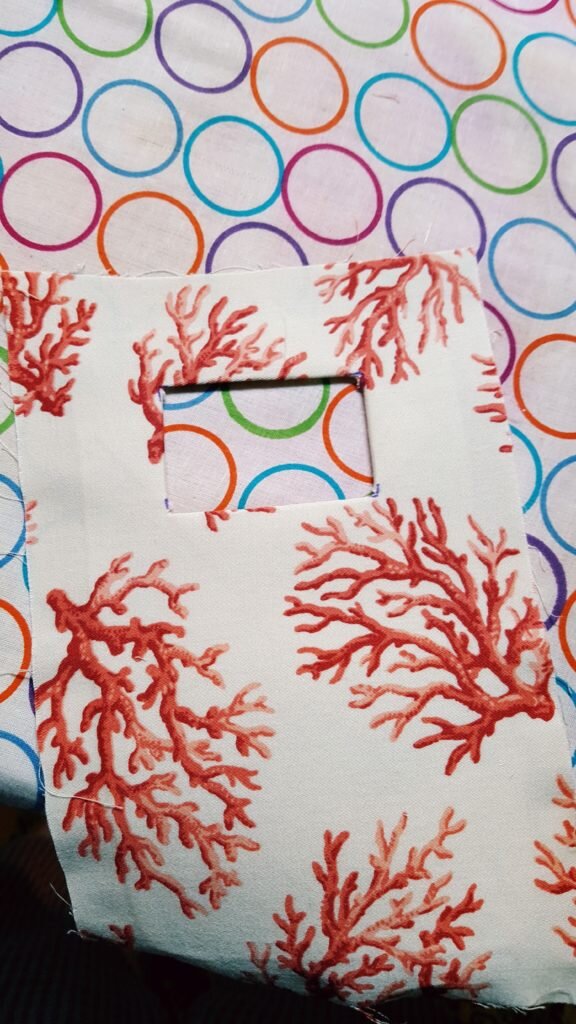
    Fold under triangles to form a frame.

  9. Position mirror behind the frame you formed in 8.  Trace around mirror with water soluble fabric ink, marking the edges of the mirror.
  10. Place a piece of scrap material slightly larger than the mirror behind the mirror.  Using the zipper foot stitch the mirror backing to the frame right up against the mirror.  Be extremely careful not to hit the mirror with your needle while you sew as this could break the needle.
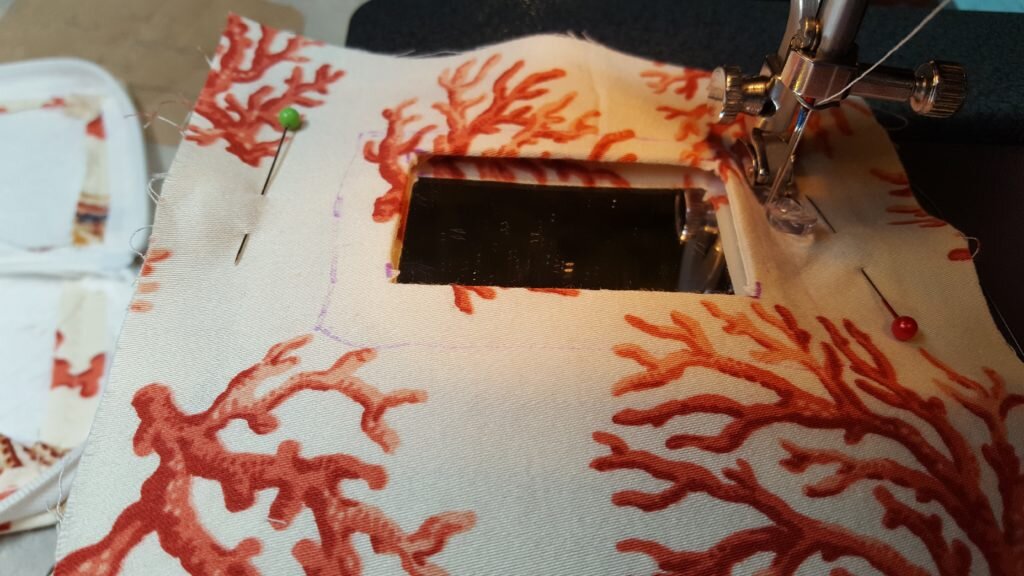
    Stitch around edges of the mirror outside the water soluble ink.

  11. Using an iron press the edges of the lining seam allowance up around the interfacing.
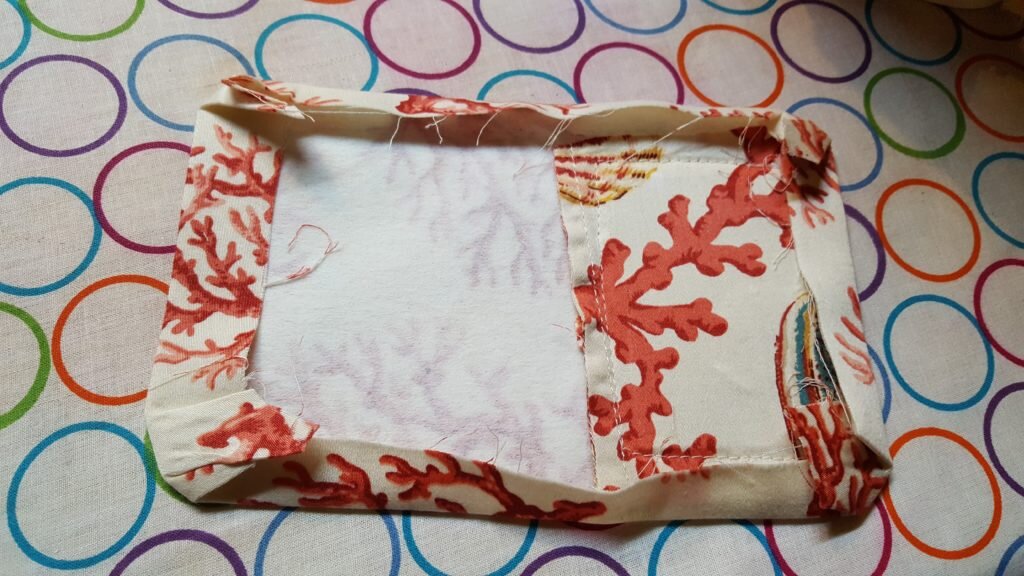
    Press under lining seam allowance.

  12. Line up the lining on the inside of the basted zipper, covering the zipper start and endpoint.  Stitch along edge of zipper close to the edge on one side of the bag.  Be sure to sew through inner lining, zipper and outer material.
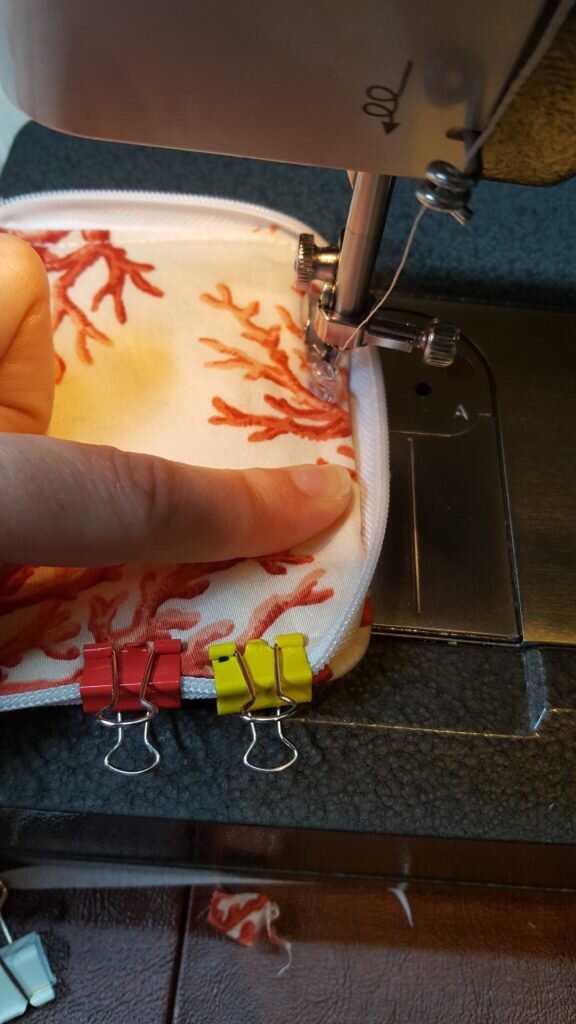
    Stitch along edge of the bag attaching lining to zipper to outside.

  13. Stitch in a straight line along where the thick interfacing ends at the center of the bag.
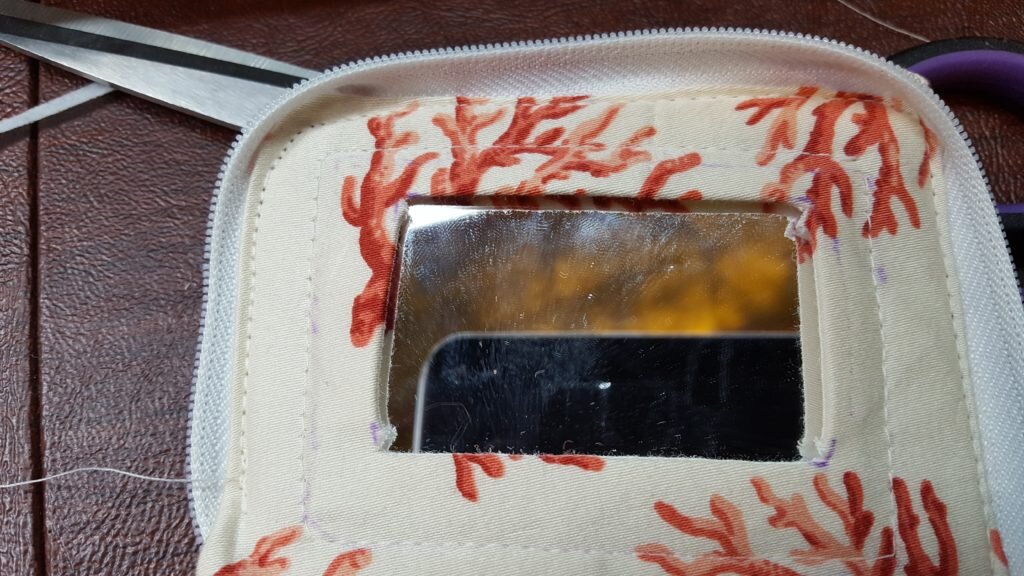
    Stitch along the middle of the bag where the interfacing ends.

  14. Repeat steps 12 and 13 for other side of bag.
  15. Remove basting stitches.
  16. Show off!

    Closed mini cosmetic case

    The perfect size for lipsticks!


Posted in Crafts & Sewing | Leave a comment

Shower Curtains and Ramblings

Well even though I’m in the second trimester, which is supposedly “the honeymoon phase”, I’ve felt worse than in the first trimester.  On top of the weird second trimester issues, I’ve had a lot of trouble motivating myself to do anything.  Normal things like cooking and cleaning have fallen to the wayside, and I’ve had a lot of trouble attempting to do anything worth blogging about.

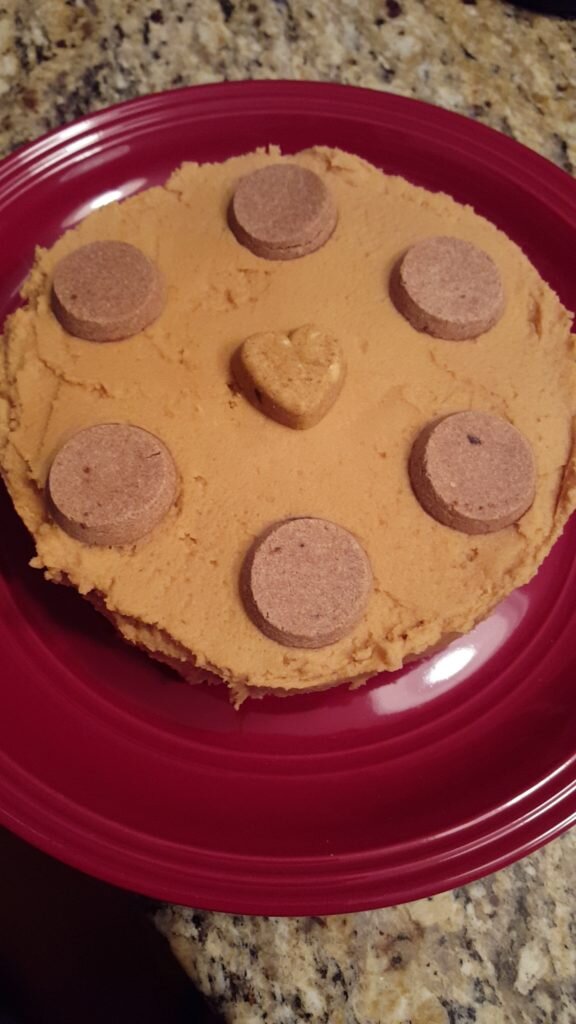
Two weekends ago with Will’s help I managed to get the house cleaned to some level of satisfaction, but that was about all I did the whole weekend.  When I mentioned to Will that I hadn’t accomplished anything and was feeling lazy his response was, “you made a cake for your dog.  No one would call someone who makes a cake for their dog ‘lazy’.”  Point taken.  It was Dany’s birthday so I had made her a banana cake with peanut butter cream cheese frosting.  But I mean, that’s not human food so its not blog worthy…

Dany’s birthday cake!

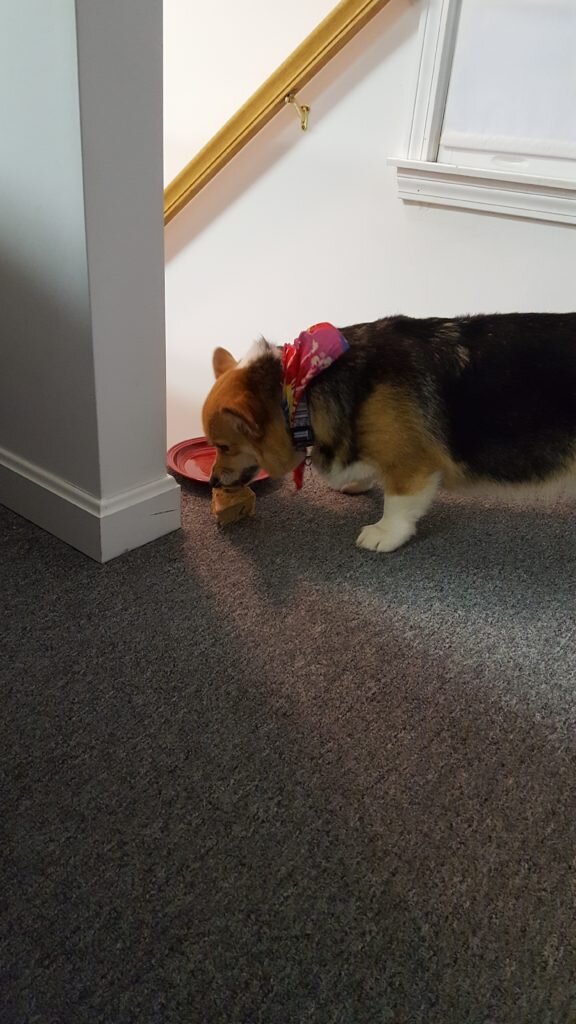
Dany eating her cake!

Birthday dog with her birthday gift!

On top of not feeling great I’ve got quite a bump now, to the point where I can’t zip my normal pants.  When I was in Nashville last weekend my mother in law offered to take me to Pea in the Pod to try on some maternity clothes.  Honestly I was very embarrassed about the whole maternity clothes thing so I was a bit hesitant.  But these clothes are more fashionable than my normal wardrobe!  So thanks to my mother in law and a friend’s hand-me-downs I’m now up to 3 pairs of pants!
Well even though the clothes at Pea in the Pod are amazing they are pretty expensive but I felt I could really use a few more tops and another pair of jeans.  So I decided to check out Savers.  My plan was to buy some second hand jeans and modify them to add a belly band for maternity.  Well the maternity jeans were actually CHEAPER than a normal pair of jeans!  Can you believe that?!  So I bought 2 pairs of jeans, 1 skirt, 6 tops, a dress and a prenatal yoga dvd for $61.  That is less than a new pair of jeans!
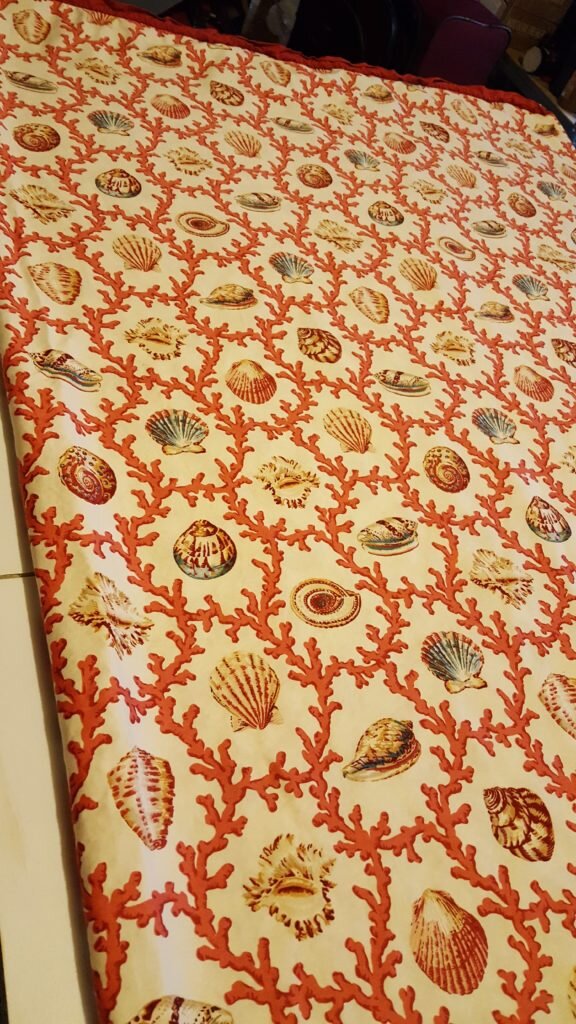
Despite my maternity wardrobe feeling nearly complete I bought a pattern for an adorable maternity dress quite a while ago.  The pattern is Kwik Sew K3486.  Well, speaking of thrift stores, I’m going to let you in on another secret of mine.  I buy most of my fabric at Savers.  Not just in the fabric section either – I tend to buy curtains or tablecloths and re-purpose them as long as they aren’t faded or don’t have any stains.  For this dress I actually bought a cotton shower curtain… The fabric was adorable and summery looking and it was made from a nice soft medium weight cotton.  The curtain cost me only $4.99 and the pattern was $11.99 for a grand total of$17.  Plus the dress only took me 6 hours to make!  It really was a quick sew!  I’ll definitely be using this pattern again!  Would you have guessed this came from a shower curtain?

Shower curtain, complete with ruffles. But look how cute the pattern is!

Can you believe this was a shower curtain?!

Back view

The dress hides the bump fairly well, until you do this.

A bit of a bump, right?

Just one more thing if you’ve gotten this far!!  We are having a Maker Faire at work and I’m going to bring in some of my best creations!  I need your help to decide what to bring in!  What are your favorite projects I’ve put up on the blog?

Posted in Crafts & Sewing, Thrift Finds | 5 Comments

Gender Reveal Scratch Off

Will and I found out the gender of our baby early on via blood test.  We decided we wanted to know the gender ahead of time, so I called to ask for the gender since my doctor (smartly) refused to leave it on my answering machine.  I had told Will all day that I’d been going back and forth on whether I wanted to know or not, so by the end of day he didn’t think I had called.

Well I had called and then at lunch called my hair dresser (who I had an appointment with that evening) to ask them if they had any gender stereotypical hair extensions in stock.  I’ve been putting colored hair extensions in for the last year so I figured this was as good a way as any.  If you read my blog, and you saw my hair around that time – surprise!  You know the gender!  Please don’t tell anyone else (since it is not your surprise to share) but feel free to send me an email or tell me in person next time you see me that you know.  I’ll give you kudos for reading my blog!  For everyone else, you’ll have to wonder for just a bit longer until our extended families find out and we decide to make it public.

Anyway, my hair dresser thought it was hilarious that this was how I was revealing to my husband the gender of our baby.  So I went home, pretty excited with my hair as always (my hair dresser is awesome), and strolled into the house.  Will complimented my hair immediately (he’s a smooth one) but he didn’t mention the hair color.  So I puttered around him a bit and then I couldn’t contain myself and just stood next to him with a goofy grin on my face.  The rest went as follows.  “What?  Why are you smiling?  Wait, do you know the gender?  Is it a girl?” (Fumbles around my hair because my extensions had apparently been obscured, which is why he didn’t ask about them.)  “Oooohhhh.”

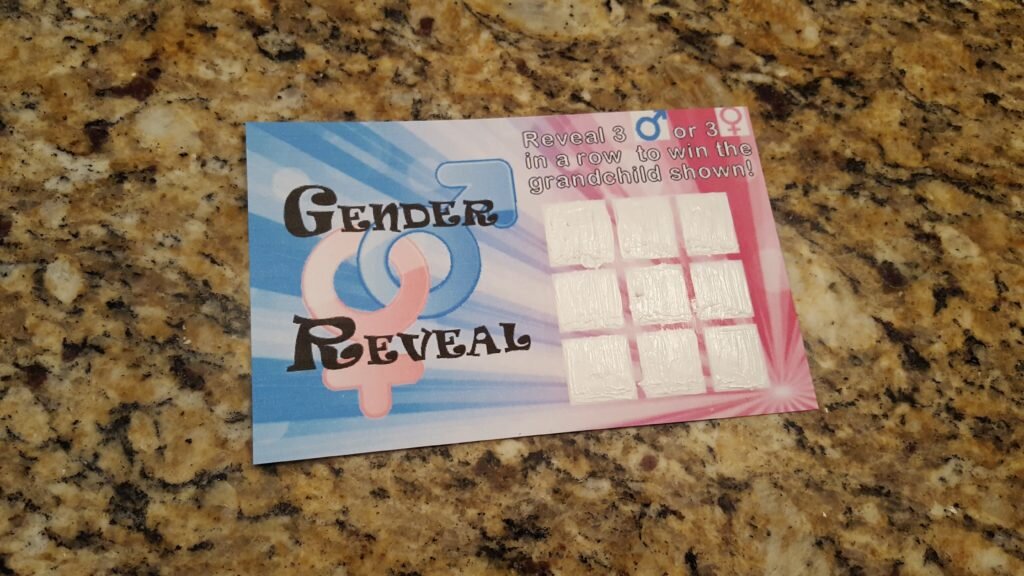
Well for our grandparents we weren’t sure they’d pick up on the hair thing without a serious hint, but we wanted to give them a surprise as well.  So we sent them little scratch off tickets that I had made to reveal the gender!  You could use them for any loved ones who are far away!  I found several instructions on how to create scratch off tickets on pinterest that suggest you use nail polish.  I tried several brands of nail polish and found this method did not work at all.  Follow my instructions below to see how I did it.

Gender Reveal Scratch Offs

  • 110lb white cardstock
  • White candle wax or a white crayon
  • Acrylic paint in your desired color (I used white)
  • Paint brush
  1. First print out the word document for a girl or boy on cardstock.

    Girl gender reveal card

    Boy gender reveal card

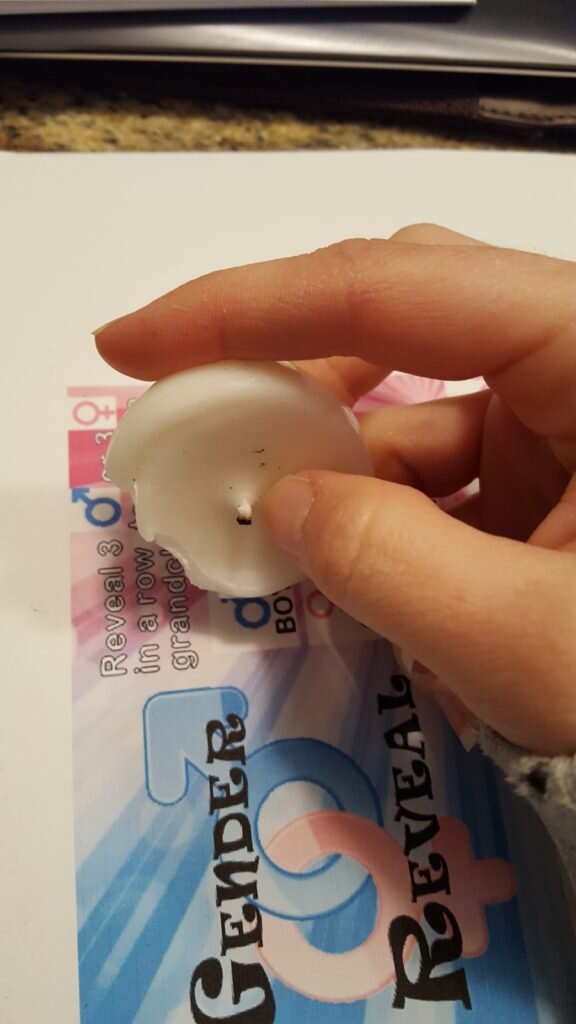
  2. Color over the white boxes containing the gender with your candle wax or crayon.  Press down firmly and be sure to cover the whole area thoroughly.  You won’t be able to see the wax on other parts of the design so don’t worry about coloring outside the lines.

    Color over scratch off section with candle wax or crayon.

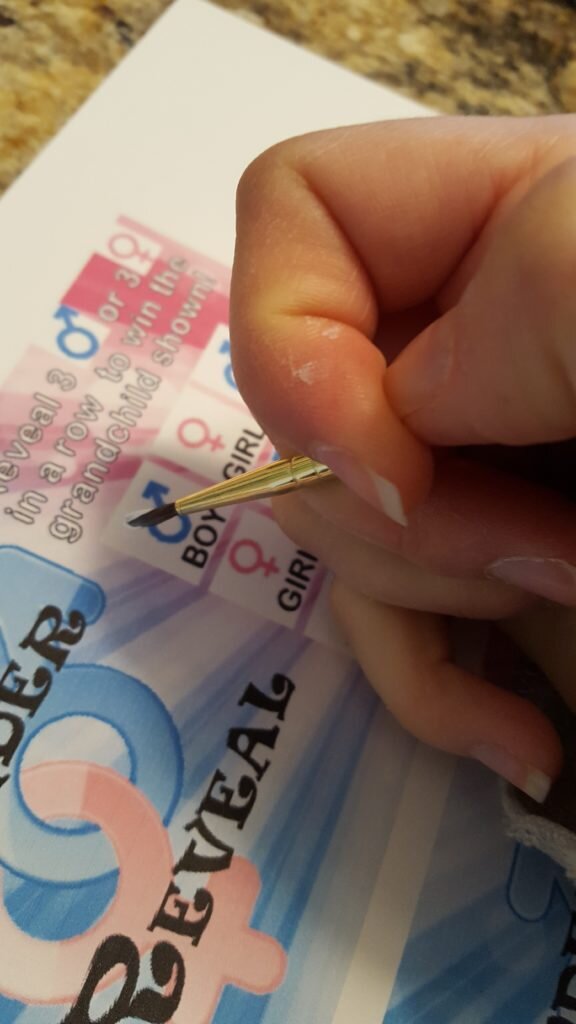
  3. Paint a layer of acrylic paint over each of the boxes you just covered with wax.  Let dry.

    Paint over each square with acrylic paint.

  4. Repeat step 3 until you can no longer see the symbols and lettering beneath the paint.  Let dry completely.
  5. Cut out each scratch off.

    Scratch off to reveal the gender!


Posted in Crafts & Sewing | Leave a comment

Not Just Donuts

Well from the vacation pictures I posted in my last entry, you might be thinking, ‘boy she has gotten a little fat’. I know, right?! Must be all that sourdough bread and soup I’ve been making! Well as my husband has been reminding me, “its not fat, you’re pregnant”. But I can tell you when your pants and shirts all suddenly stop fitting, it sure feels like fat!

Oh right, so I glossed over that. I’m pregnant! Will and I are having a baby! That belly in the pictures is a baby! (Or really all my intestines pushed upwards by a baby as I have been reminding my husband.) Crazily I have two other friends who are due around the same time as I me – Oct/Nov. When my friend Maren and I were discussing our slightly protruding bellies she made the hilarious comment, “everyone probably just thinks its too many donuts”. How true! And then she followed it up with, “I wish I had a shirt that said, ‘not just donuts'”.  Wish granted!

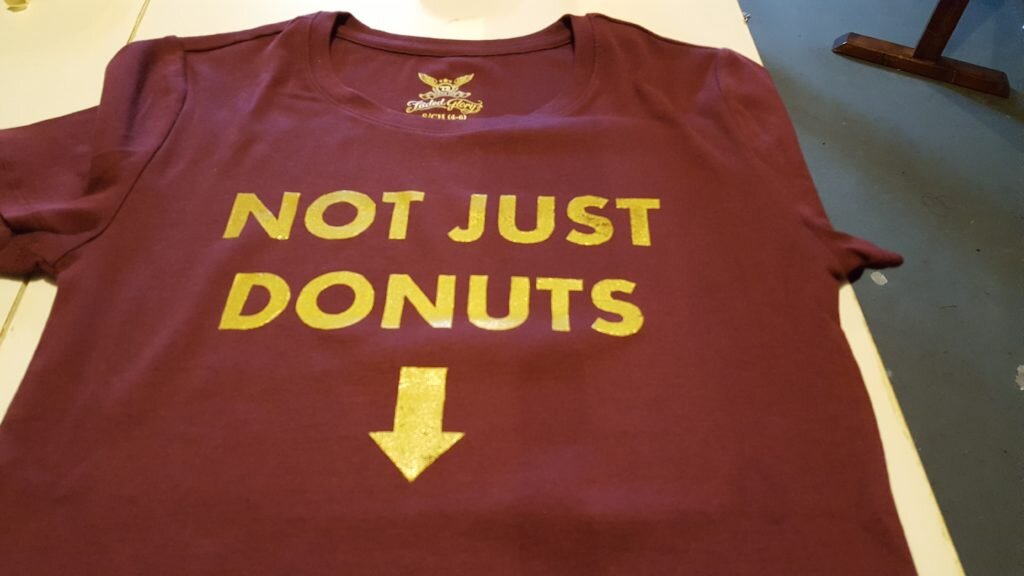
Here is the super clever shirt Maren came up with, as interpreted by me. If you’d like to make your own, follow the instructions below.

Not just donuts…

  1. Print out the MS Word document here.
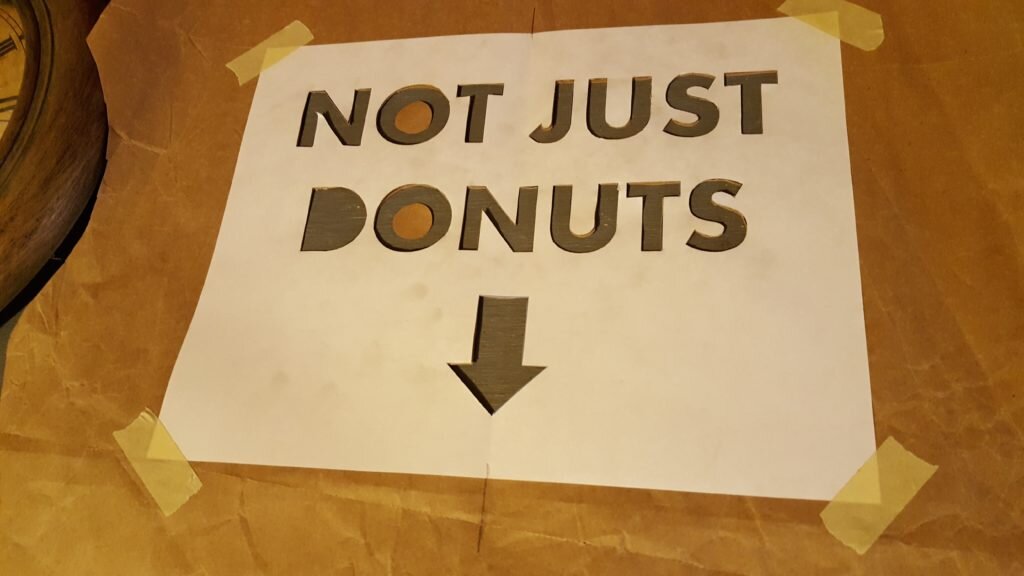
  2. Take your print out and tape it to your brown paper. Using your X-acto knife, cut out the letters and arrow. Make sure you cut out the inside portion of the ‘D’ and ‘O’s and save them.

    Cut out letters with an X-acto knife and save the insides.

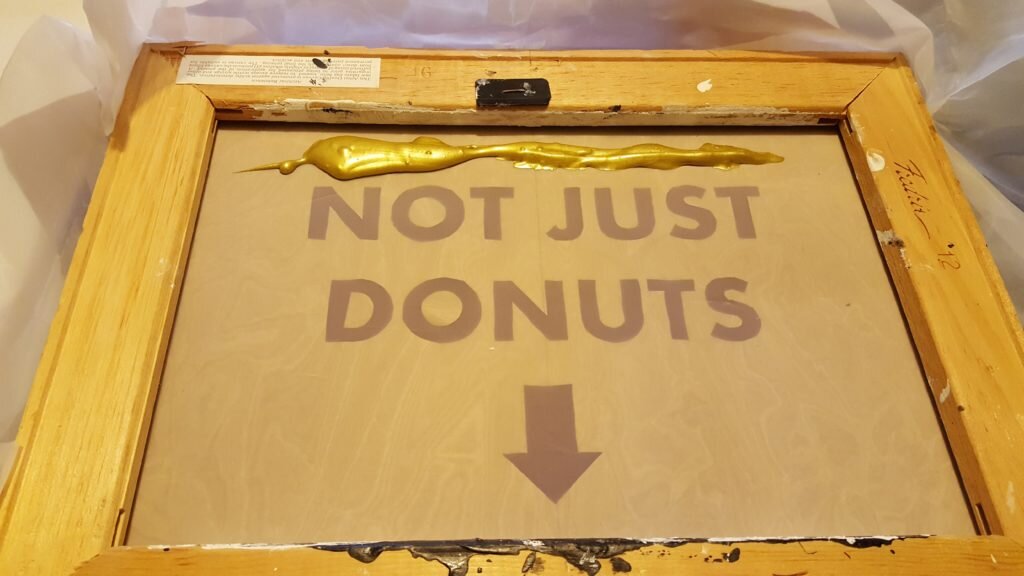
  3. Follow the instructions in my previous post to screen print the design onto your shirt.
  4. Make sure when you get to step 14 you remember to also position the inside of the ‘D’ and ‘O’s you saved in step 8 in their proper positions.

    Position cut out onto shirt, make sure to add the inside of the “D” and “O”s.

Screen print following the instructions in my dyeing-to-screen-print post!

Finished shirt


Posted in Crafts & Sewing | 2 Comments

My New Yeast Pets

Well we are back from vacation! My brother and his wife planned the whole thing, and I think I’m inclined to let them plan the next one! We toured the Grand Canyon, Antelope Canyon, Bryce Canyon, Zion, went through the Glen Canyon by boat and finally stopped in Vegas for a couple days. Every Canyon and National Park we visited was amazing in different ways. Grand beauty (according to a sign in the visitor center the Grand Canyon is not the widest, deepest or longest canyon in the world, but we can all agree it is the grandest), alien looking landscapes and rock formations and finally lush forests in middle of the dessert. My favorite part of Las Vegas was the Cirque du Soleil show, “O”. It was just plain amazing. We all couldn’t believe how amazingly choreographed the performers and the stage were. I’ve never seen anything like it!

Will and I at the Bellagio under the beautiful Chihuly installation. I just love Chihuly – he is one of the few artists whose works I have sought out in multiple museums and locations.

Unfortunately vacations come to an end, and I’ll be back at work when you’re reading this. Before my vacation I started a number of projects – a sash and cookies for Emma’s bachelorette party, another screen printed tee that I’ll show you soon and finally I created a sourdough starter.

I blame the Great British Baking Show for making me decide to create a sourdough starter. I’ve wanted to make sourdough for years but had convinced myself it was like having a pet and thus too much work. Well, I’m pretty sure the only people who will tell you this have never had a proper pet. Sure you have to feed it once a day, but you don’t have to groom it, take it for walks or clean up its poop. Plus what kind of pet can you stick in the fridge when you go on vacation? I seriously hope you don’t try that with a non-primitive lifeform…

Sourdough starter a few days before it is ready.

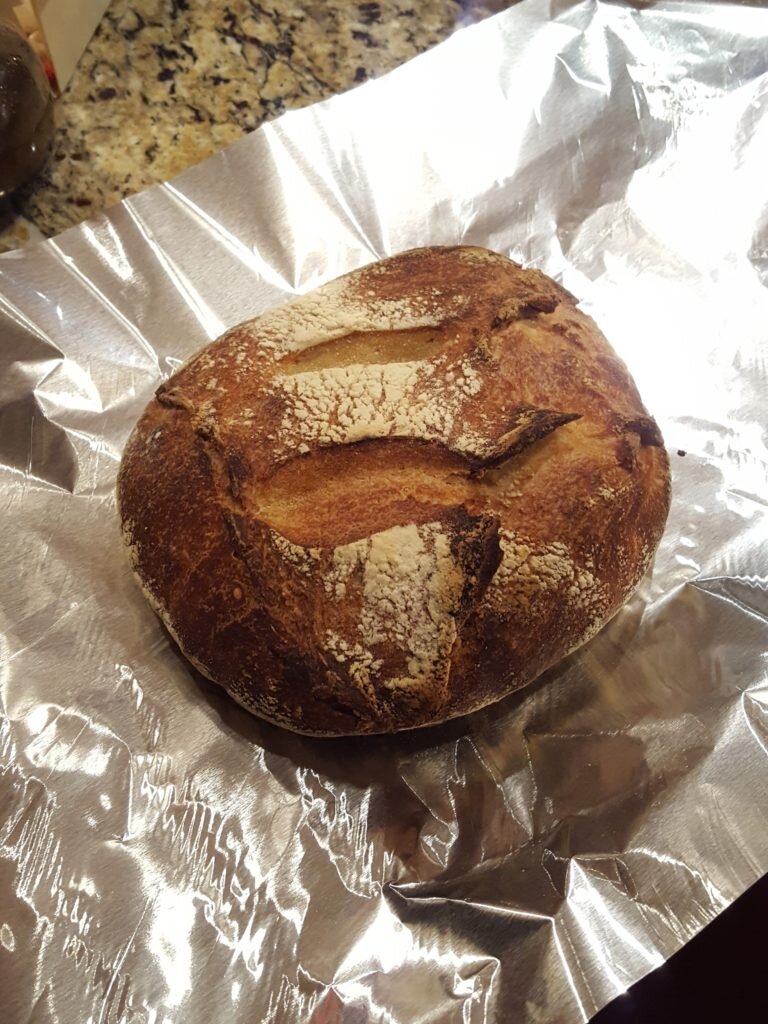
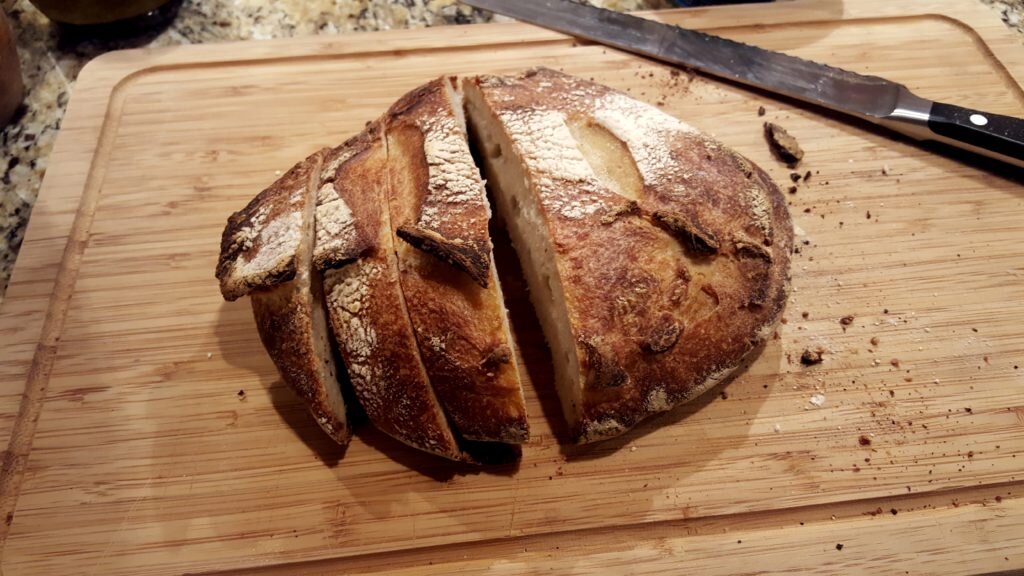
Pet or otherwise I created a sourdough starter following these directions before vacation. You can tell from my pictures it worked pretty well, though it took mine a few extra days beyond her original tutorial (probably because our house is so cold). Then I followed her directions to make a batch of sourdough bread. Well the loaves were a bit of a failure – I’m not sure if they were under or over proofed. (I have some learning to do.) But boy did they taste amazing!! Her foolproof steps basically force you to start the bread on a weekend, but of course I didn’t do that. Instead I stayed up really late the day before our flight out and started it. Then for the final proof instead of leaving it out for 4 hours (and me starting to bake the bread at 4am) or leaving it in the fridge for 12 hours (and having me bake the bread in the middle of the work day) I left the bread on our chilly counters and baked it at 8am.  My theory was that our chilly house is somewhere between fridge temperature and normal room temperature. I’m hoping in the summer my house’s “room temperature” will be more like the normal room temperature and thus the yeast will have much less trouble multiplying.

The bread is a bit flat, but doesn’t it look tasty?

My slightly sad looking delicious sourdough attempt #1!

Will chose to eat one of his twelve slices with oil and dipping spices.

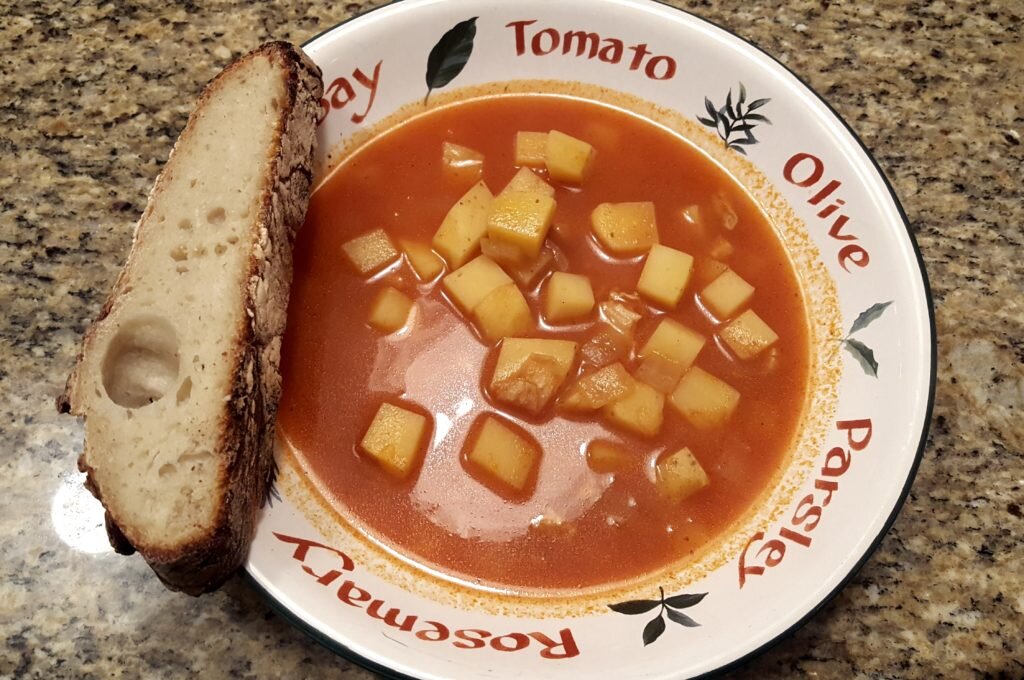
Oh and if you’re wondering, “how did you manage to eat two loaves of sourdough in 4 hours?”  We didn’t!  Well we did eat one loaf.  The other I froze then defrosted, reheated and ate for dinner with some homemade Rocky Point (RIP) Clam Chowder.  See below for reheating instructions!

Reheating Homemade Sourdough

  1. Wait until bread it completely cool then freeze sourdough in a heavy ziplock bag until you would like to use it.

    Tightly wrap in a freezer bag.

  2. Defrost frozen sourdough on the counter until thawed.
  3. Wrap sourdough in aluminum foil.

    Wrap in aluminum foil before placing in oven.

  4. Heat in 350 degree oven for 6-8 minutes.

    You’d never know it was frozen!

    Enjoy with some delicious comfort food!

Posted in Culinary Delights | 2 Comments

Bride-to-be Sash

Well I’m officially late to post this.  For the last several 6 days we have been traveling the southwestern national parks.  We saw the Grand Canyon, Antelope Canyon, Glen Canyon and Bryce Canyon.  All the canyons were beautiful and we got to go on some cool hikes, see some petroglyphs and ancient native American ruins.  So far so good!  I’ll give a better update in a few days.

Bryce Canyon (which technically isn’t a canyon) isn’t it gorgeous? It snowed one of the days we were there…

Just one of many pictures of the view from our hikes into/around the Grand Canyon.

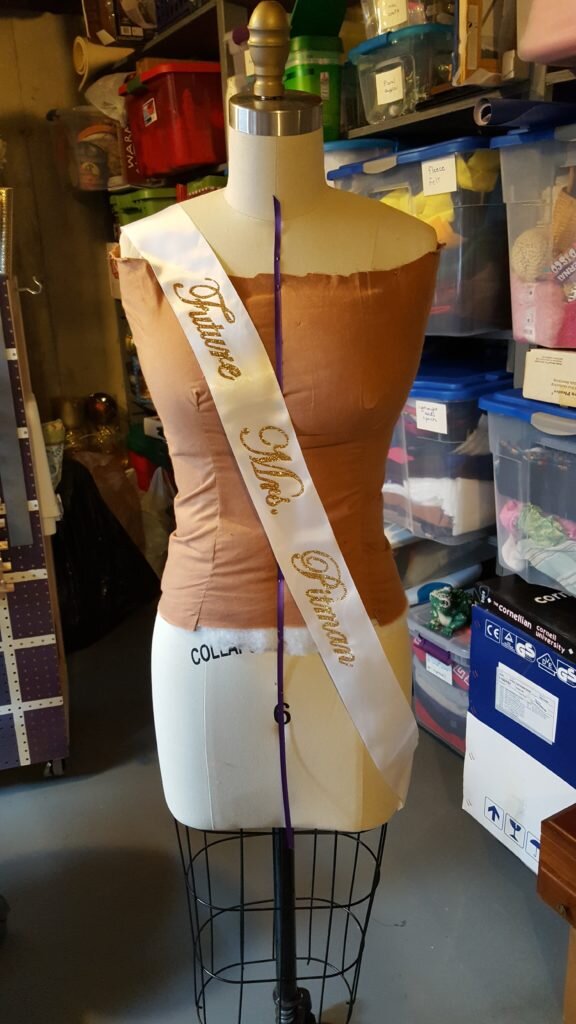
Before we left I celebrated our friend Emma’s marriage to our friend Andrew via a bachelorette party.  It was a lot of fun.  To celebrate I made her some cookies (which are not PG-13 and thus won’t be on my blog, but just trust me they are hilarious.)  I also made her a sash with the words, “Future Mrs. Pitman”.  (That I can show on the blog.)  It was pretty quick!  If you have a die cutter it would be even easier, but I don’t, so it took me about an hour.

DIY Bride-to-Be Sash

  • 5 feet of 3″ ribbon
  • 10″x10″ Glitter Heat Transfer Vinyl Sheet
  • Exacto Knife
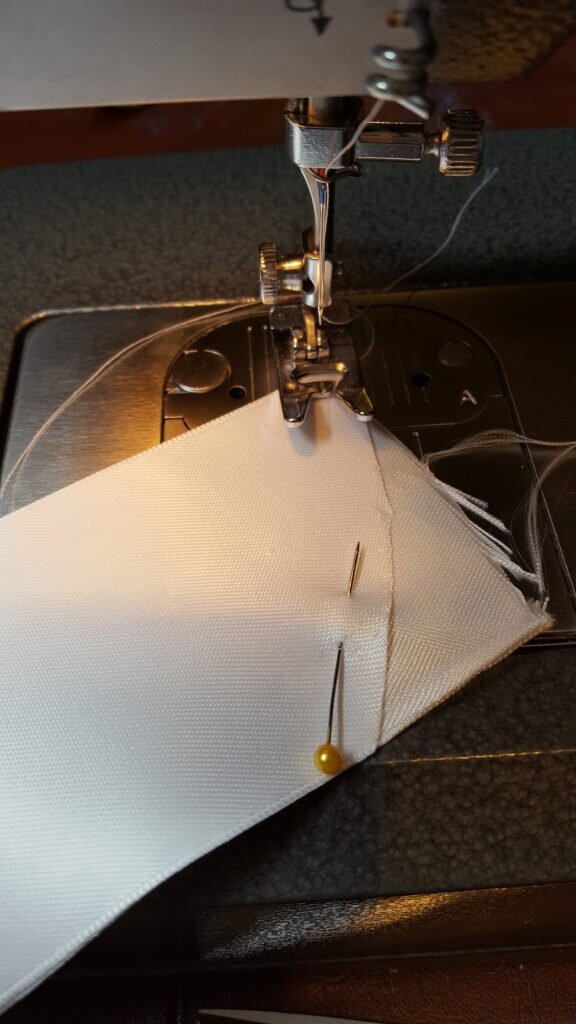
  1. Fold ribbon in half.  You want the ribbon to sit on the bride’s right shoulder and hit the bride’s left hip. Stitch on the diagonal near the left hip.

    Fold ribbon, stitch on the diagonal.

  2.  Type out your desired message (“Future Mrs. So-and-So”) in your desired word processing program in size 175 Edwardian Script ITC.
  3. Print.
  4. Tape your print out face down onto glitter vinyl sheet so it is facing backwards.
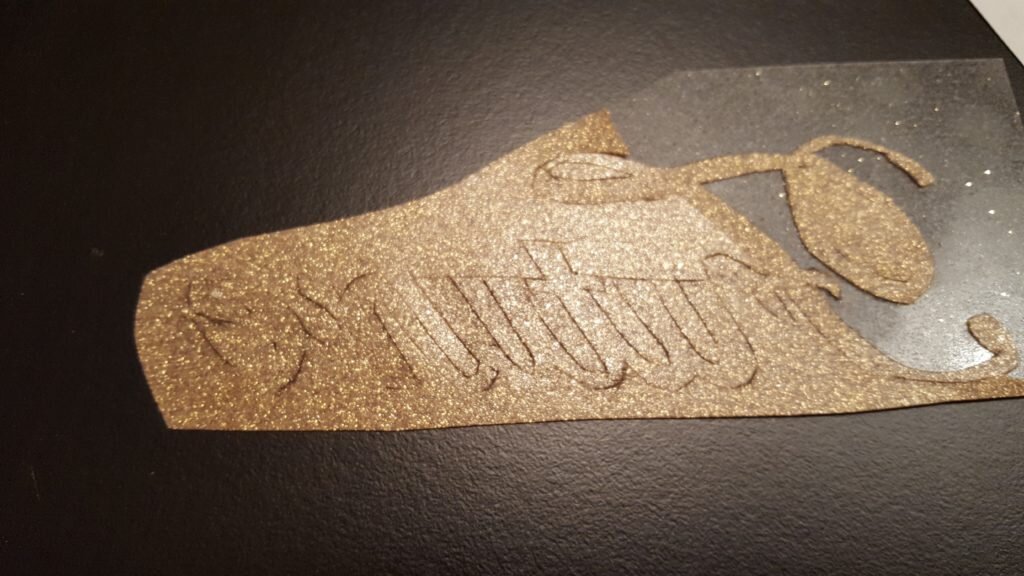
  5. Using exacto knife trace around the message.  Press firmly, but you do not need to cut through the transfer sheet.

    Placing paper over the vinyl, trace with x-acto knife. Do not cut all the way through the backing.

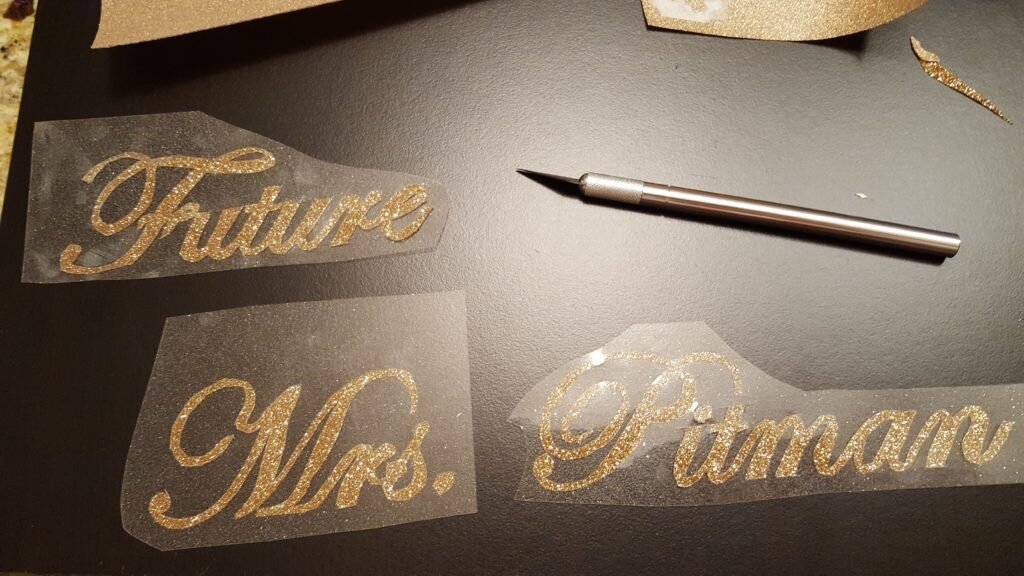
  6. Trim around each word and remove the glitter from the negative space areas.

    Remove glitter from negative spaces.

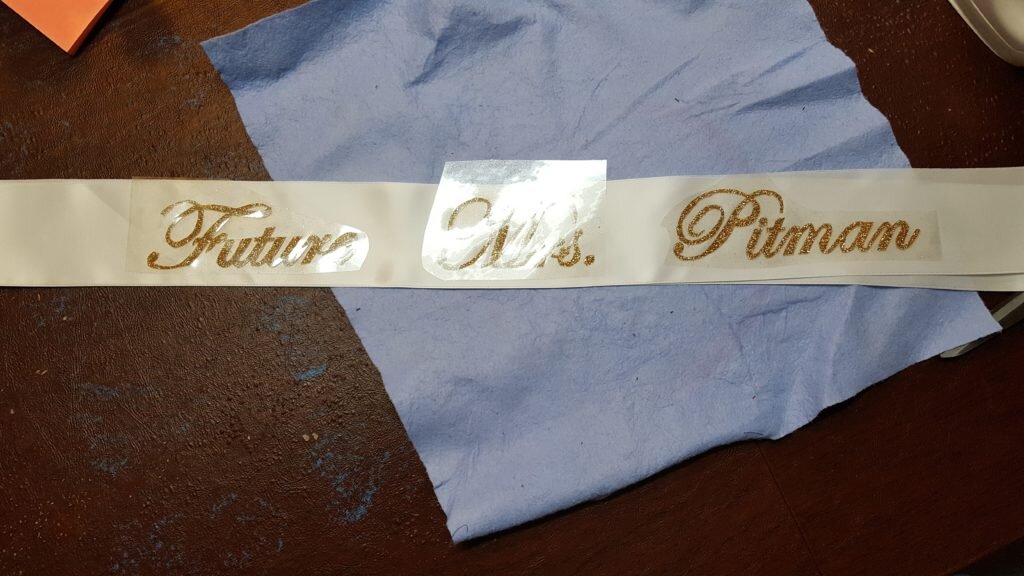
  7. Place each word face down on the sash, spacing evenly.  The transfer paper should be on the top, and the words should be face up through the transfer paper.

    Position words right side up on ribbon.

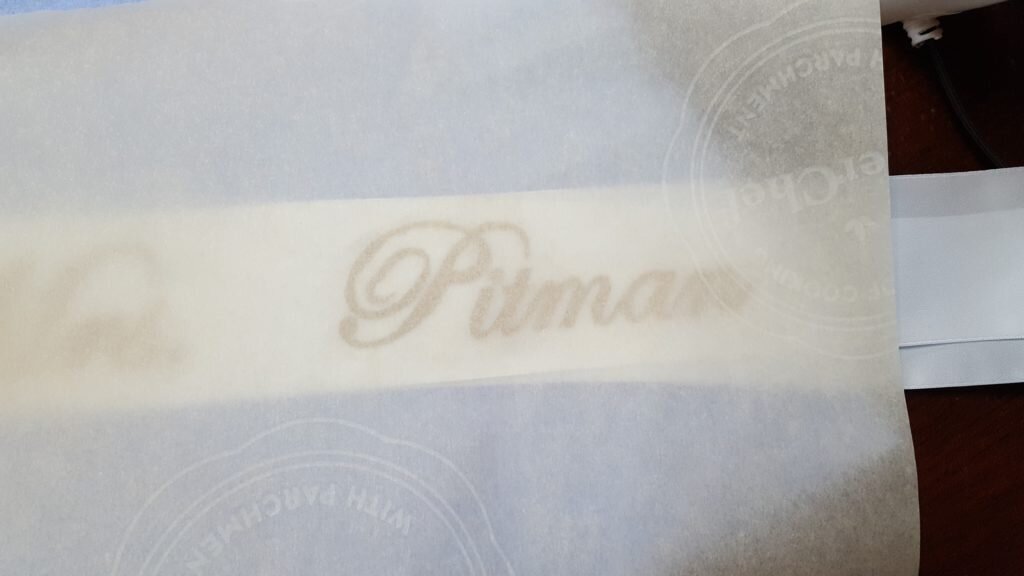
  8. Place parchment paper over the transfer paper.

    Place parchment paper over vinyl.

  9. Using iron on the highest setting (320 degrees F), press for 10-15 seconds.
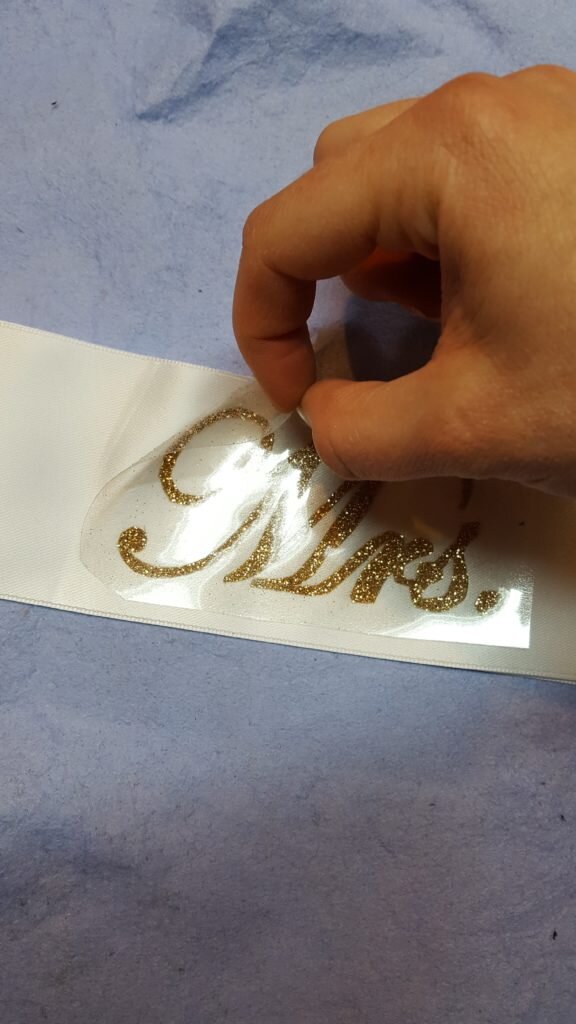
  10. Gently peel and remove the transfer film while still hot.

    After ironing, peel and remove transfer paper while still hot.

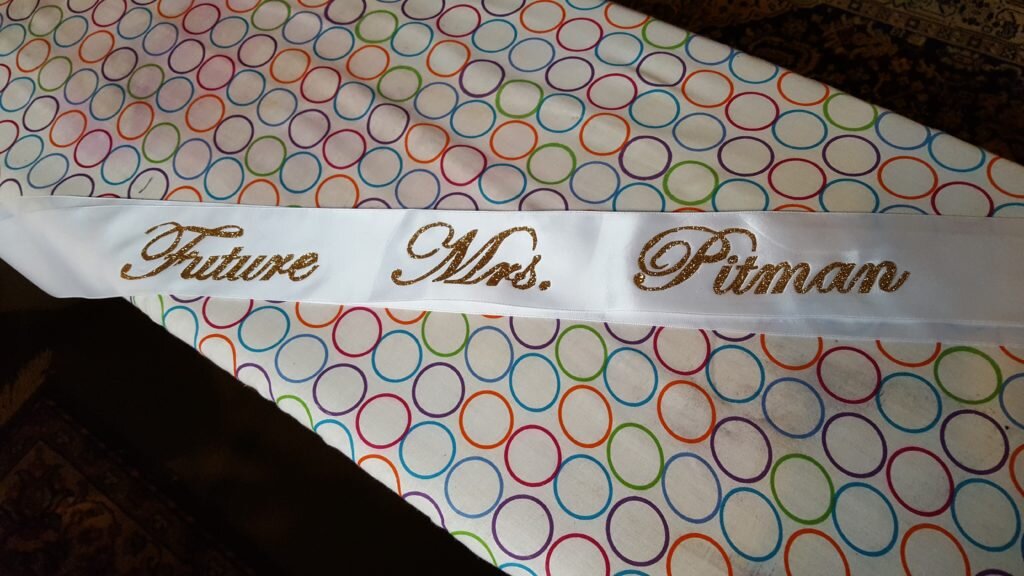
    Finished sash!

    I sadly don’t have one of the bride wearing the sash, but here’s my lovely mannequin displaying the sash!

Posted in Crafts & Sewing | 2 Comments

Yoshi in the Hood

Well I made a lot of soup this week.  We had a ham earlier in the week so I made split pea soup and lentil soup (my favorite)!  Then I felt like making even more soup (I guess) and we had a shrimp coconut soup in the middle of the week.  Crazy.  Probably too much soup.  Oh and I started a sourdough starter! I’ve always wanted to try my hand at sourdough, but have never been brave enough.  Well I finally decided to mix up my own starter and try it!  I’m sure I’ll include that in a future post.

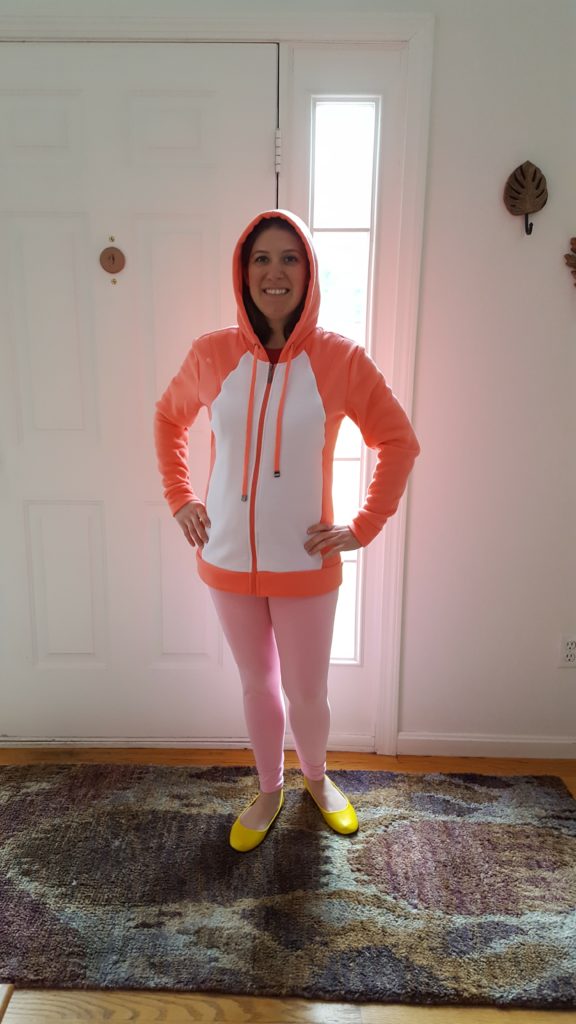
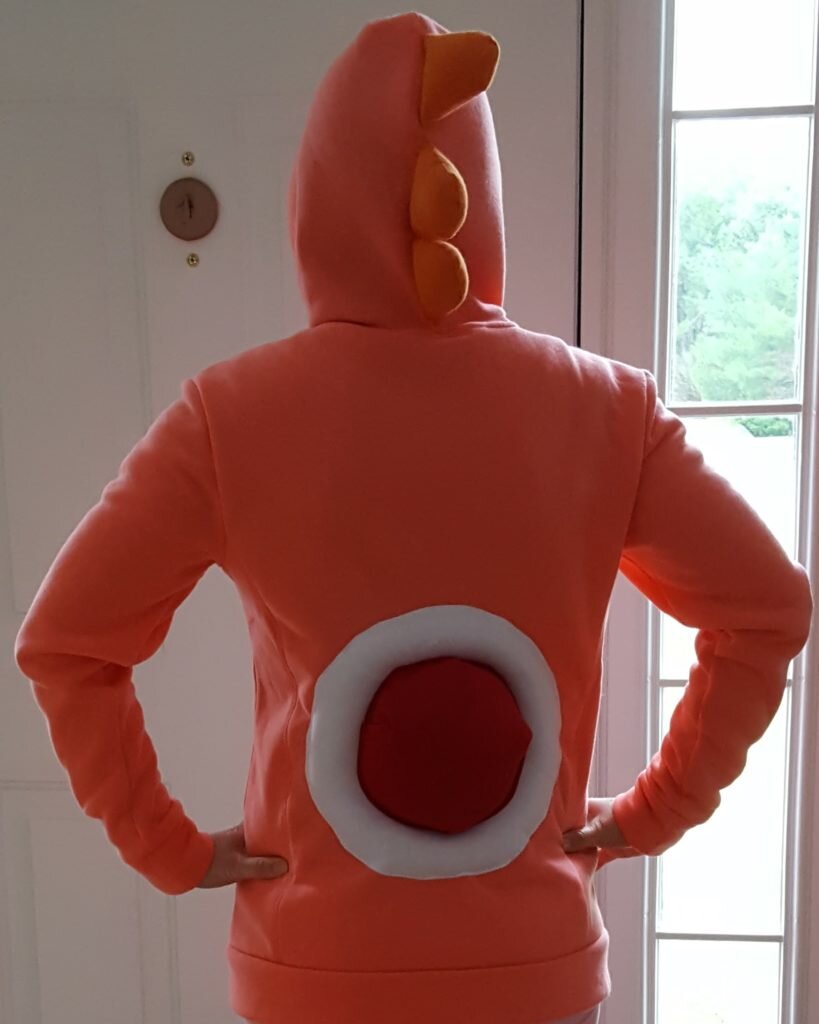
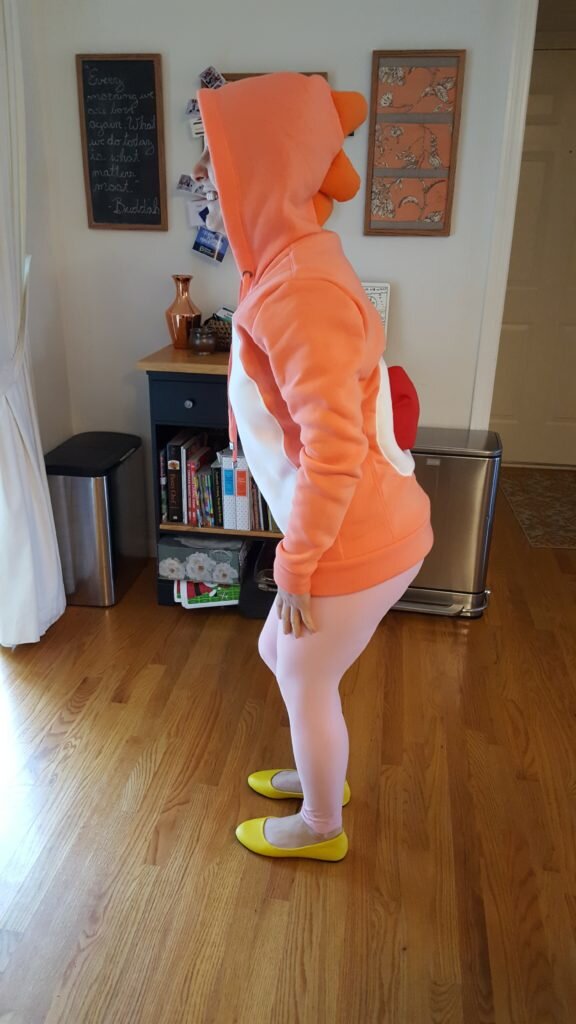
I have been making so much food I haven’t been doing much crafting or sewing.  I’ve been thinking a lot about both and have increased my list of things to do, but haven’t tackled anything on it.  That is since Joe’s birthday which I mentioned in my previous post.  By this point you either have no idea what Mario related character I went as, or you didn’t care to comment.  Either way I will tell you – I went as pink yoshi!  To my great dismay most people had not played either Yoshi’s Island or Yoshi’s Story which, I can tell you, are amazing games!  So this means most people had no idea that pink Yoshi even existed!  Instead I got “birdo” or “koopa“.  Next time I will have to just have to go as normal green Yoshi instead.

Anyway, if you want to make my Yoshi sweatshirt you just need to buy a zip up hoodie and a yard of additional material.  Within a few hours you’ll have an easy costume!  Not to mention Yoshi’s saddle makes for great lumbar support!

Yoshi Sweatshirt

  • 1 zip up hoodie in your size
  • ~1 yard white sweatshirt material
  • ~1/2 yard red sweatshirt material
  • ~1/8 yard orange sweatshirt material
  • stuffing
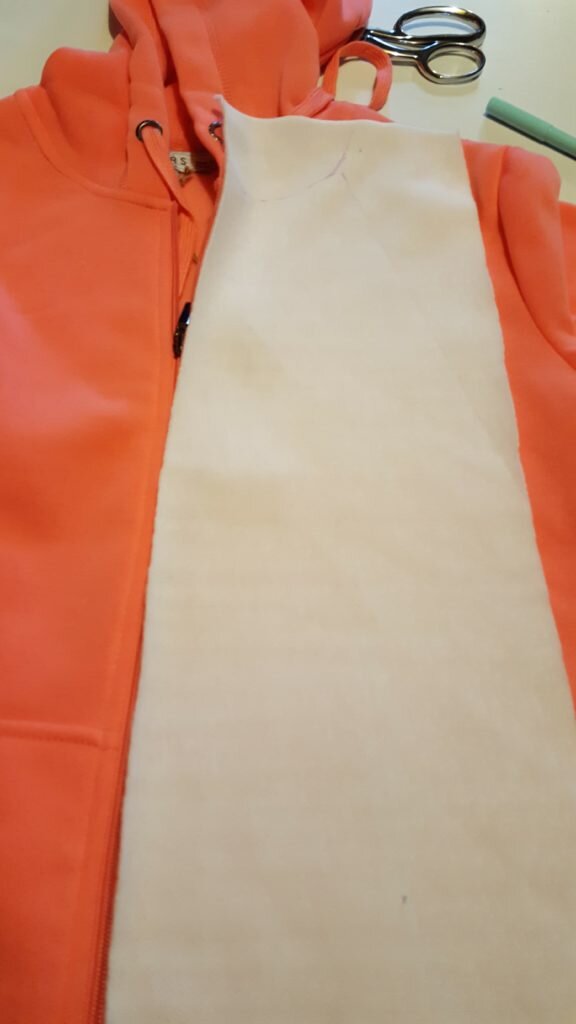
  1. First measure out the size for the belly of your yoshi sweatshirt.  This will depend on your size sweatshirt.  You’ll want to form a half-oval shape of white fabric starting at the seam just under the neck and truncating at the bottom hem.  Cut your fabric for each side of the belly by overlapping an inch beyond the zipper, leaving an inch at the top and bottom and leaving only 1/4″ seam allowance on the final edge.

    Measure belly for sweatshirt.

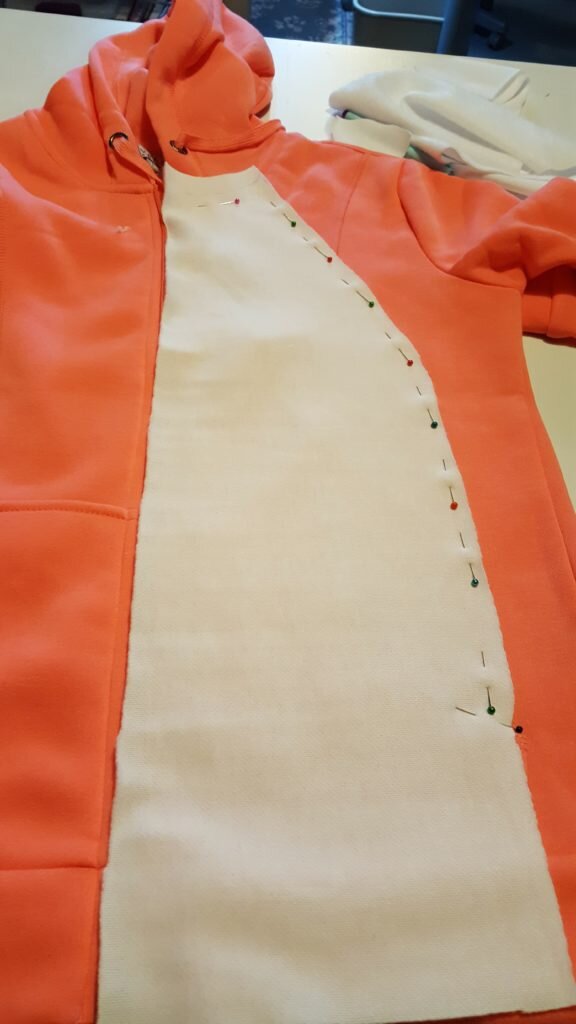
  2. Remove the pockets if you have any then pin one belly side to the sweatshirt.

    Pin belly to sweatshirt.

  3. Seam rip the zipper area to encompass the belly piece.  You will use the 1″ seam allowance you added to fold the white material over the original material and form the zipper casing.
  4. Seam rip the seam at the bottom of the hoodie so you can tuck the belly fabric into this seam. Repeat for the seam attaching the body of the sweatshirt to the hood.
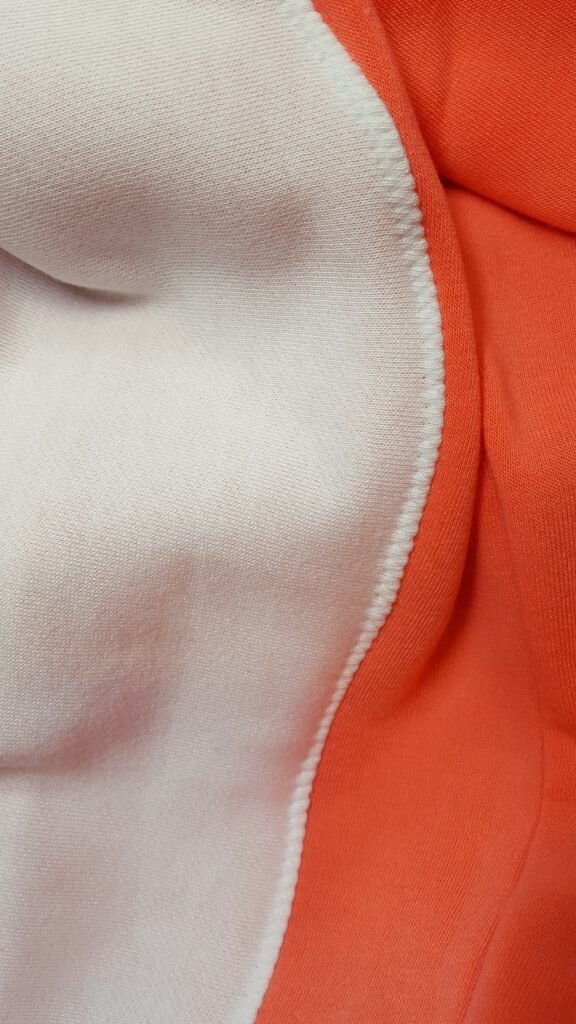
  5. Switch your machine to zig-zag stitch and a medium stitch width.  Starting at the top where you seam ripped, fold the edge of the belly fabric under 1/4 inch and zig-zag stitch to the hoodie.  Continue along the entire outside seam of the belly until you get to the bottom seam that you ripped.

    Zig-zag stitch the belly to shirt, folding under 1/4″.

  6. At the bottom seam, reconstruct the seam by pinning the bottom band to the sweatshirt edge, but this time sandwich in between the white fabric.  Pin and stitch using a straight stitch.
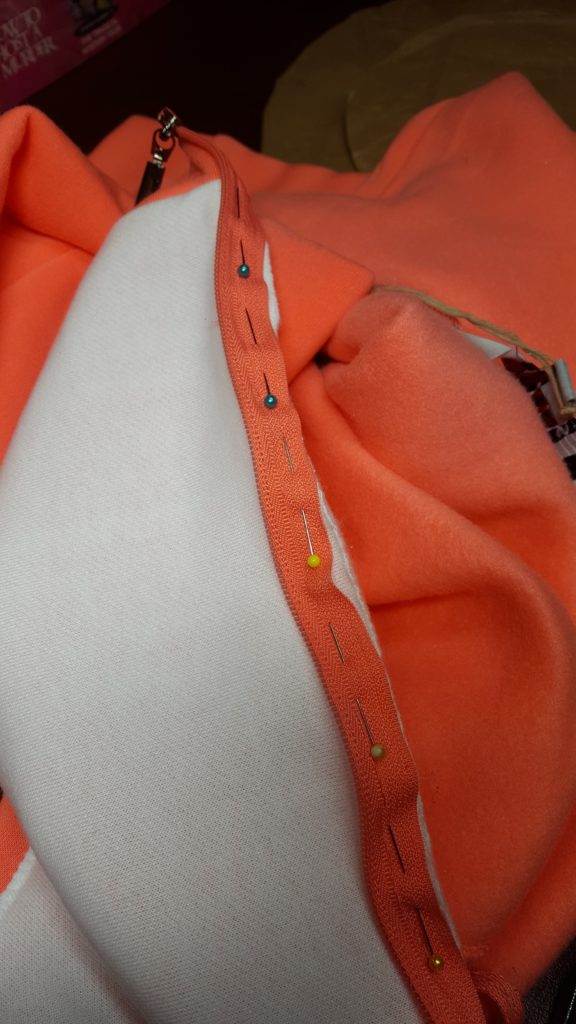
  7. At the zipper seam, Pin the layer of original sweatshirt material and the white fabric to the zipper, right sides together as shown below.

    Pin zipper to belly fabric and original sweatshirt fabric.

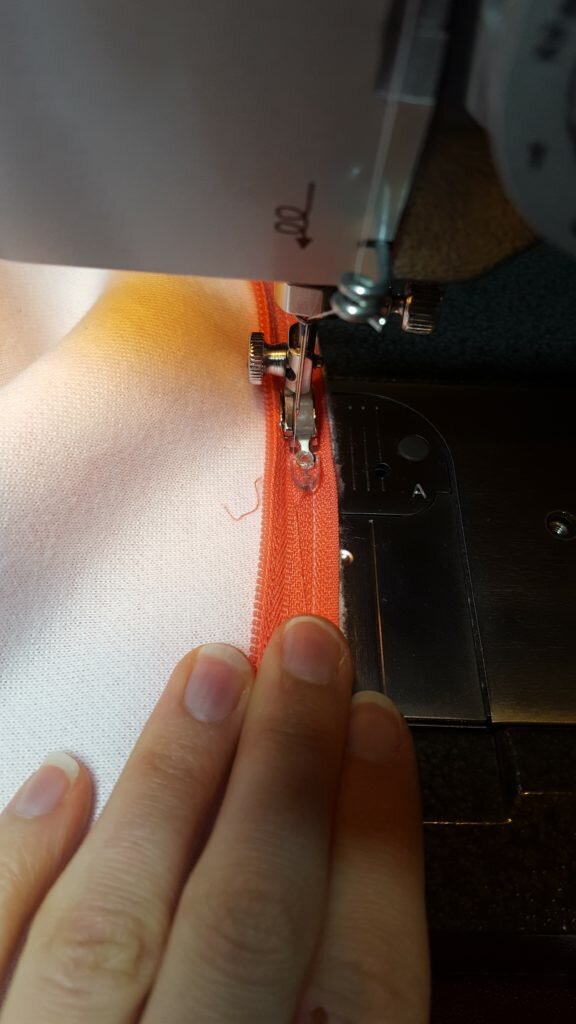
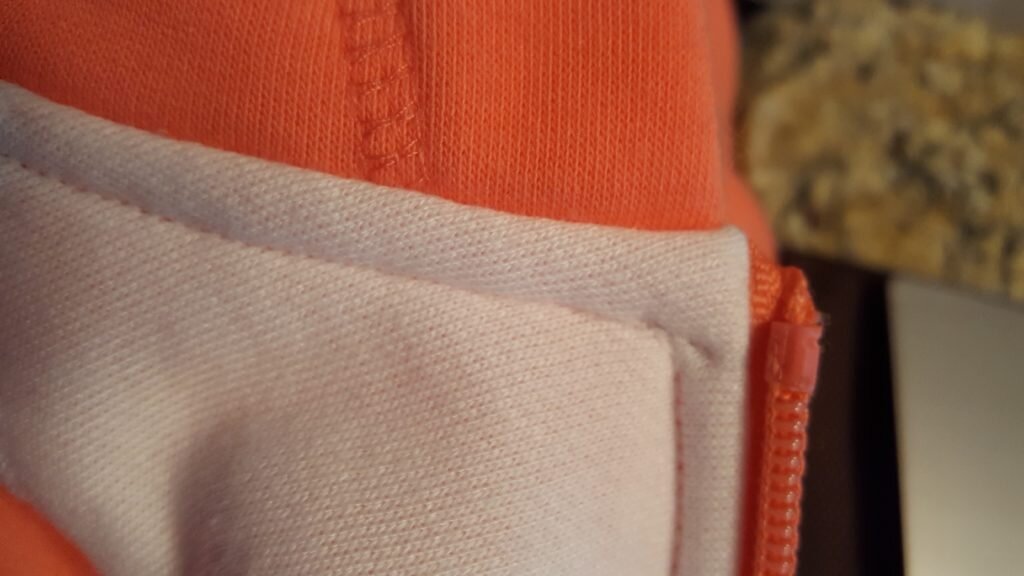
  8. Using a zipper foot stitch very close to the zipper teeth.

    Stitch close to the zipper teeth.

  9. Fold under and then stitch on the right side of the fabric, catching both layers of sweatshirt material and the zipper again.
  10. At the neck of the sweatshirt the creators did something fancy.  They used a piece of bias tape to finish the seam and cover the unfinished edge of the zipper above the top zipper stops.
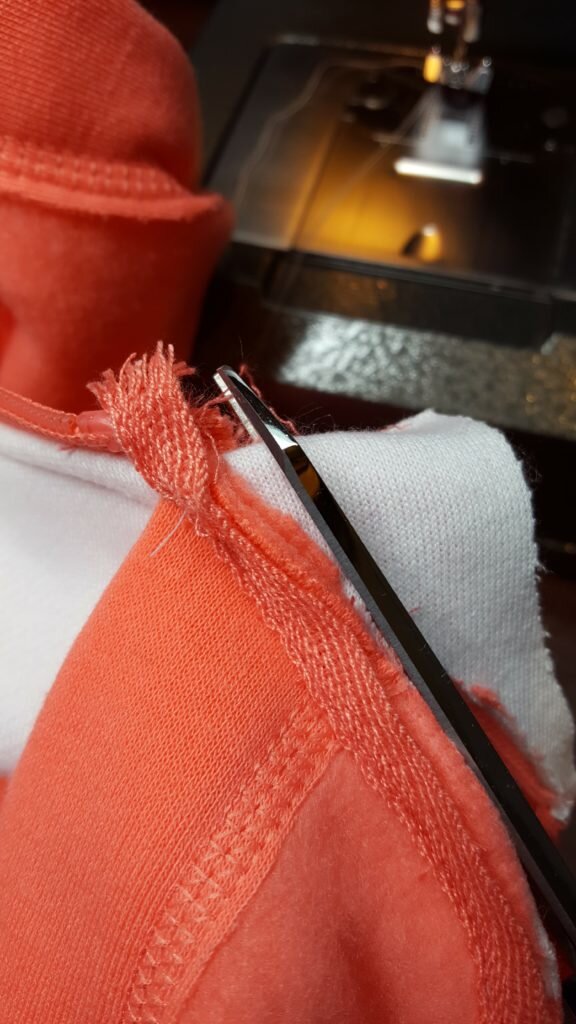
  11. Here you’ll want to pin and stitch the hood layer to the body sweatshirt layer, right sides together, sandwiching in the white piece.  On top of that you’ll want to lay your bias tape on this line, but don’t line up the bias tape with the edge of the other fabrics.  You’ll want to stitch along the opposite edge so you can fold it up to cover the seam.  Make sure you stitch the top of the zipper tape (just above the teeth) onto the bias tape as well.

    Stitch belly to neck seam and cover with bias tape. Trim.

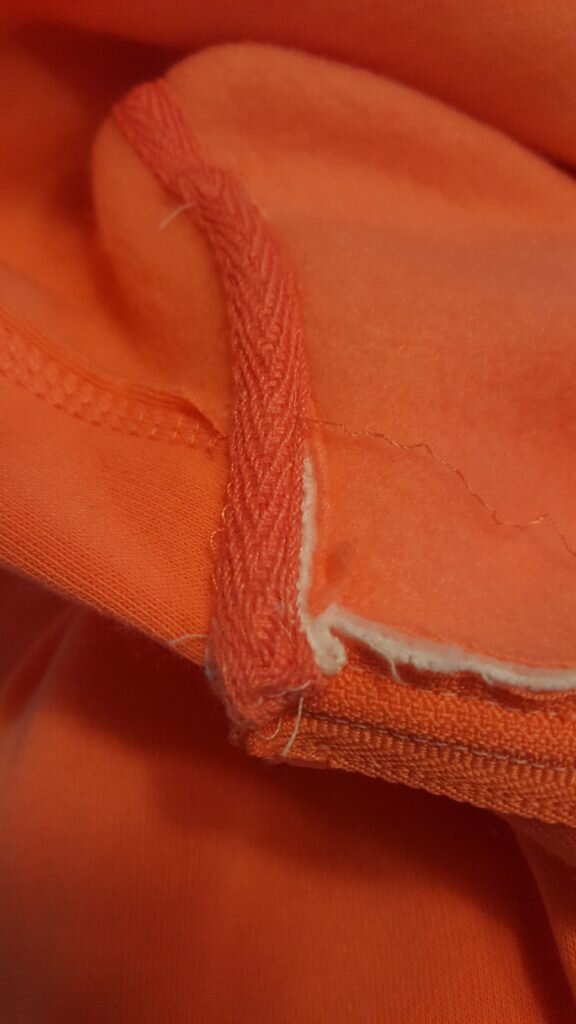
  12. Trim seam allowance to 1/4″. Fold the bias tape over seam allowance to cover it and tuck the end of the bias tape (the portion attached to the zipper tape) under. Stitch along the bottom edge through all layers (this will show on the outside of the fabric).

    Fold bias tape under at zipper tape. Stitch.

    View of stitching from the outside.

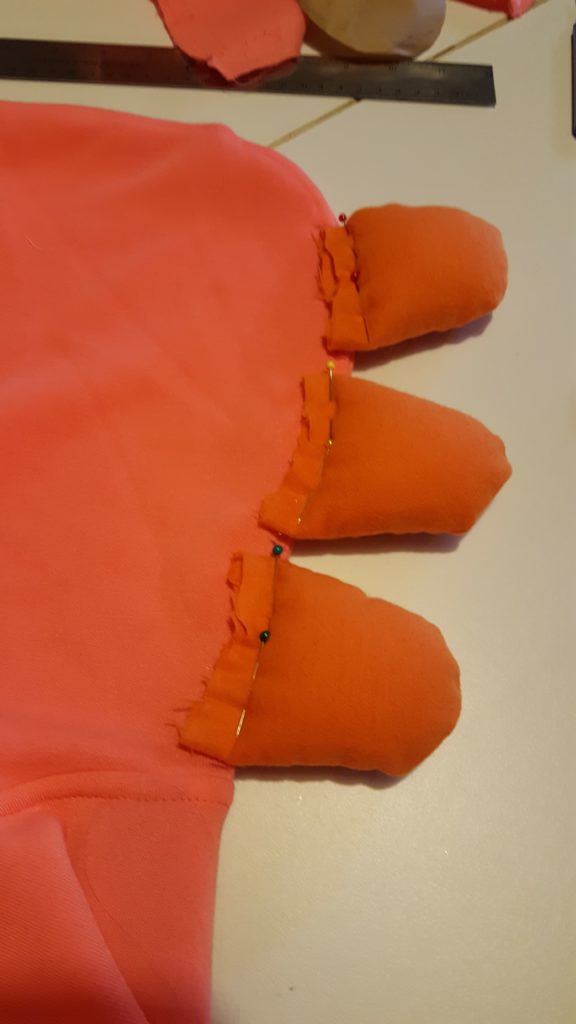
  13. Next make the spines on Yoshi’s back.  Cut 6 horseshoe shaped pieces of red fabric.  (The size will again depend on your sweatshirt size.  Make sure to allow for 1/2″ seam allowance all around.

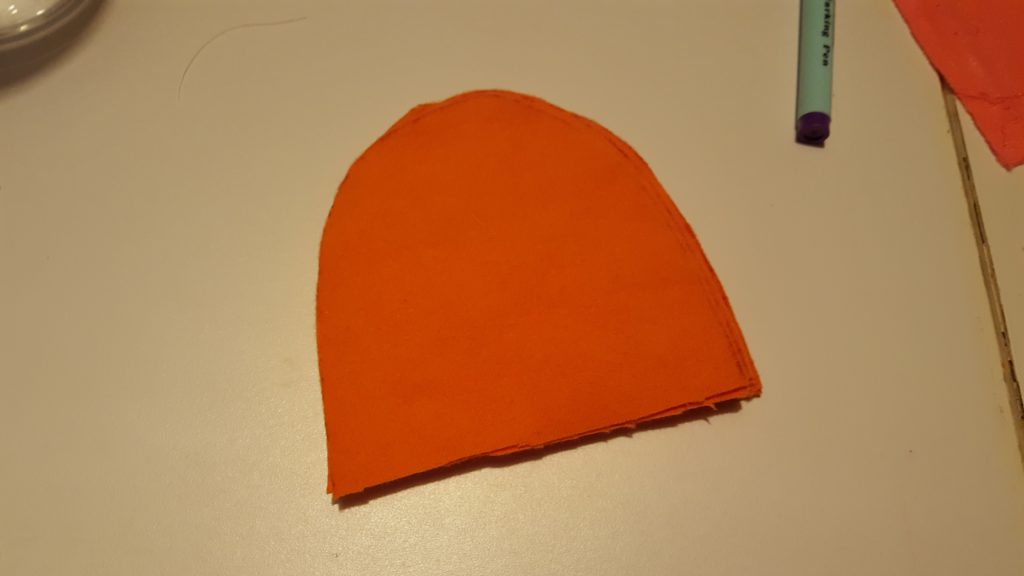
    Cut 6 horseshoe shapes for the spines.

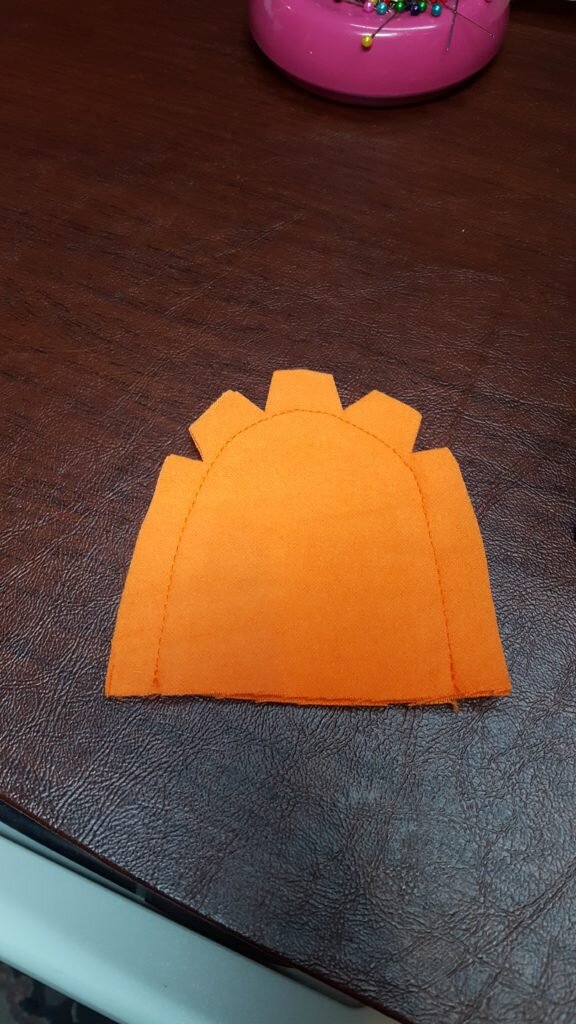
  14. Stitch around the curve of the horseshoe and clip curves.

    Stitch and clip curves.

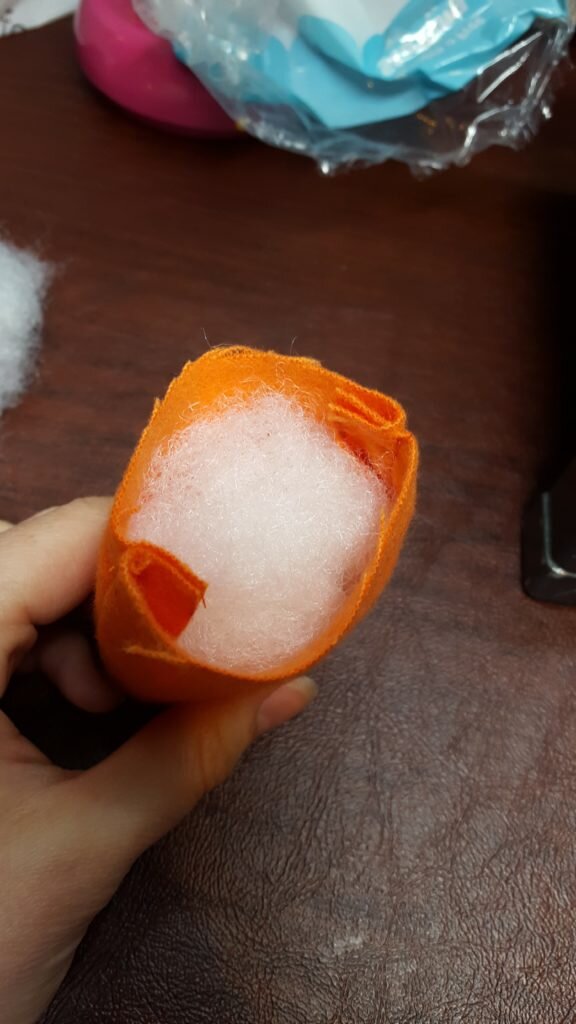
  15. Turn inside out and stuff.  You want them to be firm.

    Flip right side out and stuff.

  16. Pin the spines to the hood, aligning them where you want them to go.

    Position spines on hood.

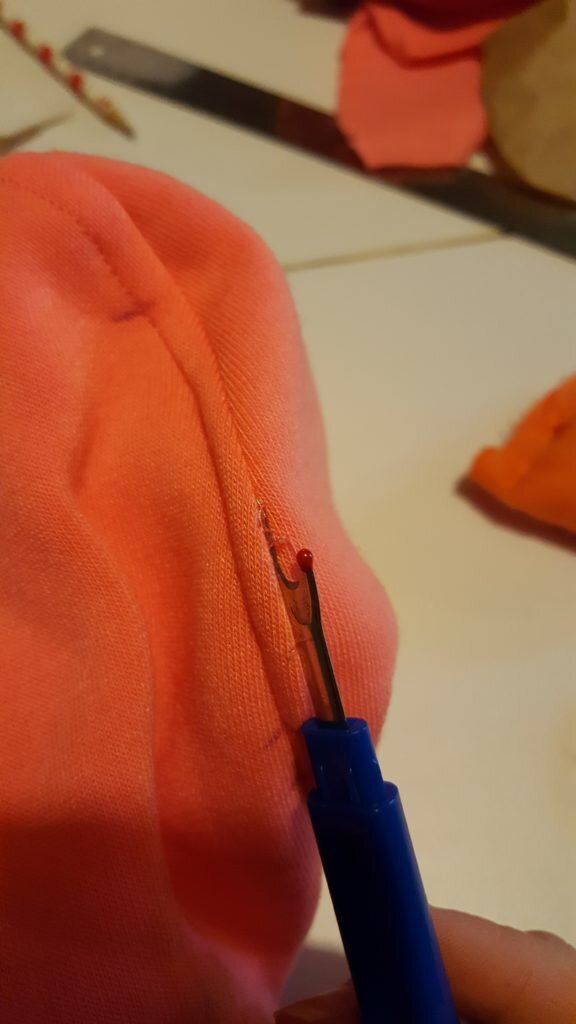
  17. Seam rip the hood at the location for each spine.

    Seam rip the hood at the location for each spine.

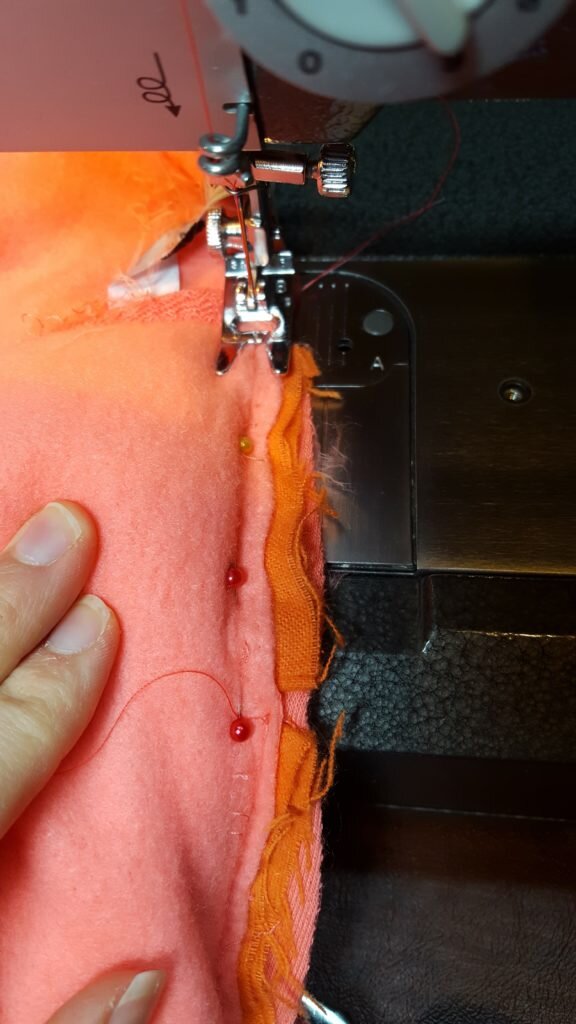
  18. Insert the spine into the seam you just seam ripped, right sides together.  Stitch.

    Insert spine into seam you ripped.  Stitch.

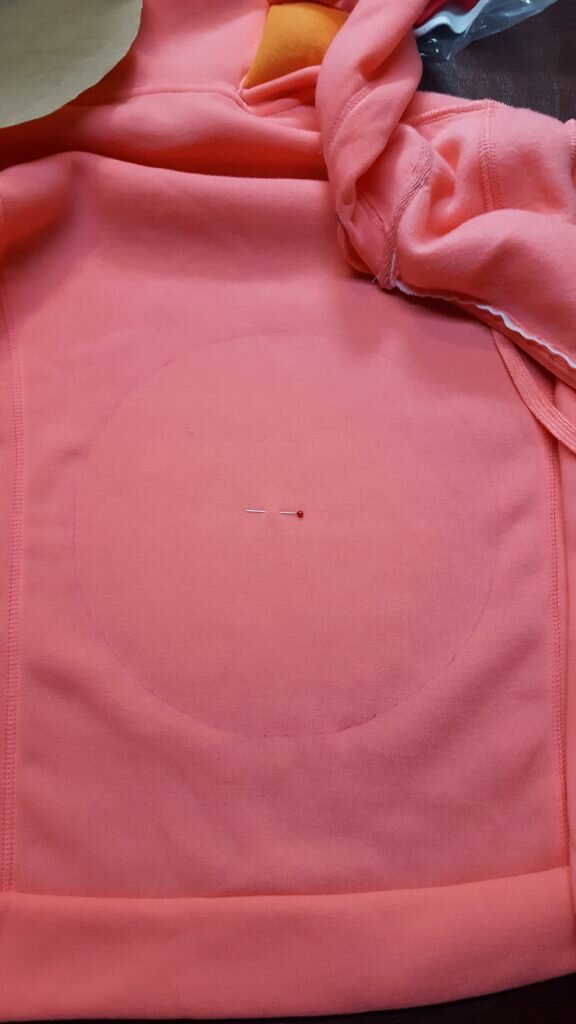
  19. Mark the location for your saddle (the little turtle shell on Yoshi’s back).  It should be right above the bum on your lumbar spine (IMHO).

    Mark saddle location.

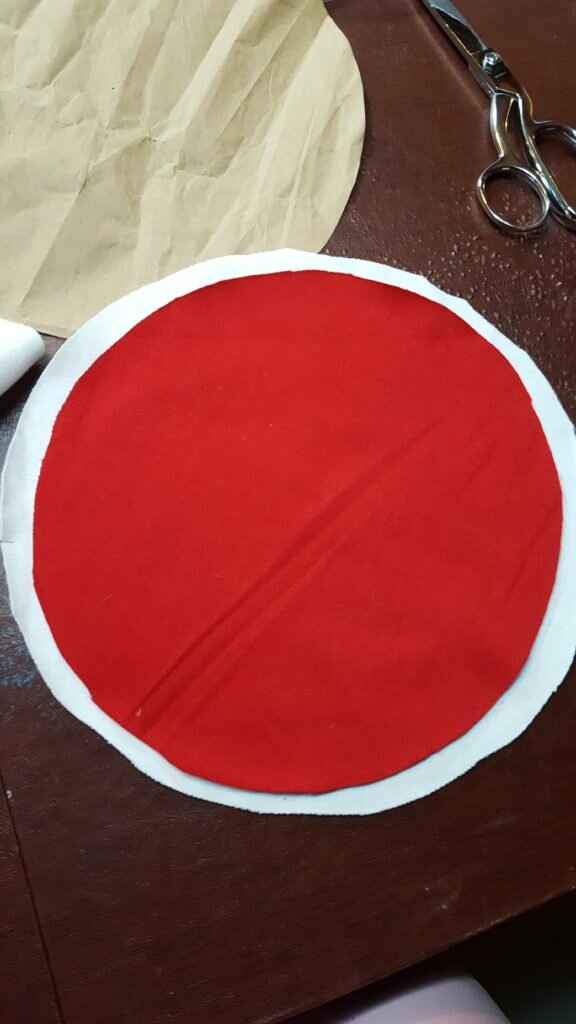
  20. I made my saddle 10″ wide.  Cut a piece of red fabric the width of your circle, and a piece of white fabric 1/2″ larger than the width of your circle.  Cut a 4″ wide “x” in the center of your white circle.

    Cut circles for saddle.

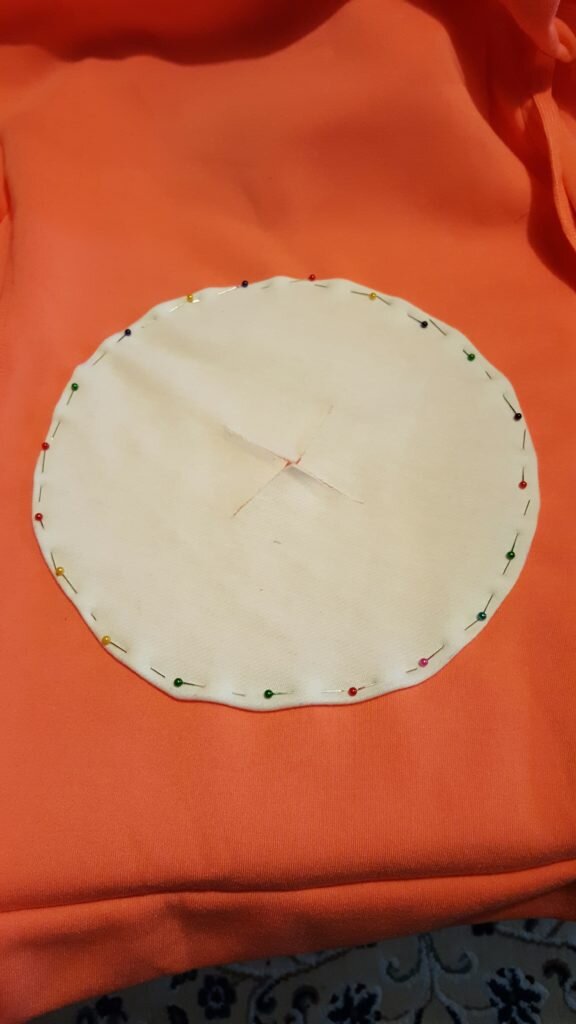
  21. Pin the white fabric to the back of the sweatshirt, tucking under 1/4″ seam all around.

    Pin white circle to sweatshirt, tuck under 1/4″

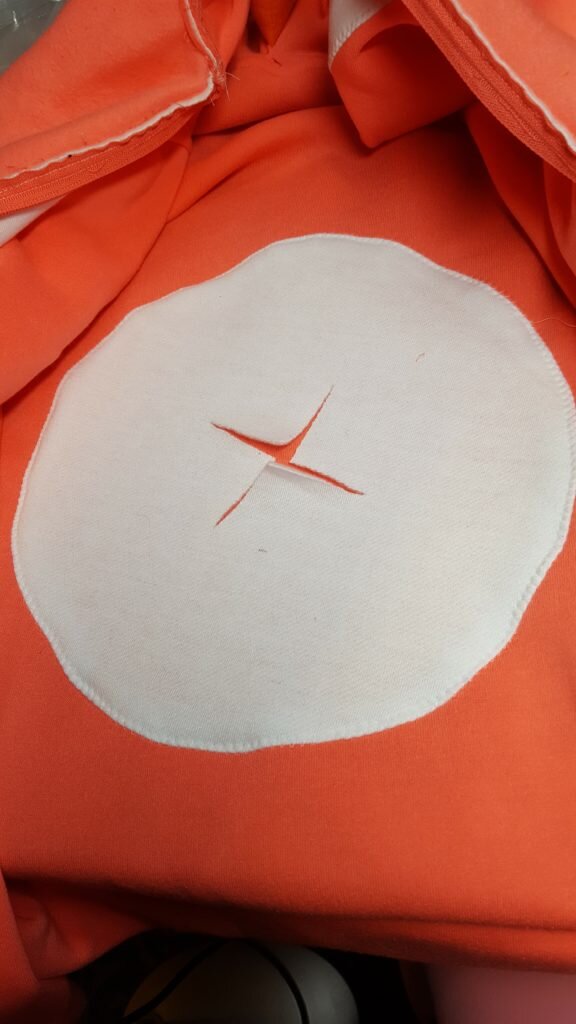
  22. Using a zig-zag stitch as in step 5 stitch around the circle.

    Zig zag around the circle

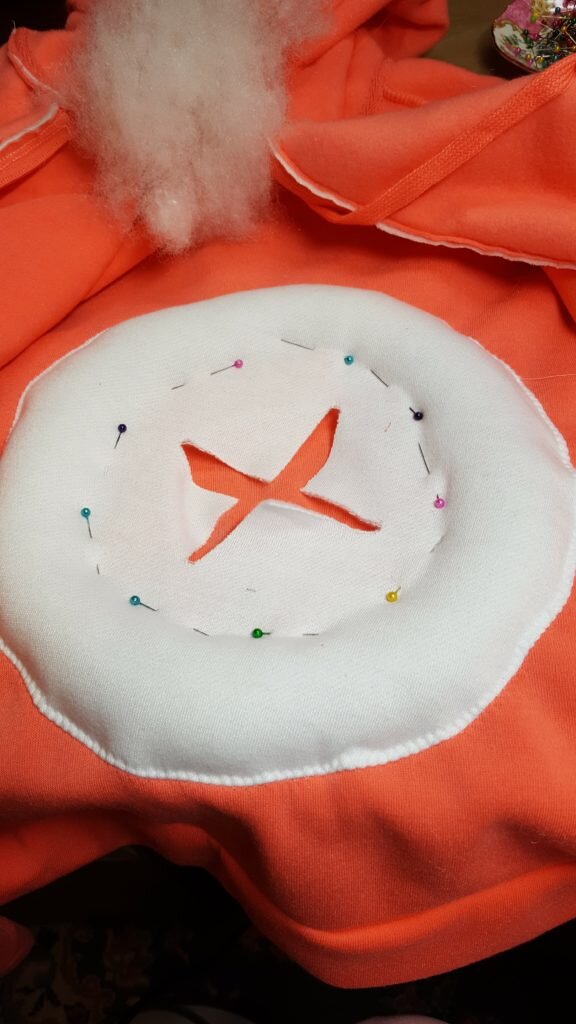
  23. Stuff the white circle with a small amount of stuffing through the “x”.  Pin to hold the filling in.  It should resemble a skinny donut shape.  Stitch along your pin line.

    Stuff the circle in a donut shape. Pin.

  24. Take your red circle and fold it into quarters.  Mark the circle at the quarters.
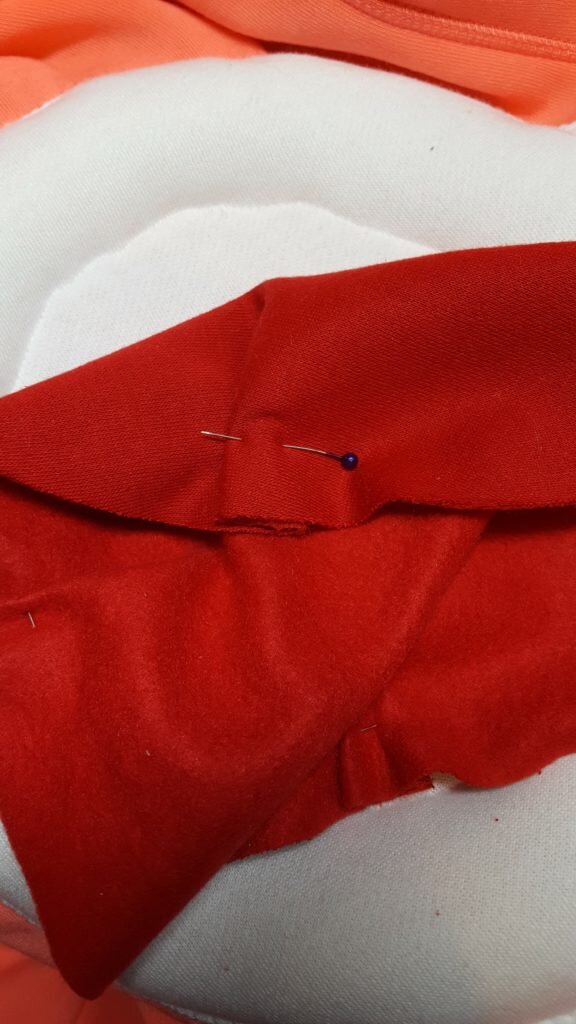
  25. Form a 1″ deep pleat on each quarter-mark.  (Note I think it would look a bit better if you used smaller pleats spread out across the whole circle, but I was in a rush.)

    Pin 1″ deep pleats at each quarter mark in shell.

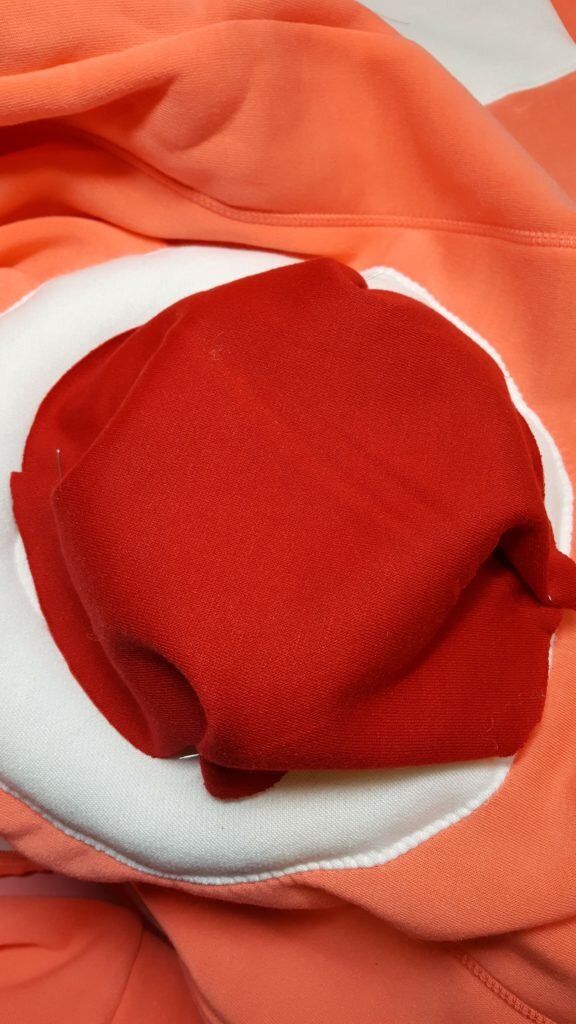
  26. Pin the red portion of the shell to the white donut, folding under 1/4″.  If your circle is too wide or too small, adjust the pleats as necessary to accommodate the circumference.

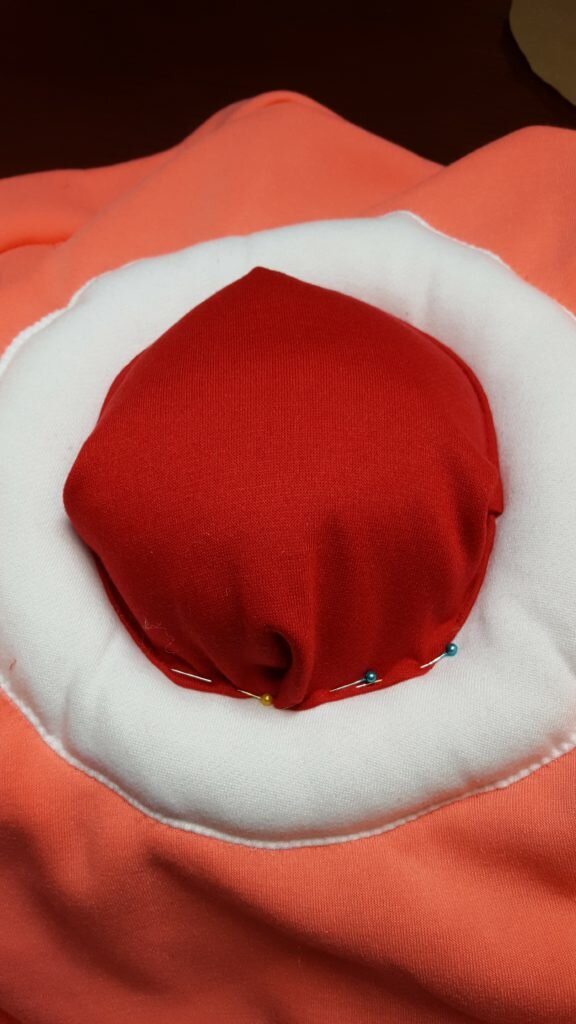
    Pin red circle to white, leaving a gap for stuffing.

  27. Stitch very close to the perimeter, leaving a 2″ gap for stuffing.
  28. Stuff.

    Stuff.

  29. Stitch gap closed.

Wear with pride!  And correct people that you aren’t birdo!

Posted in Crafts & Sewing | 2 Comments

You seem to have forgotten something…

Ah yes, you may have remembered the name of this blog.  You may be wondering now that it is spring, “how are the bees doing?”  I just can’t pull the wool over your eyes!  Well once again I lost both hives over the winter.  When I peeked in on both hives on a mild March day, one hive had already perished and I thought a mouse had gotten into the second hive, but it still seemed to be doing okay.  Well April rolled around and the weather got up to 80 and I didn’t see a single bee leaving the “good” hive.  Bad news.

I did my official hive check a couple weekends ago.  The first hive didn’t have a significant amount of dead bees, nor did it have much honey left.  This was the hive who I’d left alone after creating their own queen.  I also noticed some voles had chewed through some of the wax of the honeyless comb.  I would have expected to see more dead bees due to starvation or shrews/voles picking them off, so perhaps they just absconded.  This is a bit of a mystery.

The second hive looked much worse.  There were tons of dead bees scattered on the floor of the hive, and tons of honey left.  A couple frames had a faint trace of mold covering them.  I forgot to put in any protection for condensation on the hives this year, so I fear they suffered from condensation build up.  When condensation builds up on the top of the hive it drips onto the cluster of bees below, chilling them and eventually freezing them to death.  That’s my best guess to their demise as  I luckily didn’t see any traces of disease in the hive.

Well after 4 seasons of crap luck with beekeeping, you probably suspect I’m giving up for a while.  At least that would be the sane thing to do in this scenario.  Nope!  I decided to buy another package again!  I hived the bees this past Saturday and it took me <10 minutes to hive them this time.  Hiving bee packages is really getting old hat!  On top of the new bees, I have 50 lbs of honey to harvest… stay tuned for that in another post.

Posted in Beekeeping | 1 Comment

Too Many Luigis

This past weekend Will and I went to our friend Joe’s 30th birthday party.  His lovely girlfriend held the party at F1 Boston Indoor Go Kart racing and made the theme Mario Kart after Joe’s favorite game.  Guests were encouraged to dress up as characters from Mario Kart.  Since Joe was going as his favorite character Luigi (who is also Will’s favorite character) Will decided to go as Waluigi – Luigi’s evil nemesis.

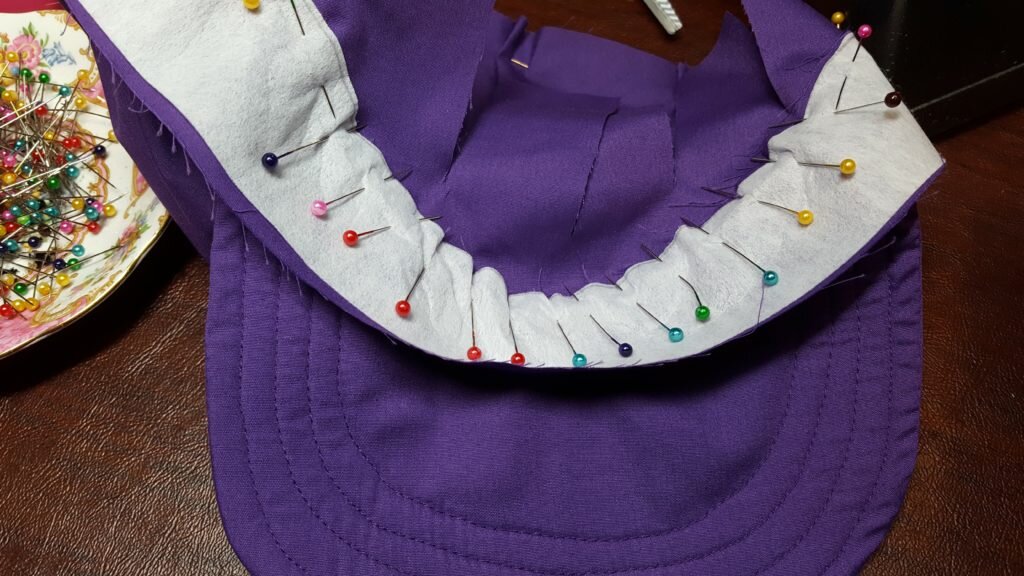
His costume was pretty easy – just a pair of navy blue overalls, a purple shirt and a fake mustache.  Plus I decided to make Waluigi’s hat.  (I really can’t justify buying hats anymore, I’d lose my street cred at mad hatter.)  The hat was incredibly easy to make – hour start to finish including the pattern.  And as an added bonus it only cost me about $2 in materials.  The hat below is tailored to Will’s head size.  If you want to scale up or down, I have some tips for what I did below.  As a bonus, someone else who went as Waluigi with a purchased hat was remarking how similar the two hats were (I don’t think he knew I made Will’s).  I always consider that a bonus.

Oh and see if you can guess who I went as…

Tutorial pictures to be posted tomorrow…

Waluigi/Luigi/Mario/Wario Hat

What you’ll need:

  • 1 yard cotton material
  • 1.5″ strip of lightweight fusible interfacing
  • a small 1’x1′ square of heavyweight interfacing – pellon 70 peltex
  • brim pattern here

All specific dimensions in the instructions are for my husband’s head size of 24.25″.  

  1. Measure head – add .75″ to the circumference for wiggle room. For Will this meant 25″.
  2. Add an inch to your measurement in 1 and cut out a strip of lightweight fusible interfacing and cotton with that length x 1.5″ wide.  This will be your hat band.
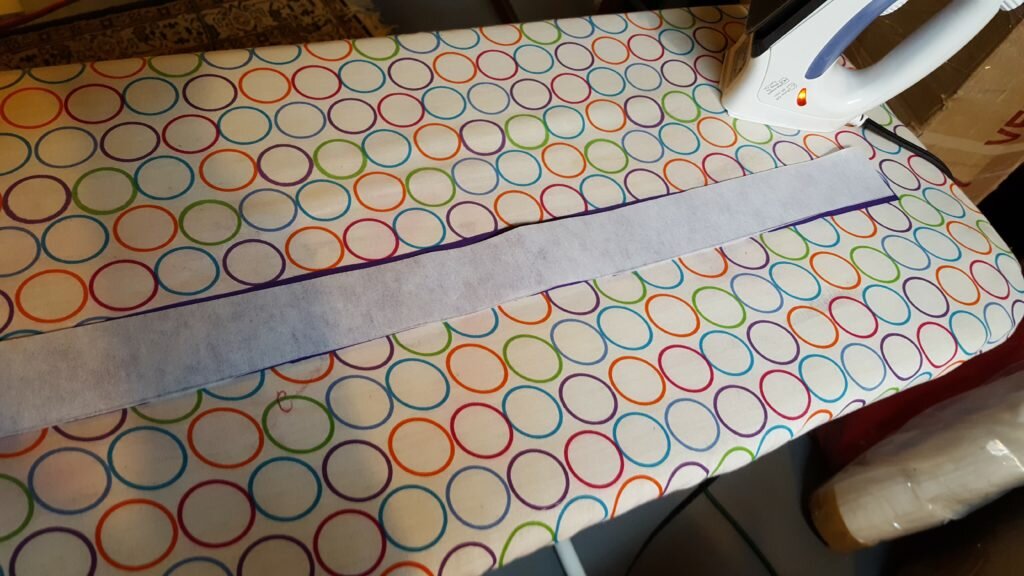
  3. Following the instructions on the interfacing fuse the interfacing strip to the hat band strip.
  4. Divide the width in 1 by pi (3.14).  For Will this was 8″.  Use this length as the radius of the circle for your hat dome.  Using a protractor trace a circle of that radius onto your cotton material.  Cut.
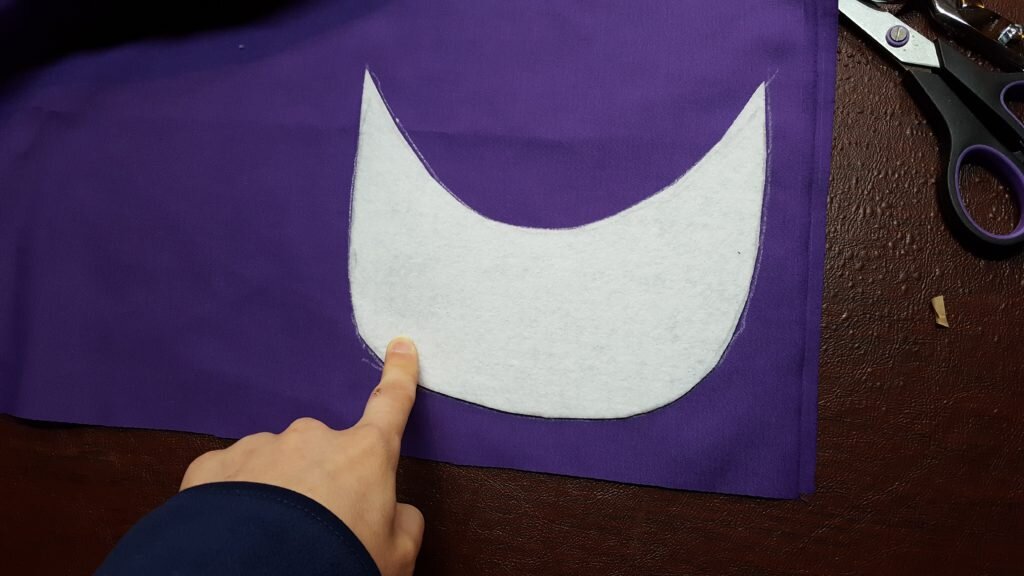
  5. Using the brim pattern above, cut out the brim from a piece of heavyweight interfacing.
  6. Trace the brim onto the cotton material and cut 2 brims, 1/2″ wider than the width you traced, and an inch wider than where the brim connects to the hat.
  7. Stitch the two pieces of cotton brim material together with 1/2″ seam allowance.
  8. Trim seam to 1/4″.
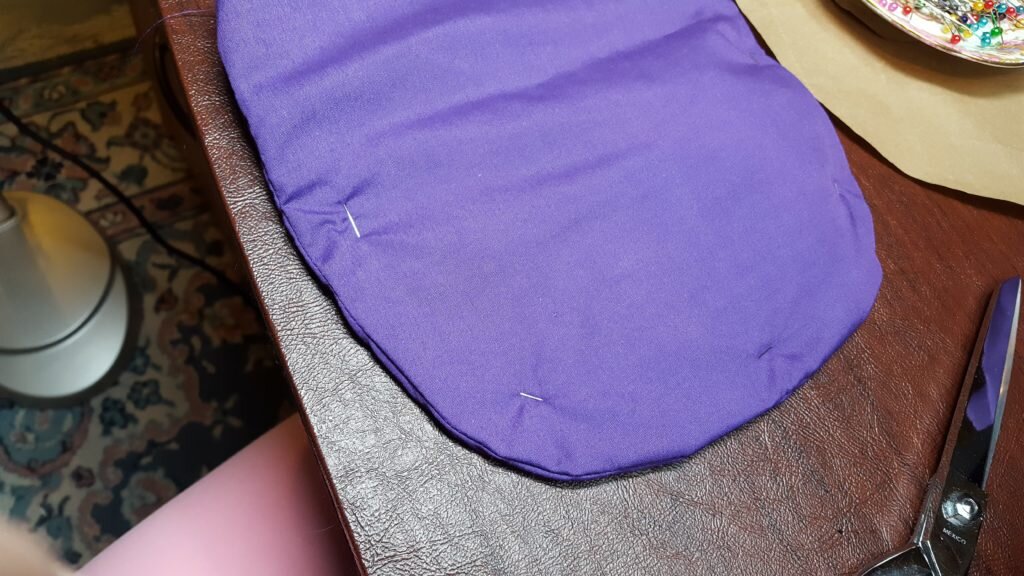
  9. Flip brim material right side out and insert the heavyweight interfacing into the pocket.
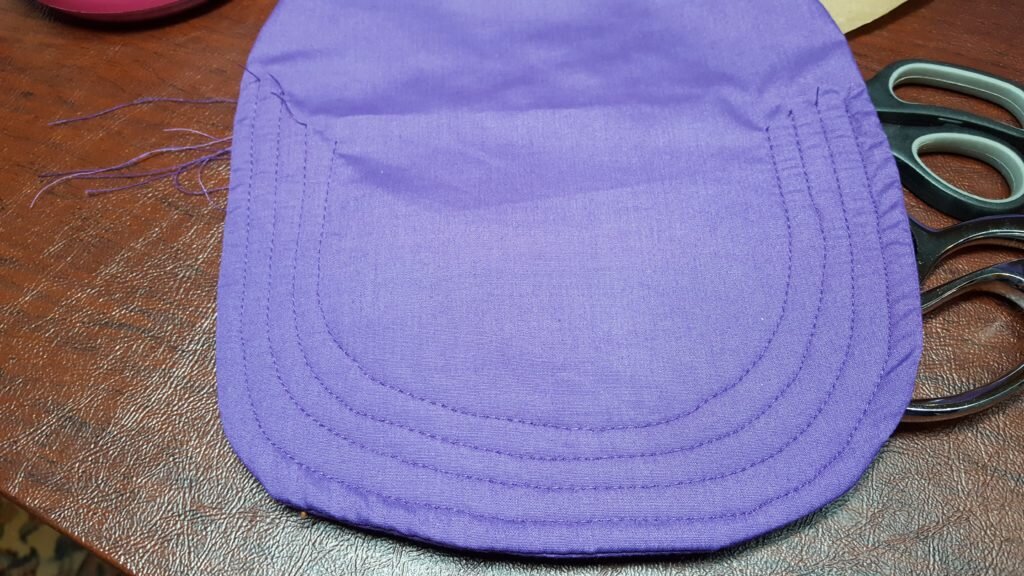
  10. Starting at the seam, stitch 1/4″ from the seam along the entire rim of the brim.
  11. Repeat 1/4″ from the previous seam 5 times (or until you get bored).
  12. Fold the hat band in half, right sides together and stitch 1/2″ from the edge.
  13.  Fold the circle in step 4 into quarters.  Mark the quarters.  Fold the band in quarters, mark the quarters.
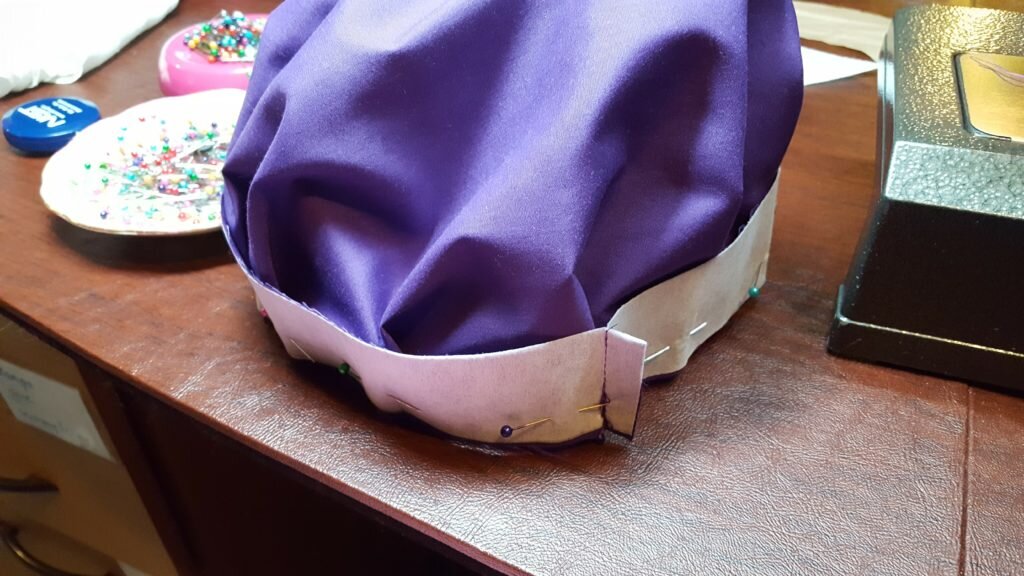
  14. Pin the band to the dome at quarter marks.
  15. Pleat at each pin 3/4-1″.  Pin.
  16. Pleat 2 pleats equally dispersed between each quarter mark.  Pin to band.
  17. Take brim and insert in the center of the hat in between the band and the dome fabric.  This is a bit tricky.  You’ll need to curve the brim to contour to the band.  You want the edge of the band to be 1/2″ above the edge of the interfacing.
  18. Stitch along the entire band.
  19. Fold the large portion of the band up to meet the 1/2″ piece of hatband.  Stitch these together.  This will make the band sit right inside the hat.
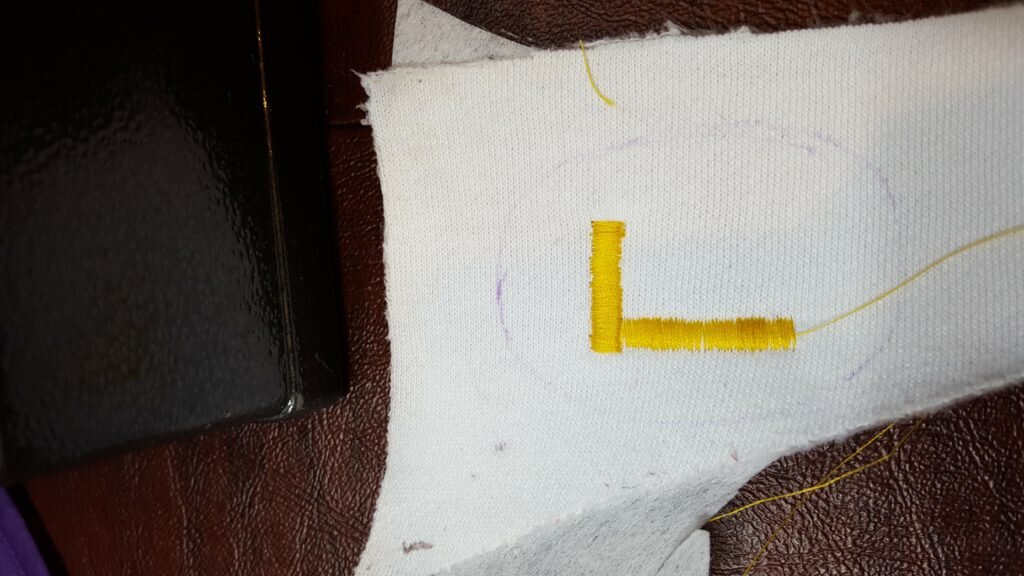
  20. Finally you can add an applique.  I chose to do this by taking a piece of scrap white fabric and fusing it to a piece of interfacing.  I then used a tight zigzag stitch to make an inverse  L and finally did a running stitch around the L.
  21. Stitch applique to hat using a simple running stitch.

Will’s hamming it up…

Posted in Crafts & Sewing | Leave a comment

That’s Not a Knife, That’s a Spoon!

This Saturday is Earth Day!  I recently read the book Oryx and Crake by Margaret Atwood and I’ve started to become increasingly more concerned for the Earth.  If you haven’t seen the xkcd on climate change I think it is a very nice visual of why people have to stop saying “we’ve had micro climate changes before”.  Now I’m of course just as guilty as everyone else of contributing to this terrifying spiral.  I use fossils fuels to heat and power my home and car and travel in airplanes several times a year.

Well, this Earth Day Will agreed we could join the GreenUp program through National Grid and pay a little bit extra for 100% renewable energy sources for our electricity!  I’m pretty excited about it.  It will cost us a few hundred dollars extra a year for our electricity costs, and I know that is just not a feasible cost for many to justify.  The idea is that with more GreenUp customers and green energy demand, the more our suppliers need to increase the green energy input into the grid.  I’m happy to pay the money now to drive up demand for green energy, hopefully eventually moving the grid to a renewable backbone.

I read this quote today (which seems to be a Native American Proverb, though sources are conflicted), “We don’t inherit the earth from our ancestors, we borrow it from our children.”  Happy Earth Day!

This little craft below was insanely simple.  Grab some spoons from a thrift store and get to work!  I hope to have some better pictures this weekend when I plant some herbs!

DIY Recycled Spoon Plant Markers

  • Spoons (I used stainless steel spoons)
  • A vice or sledge hammer
  • A set of metal stamping letters (mine were 3mm, but bigger would probably be better)
  • A hammer
  • Sharpie
  • Paper towel
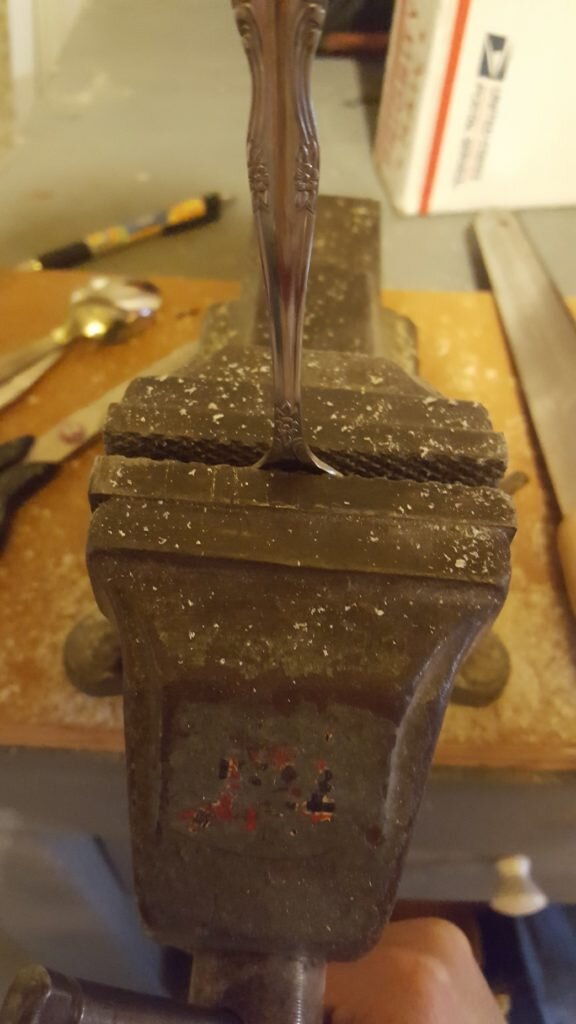
  1. Take your spoon and flatten it.  I flattened mine by tightening the spoon in a vice, starting at the point of the spoon and moving down the head gradually.  You could also place the spoon face down on a workbench and hammering it with a sledge hammer until flat.  This was much more laborious (I tried it).

    Press spoon in vice, little by little.

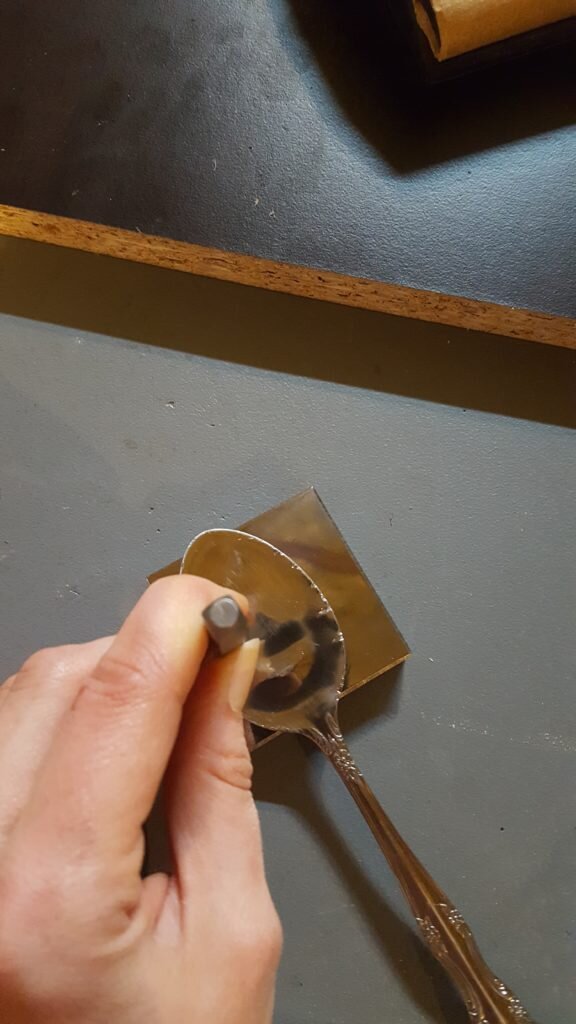
  2. Place your spoon right side up on your metal stamping pad. Position a letter onto the face of the spoon and hammer swiftly 3 or 4 times.

    Swiftly hammer metal stamp 3-4 times.

  3. Repeat for the other letters and symbols.
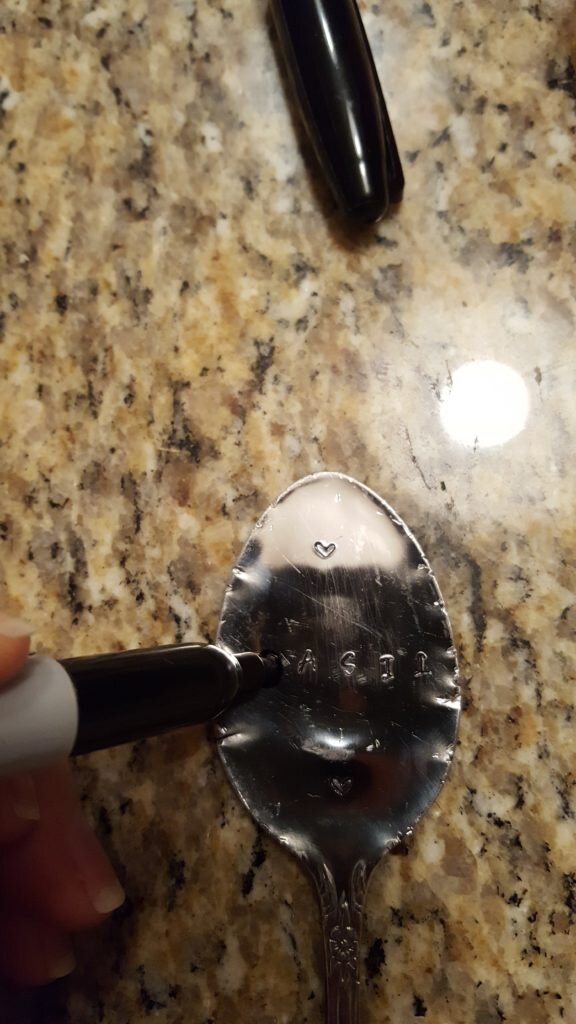
  4. When you are done lettering, take your sharpie and write all over each letter until the whole space is black.

    Cover stamped letter with sharpie.

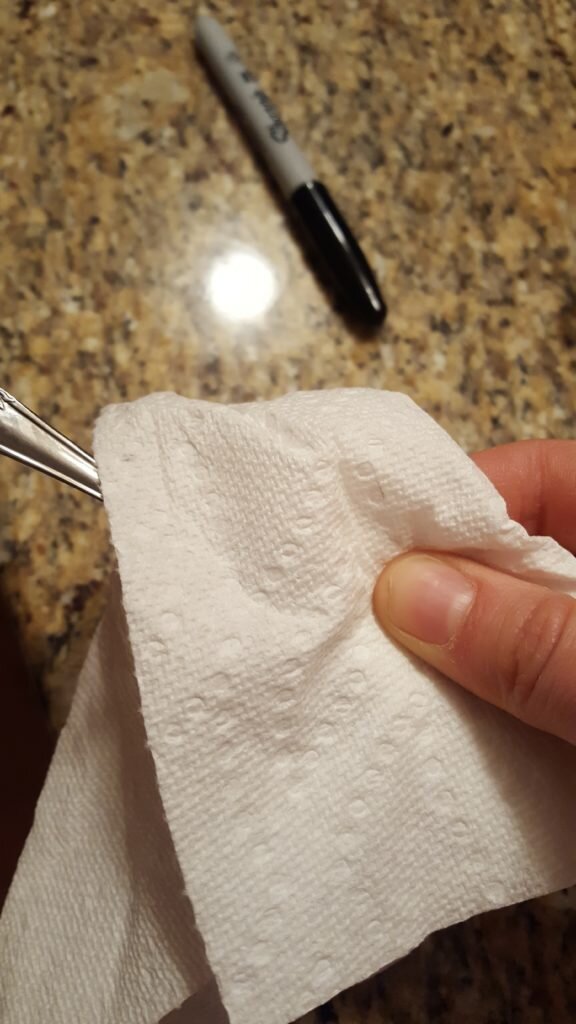
  5. Using the paper towel, rub firmly along where you inked.  The sharpie on the face of the spoon should come off but the sharpie in the indentation will remain.

    Rub away sharpie from face of spoon.

  6. Repeat for the other letters and symbols.
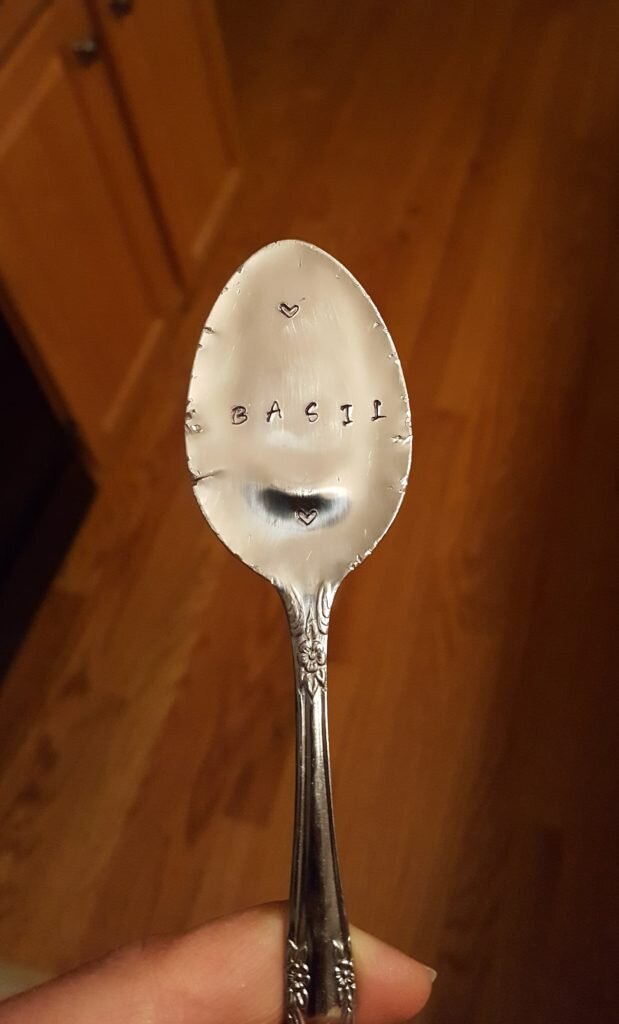
  7. Mark your garden!

    Finished spoon that will mark my basil plants!

Posted in Crafts & Sewing | Leave a comment