Well friends, I’m pretty pumped. I’m on an 8 week sabbatical! Intel is (really sadly) getting rid of those in a few months, which is rather depressing. But I won’t be depressed on (my last 8 week) sabbatical! For the start of sabbatical we’re on Block Island. I know you’ve heard me talk about how quaint and beautiful it is, so I won’t wax poetic about it again today. It’s going to rain quite a bit this week so we tried to frontload the week with all the usual outdoorsy things we do when it’s not raining. Then we’ll get in some more Disney movie watching before our trip to Disney next week! Yes that’s right we’re front loading sabbatical with lots o’ stuff. I’ll tell you all about that next week though.
I’m going to be honest here. I love Block Island, I always have since I was a kid. But I REALLY LOVE the place we stay on Block Island because it’s this teeny little loft house that still has everything we need. More importantly though… it has an outdoor shower. Is there anything that is better than an outdoor shower? I declare there is not. The sunshine overhead with the wind caressing your naked body… nope, nothing better. I told Will he needs to build me an outdoor shower.
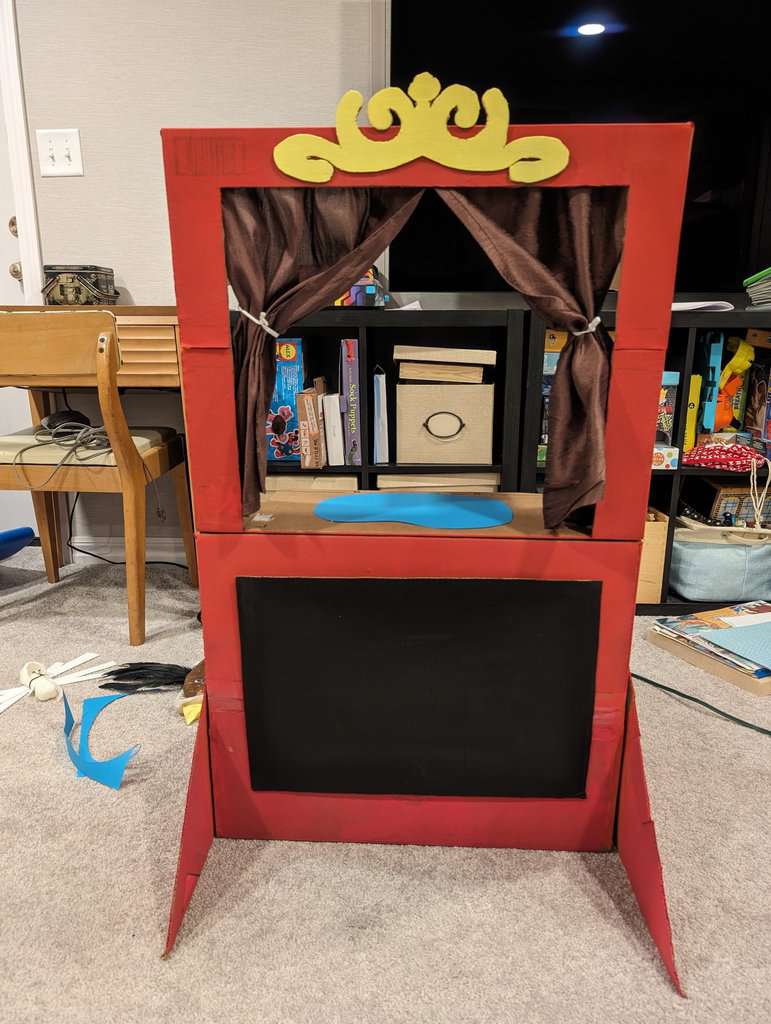
You know what Patricia loves? Sock puppets. She has made several more sock puppets since the Earth Day Celebration. They haven’t really used the theater a ton since that week though… but I’ll convince them. The theater was so fun to build. I was debating on making it out of wood, but I figured I might as well use cardboard… since… it was for the Earth Day party. Here’s how I did it…
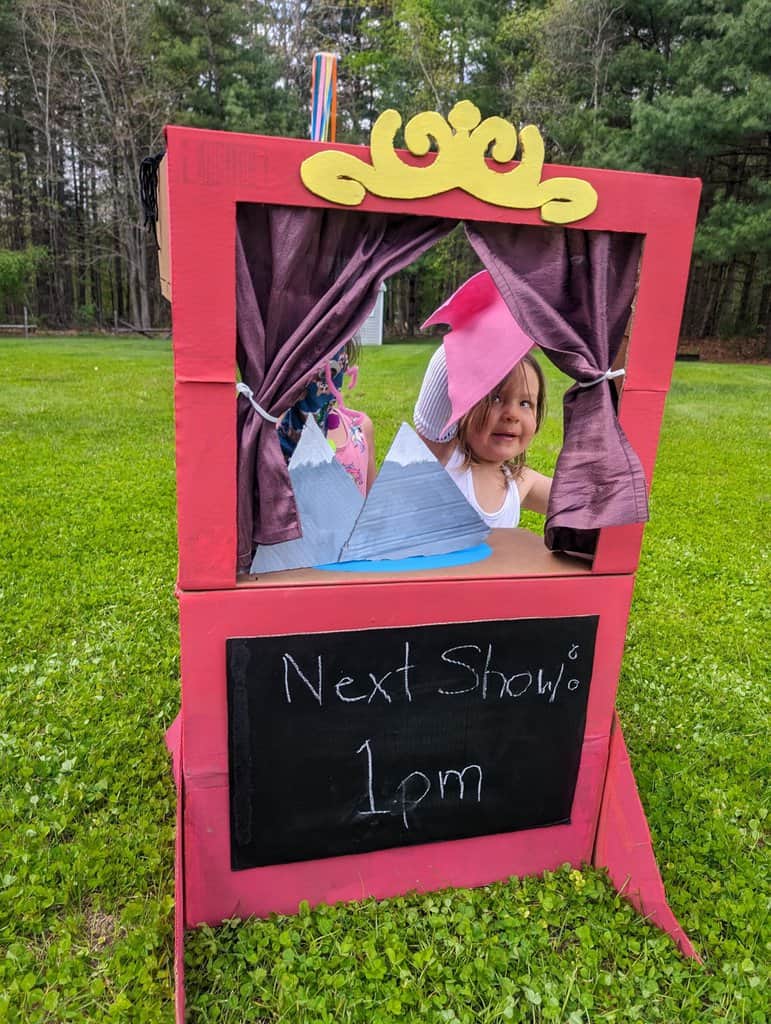
How to Make a Cardboard Puppet Theater
What you’ll need:
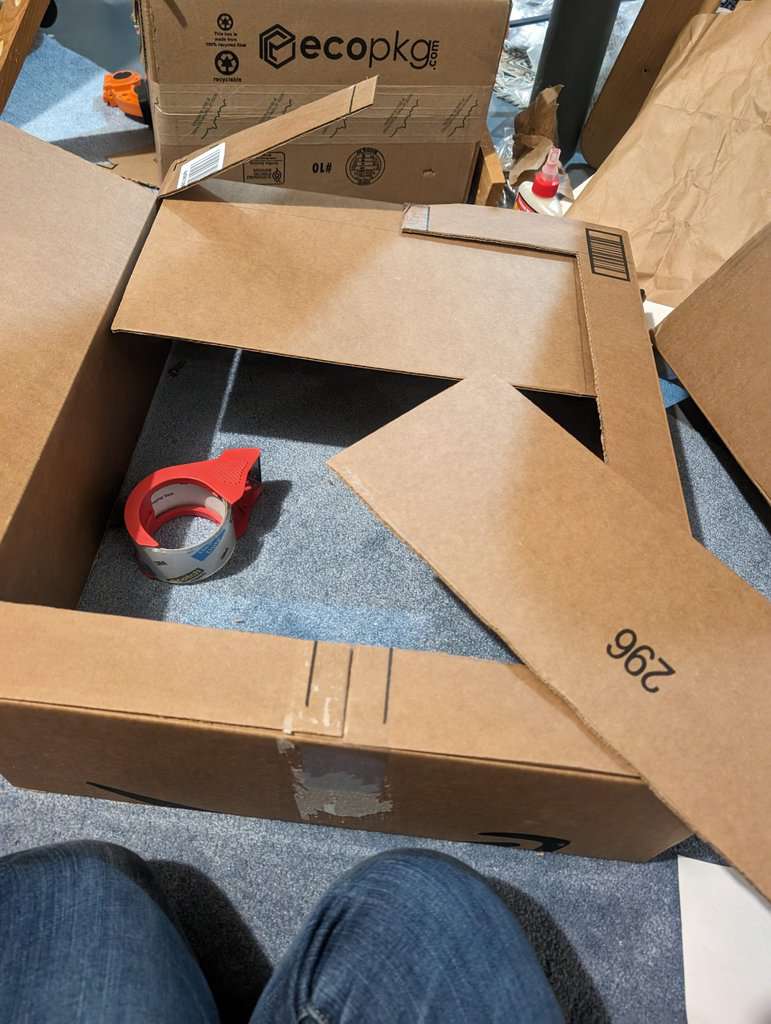
- A large (2ftx2ftx1ft) box
- Additional scrap cardboard for supports & decorations
- Wood glue
- Acrylic paint and chalkboard paint (optional)
- a canary box cutter
- scrap fabric for curtains
- pushpins
- Start by making sure your box is completely sealed and then cut it in half (on the line between the box flaps).
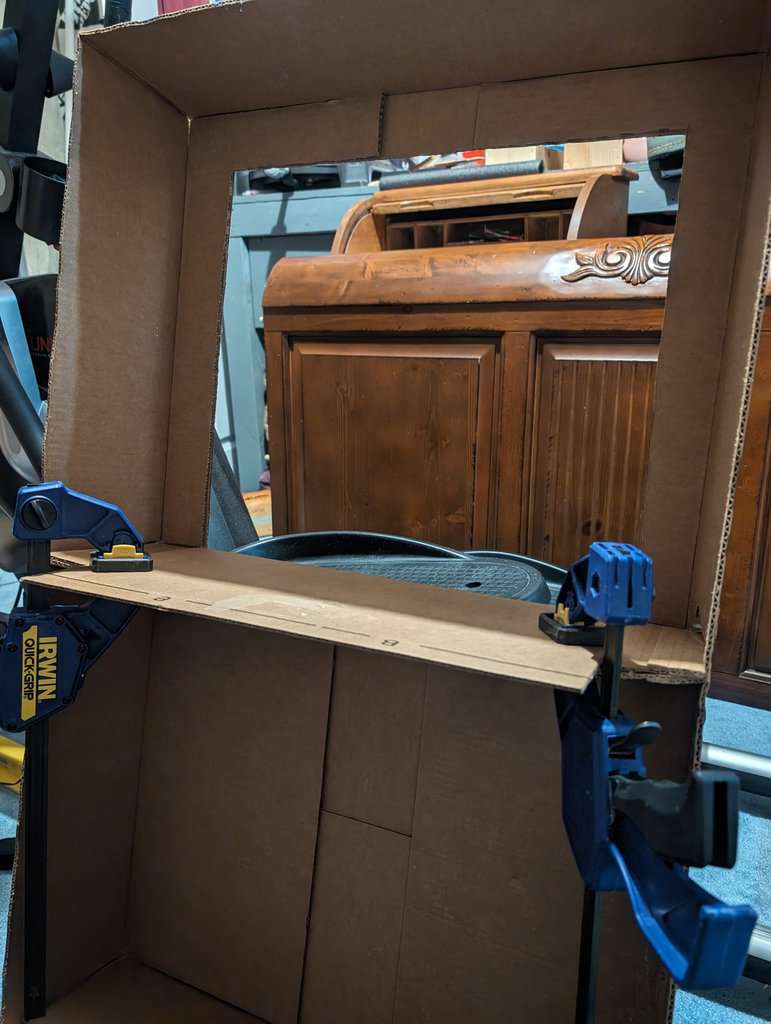
- On the face of one of the box-halves (where the flaps are) cut out a square (or rectangle depending on box size) leaving a 2″ border all around, except on the bottom (where one of the flaps would fold down – see picture).
- Glue the remaining flaps so the border becomes secure.

- Fold down the flap from cutting out the stage. Glue the top of the box (from step 2&3) to the bottom box, so the whole thing will form a tall theater (should be 4’x2’x6″ when complete).
- Glue supports with the excess cardboard on the bottom of the theater so it isn’t wobbly.
- Paint the entire theater in the color of your choice (I chose red). Again I used a roller brush to paint the whole thing.
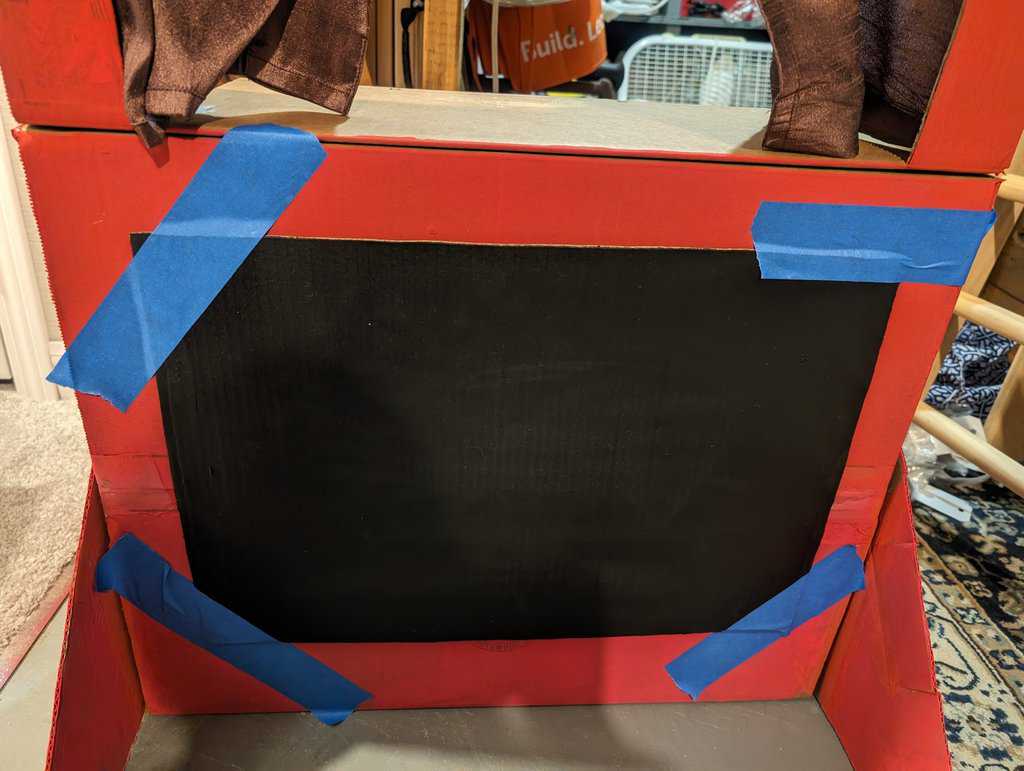
- Cut a rectangle from excess cardboard that is slightly smaller than the bottom half (this will be used for a sign). Then paint with chalkboard paint.
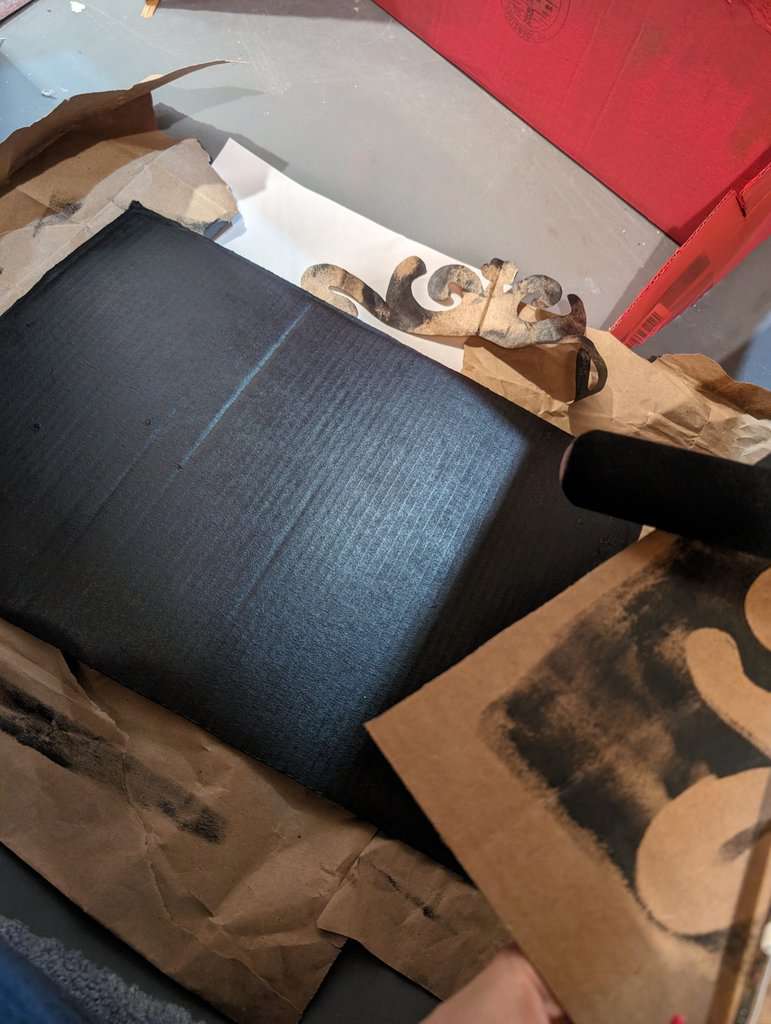
- Cut out a pattern of your choice to use as a decoration above the puppet stage. Paint in contrasting color (I chose yellow)
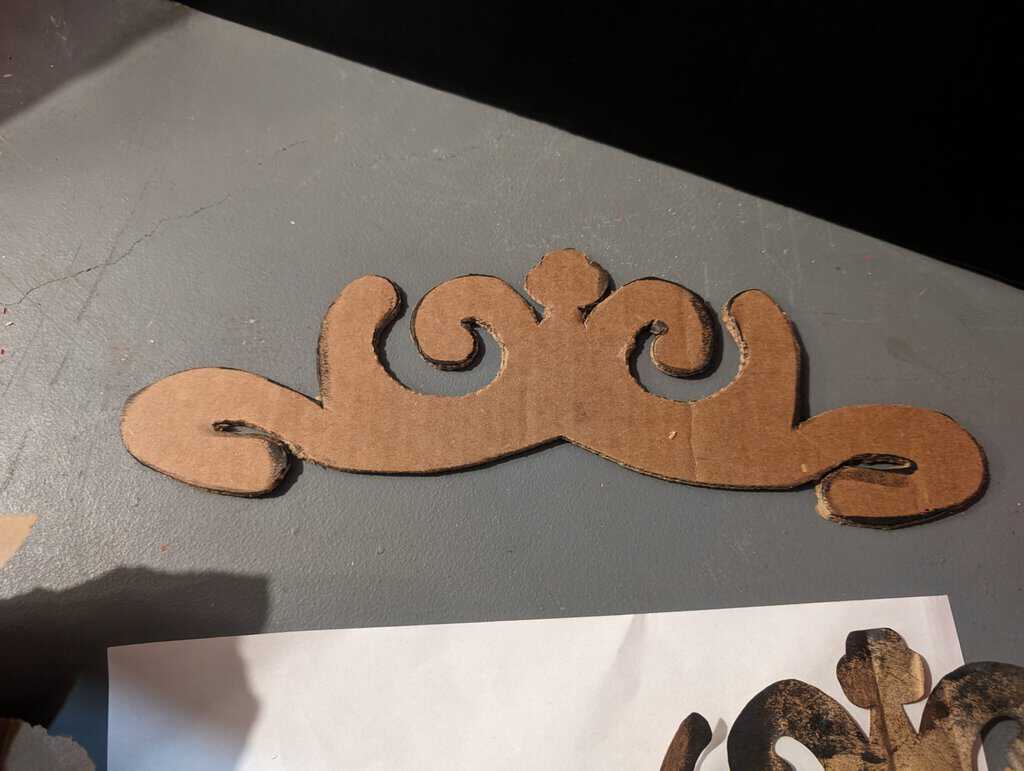
- When everything is dry, glue on the decoration above the stage and the chalkboard sign.
- Cut your scrap fabric into two pieces that are a couple inches wider and longer than half the width of the stage opening.
- Using the pushpins, pin the fabric to the back of the stage. If the pushpins go all the way thru the cardboard, glue a strip of cardboard just above the stage opening.
- Perform away!
Okay and since you got this far here are some gems from J&P this week:
Julius stares at the table contemplatively after we’re all done.
Will: What is it Julius? Are you still hungry?
Julius: (pointing to full water cup) Was this supposed to be my water cup?
Will: Yes.
Julius: (Eyes wide) I drank from Patricia’s!
Patricia (about letting me have the last tomato): Daddy had 3, Julius had 3 and I had a hundred so I’ll let Mommy have that one.