Botanical Prints

The dining room was the very first room in the house that Will & I painted.  Yet somehow it is one of the last rooms where I have put up wall decor or curtains.  I don’t really have an excuse for why except that I couldn’t find anything I liked to put on the walls, and I haven’t found a style of curtains I like yet.  About a year ago I decided that I really liked the look of framed botanical prints and thought that edible plants would be cute to put up on the wall.  There are many sets of these you can buy online, like these for instance, but the price is exorbitant – $200 for one framed print??  This discouraged me and I forgot about the wall decor for a while.

I gave up the search until one day I went with my mom to an estate sale furnishing store and found an original watercolor by Rosalind Oesterle with the perfect gold frame to compliment my dining room (which was much less than the framed prints!).  I was convinced it would go beautifully with some botanical prints on the opposing wall so this kicked off the hunt again.  I couldn’t find anything I liked in a reasonable price range until a trip to the Brimfield Fair with Ka & Joe gave me an idea.  We had stopped by a booth that was selling botanical prints.  They were perfect and exactly what I was looking for!  I asked the owner some questions about the prints and he answered every question I asked him rudely and sarcastically.  He was a complete JERK!  I have never had such an awful experience talking to someone for so short an amount of time!  Even though the prints were exactly what was looking for, I couldn’t justify giving this awful, rude man my money so I promptly thanked him and about faced out of the booth.  It was so hard to do considering I had been searching for so long for these prints and here they were, imprisoned by this rude man!
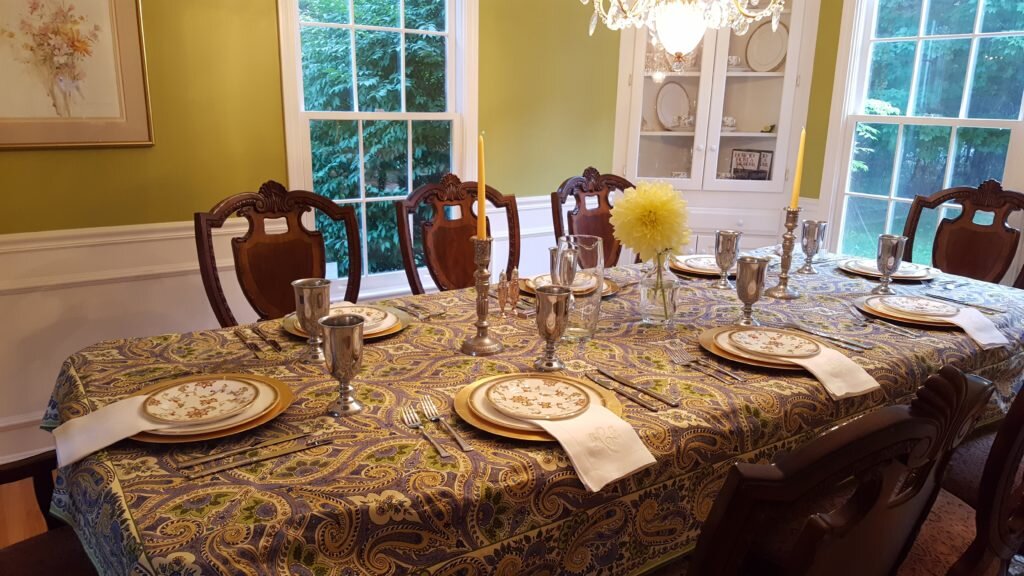
Dining Room all set up, you can see the watercolor on the left that re-sparked my interest in decorating the walls.

When I left the booth Joe commented that he had clearly cut them out of books and were selling each for the price of many times that of a whole book (the prints were $30-$50 each depending on size).  Genius observation Joe!  So when I returned home I scoured the internet for large format books of botanical prints.  I found the best reviewed one was this one with prints by Basilius Besler.  I purchased the book used for $38 and then searched through the entire thing when it arrived for pictures of edible plants.  I found around 20 large format pages of edible plants.  I decided I would pick 4 edible herbs, since the color schemes of these were complimentary.   My final choices included mint, pennyroyale, feverfew and basil that were on the same plates as some other edible plants like edible marigolds.

Next I cut each page out as close as I could to the spine using an Xacto-knife.
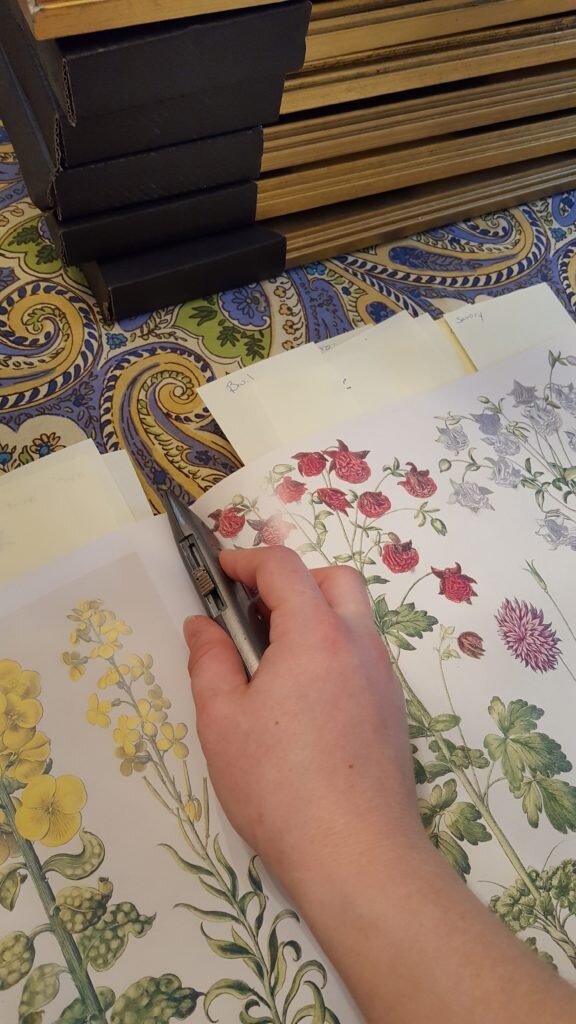
Carefully cut each page out with an Xacto knife.

I waited until Michaels had a sale on frames and purchased 4 16″x20″gold frames for half price ($25 a piece).  Then I waited for another sale and purchased 4 16″x20″ cream colored mats with 10″x13″ openings.  The mats cost me $7.50 a piece.  I then matted and framed each picture.
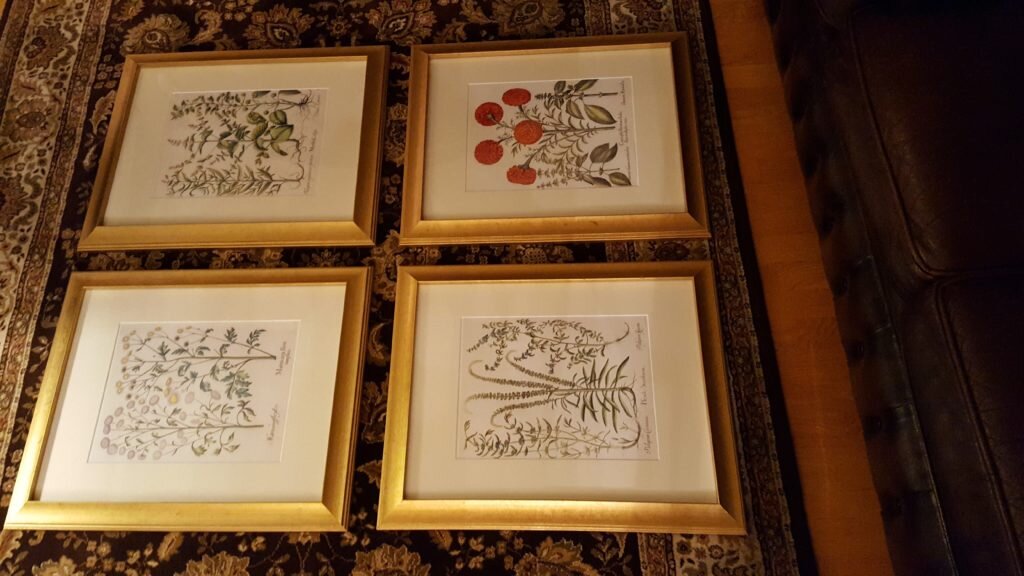
Matted and framed prints.

After I matted and framed each print I enlisted Will to help me hang them.  I measured the size of each frame and cut out 4 rectangles from scrap paper.  On the papers I drew a line down the center and marked an “x” where the wire hanger would hit the center line when pulled taunt.  Because each frame’s hanger tension could be slightly different, I did this separately for each frame.

Next I taped up a piece of string from the ceiling to represent the halfway point of the wall.  I would center my frames around this line.  After I adjusted the rectangles where I wanted them I simply hammered in hangers at the “x” markings and hung the paintings.
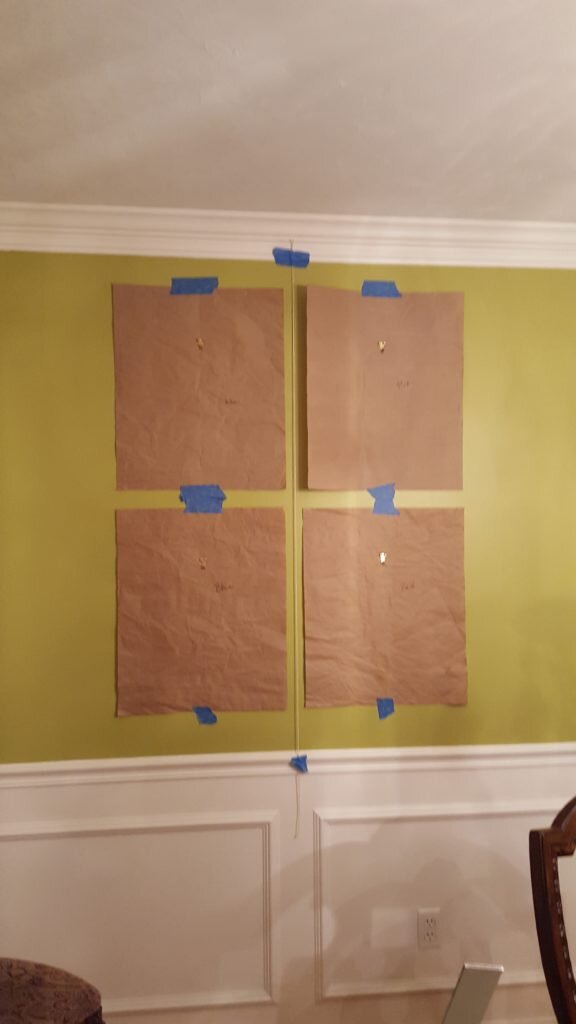
Scrap paper templates to represent each frame. I have centered them around the center string on the wall. The hooks have already been nailed into the walls in this photo.

I’m really happy with how they came out, and the grand total for the project was $168!  That’s less than just a single matted botanical print from Ballard Designs!  Now I just need to work on window treatments…

Finished botanical prints on my wall!

Look how well the frames match my chandelier!

Posted in Crafts & Sewing, Home Improvement | 2 Comments

Eight Maids a Milking

I really don’t want to harp on more things that make child-rearing difficult, so I’ll try and make this the last one (though I have a sneaking suspicion it won’t be).  For the record, I am honestly not trying to complain about or dissuade anyone from parenting, just trying to document all the things that have been surprising to me as a new mom.  What can I say?  I’m an engineer so I’m taking the analytical approach.  Maybe it will make it easier to look back and empathize when my other friends are raising children and I’ve forgotten everything.

Anyway, today’s topic is breastfeeding.  All I’m going to say is that it is difficult, and I was warned it was difficult by pretty much everyone I know.  You’d think something that humans have been doing for hundreds of thousands of years would be pretty innate by now.  Unfortunately it seems that even if you don’t have any problems with latching or supply, it is still a learning experience for both mom and baby.  And once you do get the hang of it there are still times where things are frustrating for one reason or another.

But luckily, because we live in the 21st century, there are many products created to make things easier!  I can tell you that my #1 favorite is the “My Brest Friend” nursing pillow – affectionately referred to as “the shelf” by my family.  The thing is amazing for positioning baby – and since it is strapped to you, it doesn’t move around when baby squirms unlike the Boppy type pillows.  In fact, you can even walk around with the thing on!  It’s great.  If you plan to breastfeed you need to put one on your registry.

Another useful item for nursing is a nursing journal.  Its sort of a pain in the butt, but up until recently I wrote down the time of every feeding, soiled diaper or pumping session.  In addition I would record the side Julius nursed on.  Early on it was very helpful to make sure Julius was eating enough.  Over the last couple weeks I’ve finally stopped recording the soiled diapers, because its pretty obvious if there are enough or not during a day.  I only record nursing and pumping sessions now, since it is still very useful to know when the last time he ate was.  At night though its not as important that I track the time – I just hope he goes as long as possible without eating!  So I don’t bother waking him every three hours like I do during the day (that would be crazy!)  So all I need to know at night is what side I need to nurse him on.  My co-worker gave me a set of magnetic nursing side indicators that address this problem.

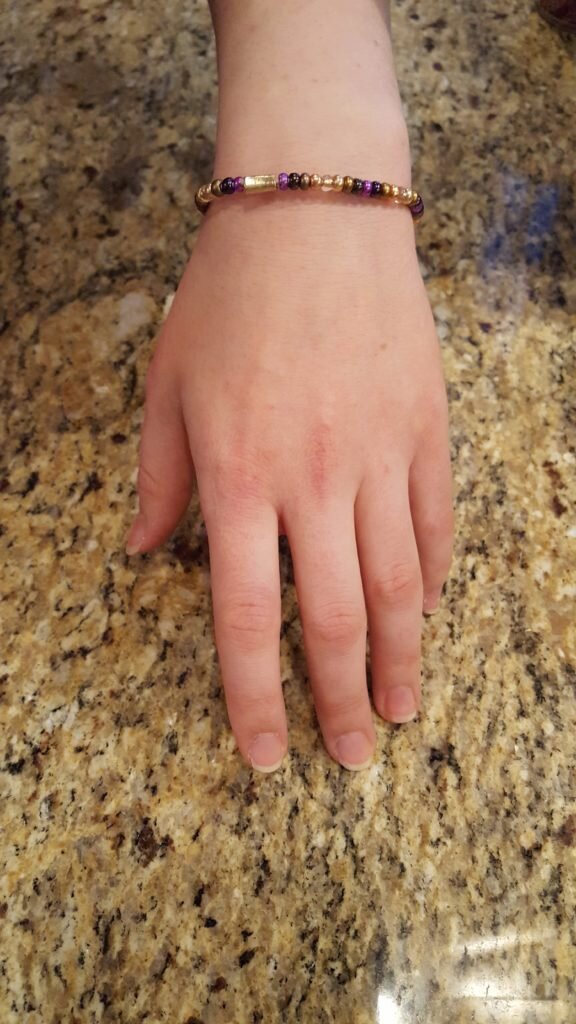
Unfortunately, while they stay on well during the day, I find that they frequently fall off in my sleep, defeating the purpose.  To solve this problem I created a version that uses snaps instead of magnets to hook over your bra strap.  These worked better than the originals (and I almost posted about them a couple weeks ago – so if you want the instructions, shoot me a message) but after using them for a while they still had some problems.  Frequently I’d forget to switch the indicator over to the other bra strap until after I was done nursing, which means I would need to lift up my shirt and fiddle around under there to fix it.  This makes using them in public iffy.  Then I realized, why not just wear a bracelet?  It’s not under your clothes so you can switch it easily from hand to hand after a nursing session without awkwardly groping around under your shirt if you forget.  Of course, any old bracelet will do, but preferably one that is easy to slip on and off.  Well, that wasn’t good enough for me, so I created one that solves one additional nursing problem!

My version of the under shirt nursing indicator using snaps instead of magnets (let me know if you want my instructions).

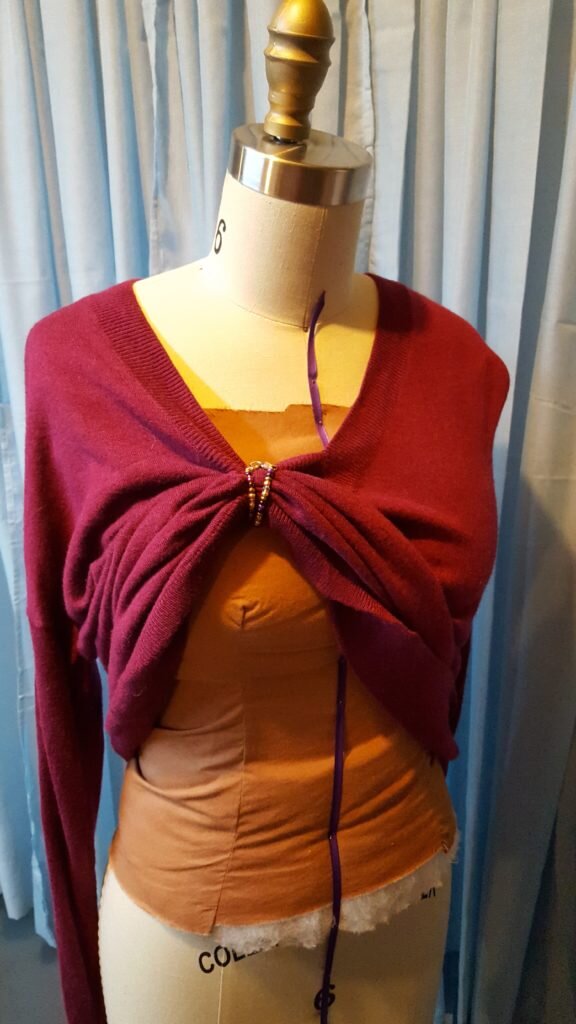
Another problem I have is that if I’m not wearing a nursing friendly shirt (think buttons, or big pull down collar) I have to lift my shirt up to nurse.  The shirt inevitably falls down on baby and annoys him and/or gets covered in milk.  This bracelet doubles as a way to hold up your shirt while you’re nursing!

Nursing Bracelet

What you’ll need

  • 1 coat hook from a package of “Dritz 4 Coat Hooks and Eyes”

and either

  • 10″ of elastic
  • small glass beads
  • Beading wire
  • Bead tip or to cover knot in elastic*
  • bead glue

or

To make the beaded bracelet

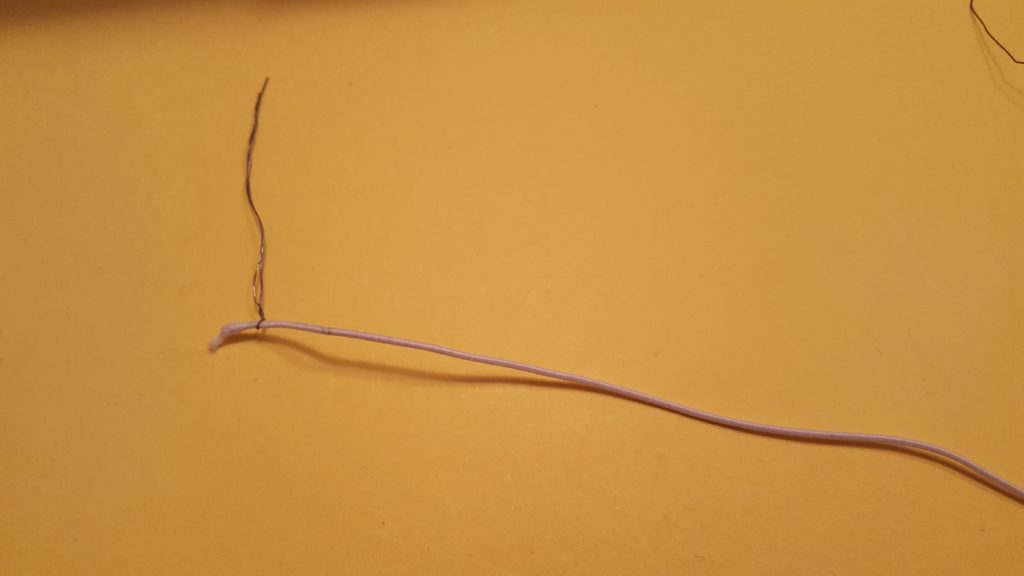
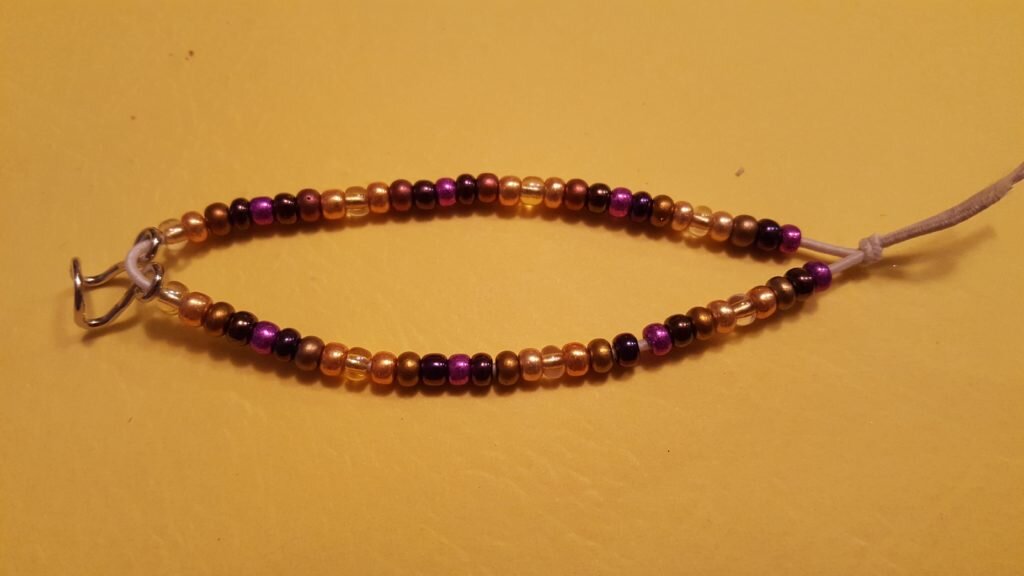
  1. Cut a 3″ piece of beading wire, fold in half and twist around one end of the elastic to form a needle.

    Thread wire around end of elastic to form a needle.

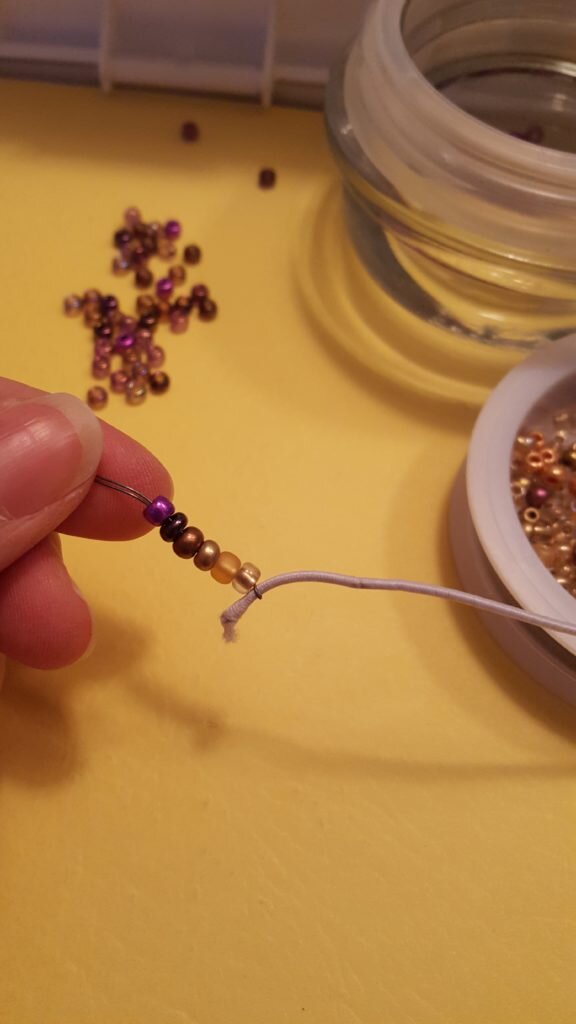
  2. Thread 4″ of beads onto the elastic.

    Thread 4″ of beads onto elastic .

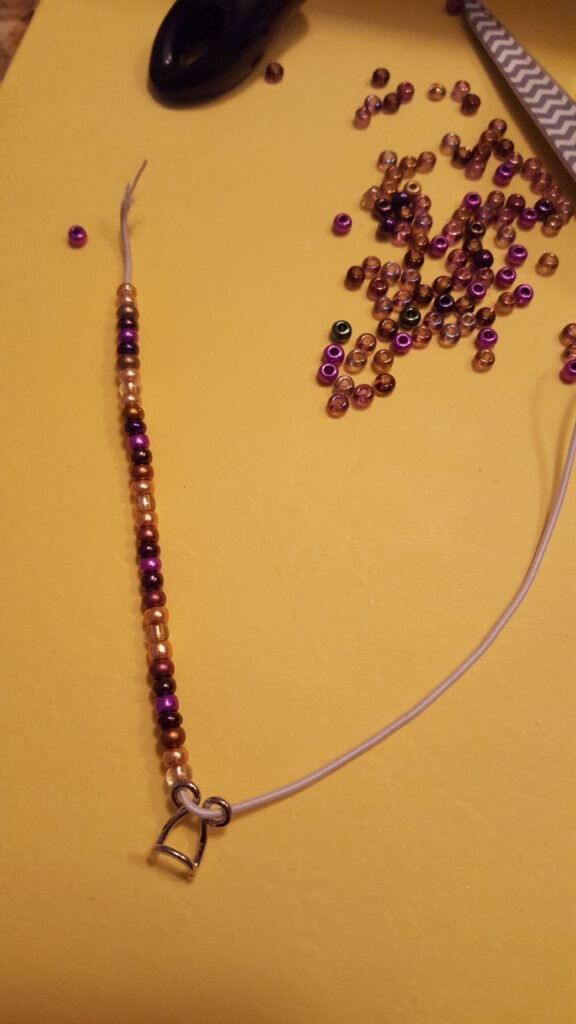
  3. Thread coat hook onto elastic.

    Thread coat hook onto elastic

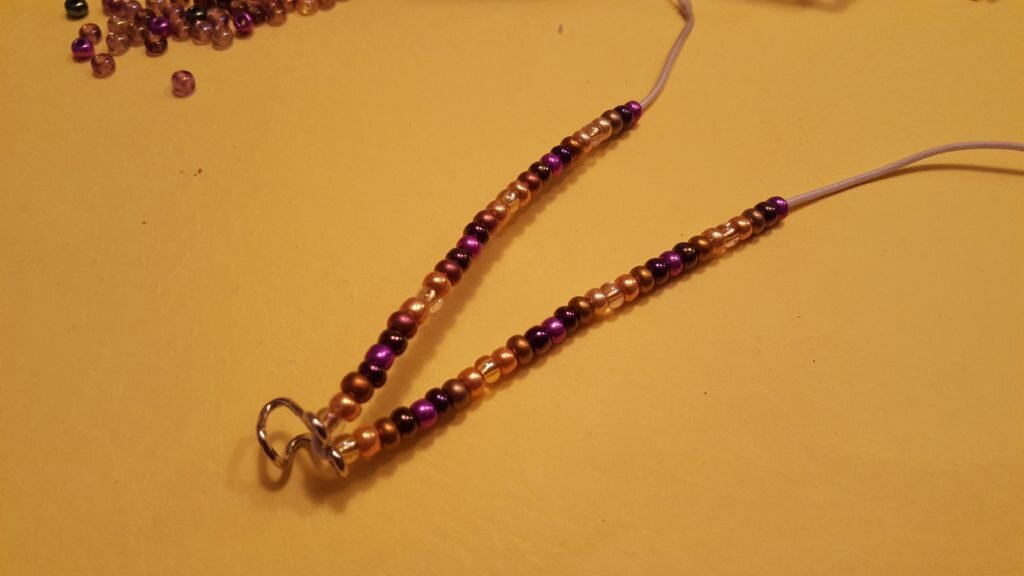
  4. Thread another 4″ of beads onto the elastic.

    Thread rest of beads onto elastic.

  5. *Add a crimp bead or tube if desired.
  6. Knot the ends of the elastic together.

    Knot ends of elastic.

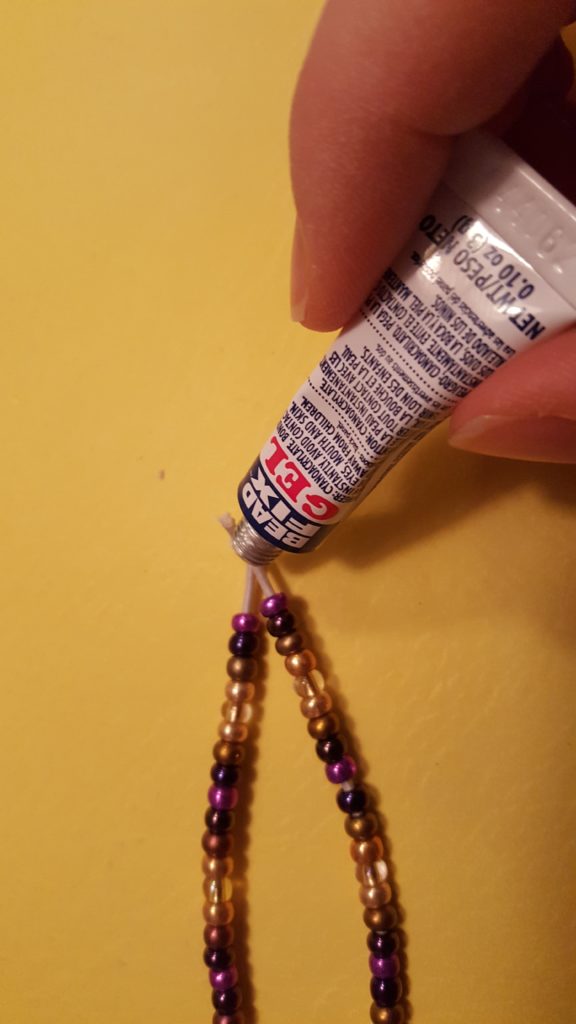
  7. Trim the ends of the elastic then put a drop of glue on the knot.

    Trim ends of elastic then put a drop of glue on the knot

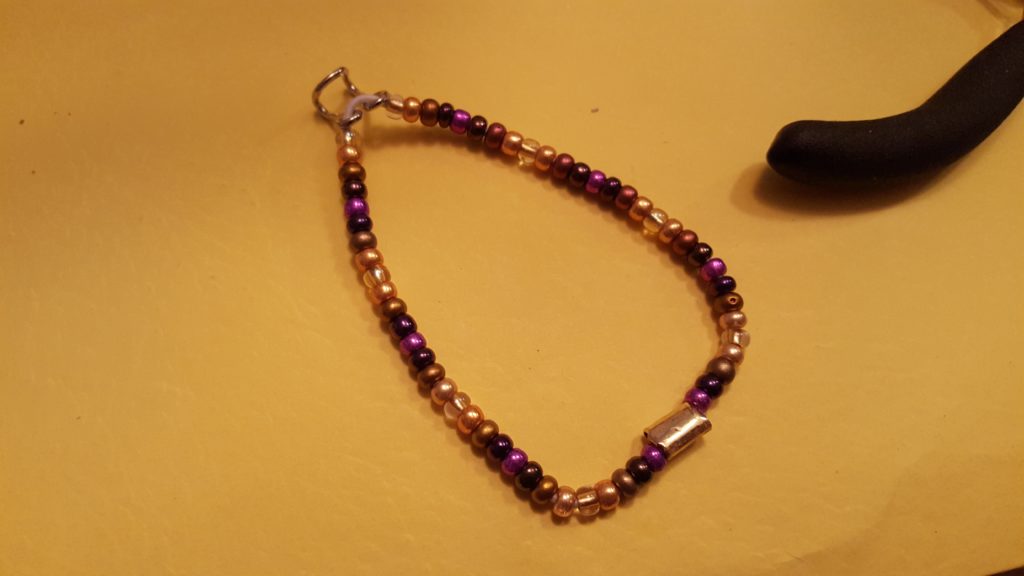
  8. Cover knot with a bead or crimp tube.

    Cover elastic with crimp bead or tube

  9. ** Note if your beads are too large, you may have to open the hook part of the coat hook slightly so it will fit over your beads when using.

    Finished bracelet

To make the hair tie bracelet

  1. Unknot hair tie.
  2. Thread coat hook onto hair tie.
  3. Re-tie hair tie.

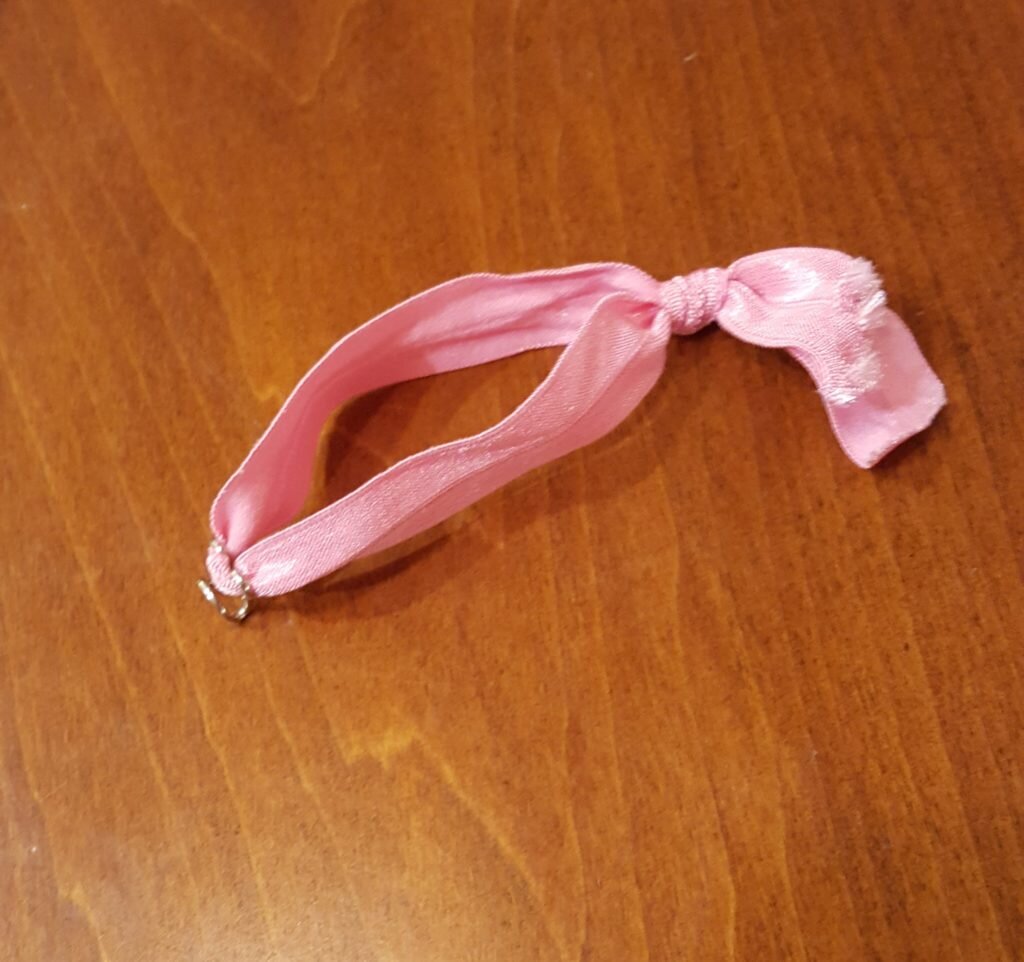
    Finished bracelet from hair tie

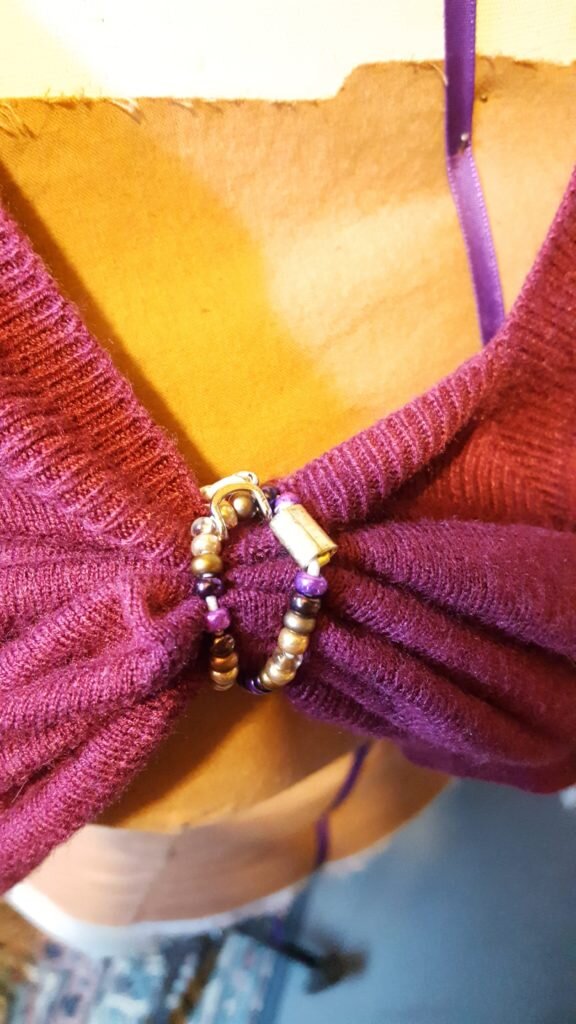
To use – simply loop the bracelet around your neckline and the bottom of your shirt. Hook the coat hook onto the opposite end of the bracelet.

Bracelet holding up shirt for nursing access.

Loop bracelet around shirt and hook onto other end of bracelet to hold shirt in place.


Posted in Crafts & Sewing | Leave a comment

Baby its cold outside

Happy new year!  I hope you all are looking back fondly on 2017 and have big plans for 2018!  2017 was a big year for us – we brewed and started raising baby Julius!  We’re excited for lots of baby firsts in the coming year.  Recently Julius has become a very smiley guy.  He started really smiling a couple weeks back – but the smiles were limited to once or twice a day.  Now the little guy seems to smile all the time!  Nothing makes me happier than seeing mister Julius smile!  Of course we cannot wait until he can LAUGH!

In addition to the smiles – this holiday break brought me some sleep!  I actually feel like a real person again!  Will let me sleep in every day while he and Grandma fed the baby from a bottle for the first morning feeding if I wasn’t up yet.  It was glorious!

As always, the first of the new year brings lots of discussion of resolutions.  Since I’m no longer pregnant, I want to get back to running.  It was sad for me to quit running for the past nine months, but unfortunately now that I have the approval to exercise again it is bitter cold out!  The thermometer right now reads 2 degrees!  This means running with Julius in the jogging stroller is out of the question for a while.  Frankly, just walking to the car with the little guy in his car seat makes me nervous!  We bundle him up and throw tons of blankets on top of him for fear of him freezing to death in the 30 second walk to a parking lot or someone’s house.

Recently I made a car seat cover to use while we carry Julius around outside the house.  It is made of cotton, but has a fleece insert you can use for the winter.  If you’re indoors or it is pleasant weather outside you can remove the fleece insert and still keep the sun (and nosy strangers) out of your baby’s face.  I made it a little large so you can tuck it into the carrier.  You may want to make it a foot shorter if you don’t want to do any tucking.

Four Season Car Seat Cover

What you’ll need:

  • lightweight fusible interfacing
  • 1.5 yards of 56″ or 58″ wide cotton fabric
  • 1.25 yards of 56″ or 58″ wide fleece fabric
  • 16 snaps
  1. Cut a piece of cotton fabric 43″ x56″.  Repeat for fleece fabric.
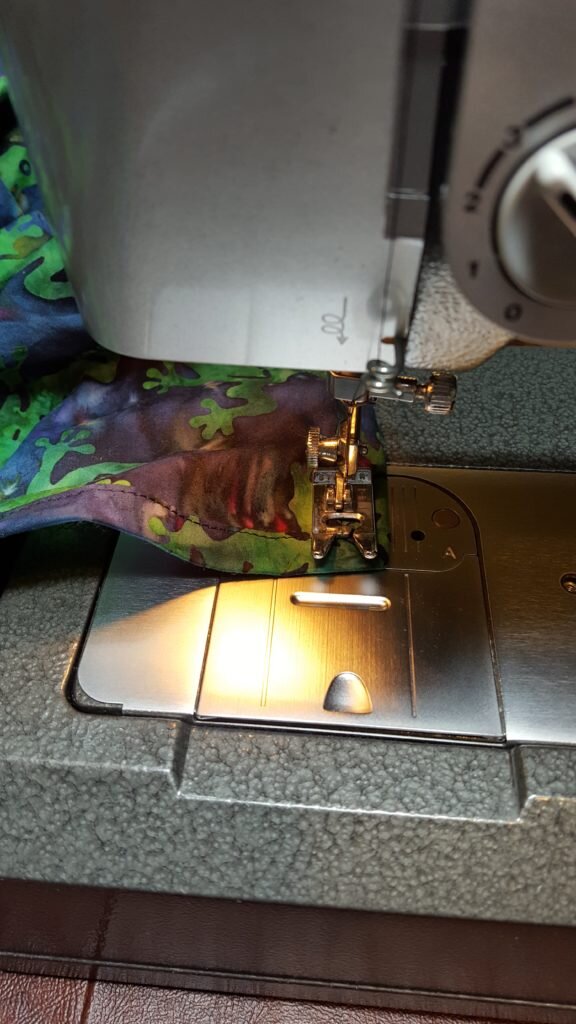
  2. Hem cotton fabric with 1/2″ double fold hem.  Make sure to miter corners.

    Hem cotton fabric using double fold & miter corners.

  3. Hem fleece fabric with a 1″ single fold hem.  The fleece will not unravel, and the single fold hem will lower the fabric bulk.

    Hem fleece with a single fold.

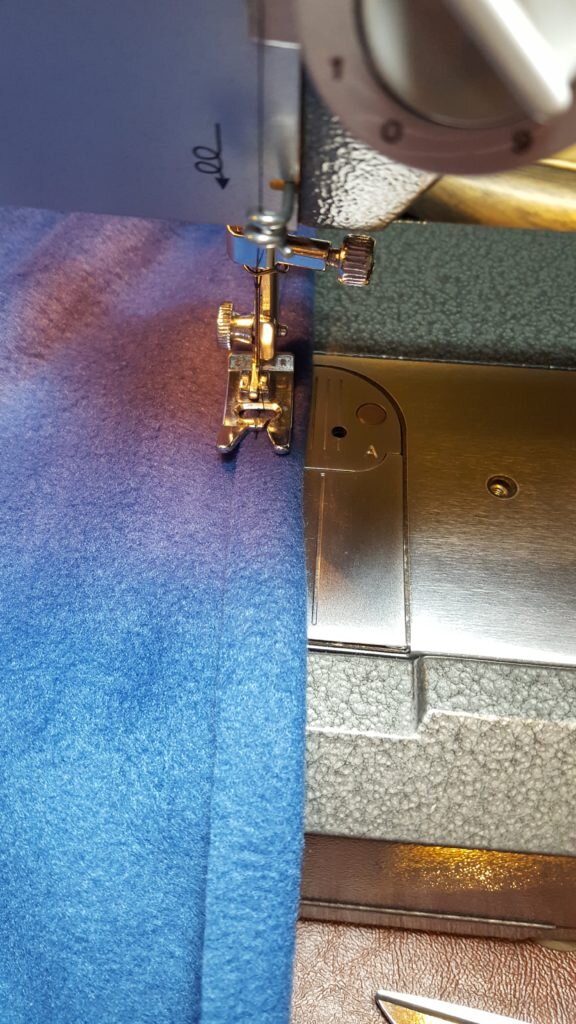
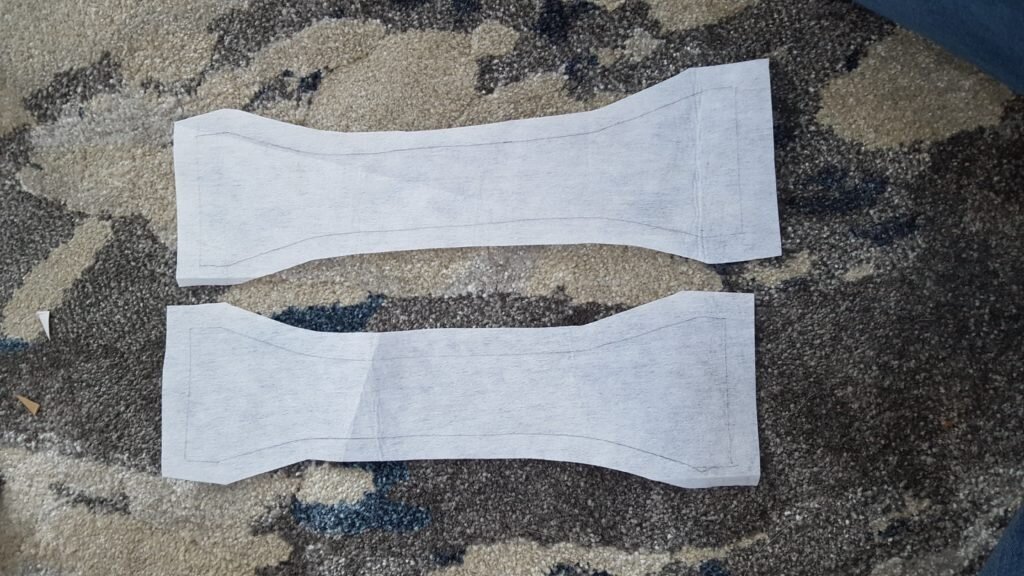
  4. Using handle template above, add 1/2″ seam allowance and cut out 4 of cotton and two of interfacing.

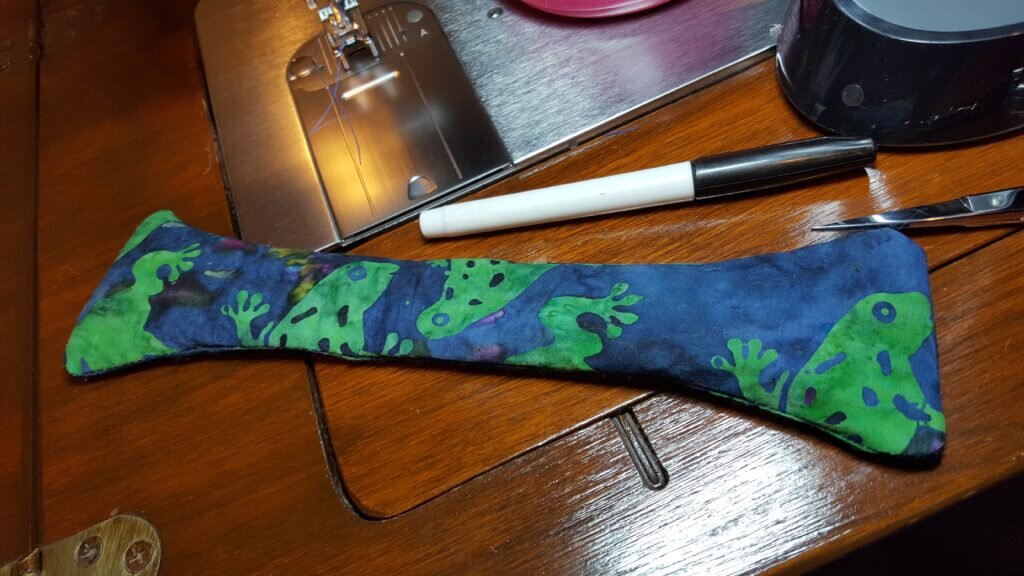
    Cut handles from interfacing and cotton fabric.

  5. Fuse each piece of interfacing to one of the cotton handles following manufacturer’s instructions.
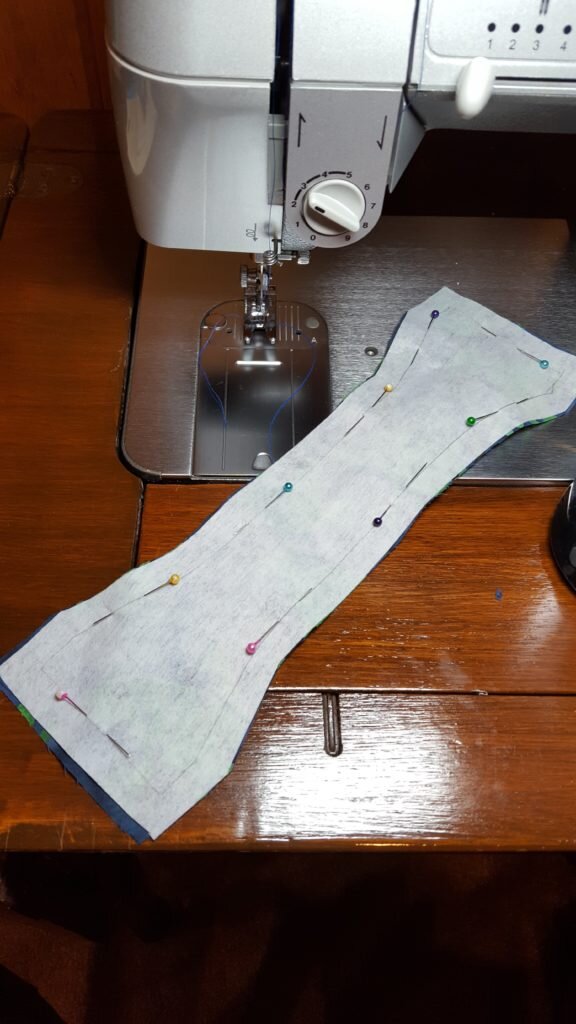
  6. Pin handle side with interfacing to a handle side without interfacing.  Repeat for second handle.

    Pin handle with interfacing to handle without interfacing

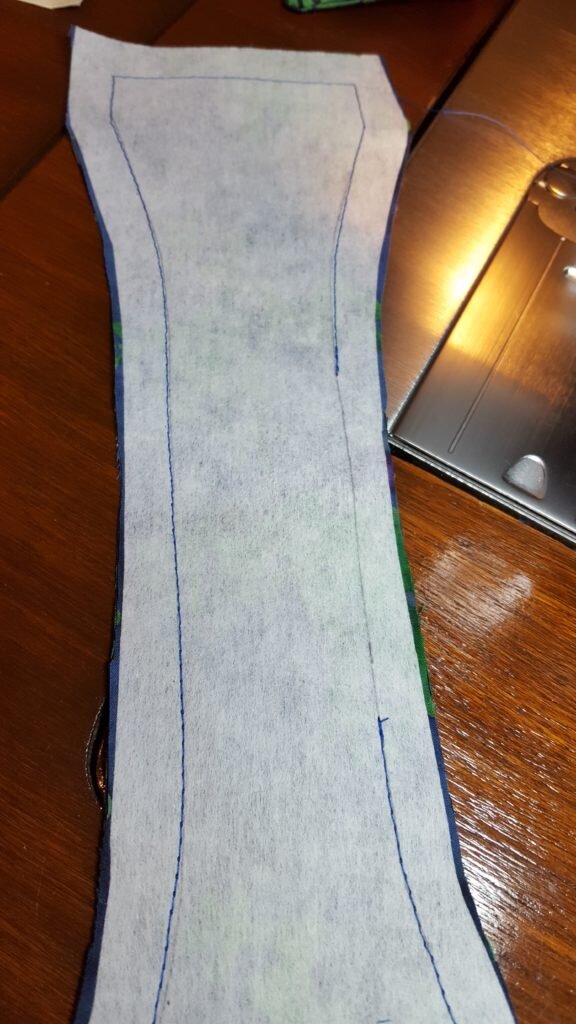
  7. Stitch around handle leaving a 3 inch gap along the skinny side of the handle.

    Stitch around handle leaving a gap at handle center.

  8. Clip curves and corners and turn right side out.  Stitch along 3″ gap to close it.

    Turn handle right side out through gap and stitch gap closed.

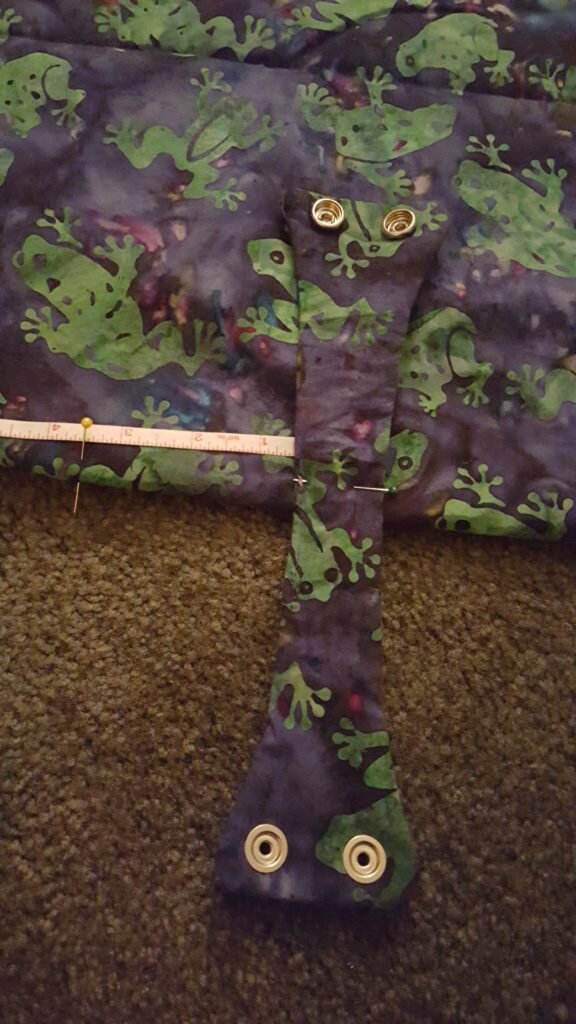
  9. Fold the cotton cover in half lengthwise.  Mark along the fold, 22 inches in (this should be the center).  Mark 3.5 inches out from the center marking along fold on either side.

    Mark 3.5 inches from the center of the cotton fabric, along the width.

  10. Center handles along this marking as shown in the picture.  Stitch handles to cotton cover.

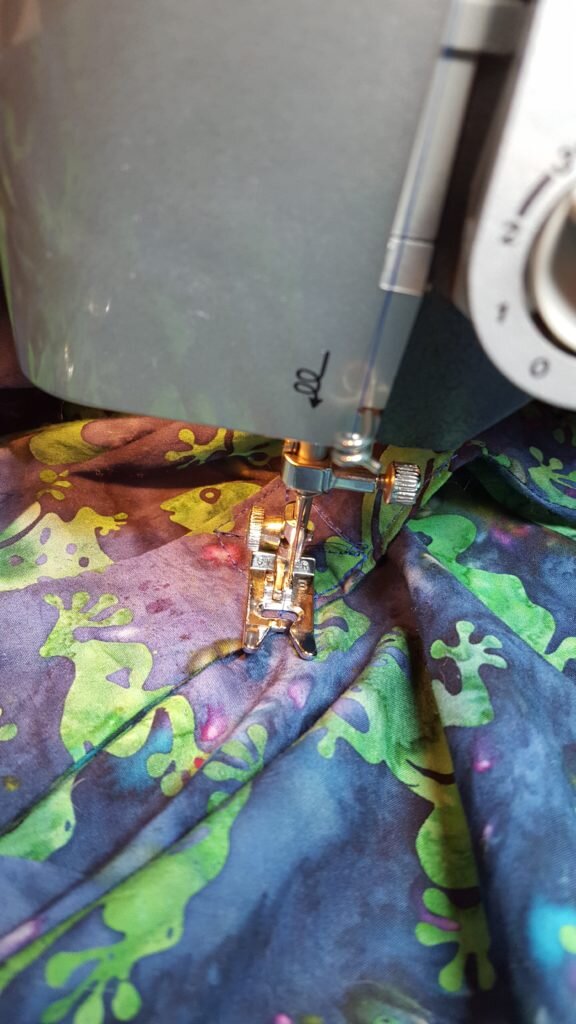
    Stitch handles to cotton cover.

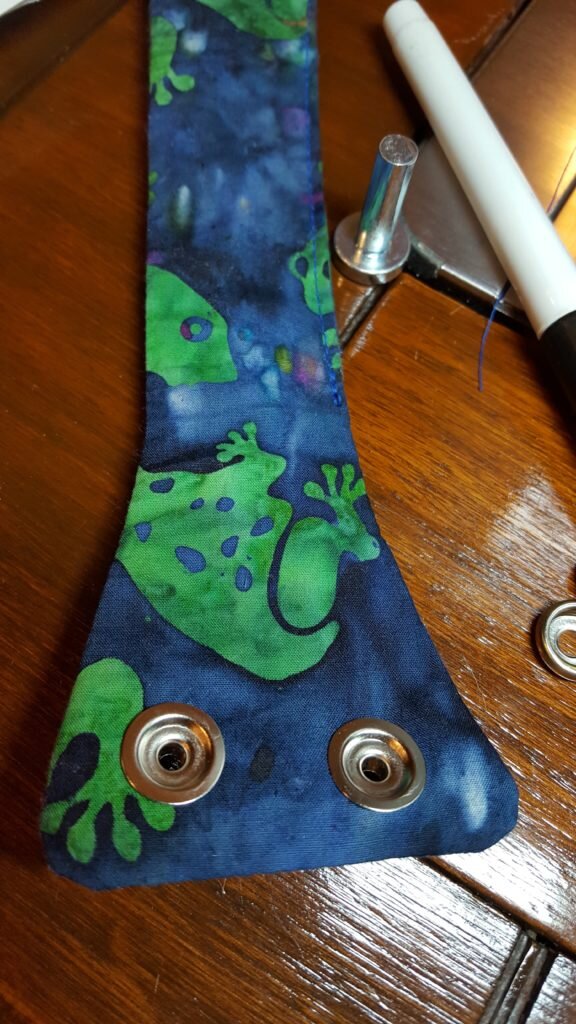
  11. Following manufacturer’s instructions attach snap tops to cotton cover in positions shown in picture.

    Attach snaps as shown in diagram above.

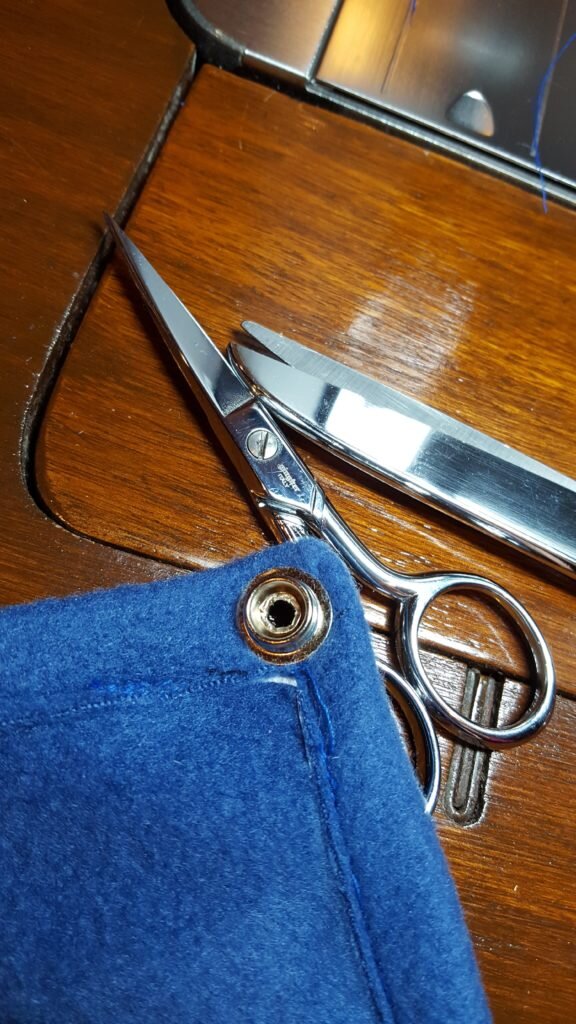
  12. Repeat for snap bottoms on fleece.
  13. Attach snaps to handles so they form loops.  (Snap tops to top side of handle, snap bottoms to bottom side of handle.)

    Add snaps to handles.

For mild weather use, attach handles to car seat carrier.  Drape over car seat.  For cold weather use, attach the fleece insert for extra warmth!

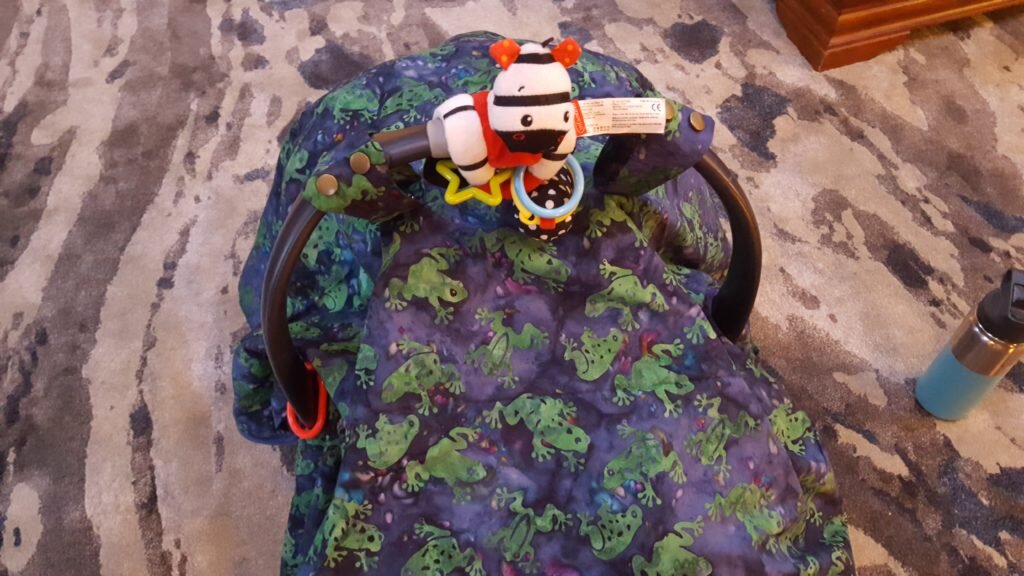
Car seat cover attaches to handles using snaps.

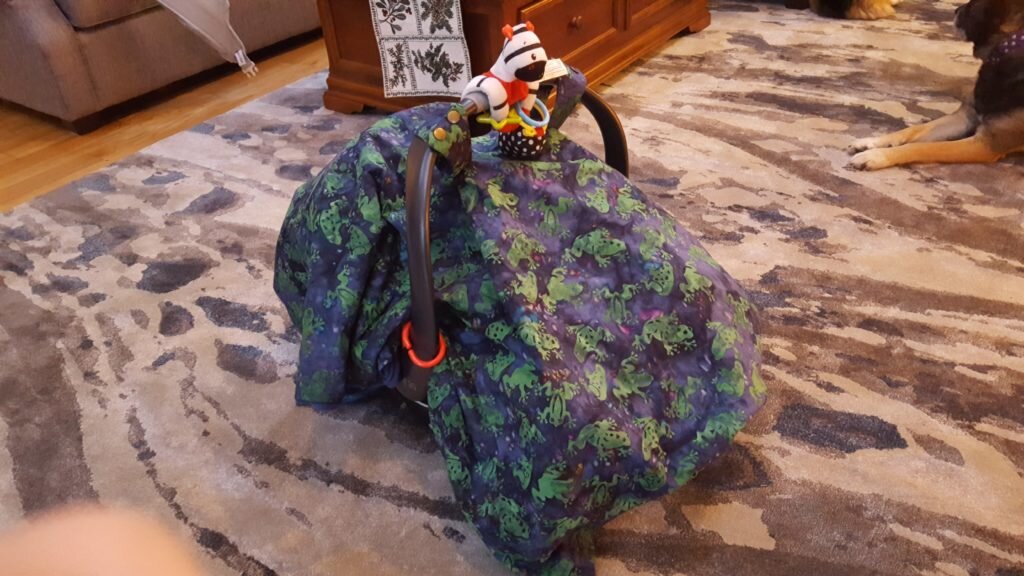
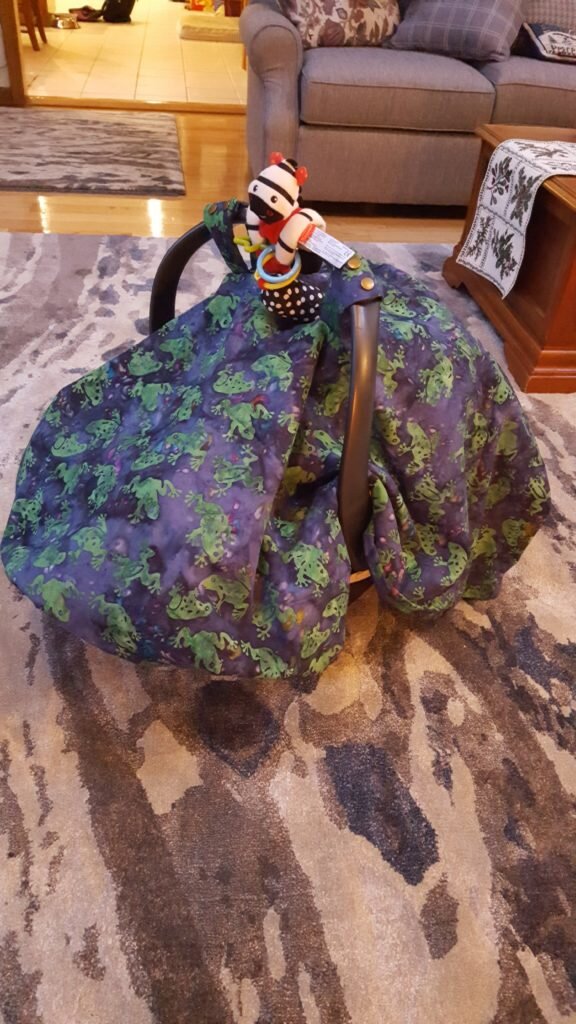
Finished car seat cover.

Don’t you just love the frog batik fabric?? I got it for only a couple dollars at a thrift shop!

Little guy is ready to brave the cold! (The car seat cover is folded up above him in this picture while we put him into the carrier).


Posted in Crafts & Sewing | 2 Comments

Happy Holidays! Merry Babymas!

Merry Christmas!  Happy (belated) Hanukkah!  Happy Noam Chomsky Day!  Or may whatever winter holiday you celebrate be jolly!  Well I had a great blog post idea for today.  I was going to write all about my breastfeeding experiences (don’t worry it wasn’t going to be graphic).  The plan was to call it, “Breastmilk and cookies”.  Get it?  You’re supposed to leave milk and cookies out for Santa?  But not breastmilk.  Definitely don’t leave him breastmilk.  Well (luckily?) I ran out of time, and didn’t get to write it yet.

So we are starting to get into more of a routine with little Julius. It is starting to feel less like, “oh my God what have we gotten ourselves into” and more like, “okay we may be able to handle this”.  I think the turning point was when I completed a shopping trip with the little guy.  My friend Maren told me she schedules a reason for her and her little one to leave the house every day – whether a visit to the library, a breastfeeding group, or a shopping trip.  I thought this was a genius idea, and though I haven’t done it every day, I’m trying to get out of the house with Julius several times a week.

For each outing it takes me an eternity to pack his diaper bag since I’m concerned I’ll forget something.  By the time I’m done packing, my bag weighs about 50 pounds.  This makes carrying a pocketbook out of the question!  Instead I throw my keys and purse into the bag.  The problem is, I’m never able to find my keys in that giant bag!  There are so many pockets they could be hiding in!  I decided to make a tether to attach my keys to the bag.  All I have to do now is grab the end of the tether and pull and I’ve got my keys!  Though I made it for a diaper bag, it would work great on a pocketbook.  In fact, I got the idea from a bag I got from Will’s grandmother – and it has even made my pocketbook searching so much easier!

Key Tether

What you need:

  • 1″ lobster clasp
  • 1″ key ring
  • 16″ of 1″ ribbon or trim
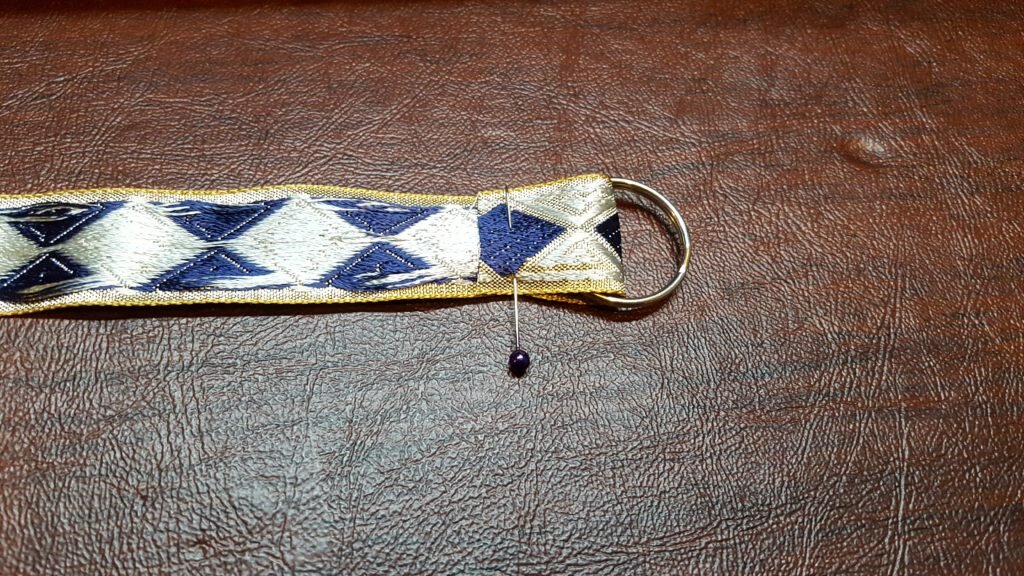
  1. Fold 1″ of ribbon over key ring.  (Right side out.)  Pin and stitch.

    Fold 1″ of ribbon over key ring. Pin and Stitch.

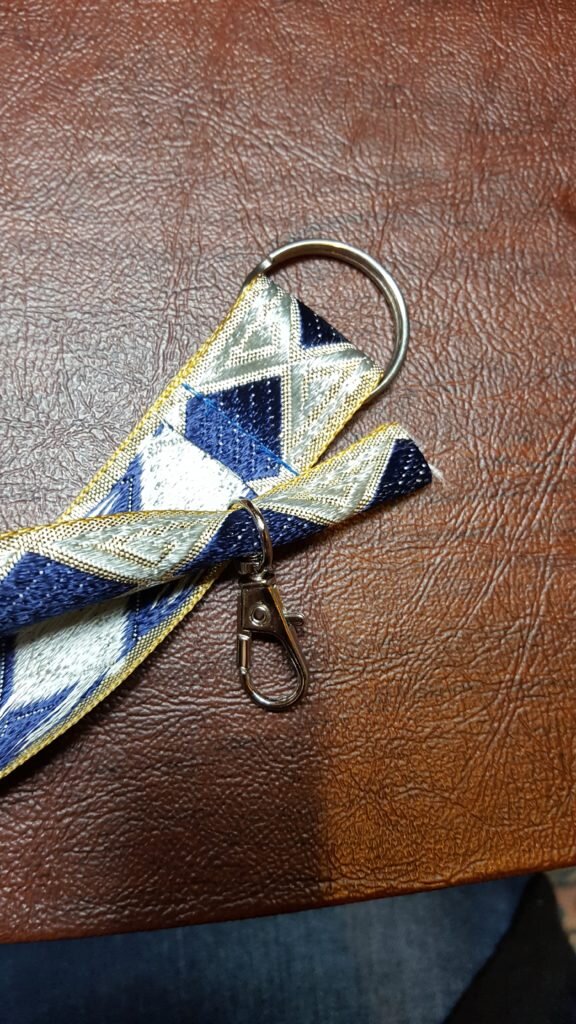
  2. Insert ribbon through lobster clasp ring.

    Insert ribbon through lobster clasp.

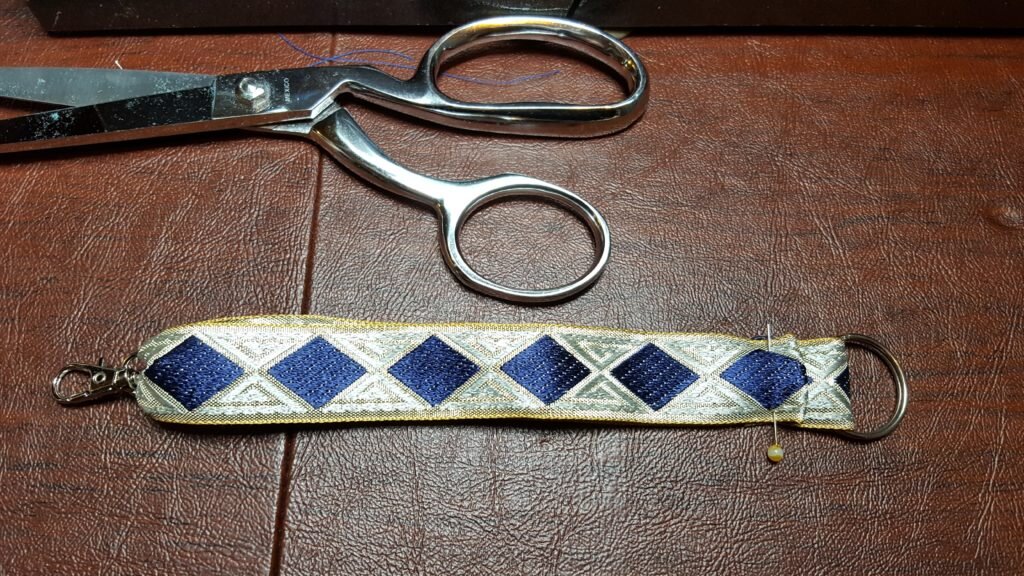
  3. Turn under unfinished edge 1/2″.  Place folded edge 1/4″ below the key ring.  Pin & stitch.
  4. Slide lobster clasp so it is opposite the key ring and the rest of the ribbon sits flush.

    Fold under 1/2″ of unfinished edge and pin 1/4″ below the key ring.

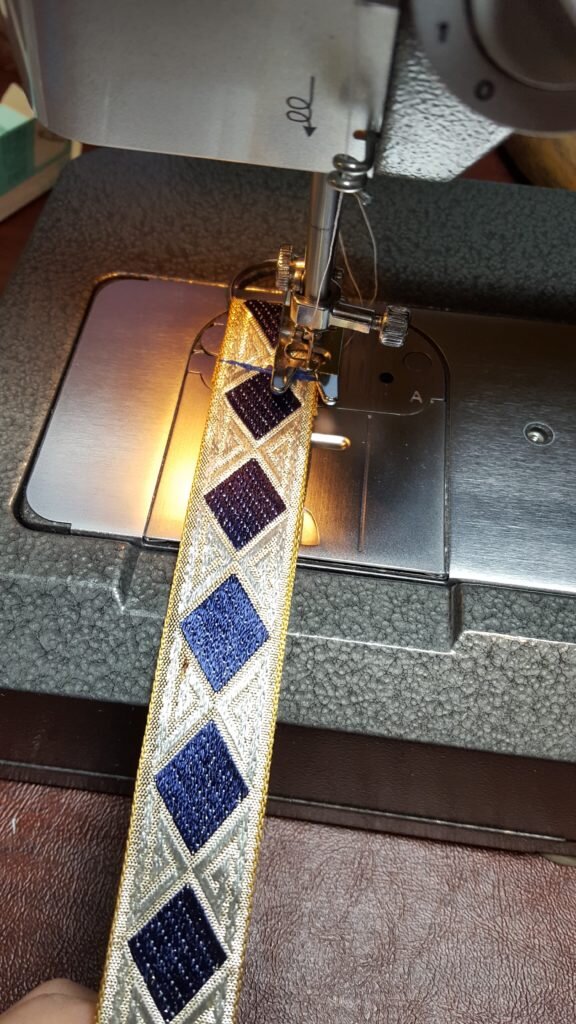
  5. Stitch the ribbon together as close as possible to both of the unfinished edges.

    Stitch along unfinished edges of ribbon to secure.

To use either attach key ring to zipper pull or loop ribbon around bag handle and through key ring.  Attach keys to lobster clasp.

You can either loop tether around handle and through key ring, then attach keys.

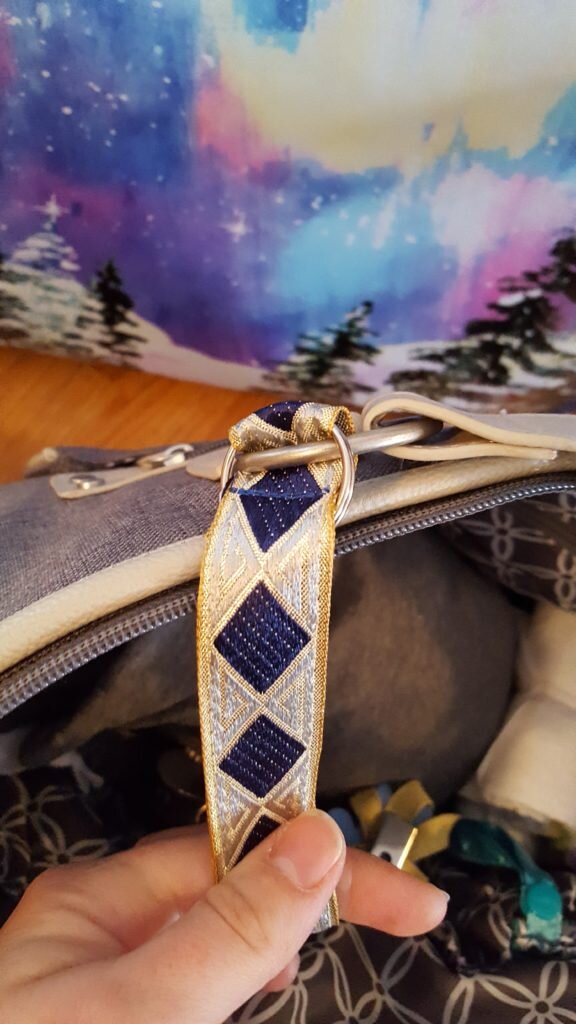
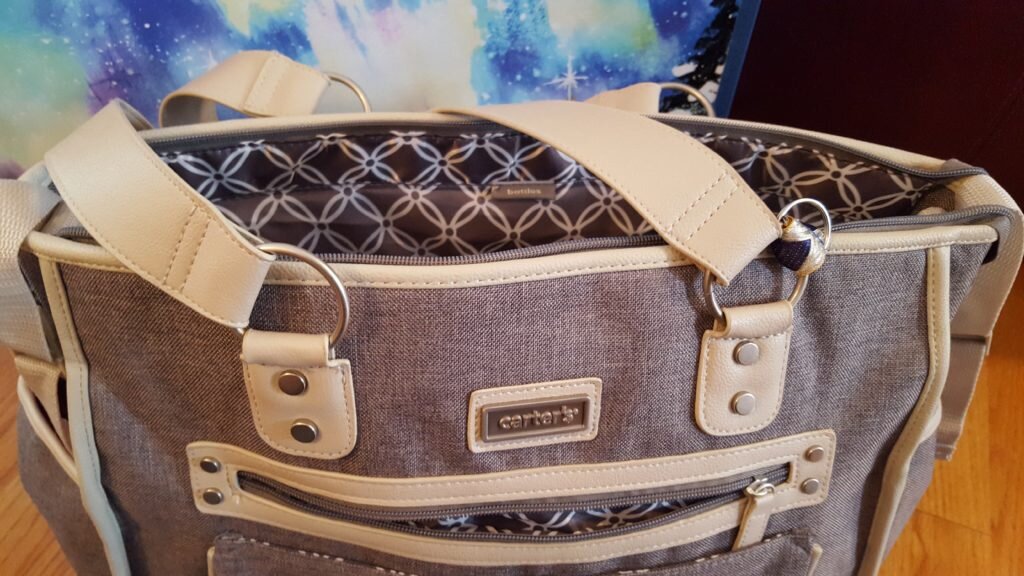
Outside view of key tether attached to diaper bag handle.

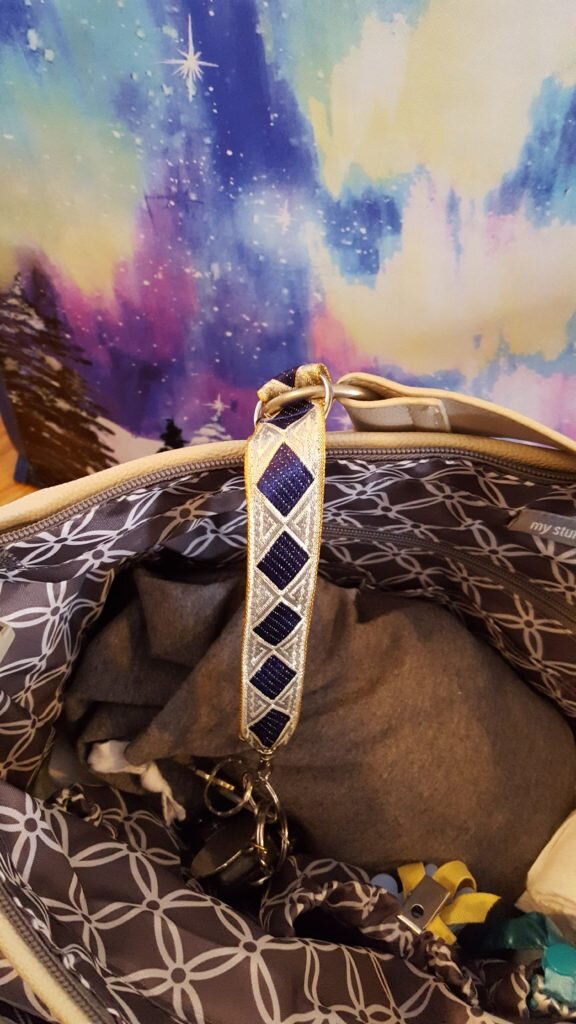
Inside view of key tether attached to diaper bag handle.

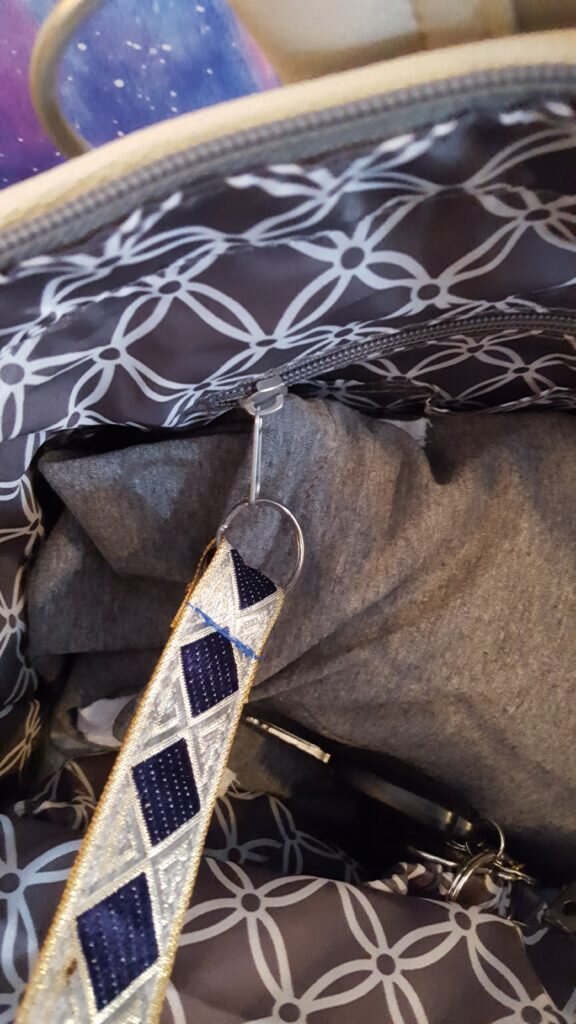
Or you can attach key ring to a zipper, and attach keys to clasp.

Merry Christmas!

Posted in Crafts & Sewing | Leave a comment

Little Prince

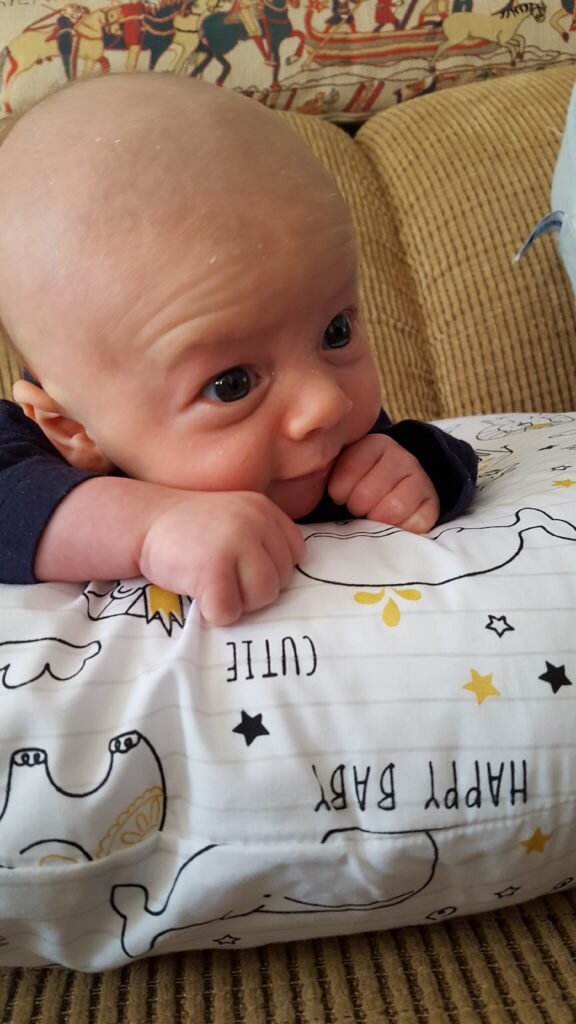
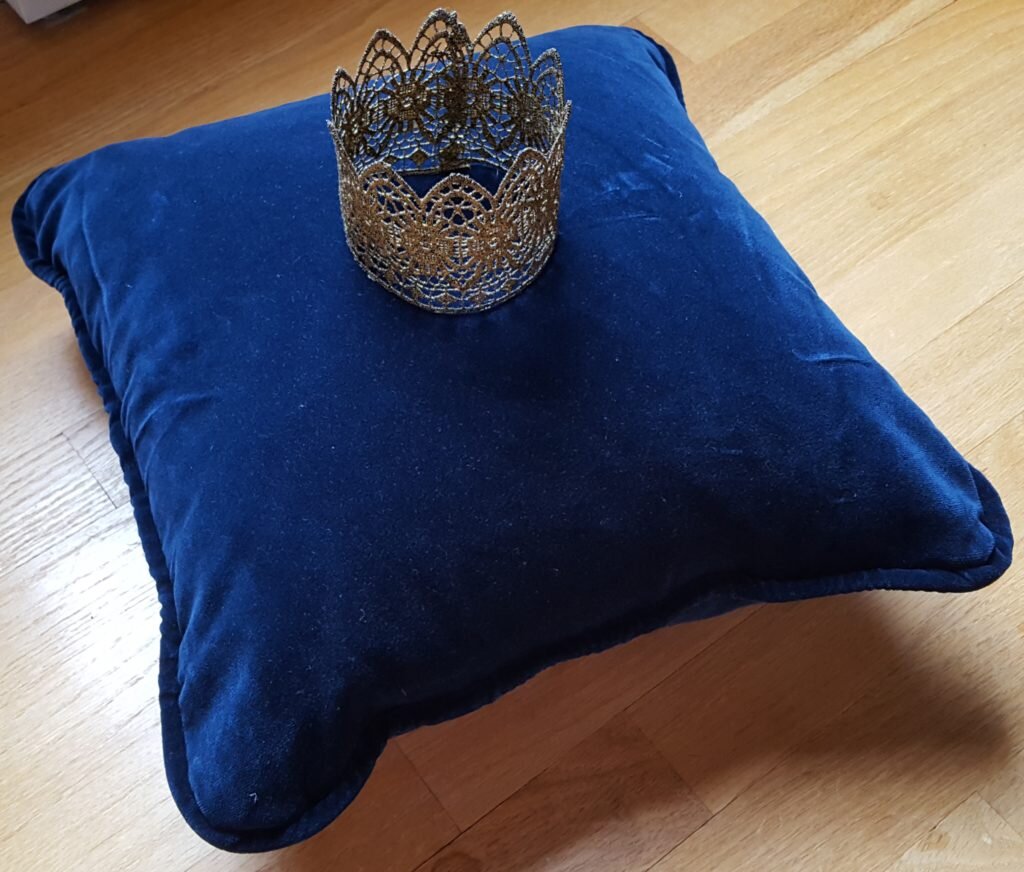
When I was pregnant I saw these adorable tiny crowns on Etsy and decided I wanted to make one.  It was very easy to make, but our uses for it were rather silly.  We took multiple pictures of him with the crown.  First, our friend Joe photographed us holding the crown while I was pregnant and waiting for our little prince.  The second time was the day after he was born when he had hospital photos taken.  This picture was incredibly silly (you can see below).  Finally I took a third picture 2 weeks after his hospital photos.  You can tell the crown is already way too small by this point!  And looking back… he has gotten SO MUCH BIGGER in only 4 more weeks!

Our friend Joe Kerekes took this cute picture of us awaiting our tiny prince.

Julius’ silly hospital photo. He wasn’t awake enough to put it on top of his head… but this is just plain silly.

This is just two weeks after his hospital photos were taken, but his head is already way too big!

And just for perspective, this was Julius yesterday at 5 weeks, 5 days! Look at that noggin, definitely won’t fit a 3″ diameter crown now!  But what a cutie, right?

3″ Diameter Tiny Crown

What you’ll need:

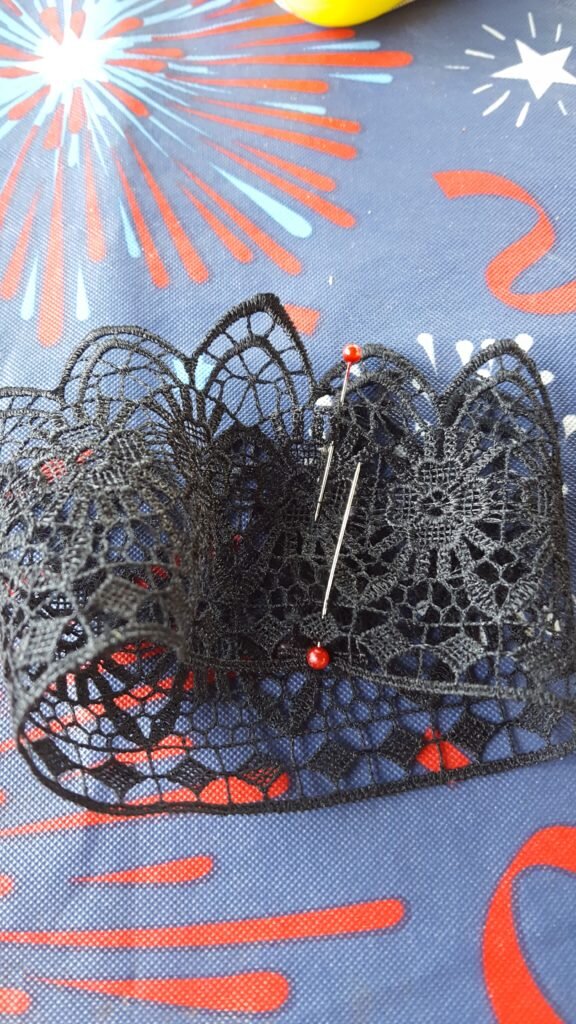
  1. Overlap the edges of your lace ribbon so the seam will not be noticeable.  For instance, if you have arches on your ribbon, make sure those arches overlap.  Make sure the diameter is close to 3″.  Pin and stitch the edges together.

    Pin lace so it discretely overlaps.

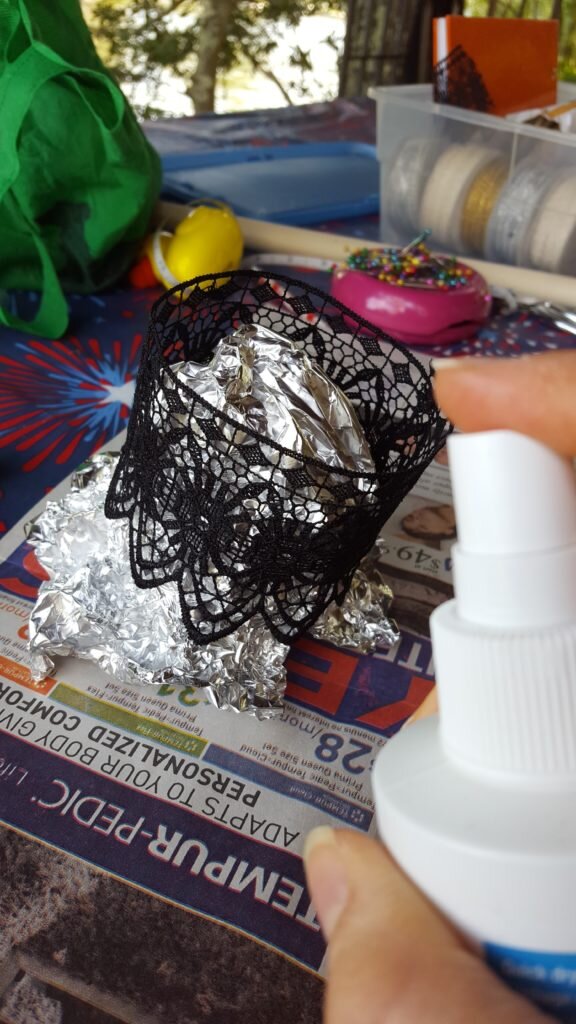
  2. Make an aluminum foil form to hold the crown, then spray with fabric stiffener.   Let dry following manufacturer’s instructions.

    Spray crown with fabric stiffener on aluminum form.

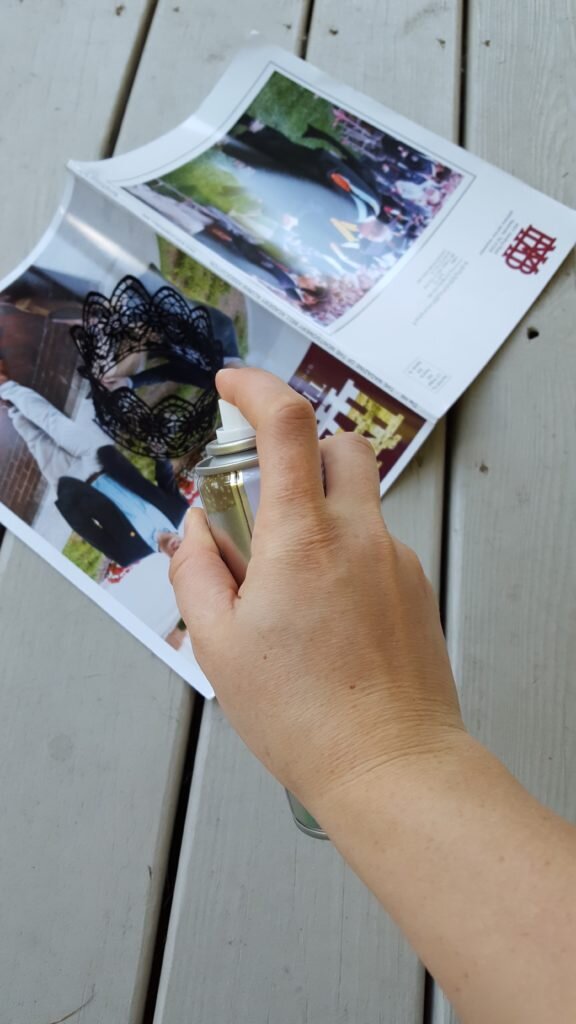
  3. Spray the crown with gold fabric paint.  Let dry following manufacturer’s instructions.  You may need to do multiple coats for full coverage.

    Spray crown with gold fabric paint.

Posted in Crafts & Sewing | Leave a comment

Big Baby Bums

We’ve been calling Julius “little squish” since he left the hospital.  He gets all cuddly and kind of squishes himself up against you when he is sleepy.  And he’s basically a ball of goo when he’s tired.  You could squish the little guy into any position and he’d live with it.  Hence “little squish”.  Well my little squish is now a whopping 9.2 lbs and 22 inches long as of last Thursday!  22 inches is in the 95th percentile for his age!  I told Will we’re going to have to start calling him “big squish”!

I thought the baby blues were supposed to be over by now, but I started sobbing today thinking about putting the little squish in daycare.  What if I miss his first word?  I know millions of people put their kids in daycare, but for some reason this is a serious concern for me right now!

At this point though, his daily milestones are mostly eating, sleeping and pooping.  This means I’ve (understandably) gotten lots of questions about how cloth diapering is going.  I can honestly tell you, it is going pretty well!  We started him in cloth diapers as soon as we got back to our house (this was a week after he was born since we stayed with my parents after leaving the hospital).  For now, we have decided to continue using disposables when we’re out on the town, just to make things easier.  (But we don’t go out very often so we haven’t used many disposables.)  From what we’ve observed, he doesn’t mind the cloth diapers any more or less than disposables.  He seems indifferent to either type and cries when he is wet regardless of the diaper.   As for me, I think the cloth diapers make his fanny look big which is kind of adorable.

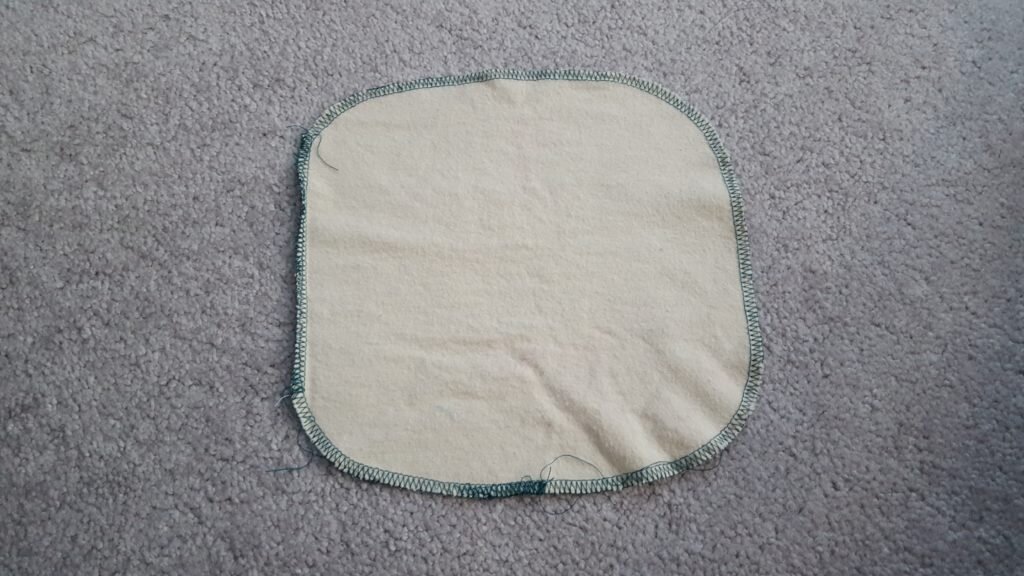
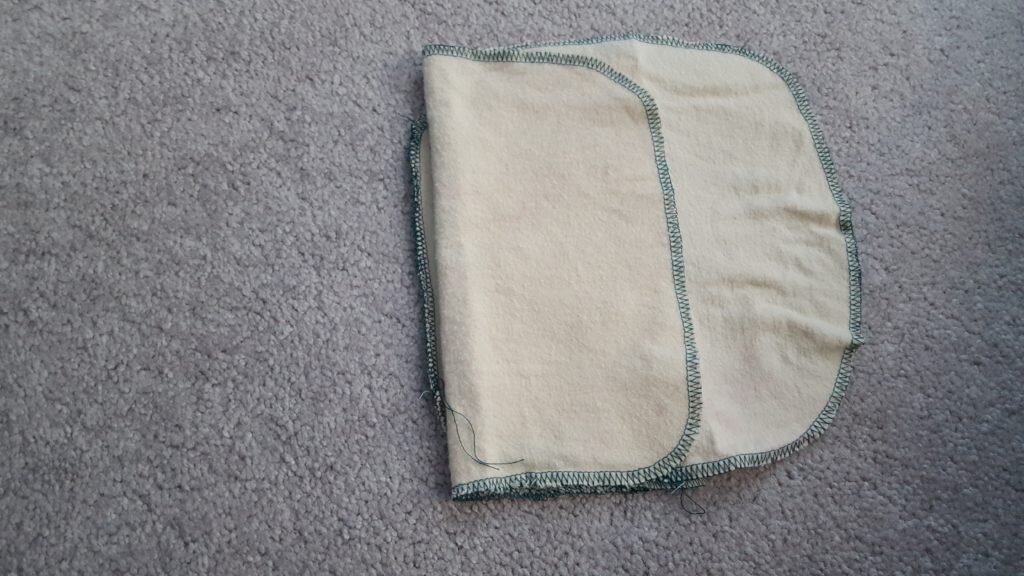
When I decided to go the cloth diapering route, I also decided to use cloth wipes as well.  In the hospital they teach you to use a disposable wipe that you wet with water, and that’s just what we do at home with the cloth wipe.  Originally I purchased a package of OsoCozy wipes off amazon.  Their wipes cost $.66 a piece, which isn’t big money, but I knew I could make them for a fraction of that price.  While I was pregnant I bought a yard of flannel fabric from Joann fabrics (on sale for $2.50 a yard).  From this I produced 20 wipes – for a total of twelve cents a wipe!  Now that’s more like it!  You can make your own wipes very quickly if you have a serger.  I made all twenty in less than an hour!

Little squish striking a pose in his cloth diapers.

What you’ll need:

  • 1 yard of 42″ wide flannel fabric (I purchased natural cozy flannel)
  • Serger
  1. First machine wash and dry your flannel.  There will be some shrinkage, so its easier to account for that initially.
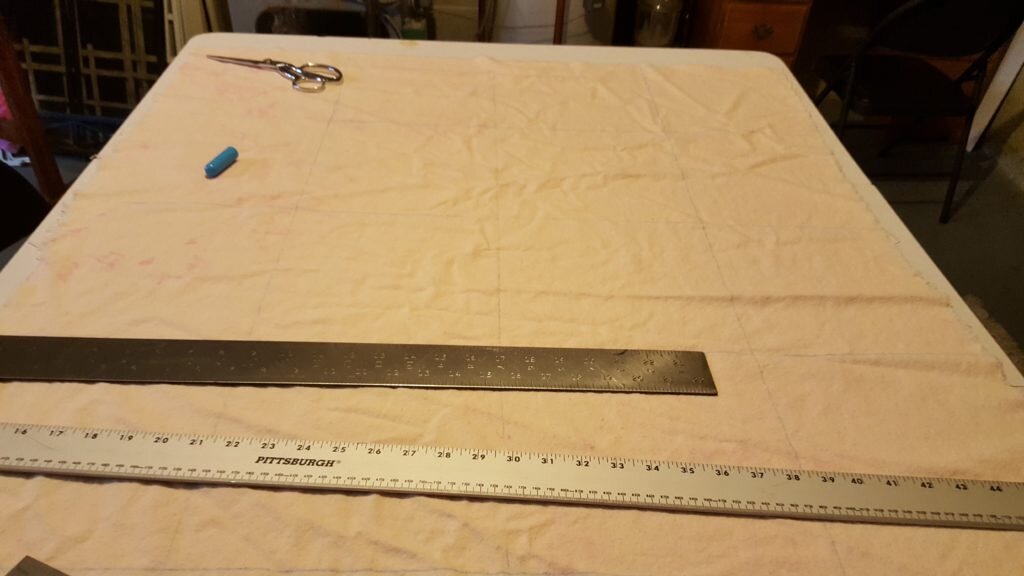
  2. Divide up your fabric into 20 8″x8″ squares (or whatever size your shrinkage allows – it may be a bit smaller or bigger depending how much shrinkage occurred.)

    Divide fabric into 8″x8″squares

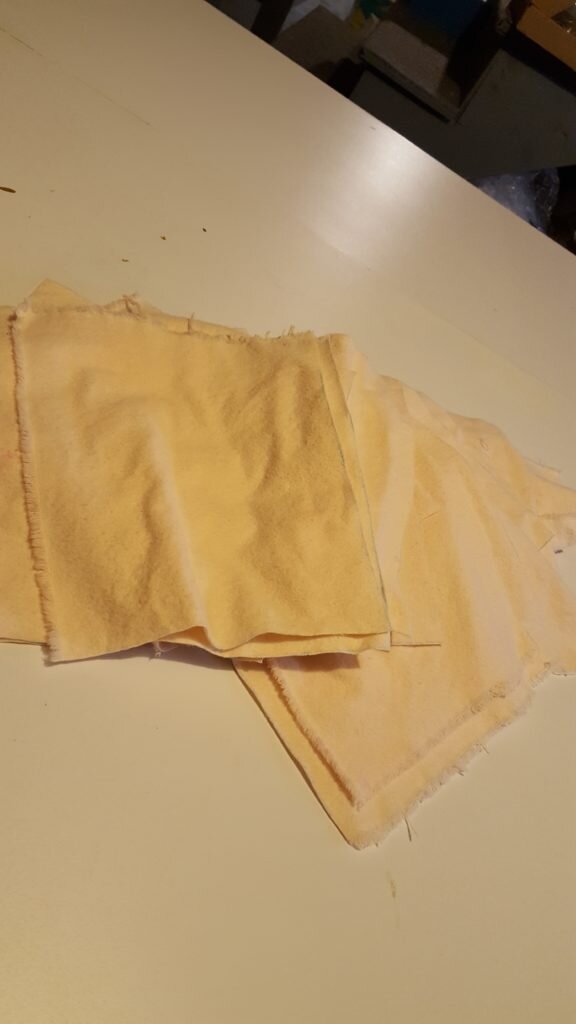
  3. Cut squares.

    Cut squares

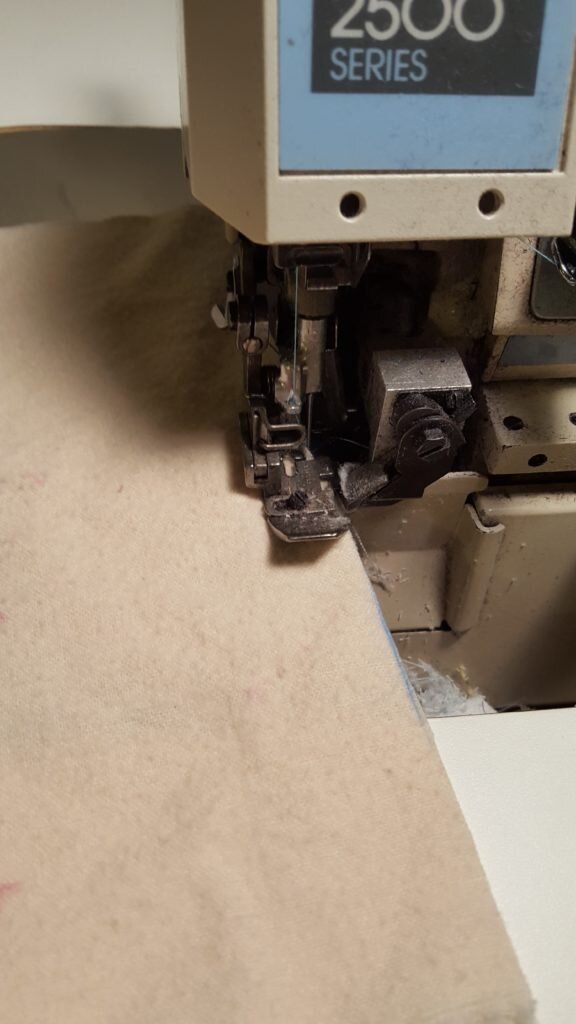
  4. Serge your fabric squares, rounding the corners slightly.

    Serge squares, rounding corners slightly.

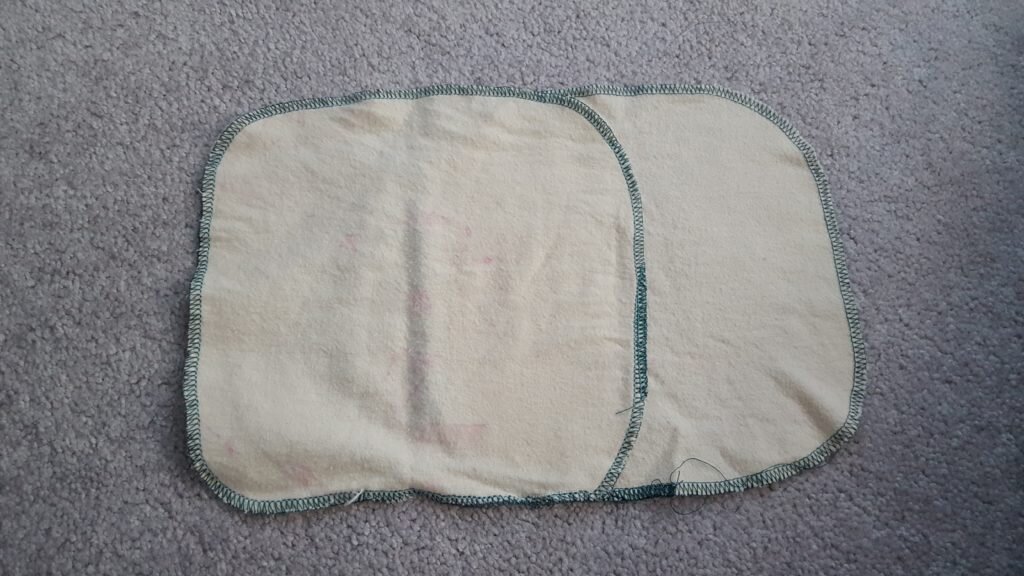
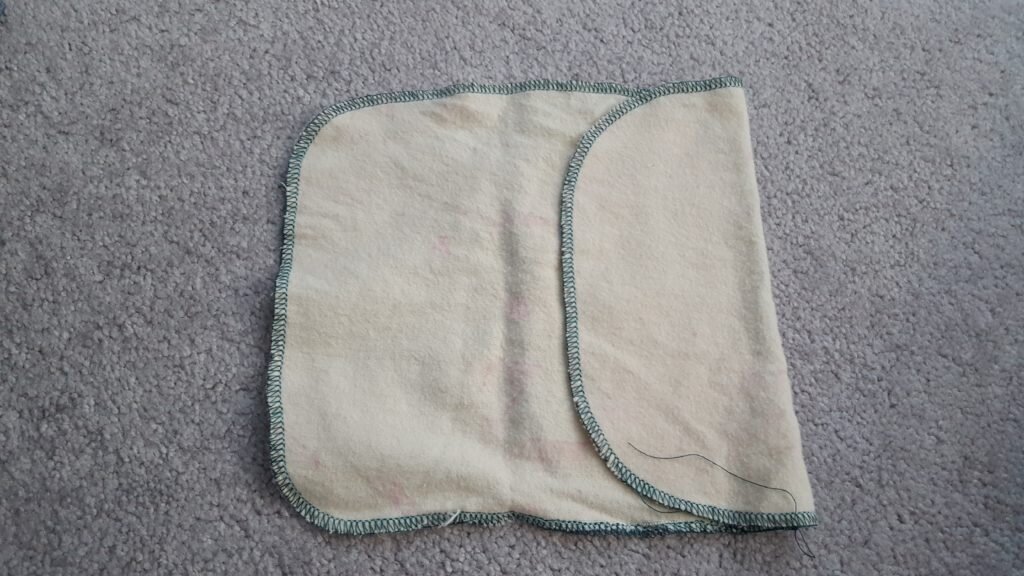
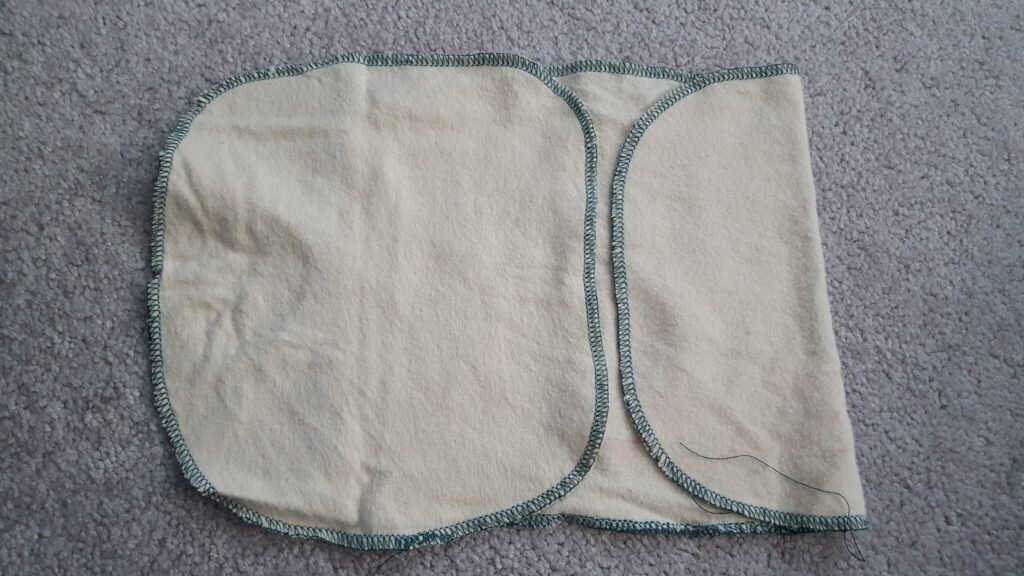
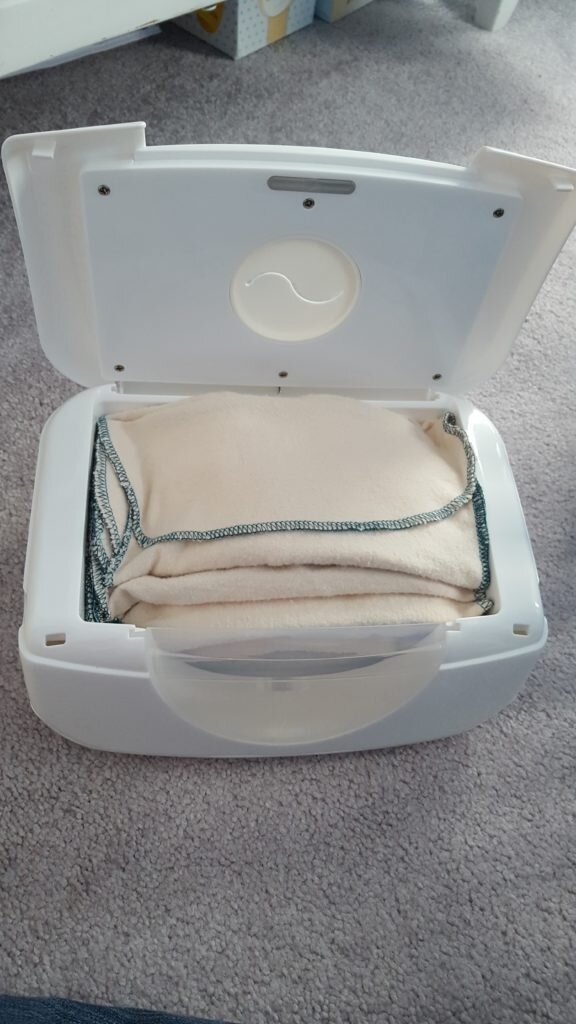
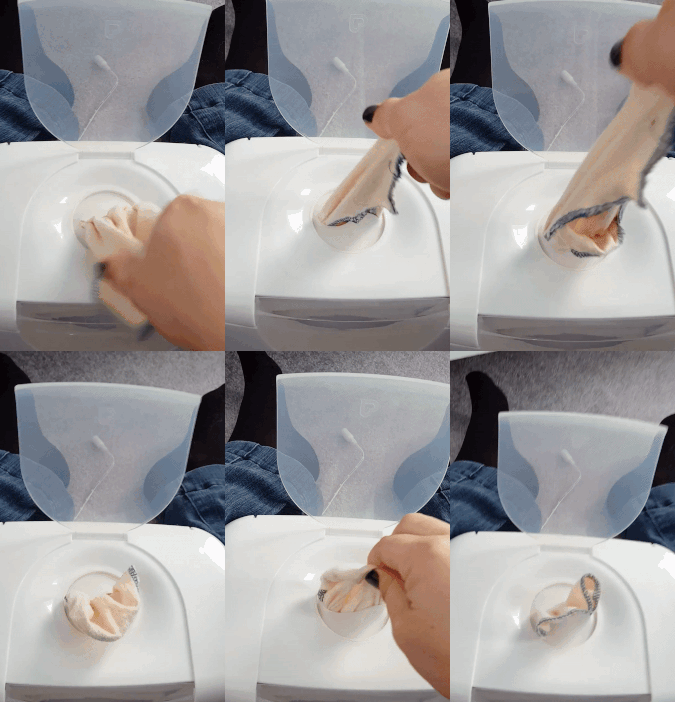
The wipes are easy to put into a wipe container.  My co-worker gave us a munchkin wipe warmer, and while I’m still debating if I want to store the wipes wet or dry it works perfectly for holding fabric wipes this size!  To store your wipes in a container – assemble as follows:

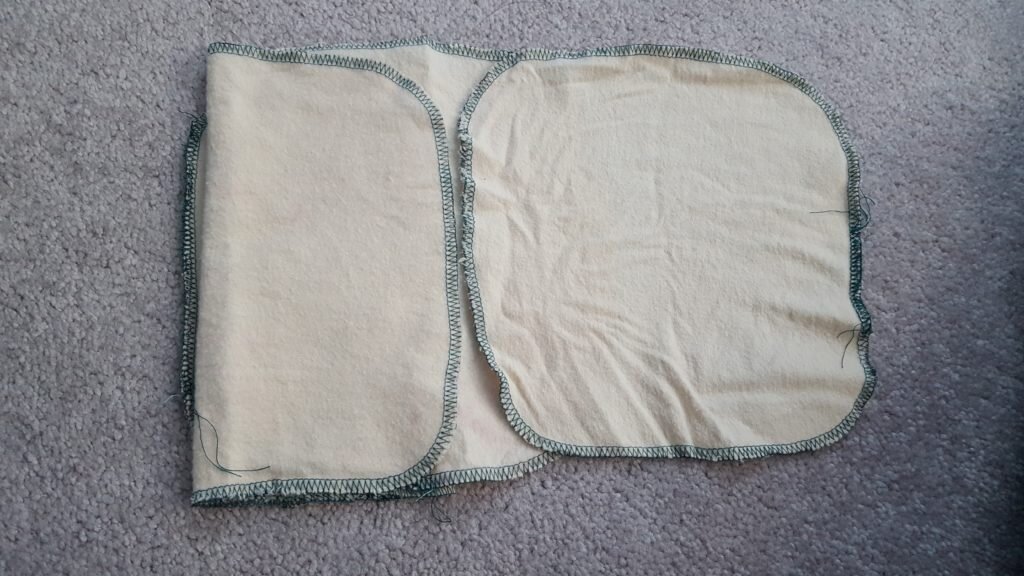
  1. Place wipe on table.

    Place wipe on table.

  2. Place second wipe overlapping with first wipe by 50%.

    Place second wipe overlapping with first wipe by 50%.

  3. Fold first wipe in half over second wipe.

    Fold first wipe in half over second wipe.

  4. Place third wipe overlapping with exposed portion of second wipe.

    Place third wipe overlapping with exposed portion of second wipe.

  5. Fold second wipe in half over first wipe.

    Fold second wipe in half over first wipe (left side of second wipe over right side).

  6. Place fourth wipe over exposed portion of third wipe.

    Place fourth wipe over exposed portion of third wipe.

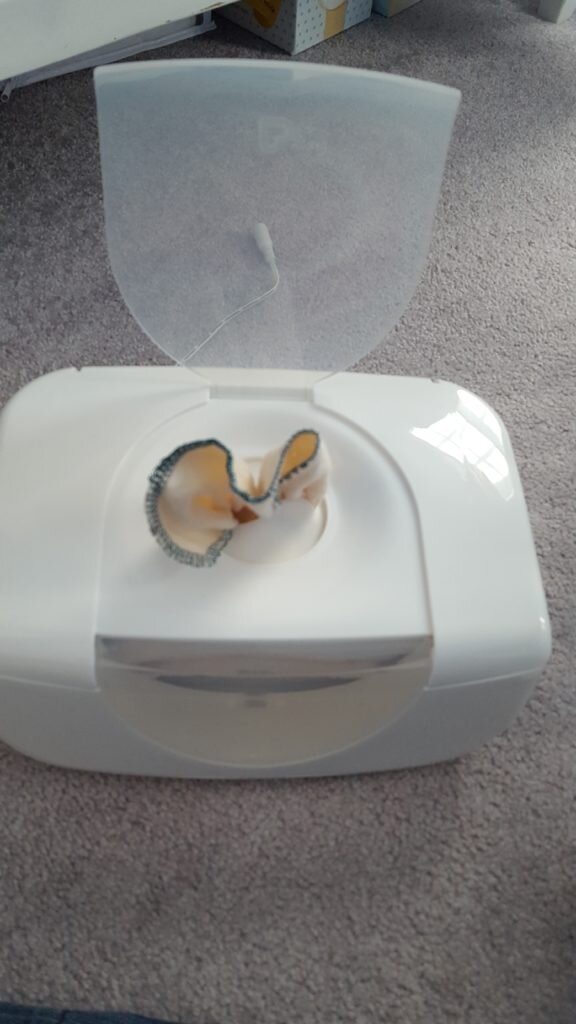
  7. Continue stacking wipes until finished, then push the top wipe half through the storage container opening.

    Place wipes in box.

    Feed top layer of fabric through hole in wipe box.

    Or just watch this GIF!

    How to fold wipes

Posted in Crafts & Sewing | Leave a comment

DIY Zippered Pillow that is Easy Unlike Parenting

Well parenting is hard.  More difficult than I imagined really, and I thought it seemed pretty difficult.  I have newfound appreciation or maybe even reverence for my parents.  I think that instead of flowers and ties every Mother and Father’s day I should have been buying my parents cruises to the Bahamas or Lamborghinis.  At this point in time, it is really difficult for me to fathom how it is possible to raise more than one child.  I can’t even imagine having twins.

And it’s not just the lack of sleep either – I know that was the main thing I’d imagined caused difficulty.  But its so much more than that.  On top of the fact that you’re already drained from pregnancy and the birth process, there are so many things that come with caring for a newborn.

My normal day is now mostly taken up by breastfeeding in some form.  Breastfeeding infants eat 8 to 12 times a day.  My little guy is a slow eater (probably because of the nipple shield I have to use) so breastfeeding sessions take somewhere between 15 minutes and an hour.  If he’s cluster feeding, there are more sessions than usual.  I also have to pump in between sessions which is time consuming.  Aside from breastfeeding, diaper changes take up the next chunk of my time.  Yesterday we changed his diaper 12 times (that we remembered to record).  After diaper changes I spend my time cleaning & sanitizing breast pump parts and nipple shields and doing laundry (he can soil many outfits a day, plus any towels or covers I get dirty while feeding or bathing him.  After that I finally spend time playing with him or determining why he’s upset.  Then if I’m lucky I’ll have some time left to tidy up the house, and maybe shower.  And finally if there is anything left it is time to sleep.

The biggest problem with all this infant time is that breastfeeding doesn’t take much thinking after you get him latched, and right now for me it usually involves both hands.  This means it is a fairly boring task and as adorable as the little guy is, sitting around watching him feed is not overly stimulating.  Martha Stewart has solved this problem for me!  I have started watching clips and reruns of old Martha episodes on YouTube while I feed Julius.  I think he’s started to get used to it to the point where if he were ever to meet Martha in person, he would take an instant liking to her.

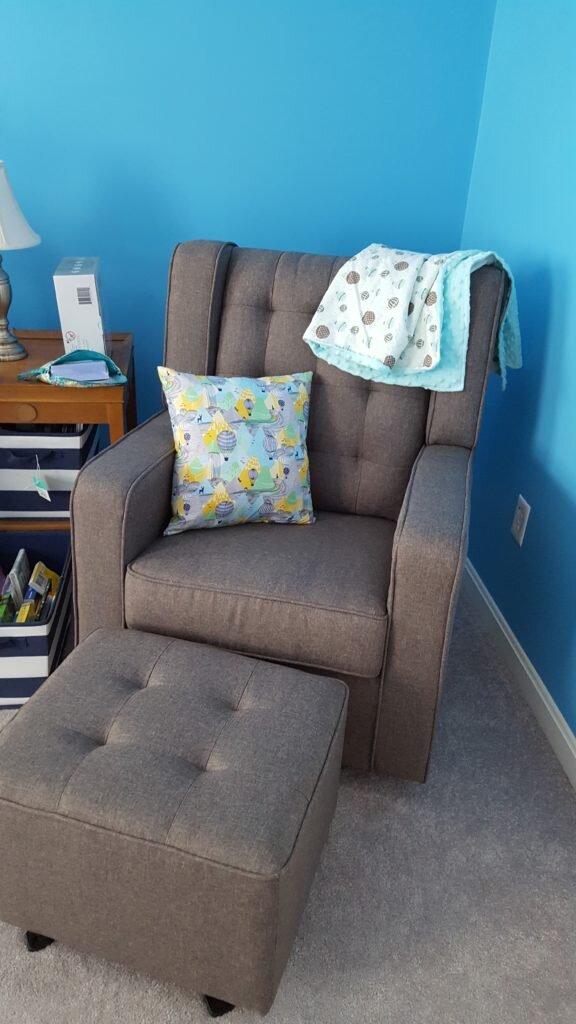
Well here’s a craft project Martha could put on her show!  A simple zippered pillow case!  I made this for the rocker in Julius’ nursery and I have been using it while I breastfeed.

Simple Zippered Pillow

What you’ll need:

  • 1/2 yard of material of your choice
  • 16″x16″ pillow form
  • 9″ zipper (or use any size up to 14″ zipper)
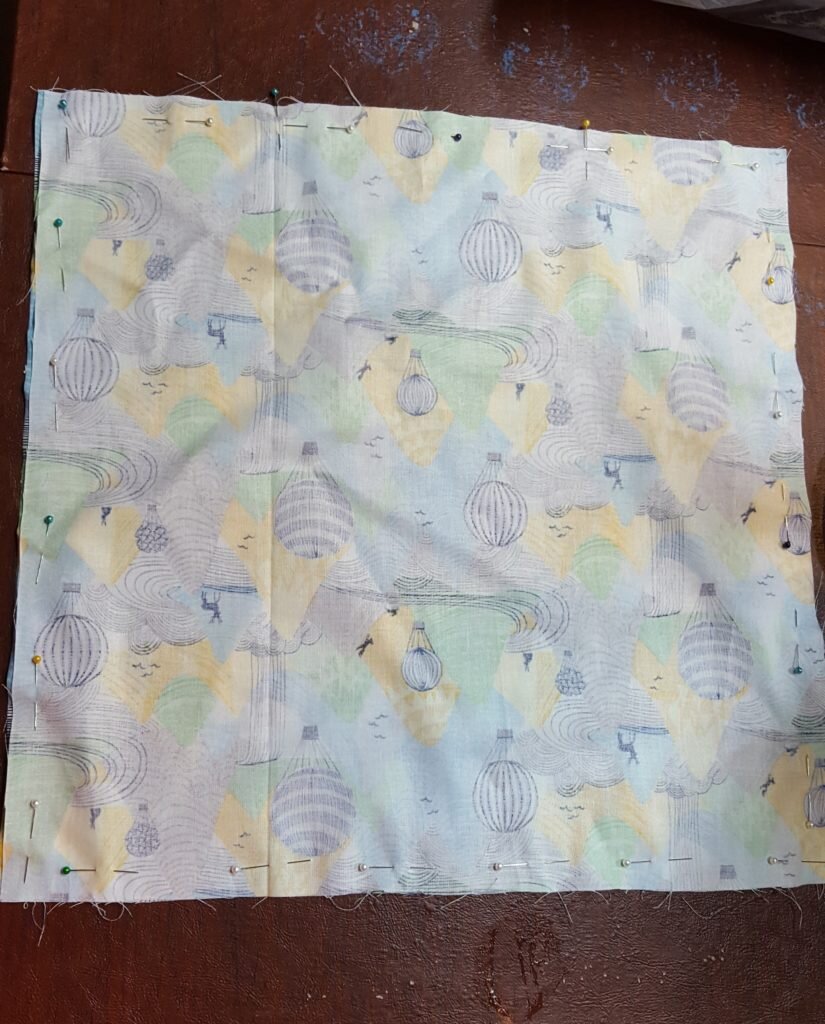
  1. Cut your 1/2 yard of material into two 17″x17″ squares.
  2. Place fabric squares right sides together and pin.  Stitch two sides of the pillow.

    Pin pillow together.

  3. Baste 3rd side of the pillow.
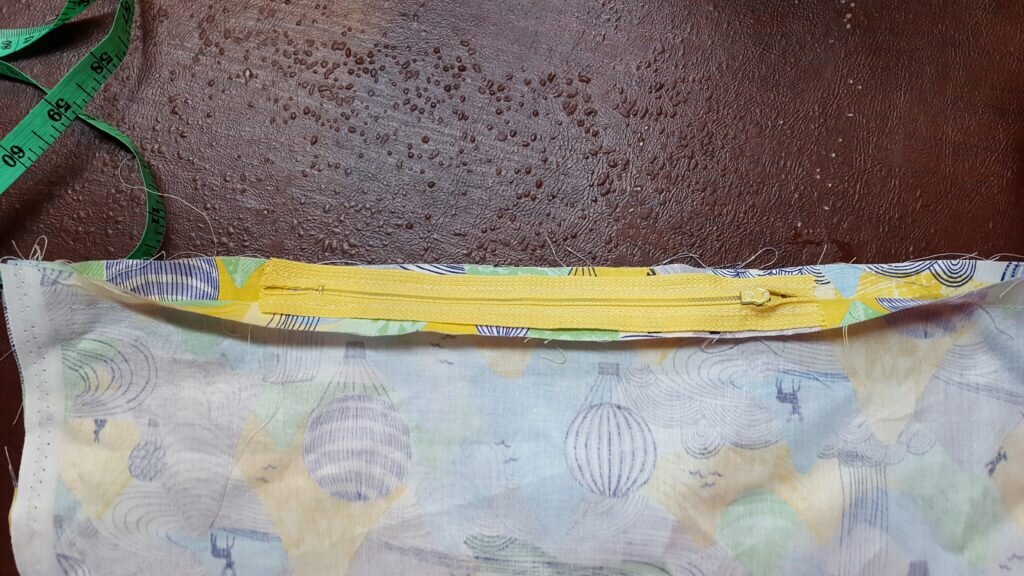
  4. Lay out your zipper on top of the basted side.   Mark 1/2″ out from the where the teeth end and begin.  Stitch from edge of pillow to this mark on either side along your basting line, leaving the stitching inside these markings as just basting.

    Place zipper on basted side of pillow., right side down. Mark 1/2″ above and below the start and end of the zipper teeth and reinforce by stitching to this marking from either end of the pillow over your basting.

  5. Pin your zipper in between the markings you made in above step, face down.  With a zipper foot baste around the zipper.
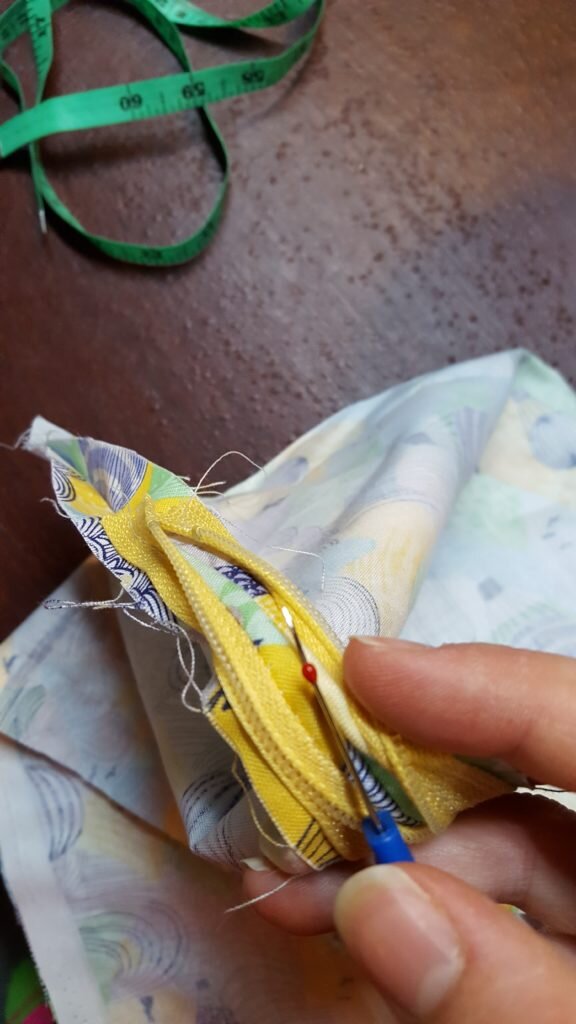
  6. Remove the basting in between your markings.  Unzip the zipper and stitch around the zipper to secure fully.

    Remove basting in between zipper opening. Stitch with zipper foot all around zipper.

  7. Stitch 4th side.
  8. Turn right side out through the zipper.

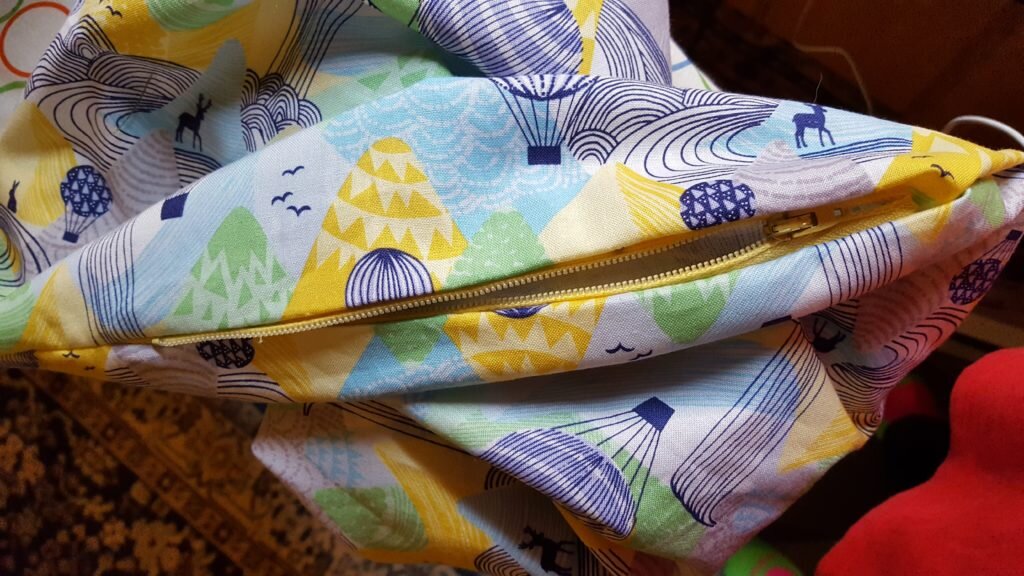
    Turn right side out through zipper.

  9. Insert pillow form through the zipper opening.

    Finished zippered pillow sitting on our glider!


Posted in Crafts & Sewing | Leave a comment

Medieval Feast

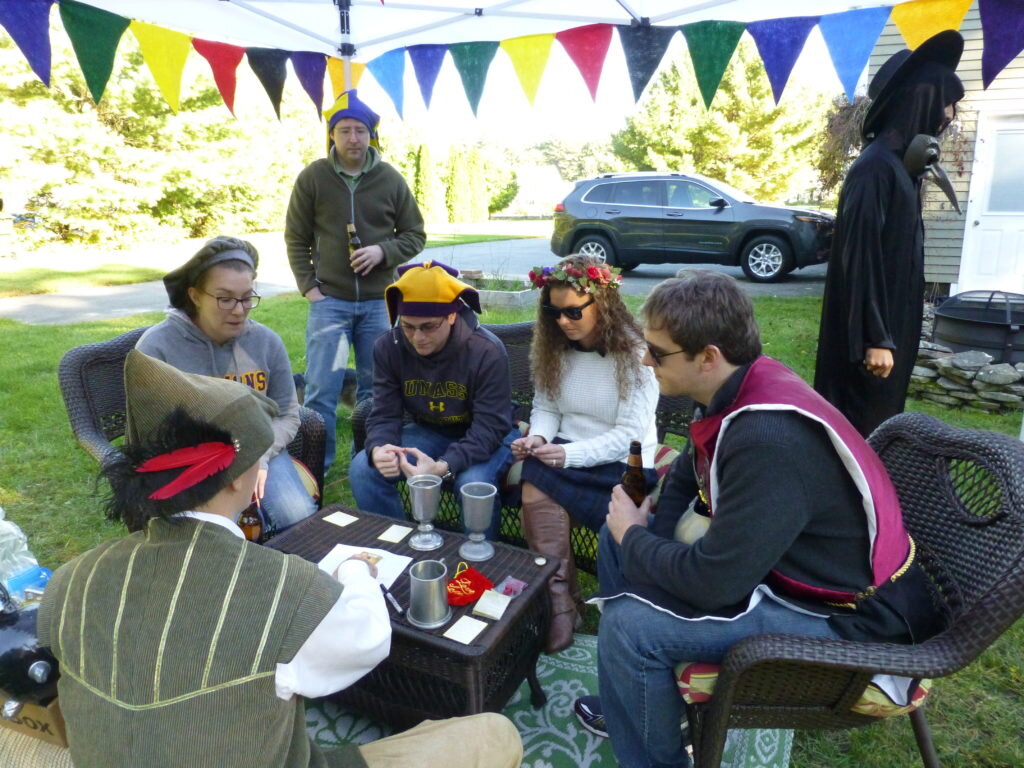
I am so embarrassed that I have never posted on this blog any info or pictures of our Medieval Party!  Since we’ve owned the house Will and I have been hosting the Medieval Party in various forms.  Usually the party is focused around a multi course feast lasting well into the night that includes tournaments of some kind beforehand and a costume contest.  This year we held an abridged version of the party with a much smaller invite list and just feasting – I didn’t feel up to hosting the full blown edition.

Tournaments and Activities

In the past we’ve held different “tournaments” where participants win “valuable” prizes (like honey, incense or tarot cards).  Here are some of the tournaments and activities we’ve held:

Tarot trick taking tournament/love letter tournament

Love letter tournament in progress

Archery Contest

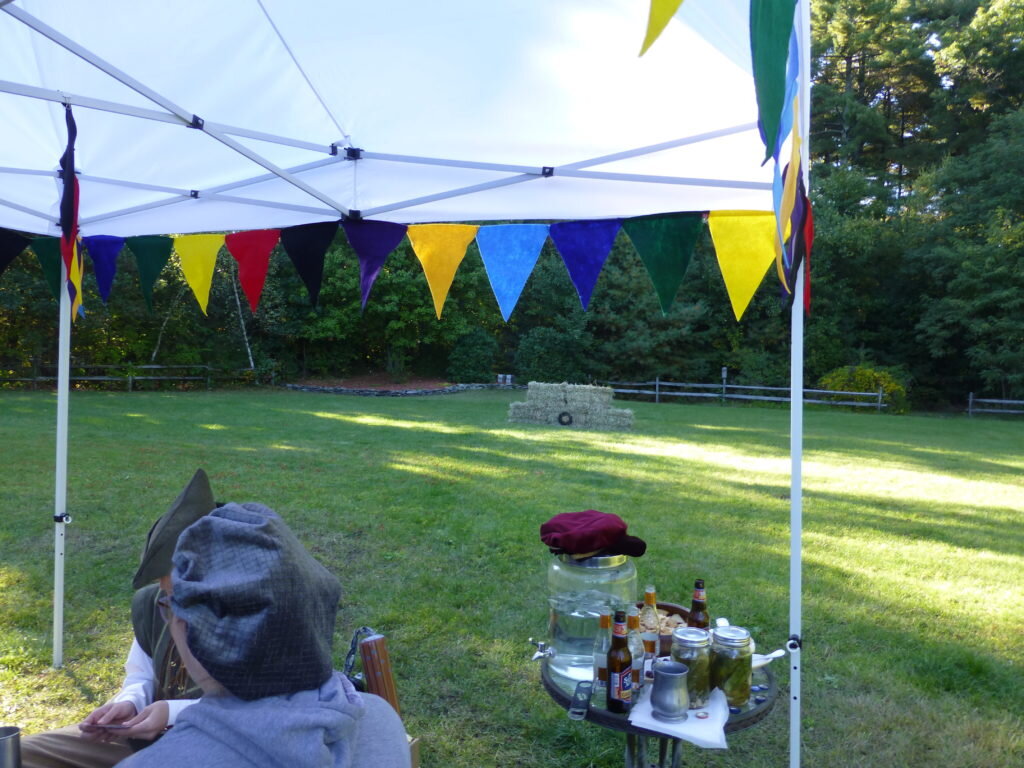
Archery target set up in the distance.

Ka takes aim at the target while spectators look on.

Nerf Sword Fighting

Andrew dodges Will’s swordpoint.

Mark and Sal come to a stalemate

Kathleen and I have an uncontrollable laughing fit during our sword match.

Costume Contest

We’ve seen some awesome costumes over the years…  Here are just a few…

Will and Andrew sharing a pint of ale

The Bhimji family in full fantasy getup

Joe in his plague mask

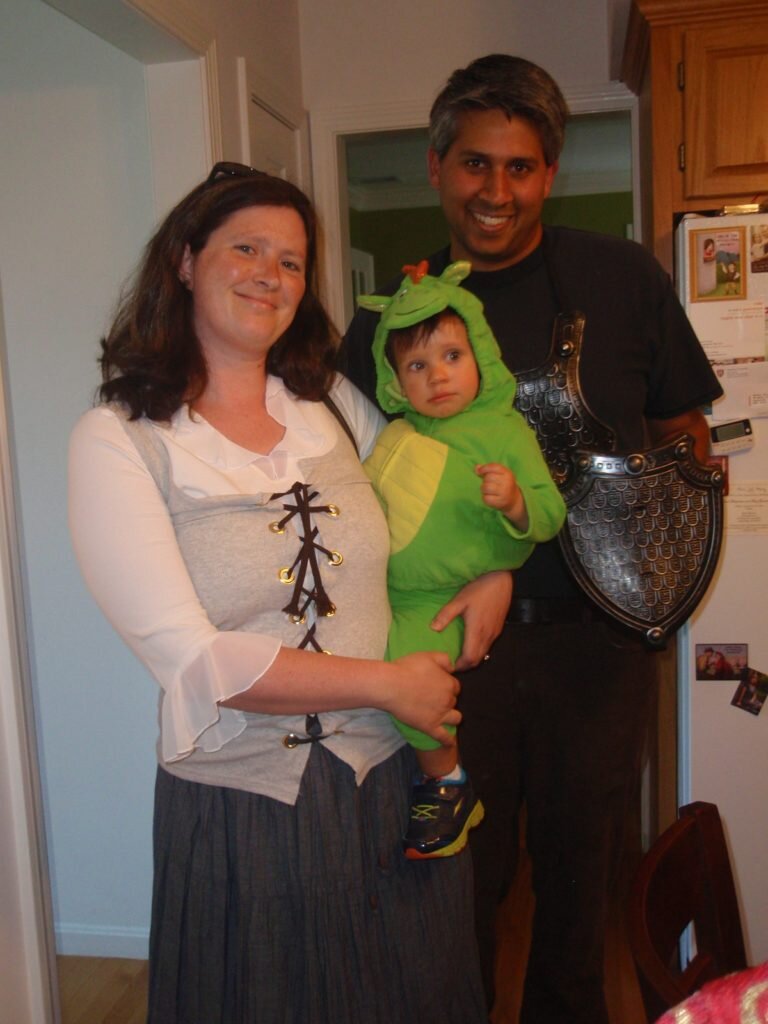
Brian and Kathleen in dragon and fair maiden attire

Mead Tasting

We purchased several varieties of mead, fitted them with 1 oz pour spouts and provided tiny cups (with bees on them!).

Aaron advertising our mead tasting setup as Ka looks on.

Dining Atmosphere

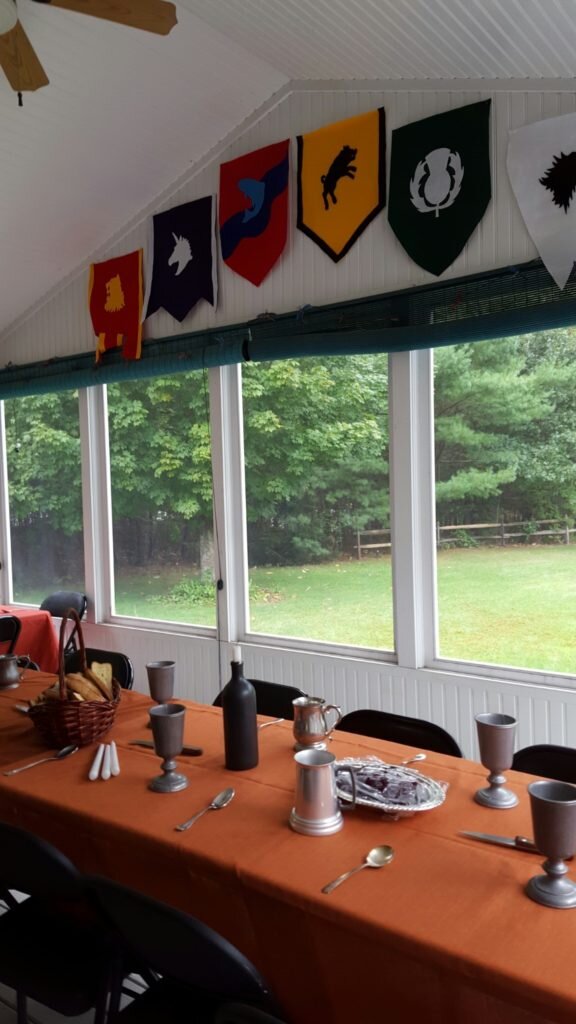
We usually dine in our outdoor porch, or as we like to call it our Great Hall, with the exception of one year where it was far too cold.  We hang felt banners that I made with house from assorted real and fantasy heritages.  The tables are simply decorated with mead bottles serving as candle holders.

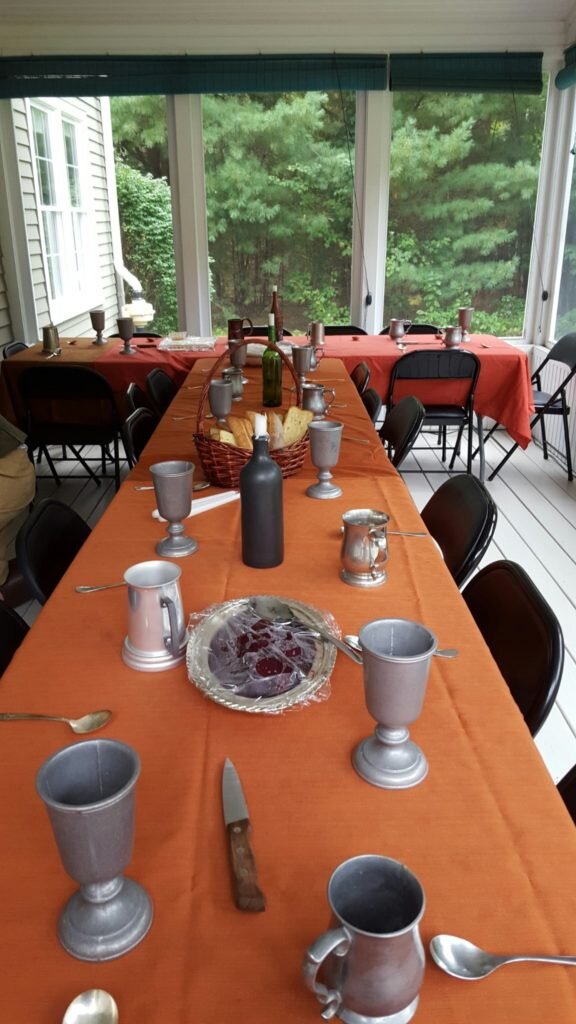
At the feast I cover the tables in cloths and provide guests with spoons, mugs and chalices.  I also scatter some shared knives around the table.  Guests are instructed that it is polite to wipe their hands on the table cloths and use their hands to eat.  Instead of plates I provide small trenchers (I find that ciabatta bread works perfectly as a trencher since it doesn’t leak much – though its not really authentic).  In the middle ages the trenchers would be given as alms to the poor after the meal, but my guests usually choose to eat them.

Crests (that I made from felt) grace the great hall.

Mugs, spoons and knives set the feast table in our great hall.

Feast Food

The feast menu varies slightly every year – but there are some staple dishes like pork pies, chicken legs and beef stew.  If I have any vegetarians attending I’ll make spinach pie as well.  While the menu is semi-authentic, semi-fantasy I try to keep the vegetables and meats authentic to the time period – so I try to avoid using potatoes or tomatoes or anything from the New World.

Appetizers (usually served during the tournaments):

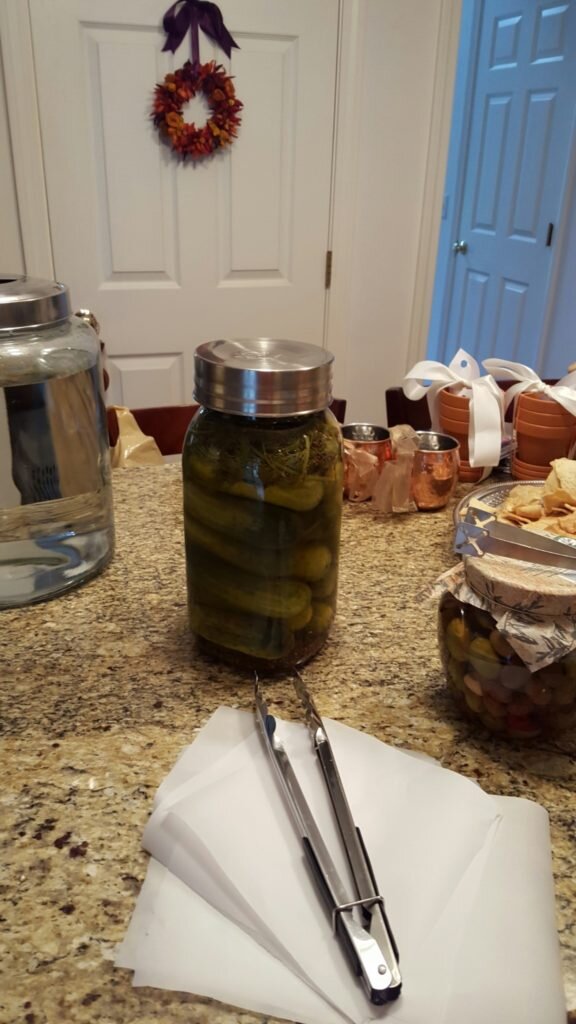
Pickles, olives and pita chips with some fabulous prizes shown in the background.

Homemade pickles  – I use this recipe and omit the sugar

olives & hummus (store-bought)

Main Feast

Beef stew in foreground with lemon salat in background.

Beef stew

Pork Pie

Pork Pies  –  I use this recipe for pork pie, but I always use chopped up raspberries instead of currants (because I can never find currants).  This year I mashed the raspberries instead of chopping them and people declared it was the best version yet.  This is my go-to dough recipe for all my pies.

Chicken legs

Chicken legs – I use this recipe but instead of turkey legs (which are from the New World) I use 20 chicken legs.

Lemon salat – this is literally just very thinly sliced lemons served with sugar in the raw for dipping.  It is a crowd favorite as it tastes like sour patch kids.

A toast! What’s left of the root salad and a pork pie are in the center of the table.

Root salat – Great because it can be made the morning of, chilled and served cold.

Cabbage chowder.

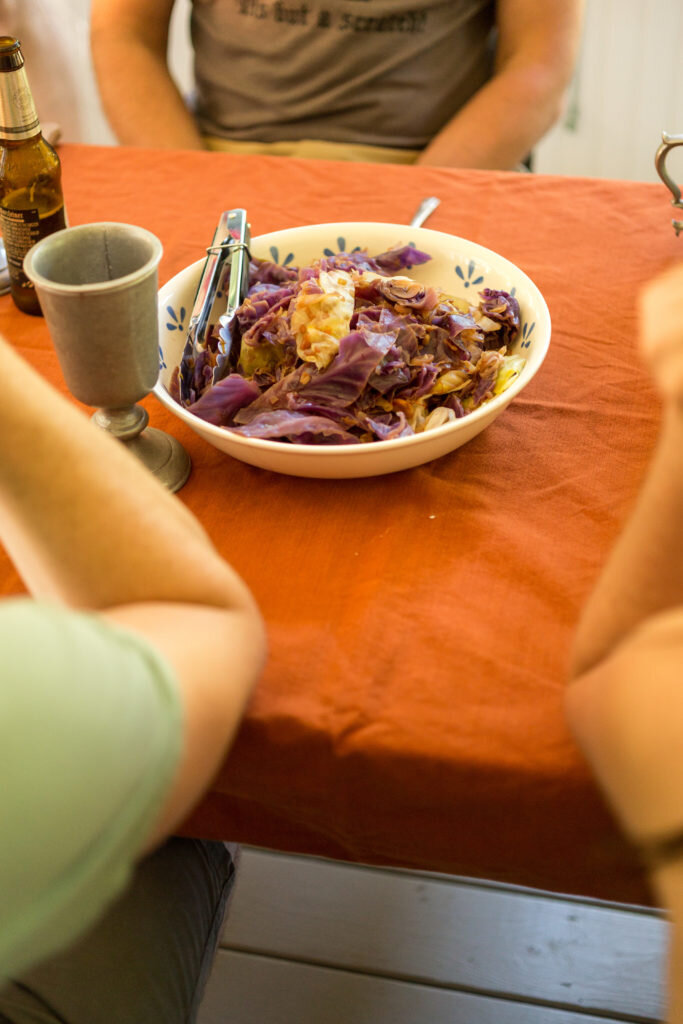
Cabbage Chowder (from The Medieval Cookbook)

Dessert

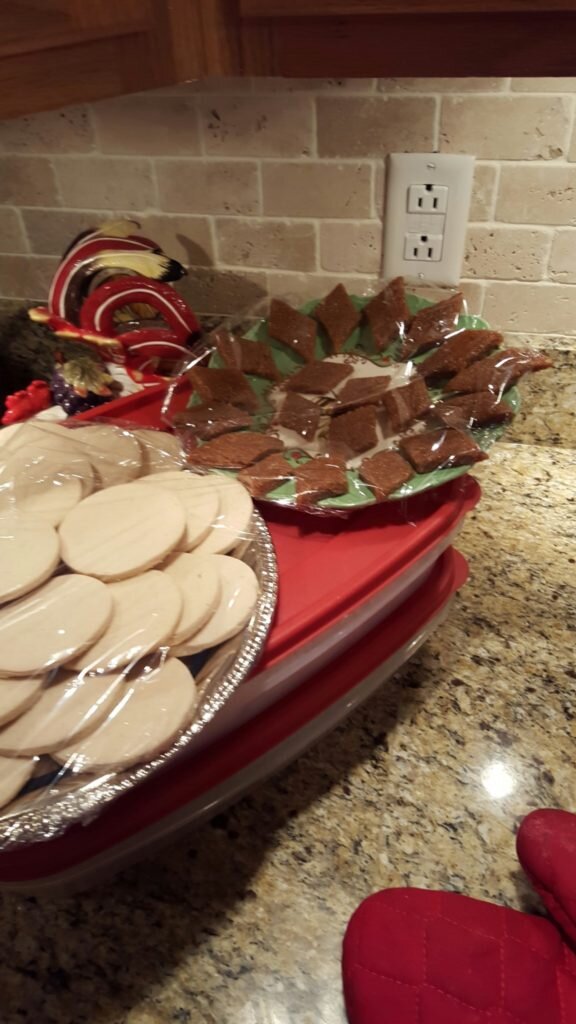
Shrewsbery cakes

Shrewsbery cakes in the foreground, medieval gingerbread in the background.

Medieval Gingerbread

Cream Custard Tart (from The Medieval Cookbook)

Posted in Culinary Delights, Parties | Leave a comment

Julius

Warning, this is Julius’ birth story.  I tried not to be graphic but it is pretty comprehensive.  TL;DR – we had a baby, his name is Julius.

I went to the doctor for my every 3 day checkup and non-stress test (NST) early Monday morning on November 6th.  I had told them three days before that I didn’t want to be induced as long as the baby was still doing well.  Well on this particular visit my blood pressure was really high and I was looking really swollen with edema.  Then the baby didn’t move very much during the 15 minute NST.  My blood pressure combined with the swelling was enough for the doctor to put me on the induction list for 4pm that afternoon.  The induction list is called via triage order (since many people opt to induce for comfort reasons) but the swelling and blood pressure meant I was going to be high on the triage list and would be induced sometime that evening.

After calling Will and telling him he needed to be home sooner rather than later, I headed home.  On the drive I mentally prepared the list of things I needed to accomplish before 4pm.  While pondering the list the doctor called me back and said he was concerned about the NST and wanted me to head to the hospital for a biophysical profile on the baby just to be on the safe side.  If the result was concerning they would induce me immediately.  I called Will and my mom and turned around to head back to the hospital.

Luckily the biophysical profile came back good, but at this point it was 1pm and I only had 3 hours until they started calling the induction list.  That was basically only enough time for me to get home and back to the hospital.  The doctor was thinking something similar and he checked the amniotic fluid levels and they were borderline (since I was 41 weeks, 3 days pregnant).  He recommended they start the induction process immediately.

In all honesty I really did not want to be induced.  Not only did I want to let things go naturally, but I had heard horror stories from several people about how the whole process was very long and painful.  I was under the delusion that I would try and go without medicine for as long as possible (in all honesty I was more terrified of getting an epidural than I was of giving birth), but the induction stories I heard made me think this wouldn’t work out.  They start the process by inserting a foley balloon catheter into your cervix that they then inflate with saline.  Next they give you a low dose of misoprostal every 4 hours which should start contractions and help push the balloon onto your cervix and encourage the cervix to dilate and ripen.  They keep you strapped to the bed for the first 2 hours after they give you the misoprostal so they can monitor your contractions and the baby’s heart rate.  They repeat the misoprostal procedure up to 5 times until your cervix is ripe (TWENTY HOURS).

I had heard the catheter insertion was painful.  Luckily I had the “self proclaimed queen of Foley catheters” put mine in.  And I can tell you she really was the queen – I barely felt anything.  She said it may have helped that I was 1 cm dilated already, but we all know it was really because I was lucky enough to have a seasoned veteran insert mine.  After the balloon insertion they took me up to the antenatal unit to hook me up to monitoring machines and give me a dose of misoprostal.  This process was painful, but bearable.  The first dose of misoprostal started contractions that were pretty painful.  My mom and Will watched me do breathing exercises while I waited for 2 hours to be up so I could go walk around or do anything but be strapped to the bed.  As soon as I got out of bed the balloon popped out.  Unfortunately losing the balloon didn’t trigger a stop to the 20 hour misoprostal procedure.  So after the full 4 hours went by they strapped me to the bed again and gave me another dose.  This one caused contractions but they weren’t as bad.  They just felt like the bad period cramps that I had been feeling the past few days.  When they started the second dose it was around 7pm and I forced my mom to go home and get dinner (she hadn’t eaten lunch OR dinner since she accompanied me to the doctor in the morning and then to the NST since Will was still en route from work at that point).  I was now feeling pretty glum that this would take the full twenty hours.

After they let me out of the bed the second time, I went for another walk around the hospital wing even though the contractions weren’t as painful.  When I got back to the room they had definitely increased in intensity, but they still didn’t seem as bad as the ones I experienced while the catheter was in.  I started swaying back and forth from leg to leg to make myself feel better, and at this point my mom called to see how things were going.  I responded darkly that I would probably be there all night and would call with any news.  After another few minutes of swaying I felt a pop and a gush of fluid.  It wasn’t a gallon of liquid like the movies but I was 99% sure my water had broken.  We called my mom and she raced back to the hospital.

Well it turns out in the antenatal unit they keep giving you the misoprostal in the 4 hours increments even after your water has broken, and even while you are in full blown labor.  The trigger for you to get down to the labor and delivery floor is for you to tell them you are in so much pain you need painkillers.  This bothered me because as I mentioned I really wanted to avoid painkillers as long as possible.

I guess my body realized what this meant and went into overdrive.  The contractions started becoming really painful to the point where I couldn’t easily breathe through them or talk.  This is where I employed Will’s help to use a breathing technique that is made to distract you from the pain.  Let me tell you – it helped a lot.  My mom arrived during one of the contractions while the nurse was telling me they were going to put me on more misoprostal in another 20 minutes.  Luckily I couldn’t talk or I probably would have said something I regretted.  In another five minutes the contractions got so bad that I realized I needed an epidural to get through the rest of the process.  The contractions were coming in waves of 3 on top of each other with less than a minute in between each cluster.  Turns out, labor is painful.  Since I’d finally made the decision to throw in the towel and get the epidural, my number one concern was that I wouldn’t be able to stay still long enough during each contraction for them to administer the epidural.

Admitting I wanted an epidural finally triggered them to call in the doctor.  It seemed like it took hours for her to come and once she said I was ready for the labor room it felt like forever that I had to wait to get downstairs.  At one point I told my mom I would be happy to walk downstairs myself and didn’t need a wheelchair or gurney.  My mom walked out to see what was taking so long, and it turns out another woman was waiting to be taken to the labor floor as well and it would take a while to get a second gurney for me.  Mom jokingly relayed my statement that I would be happy to walk to the labor room myself, or in all seriousness use a wheelchair.  Luckily wheelchair was the magic word and I got wheeled down to the labor and delivery room immediately.  Honestly, it was all worth the wait because my nurse (like all the other nurses from here on out) was amazing.  I think I got to the labor and delivery room around 1:30am, though neither Will nor I really remember.

Luckily, with my nurses help, I was able to hold still during the contractions to get the epidural.  After I got the epidural I felt so much better.  Everyone commented how I was extra smiley during the rest of the labor process, I told them that it was because epidurals were magic!  I could still feel the contractions but they again felt like bad period cramps.  I was told if I didn’t want to feel them at all I could press a button to up the dose for a short period of time.  They even recommended that we all sleep to prepare for the labor process.    After a couple hours the doctor came in to check on my progress.  He asked me if we knew the baby’s sex and what we were going to name it (or if it was a secret).  I told him we were planning on naming him Julius and his reply was, “well, little Julius is a good boy.  You’re fully dilated and he’s +3!  Feel free to push anytime.”  After he left the room, I pushed three times and the nurse told me to stop.  She called the doctor to the room for delivery and I pushed two more times and got to meet Julius at 6:01am on November 7th.  He was screaming bloody murder!  I didn’t realize babies cry so much when they come into the world!  I’ll never forget those first few moments when I got to hold him.  I felt terrible that he was crying so much!  Once he finally calmed down he furrowed his little brow and peered out at the world through his giant eyes taking everything in like a tiny wise old man.

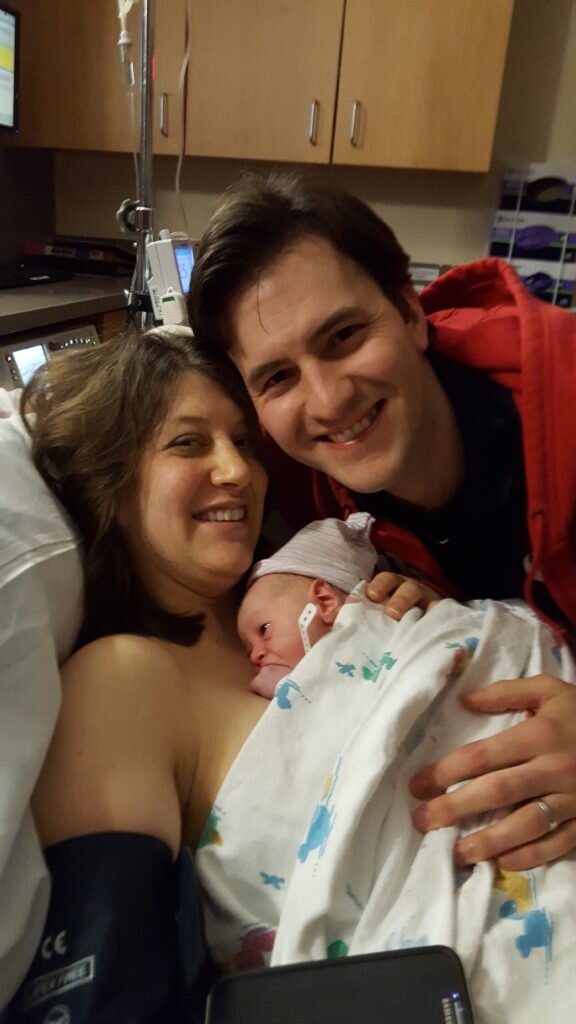
This is the first picture of me and Julius – minutes after birth. Will says he loves this photo because this as the moment that I became a mom.

Picture of our new little family (minus Dany who they wouldn’t let in the hospital).

Here’s Julius’ hospital photo (he’s 2 days old)!

Posted in Uncategorized | Leave a comment

Just a Small Smackerel

Well, my laissez faire version of beekeeping this year seems to have completely worked out.  I hived the bees, and literally have not opened the hive the entire season, but just from observing the hive exterior it seems to be rocking!  Had I been interfering more I probably would have put another hive box on halfway through the season, but I just decided to let them be.  The one thing I did decide to do this year is put a mouse guard on the hive this autumn to prevent any rodents from entering as the days start to cool off.

Since I took the hands off approach to beekeeping this year the only beekeeping related thing I’ve done is finally harvest that box of honey left over from last season’s bees.  It has been sitting in my garage since last spring, waiting to be harvested.  A couple weeks ago, Will moved it closer to the garage entrance and I left my garage door opened on my way out to an errand, only to discover the bees had found the honey!  I had to wait until sundown when the bees returned to the hive to close the garage door and for the last couple weeks I’ve had to be extremely careful to close the garage when leaving.

After a couple weeks, I finally grew tired of this caution and finally decided to harvest the honey.  We finally used the honey extractor that I purchased so many years ago!  Luckily the extractor hasn’t been going to waste all this time – two of my other beekeeping friends have been able to use it several times.  One of them lent me their sieve, and that is where a large portion of the honey is now draining after the whole process.

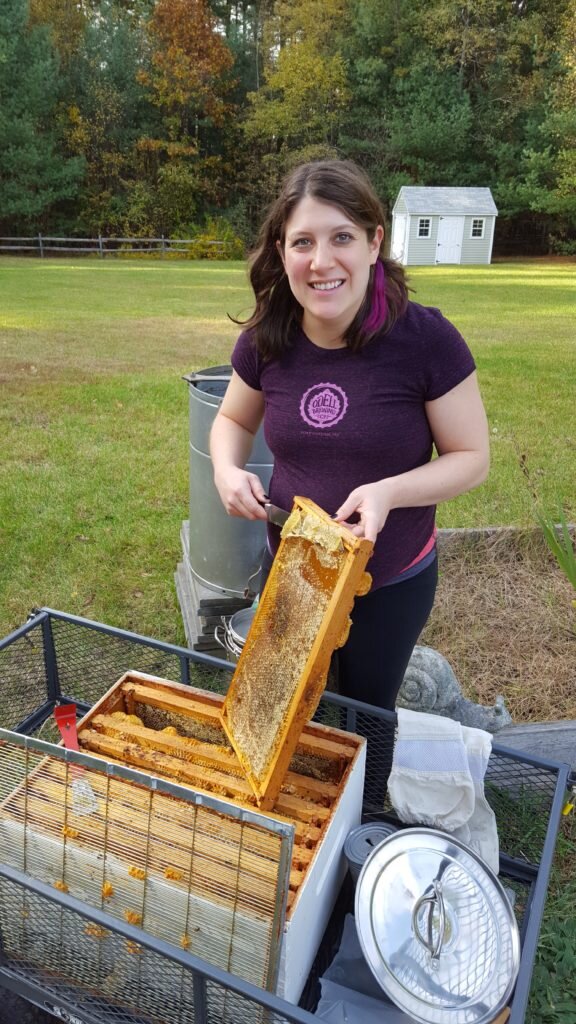
Our process was simple – I used a large serrated knife to decap the frames while Will spun out the honey from the frames in the extractor, two frames at a time.  We probably could have done four frames at once but it took me so long to decap the frames, that Will was actually ahead of me in the spinning process.  Things were going swimmingly until some wasps and hornets found the frames and I accidentally put my hand on a wasp which promptly stung me.  Bees don’t bother me one bit, but wasps and hornets scare the heck out of me.  They are so much more aggressive than docile bees and really give bees a bad rap for just sharing the same color spectrum.

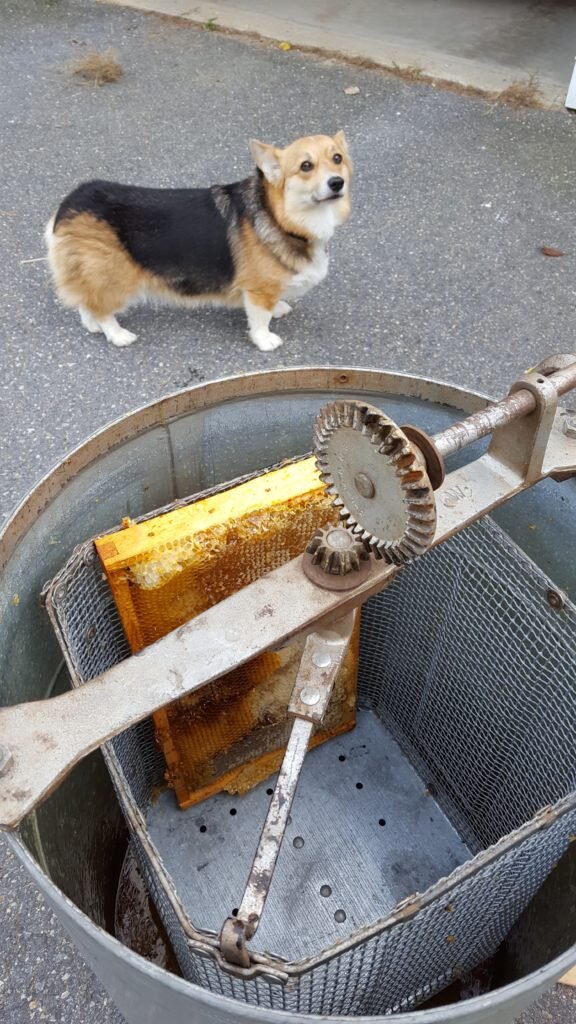
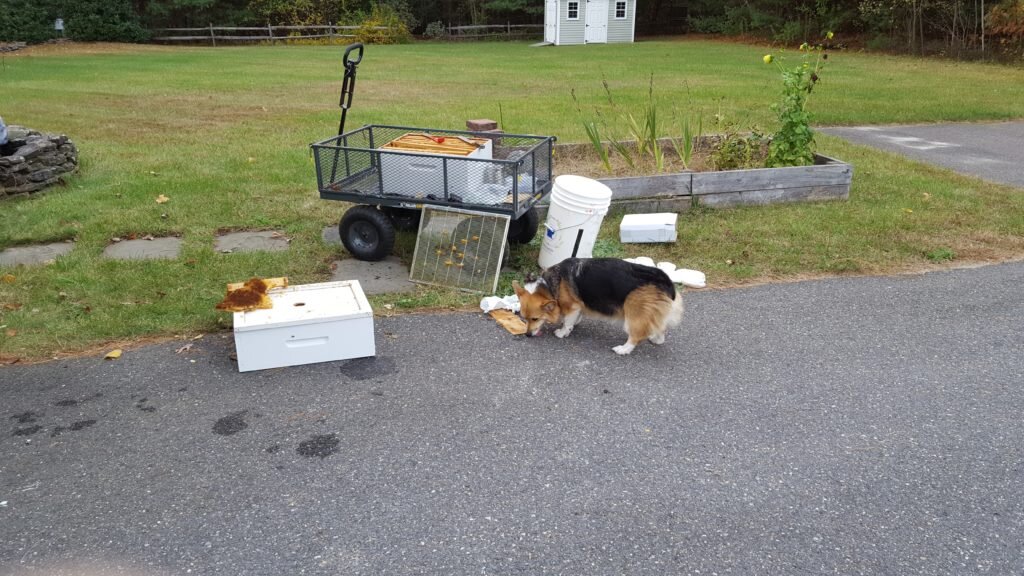
My favorite part of the whole process was that Dany would try to get very near the frames, very slowly and carefully, with her tongue partially stuck out the whole time.  It was as if she was thinking, “if my tongue just accidentally grazes this honey as I walk by, I can’t get in trouble for stealing it.”  It was rather comical to watch her approach the frames “stealthily” and I just kept picturing Winnie the Pooh.  After we finished spinning out all the frames, I let Dany play clean up crew around dusk when the bees and wasps had left.  She seemed to enjoy that.

After the honey drains I’ll have to strain it – then it will be ready for mead – or my normal breakfast routine!

Here I am decapping the frames.

Dany looks on, concerned, as Will loads the frames into the extractor.

Will spins the extractor.

Dany playing clean up crew.

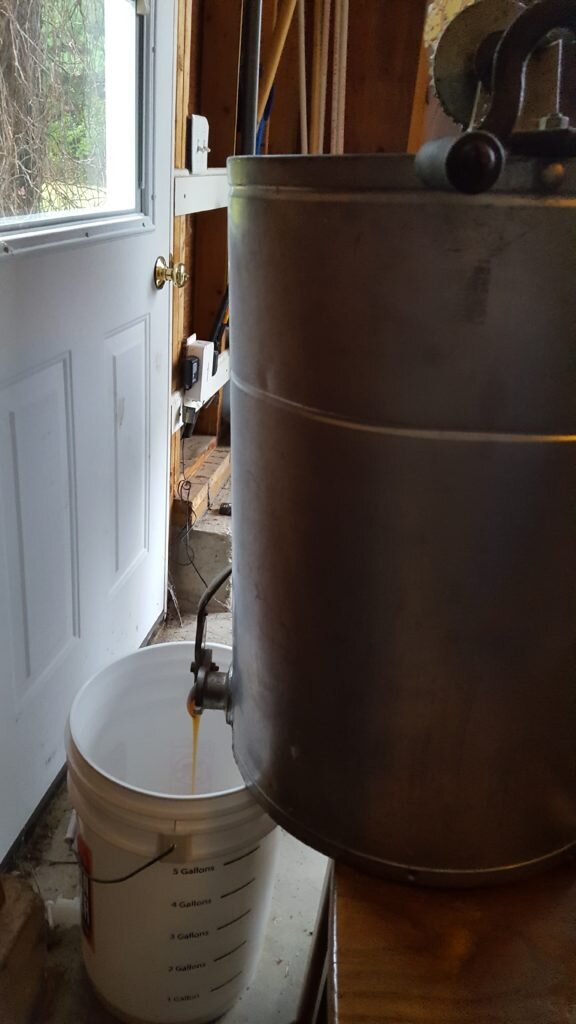
Our honey harvest draining into a 5 gallon bucket (we didn’t get nearly 5 gallons though!

Posted in Beekeeping | Leave a comment